
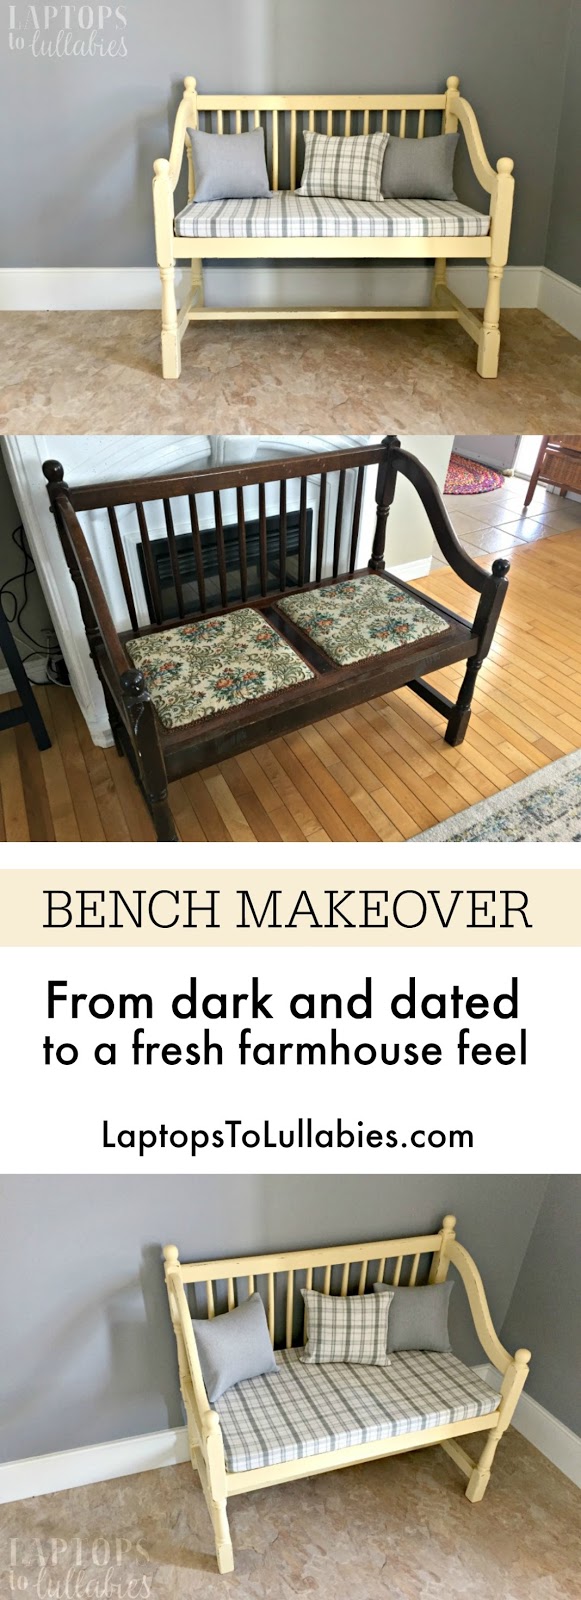
Bench makeover: Giving old furniture new life

Painting a piece of furniture remains one of my all-time favourite DIYs for a few reasons: it doesn’t take too long (unlike walls, ugh), it’s fun to pick a new colour, and it dramatically changes the piece.
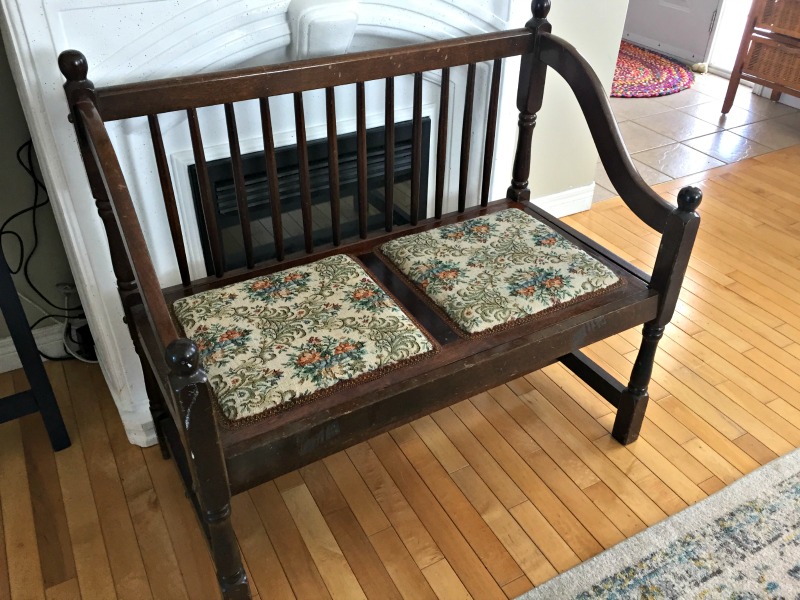
It also feels indescribably good to give old furniture a new life. That was the case for my friend, Melissa, who had been handed down a wooden bench from her parents.
For less than the cost of buying a new (cheaply-made) bench at a big-box store, we totally refreshed this sturdy piece of furniture.
She and her husband just built a stunning farmhouse in Debert and wanted to use the bench in their mudroom, but not in its current condition. The dark wood and needle-pointed cushions must have been stylish 30-odd years ago when it was made, but it wasn’t going to work in their bright new home.
I set the bench up in our basement playroom one night —amidst a giant mess my daughter made that I ‘saved’ for her to tidy the next morning — and started on the first coat of paint.

Melissa and I had decided on Fusion Mineral Paint’s Buttermilk Cream, a nice soft yellow, and I think it only took two coats to cover the wood.
There was no question that the needlepoint cushions needed to go.

But I was surprised to see that the bench seat actually popped right out and could be flipped over and fit back inside. This meant I didn’t have to deal with the built-in cushions — they just got hidden on the underside of the seat. Furniture was built properly back then!
After the last coat was dry, I took a bit of low-grit sandpaper — the really scratchy stuff — and roughed up the edges to give it the “farmhouse” look Melissa loves. The distressed areas really highlighted the bench’s curves and pretty details.
To make a new cushion, we bought two 18x18x2 squares of foam, and I only needed to trim a bit in order to make them fit together and cover the length of the bench. Then I made a removable cushion cover by laying them on a piece of right-side-up fabric, sewing a zipper along one side, and pulling the other side overtop to meet the zipper. You sew the cushion with the “good” side of the fabric facing in, and then turn it right-side-out at the end when it’s time to add the cushion.

The trick to making a tidy cushion cover is that you sew a straight line along each short end — closing up the cushion — and then sewing four small vertical lines from the top of the cushion cover to the bottom, right on the corners. This basically nips off the extra fabric at the corners and so the cover fits snugly.

The cushion fit perfectly onto the bench, and then I made a couple of quick envelope-style pillowcases for the little throw pillows we’d picked up. One of the pillows matches the bench seat, and the other two are a solid greeny-grey.

It was so much fun to bring the bench to Melissa’s new house and install it in her beautiful, bright mudroom. The yellow is cheerful against the grey walls, and the cream-and-grey plaid cushion is the perfect farmhouse touch. Plus, she gets to keep a piece that’s been in her family for a long time — and give it a brand-new life.
xo
Weekly wrap-up: Playmobil + birthday fun + photo day at dance

SUNDAY
I shared a fun selfie with my mom and sis from cosmic bowling in Halifax. It was decidedly un-cosmic, which was disappointing since we’d worn black and white with the hopes it would look really cool, but we had a great time.
//platform.instagram.com/en_US/embeds.js
Oh, and the kids left me feeling bitterly disappointed when I woke up to find they had used all of the milk in their cereal. #thestruggleisreal
😦 😦 😦
I had to resort to things I’m not proud of …

MONDAY
It was the big reveal for the HUGE shelving system we built to organize our Playmobil collection. The secret sauce is the wooden “play platforms” that the kids can stage and move around, or take down to the floor to spread out.
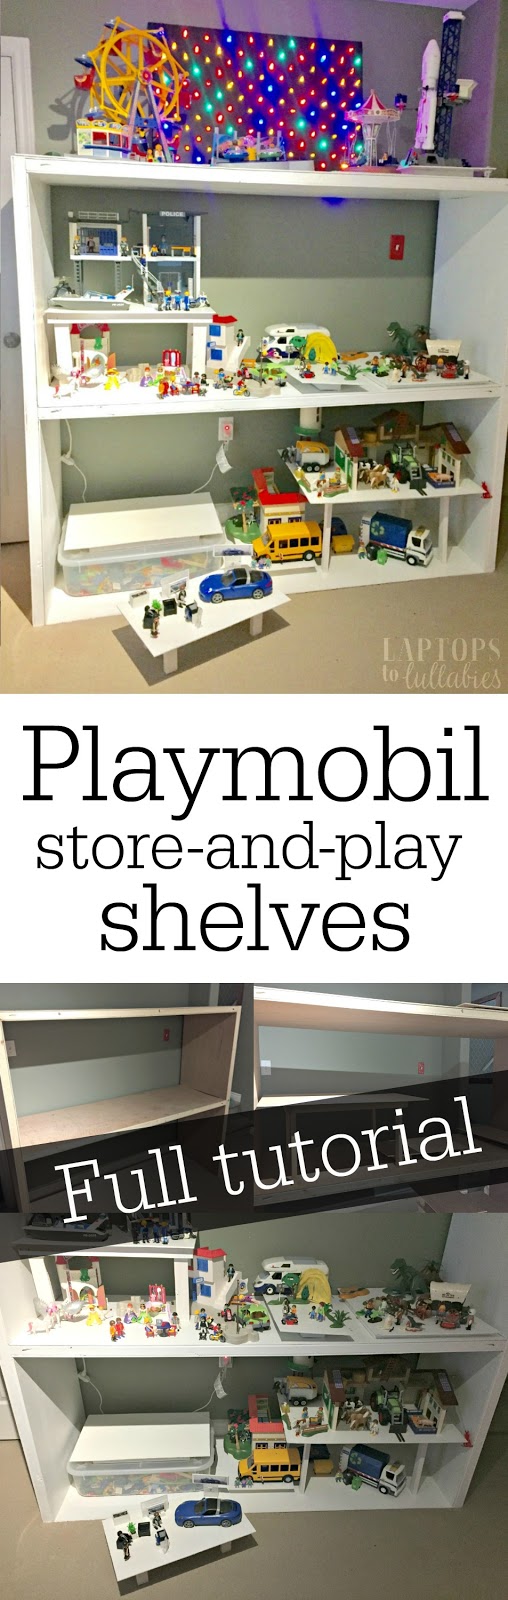 |
| DIY Playmobil storage |
(We also learned that C gets really, really excited about bubble wrap.)

Oh, and over on Instagram I did a fun Boomerang of the $2 lunchbox I bought at a thrift store. #LEGOlife
//platform.instagram.com/en_US/embeds.js
TUESDAY
In my weekly parenting column, The Mom Scene, I talked about why EVERYONE is talking about those happy, happy Dutch kids. Seriously — they’re that happy. More importantly, what can we learn about Dutch parenting so we can shamelessly copy it?
 |
| Dutch kids are happy, so let’s copy what their parents do! |
I also shared an article I wrote about Neptune Theatre’s new season, which is going to feature Mamma Mia! and I’m insanely excited about that. #musicalobsessed

WEDNESDAY
Our baby girl turned FIVE on Wednesday! FIVE YEARS OLD! (It doesn’t feel that long ago that I was having her, does it?) It was happy and actually not that emotional — possibly since she’s already seemed five for so long.
She opened all of her gifts before 7 a.m. because she was so excited (we’re not picky about waiting until a certain time of day for that). There’s actually a video of it on YouTube if you’re interested in the blind bag phenomenon.
She got to pick all of the meals, as per birthday tradition, so we had a very nice breakfast with friends at Smitty’s, she sweet-talked her daddy into getting her a HappyMeal for lunch, and then we ate ice cream for dinner at our favourite local spot, Molly’s Dairy Bar.
//platform.instagram.com/en_US/embeds.js
(Then we went home and had nachos — another C favourite — so it was a pretty delicious day.)
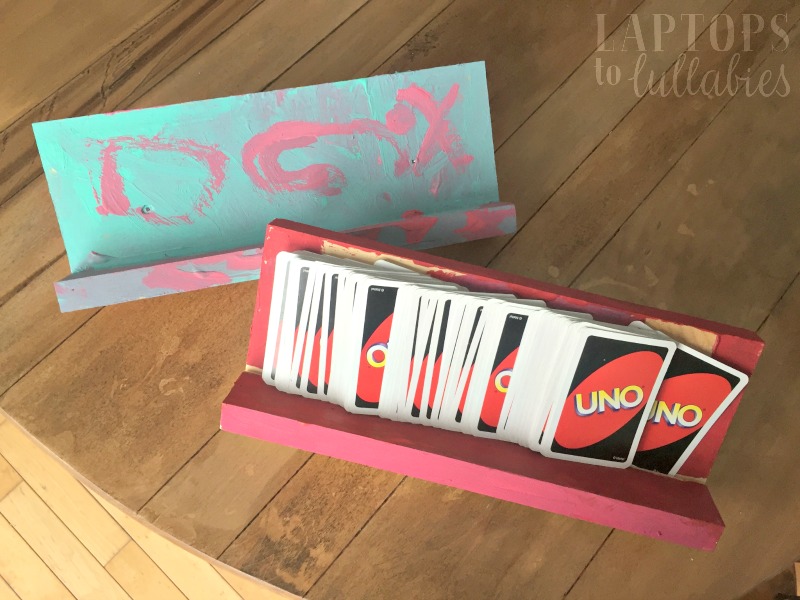
I shared a simple DIY project that has made our UNO games sooo much easier.
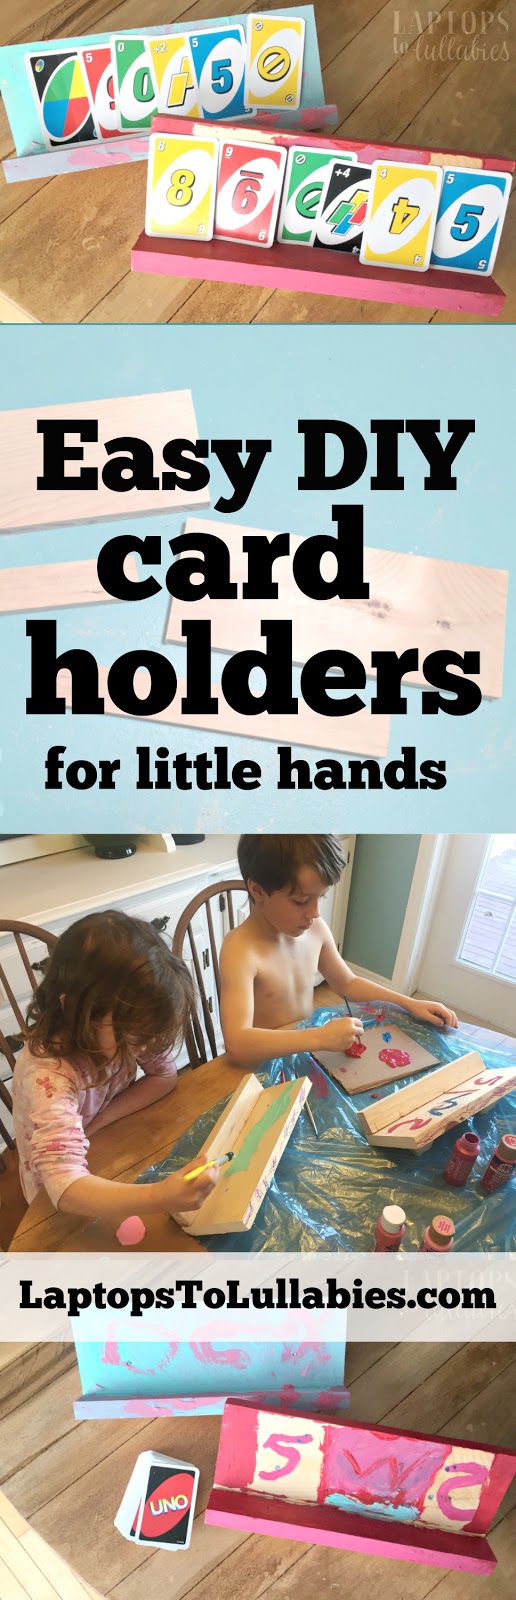 |
| DIY card-holders |
We use these things constantly and I can’t EVER go back to the hassle of playing cards without them. I kind of want one for myself.
Oh, and I shared a cute shot of C and her best friend, J, at their dance school for PHOTO DAY, YAYYYYY! (I love Photo Day. It’s the cutest to see them all dressed up in their recital costumes for the first time.)
//platform.instagram.com/en_US/embeds.js
Last year’s picture was SO FREAKING CUTE so I’m excited to see how this year’s photos turn out.
//platform.instagram.com/en_US/embeds.js
Over on Facebook, I shared an interview I did with Olympic figure skater Jeffrey Buttle about the Stars on Ice tour that kicks off TONIGHT in Halifax.

THURSDAY
Yesterday, as promised, I broke down the steps for executing the really (REALLY) easy hairstyles we did a few weeks earlier for Crazy Hair Day at D’s school.

The three of us were “Lego Head,” “Pop-Bottle Head,” and “Cupcake Head,” according to the giggling kids who came to see us at the breakfast program.
Oh, and over on Twitter I shared a weird lunch photo. Darling Husband never fails to keep things interesting!
Work-at-home lunch for the freelancer on a deadline? Cold chicken, Coke-bottle gummies, and Tylenol. 😂 pic.twitter.com/Xf8I1vshul— Heather Laura Clarke (@HFXHeather) April 27, 2017
//platform.twitter.com/widgets.js
I also re-shared my post about Why We Should All Quit Loot Bags because UGH THEY ARE THE WORST. It needed to be said again.
 |
| Here’s why we should all just quit loot bags |
***
Hope everyone has a wonderful weekend! Is it supposed to rain or be nice? I never have any idea, as I am primarily an indoor person.
We’re having a double-dose of birthday fun tomorrow (a family birthday dinner for C, as well as a small I’m-not-calling-it-a-party-party with a few of her close friends. More on that soon!)
xo
Easy hairstyles for Crazy Hair Day

Our son’s elementary school had Spirit Week leading up to Easter, and one of the days was Crazy Hair Day.
I’m not exaggerating when I say I had been waiting my ENTIRE PARENTING LIFE for Crazy Hair Day.
I was even MORE excited when I realized it fell on a Wednesday, which is the day C and I take him to school early and volunteer at the breakfast program (serving cereal, toasting waffles, and occasionally wrecking oatmeal). Which meant we could participate, too. OMGGGGGG!!!
Of course, we already get up at the crack of crow-pee for school, and we get up even earlier on Wednesdays so we can get to school by 7:25 to start making breakfast for the students. That meant we needed EASY Crazy Hair Day styles that I could execute on all three of us very quickly.
Here’s what we came up with …
Crazy Hair Day Cupcake Hair
1. Make a high ponytail. (I gelled C’s hair but in the end, I realized it would have been fine without the gel.)

2. Cut a hole/square in the middle of a paper plate.
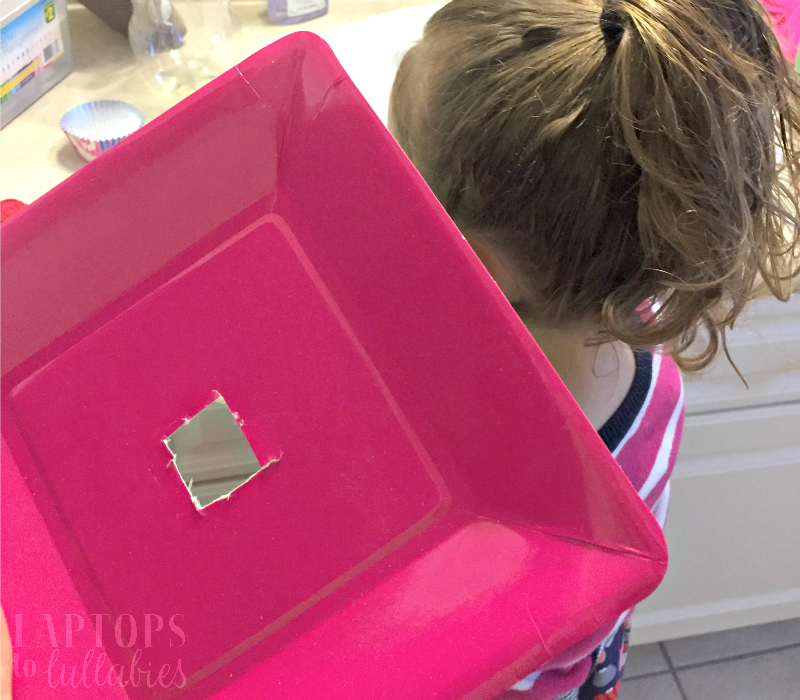
3. Slip the ponytail through the hole in the plate, and then cut another hole in the middle of a cupcake liner.

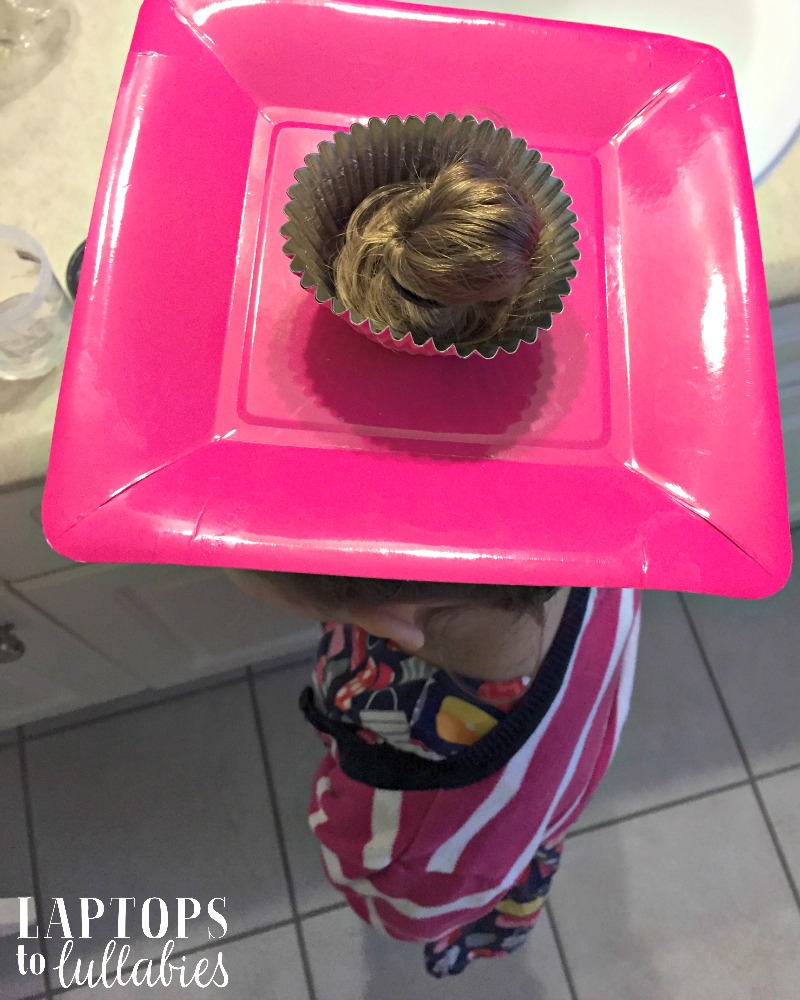
4. Slip the ponytail through the hole in the cupcake liner, twist the ponytail into a bun, and wrap it with an elastic.
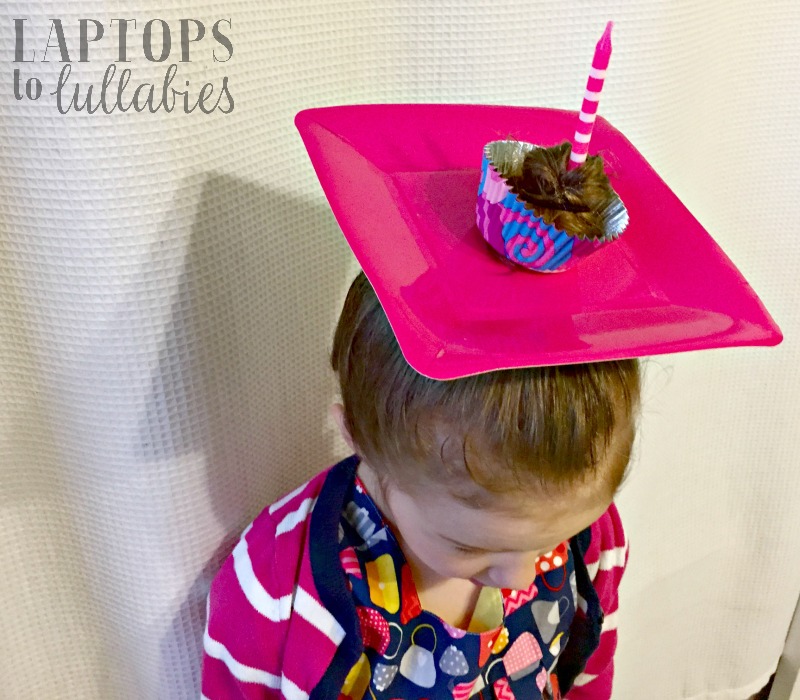
5. Decorate your cupcake with sparkly clips or stick a candle in the middle to make it a birthday cupcake.
It’s almost like a little fascinator! We saw a couple of other girls with this hairstyle — some with just the liners and not the plate.

This next picture cracks me up because it looks like swirly chocolate icing!

Next up, I needed a simple Crazy Hair Day idea for D, who is in Grade 1. He’s Lego-obsessed, so of course we wanted to make …
Crazy Hair Day Lego Hair
1. Round up some plain barrettes or clips (I bought a bunch of these double-prong alligator clips years ago for making clips for C) and some pieces of brightly-coloured Lego.
Don’t worry, it won’t be harmed.

2. Hot-glue the Lego to the clips and stick them haphazardly all over your kid’s hair. I gelled D’s first to make it look like a Lego tornado.

I was surprised that he didn’t see a single other kid at school with Crazy Lego Hair. It was such an easy one to do!

Finally, I needed a hairstyle for myself. I looked all over Pinterest and I had lots of options since my hair is long. BUT I wasn’t going to mess around with dyes or sprays, especially at 6 a.m., and a lot of the styles involved colouring your hair or attacking it with glitter. (Fun, but … not at 6 a.m.)
When I saw the pop-bottle hairstyles, I knew it was the perfect one for this Diet Coke-lovin’ Mama …
Crazy Hair Day Pop Bottle Hair
1. Take an empty pop bottle that’s sized appropriately for the amount of hair you have.
I have tons of long, thick (too-thick) hair, so I needed a 2L bottle. If I’d been doing C’s hair, I would have used one of those tiny 355ml bottles.
2. Put your hair in a really high ponytail.
3. Cut a hole between the middle and the bottom of the bottle.
It should be approximately the diameter of your ponytail so that it stays nicely in place.
4. Twirl your ponytail into a long swirl (just to make it more compact) and cram it into the hole you cut in the bottle.
5. Shake the bottle slightly to get your hair to fall down to the neck of the bottle, and grab the strands to pull them through (I could only get some of mine through) so it looks like your hair is pop pouring out of the bottle.

It was SO FREAKING EASY.
I didn’t even need bobby pins to get the bottle to stay in place — it gripped the elastic of my ponytail and stayed on for hours.
I saw quite a few girls at school with this style, and some even had a paper cup affixed to the side of their head to “catch” the pop.

Driving to and from school, though? Not easy. I had to duck my head to keep the bottle from whacking the ceiling every time I moved.
A small price to pay for Diet Coke Hair, though. 😉
|
| Pin these ideas to remember them for your next Crazy Hair Day! |
Five-minute, no-fuss styles for Crazy Hair Day

2. Cut a hole/square in the middle of a paper plate.
3. Slip the ponytail through the hole in the plate, and then cut another hole in the middle of a cupcake liner.
4. Slip the ponytail through the hole in the cupcake liner, twist the ponytail into a bun, and wrap it with an elastic.
5. Decorate your cupcake with sparkly clips or stick a candle in the middle to make it a birthday cupcake.
It’s almost like a little fascinator! We saw a couple of other girls with this hairstyle — some with just the liners and not the plate.
This next picture cracks me up because it looks like swirly chocolate icing!
Next up, I needed a simple Crazy Hair Day idea for D, who is in Grade 1. He’s Lego-obsessed, so of course we wanted to make …
Crazy Hair Day Lego Hair
1. Round up some plain barrettes or clips (I bought a bunch of these double-prong alligator clips years ago for making clips for C) and some pieces of brightly-coloured Lego.
Don’t worry, it won’t be harmed.
2. Hot-glue the Lego to the clips and stick them haphazardly all over your kid’s hair. I gelled D’s first to make it look like a Lego tornado.
I was surprised that he didn’t see a single other kid at school with Crazy Lego Hair. It was such an easy one to do!
Finally, I needed a hairstyle for myself. I looked all over Pinterest and I had lots of options since my hair is long. BUT I wasn’t going to mess around with dyes or sprays, especially at 6 a.m., and a lot of the styles involved colouring your hair or attacking it with glitter. (Fun, but … not at 6 a.m.)
When I saw the pop-bottle hairstyles, I knew it was the perfect one for this Diet Coke-lovin’ Mama …
Crazy Hair Day Pop Bottle Hair
1. Take an empty pop bottle that’s sized appropriately for the amount of hair you have.
I have tons of long, thick (too-thick) hair, so I needed a 2L bottle. If I’d been doing C’s hair, I would have used one of those tiny 355ml bottles.
2. Put your hair in a really high ponytail.
3. Cut a hole between the middle and the bottom of the bottle. It should be approximately the diameter of your ponytail so that it stays nicely in place.
4. Twirl your ponytail into a long swirl (just to make it more compact) and cram it into the hole you cut in the bottle.
Shake the bottle slightly to get your hair to fall down to the neck of the bottle, and grab the strands to pull them through (I could only get some of mine through) so it looks like your hair is pop pouring out of the bottle.
It was SO FREAKING EASY.
I didn’t even need bobby pins to get the bottle to stay in place — it gripped the elastic of my ponytail and stayed on for hours.
I saw quite a few girls at school with this style, and some even had a paper cup affixed to the side of their head to “catch” the pop.
Driving to and from school, though? Not easy. I had to duck my head to keep the bottle from whacking the ceiling every time I moved.
A small price to pay for Diet Coke Hair, though. 😉
|
| Pin these ideas to remember them for your next Crazy Hair Day! |
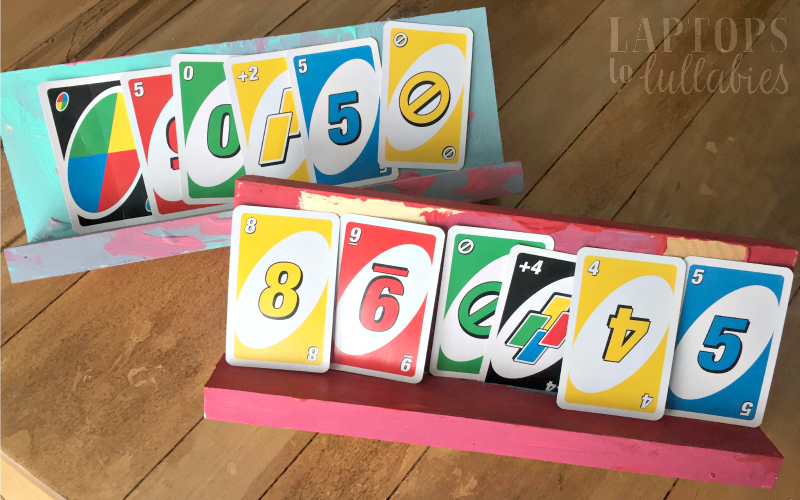
Easy DIY card holders for kids
 |
| Best birthday present EVER |
 |
| This girl does everything. |
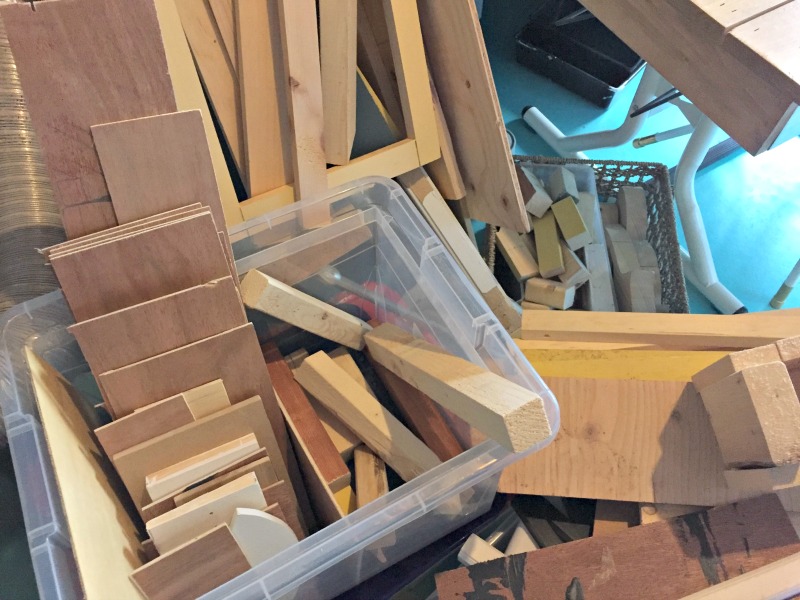 |
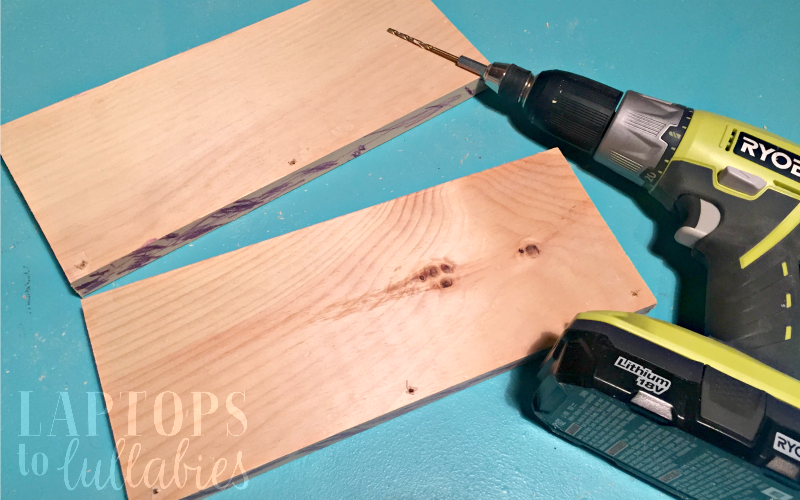
| My wood pile is in constant need of tidying |
Then I pre-drilled little holes along the bottom of the back pieces, since this wood splits easily.
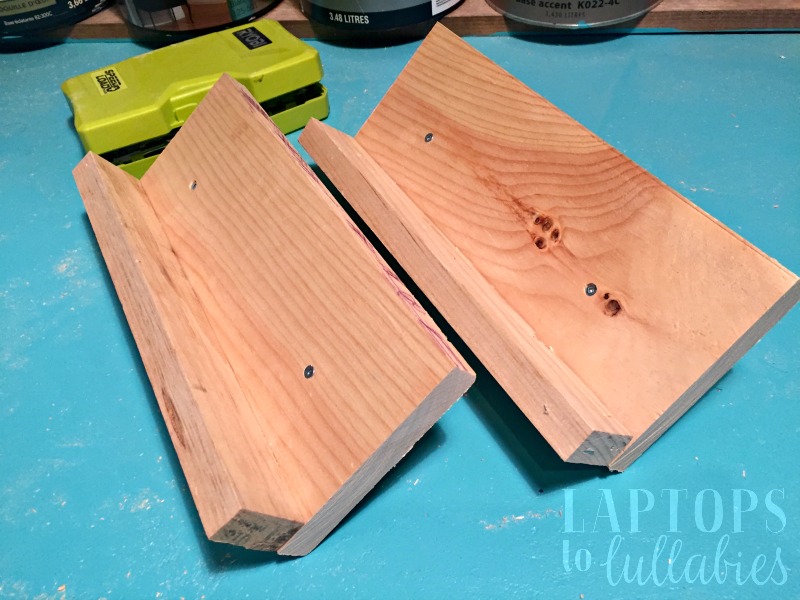
I used 1″ screws and screwed them through the back of the big pieces, straight into their little ledges to connect them. Now I had L-shaped contraptions, but they couldn’t stand up on their own yet. (They’re leaning against something in this picture.)
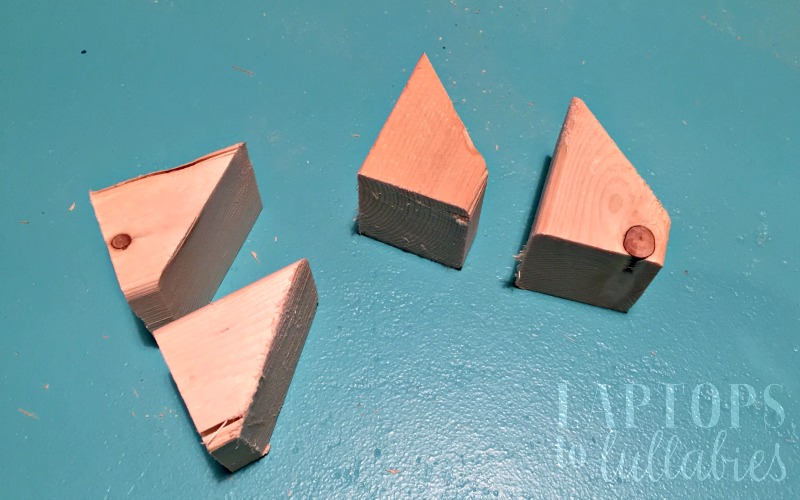
Now I’m JUST starting to play around with cutting on an angle, and it was especially fun for this project because it didn’t matter WHAT kind of angle I cut — anything that propped up the card-holders would work.
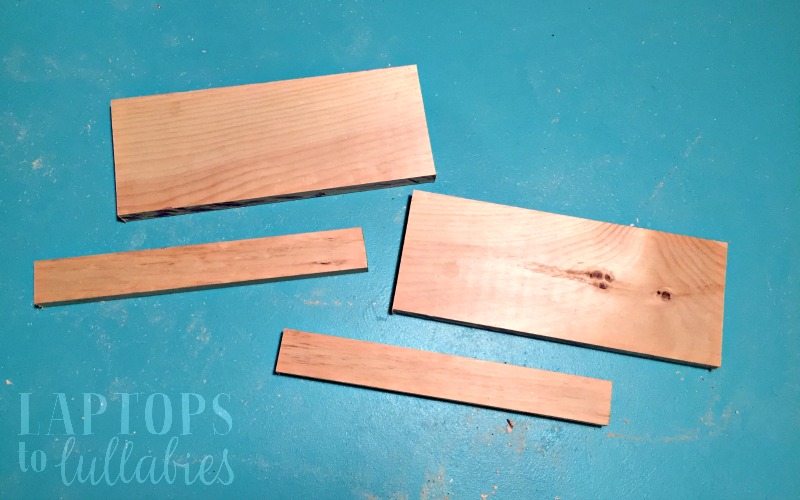
I grabbed a scrap piece of 2×2 (nice and chunky), cut it into four little pieces, clicked my saw over to a 45-degree angle, and nipped one end off each piece.
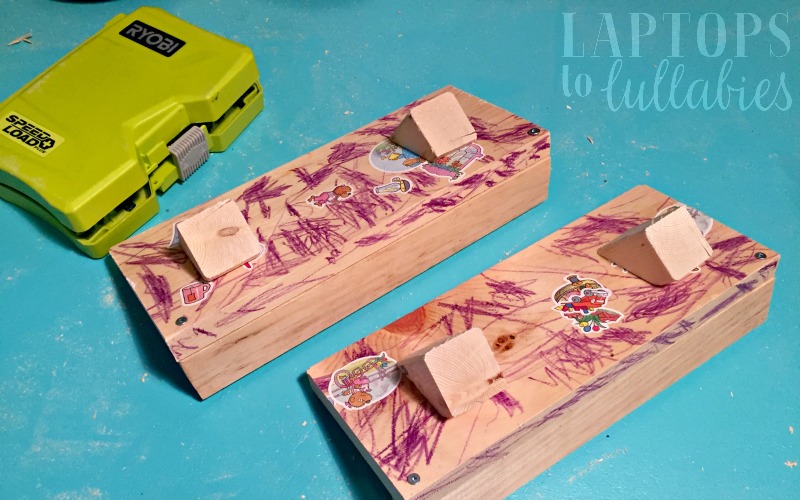
Then I just positioned the angled doodads (as I started calling them in my head) against the back of the card-holders and screwed into them from the front. It didn’t matter where they were, exactly, as long as they lined up.
(Yes, this lumber was once used for something in my daughter’s room. Hence the crayon and stickers.)
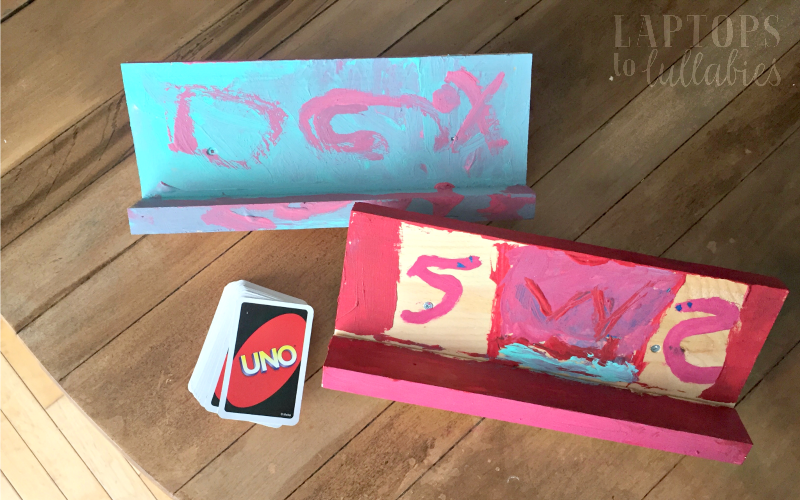
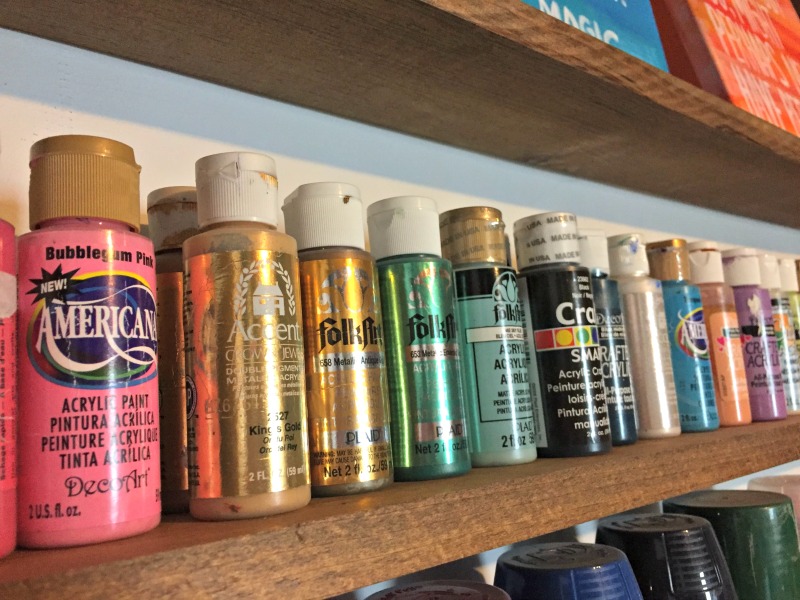
It took less than 10 minutes to cut and assemble these card-holders (while the kids were having breakfast one morning), and then I covered the kitchen table and let them go wild with the paints.
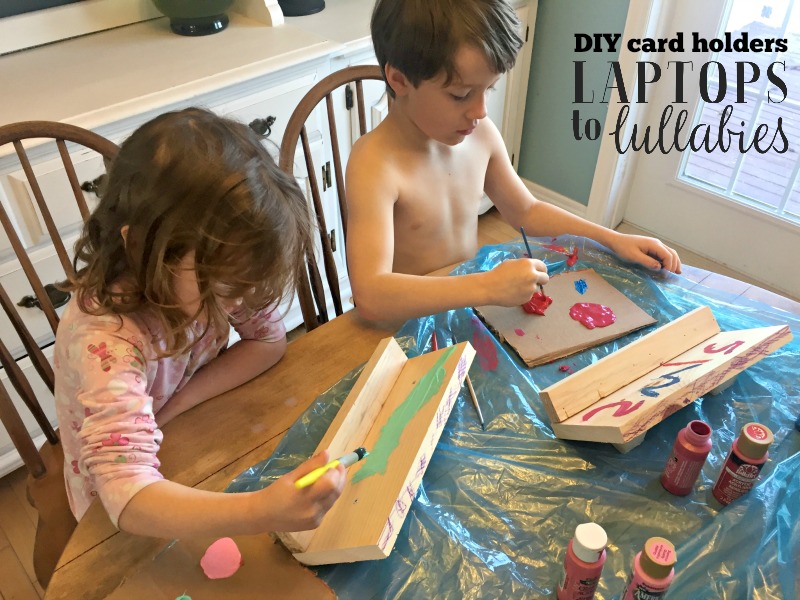
C picked pretty pastels and mixed them together, and it was looking really dreamy and etherial. Then she painted her brother’s name on hers, for reasons I couldn’t quite understand.
D was very intentional about painting some kind of Power Rangers logo involving two snakes. I got a long explanation.
They dried overnight (very. drippy. paint. jobs.) and were ready to roll the next day. They made our UNO games so much easier, and now I’m wondering why I’m stuck holding my own cards like some kind of sucker? Maybe I need my own?
|
| Pin this idea for later! |


As featured on …


