
When your dog eats a grape

I had a thoroughly unpleasant hour earlier this week when C dropped half a grape while she was eating her lunch.
Half a frigging grape! Shouldn’t have been a big deal buttttt …
Annabelle gobbled it up.
Darling Husband noticed her eating something and asked C what it was. I JUST SO HAPPENED to have warned him THAT MORNING that grapes are toxic to dogs, so he panicked and ran down to my office and then I panicked and there was much, much panicking.
I called the vet almost in tears. They said we could wait to see how she was (i.e. was she drinking a lot of water, struggling to pee, etc.) and get bloodwork done the next day. I asked if we should induce vomiting and GET THAT GRAPE OUT, and they came back a few minutes later with instructions on how to do that.
(All I could think about was the Ipecac scene from Anne of Green Gables, and it just took me almost two minutes to get the correct spelling via Google because I was so far off.)
I sent Darling Husband rushing down to the drugstore in a screamy fit of panic (I was wrongly blaming him because YOU WERE ON DUTY and it was not a good moment for me).
WARNING: Gross stuff ahead, if you’re not a pet-owner.
So, keeping in mind I’m not a vet (not even a vet Barbie), here’s how we got our almost-four-month-old puppy to yak up half a grape, according to the vet’s excellent instructions …
- I fed her a meal (wet food, so she’d eat it) and wouldn’t be upchucking on an empty stomach
- We filled an eyedropped with 5ml (one teaspoon) of 3% Hydrogen Pexoide, held her down, and squeezed it down her throat.
- She coughed a little and it clearly did not taste good. Poor thing.
- We immediately took her down to the grass and walked her around.
- Within 1-2 minutes, she threw up a (sorry) foamy puddle that included the chunk of grape (fully intact)
- I plucked it from the puddle (ew) and whooped excitedly that it was out of her!
- She then threw up a little bit twice more, and seemed to be feeling like herself shortly thereafter
Also I informed the family we are no longer buying grapes. They were displeased but I don’t care. NO MORE GRAPES!
The End
The Great Ear-Piercing War

This isn’t a story about our four-year-old daughter begging for permission to have her ears pierced, working up the courage, or shrieking in the chair while a gun shot spikes of hot metal through her tender earlobes.
Nope — all of that went off without a peep.
//platform.instagram.com/en_US/embeds.js
This is a story about something much more dramatic: what happened AFTER her ears were pierced.
At first, it was a blissful afternoon. She was so proud of herself and her shining turquoise studs. I was smugly pleased she hadn’t flinched when the gun clicked or shed a single tear. For days and days, everyone we met got to (read: had to) admire her sparkly earrings and listen to my tale of her bravery. We even planned to get matching Mother/Daughter earrings once she was allowed to swap out the studs. How cute was that going to be?!
Then the first earring fell out. I got a panicked phone call from my husband and rushed home to chaos and tears. We couldn’t find the earring back so I grabbed one of mine and pleaded her to let me put the earring back in. After an hour of hysterics and bribes, she screamed and kicked while my husband held her in place and I popped the earring back in and clicked the back on.
“Oh,” she laughed weakly, embarrassed at her fussing. “That didn’t hurt at all!”
OF COURSE IT DIDN’T!
I wish I could say it never happened again, but it did …
Continue reading in my weekly parenting column, The Mom Scene …
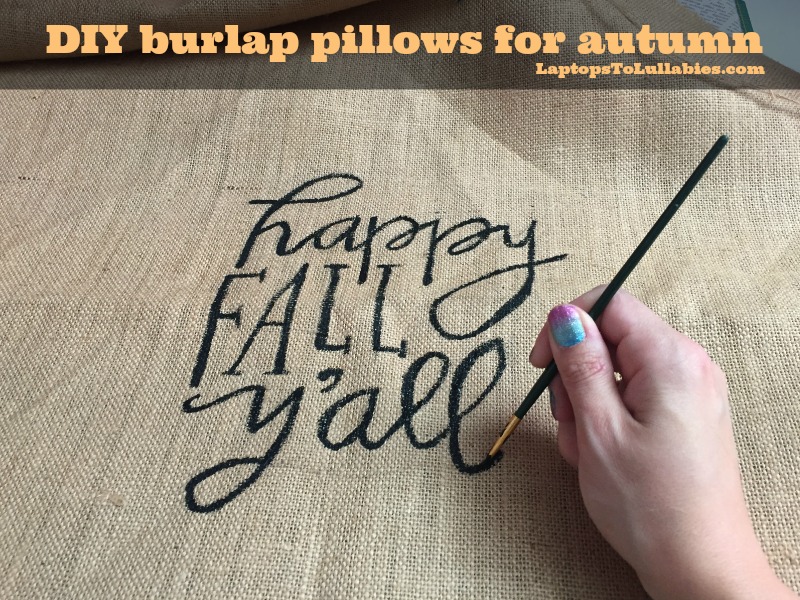
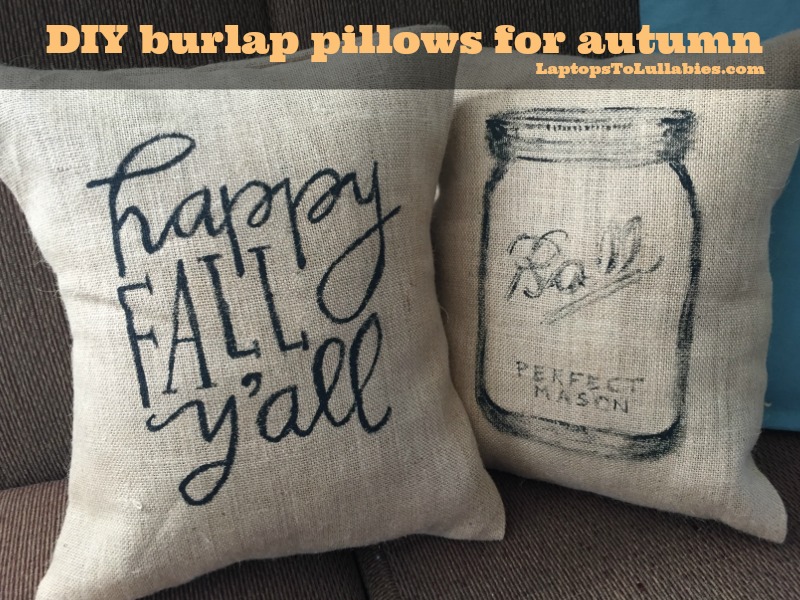
DIY printed burlap throw pillows

I don’t normally do seasonal throw pillows for the living room, but I was smitten with all of the subtle autumn-themed ones I kept spotting on Pinterest. A mason jar pillow? I needed it! And, of course, I wasn’t paying $20 or $30 for one when burlap is CHEAP and so is paint.
I’d never sewed with burlap before so I was surprised by how many different varieties they stocked at my local Atlantic Fabrics (a.k.a. my second home). I picked one that had a tight weave and minimal stretch — better for a painting surface — and headed home to get started.
I cut four large squares of the burlap — two for pillow fronts and two for pillow backs — knowing I’d trim them down to size later. Then I scoured Pinterest and printed off two images I liked: a mason jar, and “Happy Fall, y’all.” (A large portion of the crafty projects on Pinterest originate in the land of sweet tea.)
Now, how was I going to get the images onto the burlap? There are tutorials online for printing directly on burlap or printing on wax paper and transferring the design to the burlap, but they sounded way too complicated …


Continue reading in my weekly DIY column, My Handmade Home …
Easy DIY leggings


Luckily, leggings are also one of the easiest things you can sew, even if you’re a beginner.

Depending on the size of your child, you’ll need less than one meter of fabric, making them far cheaper than leggings you buy in the store. You also don’t need a pattern — just an existing pair of leggings to copy.
Here’s how to take a well-fitting pair of leggings and sew many new pairs …
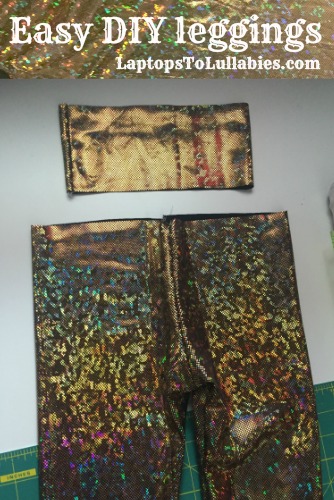
Pick out a fun, stretchy fabric and fold part of it over on itself, so the two “good” sides are touching. (Depending on the size of your child, 1 meter of fabric could get you 2-3 pairs of leggings.)
Take a pair of leggings that fit your child, fold them in half, and lay them on the fabric so the straight edge of the leggings is on the fold of the fabric.

Trace about an inch around the leggings. If you want them to be a little taller, now’s the time to add a few inches to the ankles. Same goes if you usually find leggings are tight across your child’s bum or waist — just draw that part larger.
PRO TIP: I always cut my kids’ leggings LONGER than they need, so they last longer!
Cut out the shape, and then repeat #3 to make a second identical shape. (Pssst — the shapes won’t look like leggings yet!)

Lay the two shapes together (“good” sides together). They’ll look sort of like a vase. Pin and sew just along the two short curves. If you don’t have a serger, just use a stretch stitch or zig-zag stitch on your sewing machine.

Shift the shapes slightly to the side, and voila! They actually look like leggings. Now you can sew from one ankle straight up to the crotch, and then down to the other ankle. Hem the bottoms if you’d like, but stretchy fabric usually doesn’t need it.

To make a comfy yoga-style waistband, cut a strip of fabric about 4” tall and twice as wide as the waist of the leggings.

Fold the strip in half so it’s the width of the waist and sew down one side to make a tube.

Turn the waistband tube and the leggings right-side out so you see the pretty side.
Fold the waistband tube in half to make it shorter, and pin the raw edges of the tube to the raw edge at the waistband of the leggings. Sew along the waist to attach the yoga waistband, and then flip it up — done!

BONUS STEP: If you want the leggings to have cuffs on the ankles, cut two pieces of fabric about 8” tall and twice as wide as the ankles.

Repeat the previous steps for attaching the waistband tube to the waist, only you’ll be attaching the cuff tubes to the ankles.

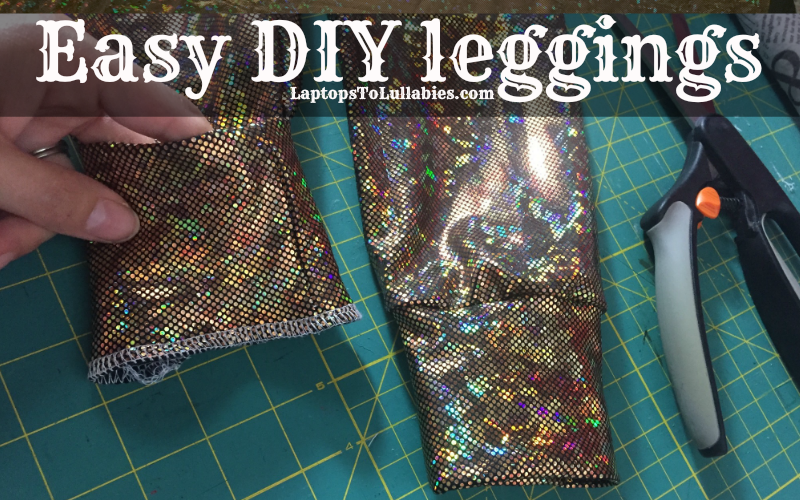
There are SO many fun fabrics out there for DIY leggings — sparkly, shimmery, patterned or printed with every colour of the rainbow — and it’s much more fun than picking out ready-made leggings from a clothing store.
How else could you get a pair of amazing, custom-fit holographic gold or turquoise leggings for less than $5?!
|
|

Don’t forget to PIN this tutorial for later!


The unexpected pregnancy test

While I was cleaning up some folders, I found one loaded with photos. All photos of a pregnancy test and the box, taken from various angles.
I was like … WTF?! What was this fr– OHHHH right. That.
They weren’t from the time I got a positive test that ended being our son.
They weren’t from the time I got a positive test that ended up being our daughter, either.
(The blog archives tell me I also used to take tests for funsies, apparently. These photos weren’t from any of those times.)
The pregnancy test photos were from the time, just two years ago, that I had to take a pregnancy test because MY DAMN IUD FELL OUT.

Yes, you read that correctly. The annoying little pinchy whatever that was supposed to be a totally effective birth control? CAME OUT OF MY BODY WHEN IT WAS NOT SUPPOSED TO, meaning I could have gotten pregnant without wanting to.
I realized I never did really blog about my IUD nightmare, so let me sum it up quickly:
Heather vs. The Evil IUD
Act I:
- Heather has an awesome OBGYN who loves IUDs and thinks they’re freaking incredible.
- Heather reads lots of positive reviews from people who love their IUDs. They sound pretty great. She’s into it.
- Heather goes for six-week postpartum appointment after having her second (final) baby and brings along the IUD she picked up from the pharmacy.
- Young Medical Student or Whatever attempts to stick IUD into Heather and it’s awful with many tears and it has to be halted.
- Heather yet again attempts to get the damn IUD people keep raving about (it rhymes with Yer-aye-na) but goes to a different OBGYN who gives her “cervix-opening” pills to take. (After Heather reminds them tearfully that she was never EXPANDED down there and that was clearly the problem during Act I.)
- Second OBGYN gets it in just fine! A pinch, as promised. Well, OK, more than a pinch, but at least the drama was over. *Dramatic foreshadowing music*
- Heather has a funny feeling DOWN THERE.
- What is it? Why, it’s a little pinchy plastic thing!
- Heyyyyy, she knows what that is!
- It’s supposed to be UP THERE, doing its job.
- Which means if it’s just been floating around up there …
- … then …
- OMGGGGG!
- Heather refrains from doing THAT, of course, because she could 100% get pregnant if her husband even looks at her.
- Heather goes back to the second OBGYN in a fury, waving the little plastic thing around (in a baggie because, ew) and dramatically retelling what happened.
- OBGYN shrugs and doesn’t seem to care.
- OBGYN infuriates Heather by saying “this happens.”
- OBGYN further terrifies Heather by telling her to “go for a blood test” the next day to see if she is PREGNANT.
- Heather, of course, can’t wait until the next day and runs out of his office to buy a home pregnancy test immediately.
- It is negative (so is the blood test) but she is still furious with IUDs and anyone who recommends them.


As featured on …


