
Easy DIY leggings


Luckily, leggings are also one of the easiest things you can sew, even if you’re a beginner.

Depending on the size of your child, you’ll need less than one meter of fabric, making them far cheaper than leggings you buy in the store. You also don’t need a pattern — just an existing pair of leggings to copy.
Here’s how to take a well-fitting pair of leggings and sew many new pairs …
Pick out a fun, stretchy fabric and fold part of it over on itself, so the two “good” sides are touching. (Depending on the size of your child, 1 meter of fabric could get you 2-3 pairs of leggings.)
Take a pair of leggings that fit your child, fold them in half, and lay them on the fabric so the straight edge of the leggings is on the fold of the fabric.

Trace about an inch around the leggings. If you want them to be a little taller, now’s the time to add a few inches to the ankles. Same goes if you usually find leggings are tight across your child’s bum or waist — just draw that part larger.
PRO TIP: I always cut my kids’ leggings LONGER than they need, so they last longer!
Cut out the shape, and then repeat #3 to make a second identical shape. (Pssst — the shapes won’t look like leggings yet!)

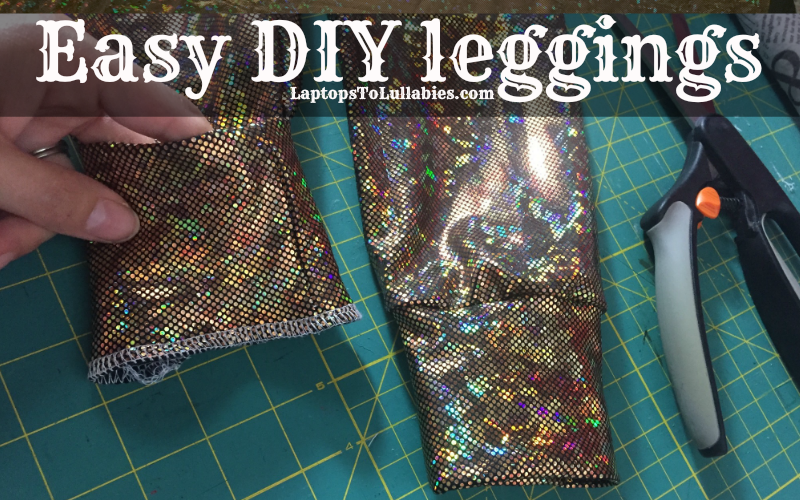
Lay the two shapes together (“good” sides together). They’ll look sort of like a vase. Pin and sew just along the two short curves. If you don’t have a serger, just use a stretch stitch or zig-zag stitch on your sewing machine.

Shift the shapes slightly to the side, and voila! They actually look like leggings. Now you can sew from one ankle straight up to the crotch, and then down to the other ankle. Hem the bottoms if you’d like, but stretchy fabric usually doesn’t need it.

To make a comfy yoga-style waistband, cut a strip of fabric about 4” tall and twice as wide as the waist of the leggings.

Fold the strip in half so it’s the width of the waist and sew down one side to make a tube.

Turn the waistband tube and the leggings right-side out so you see the pretty side.
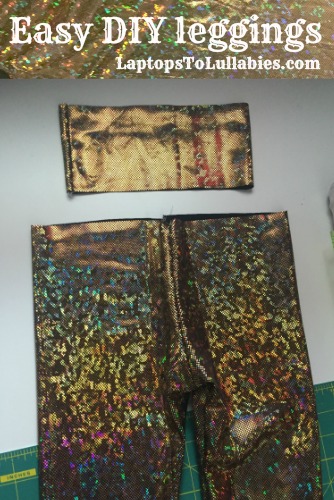
Fold the waistband tube in half to make it shorter, and pin the raw edges of the tube to the raw edge at the waistband of the leggings. Sew along the waist to attach the yoga waistband, and then flip it up — done!

BONUS STEP: If you want the leggings to have cuffs on the ankles, cut two pieces of fabric about 8” tall and twice as wide as the ankles.

Repeat the previous steps for attaching the waistband tube to the waist, only you’ll be attaching the cuff tubes to the ankles.

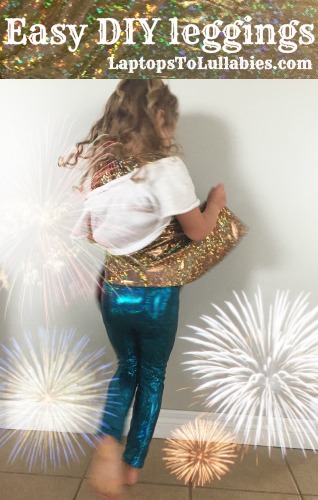
There are SO many fun fabrics out there for DIY leggings — sparkly, shimmery, patterned or printed with every colour of the rainbow — and it’s much more fun than picking out ready-made leggings from a clothing store.
How else could you get a pair of amazing, custom-fit holographic gold or turquoise leggings for less than $5?!
|
|
Don’t forget to PIN this tutorial for later!


2 Comments on “Easy DIY leggings”
So what do you think?


As featured on …


Great tutorial! Thank you very much indeed.
I love leggings too and I love when they fit.
LikeLike
They're well-constructed, fit exactly how I expected (I'm 5'10″ 125 lbs and the XS is great for me, even though they're probably shorter than on the model shown). The color of alo yoga pants was perfect for what I wanted and the material is soft and breathable.
LikeLike