
When your kid learns a bad word

“Hey Mom, I know the ‘F’ word!”
The first time he claimed to know it, he didn’t. He blanked when I asked him and couldn’t remember it.
“Was it … fudge?”
“Nope.”
“Fetch?”
“I don’t think so.”
“Fart?” (In my mind, this is the actual ‘F’ word.)
“No … I can’t remember.”
That was a couple of months ago. This time? He proudly told me he knew the ‘F’ word and, again, I invited him to tell me. He squared his shoulders and grinned.
“WHAT THE F**K!” he said brazenly, with exactly the right emphasis.
Oh, he knew it all right. Did I mention he is six years old?
“Where did you hear that?!” I choked, my eyes bugging out of my head. I knew, with confidence, he had not heard it from me. I’m pretty good about swearing quietly (or mentally) if the kids are around just to avoid situations like this.
“On the bus.”
The elementary school bus where the oldest kids are in Grade 5, so they’re all about 10 years old?! Yeesh.
I recovered from the shock, steadied myself and began my usual Mommy Inquisition.
Who said it? Was it a Grade 5 student? Did they get in trouble? Have you said it in front of other kids? You didn’t TEACH it to anyone, did you?!
I didn’t get a lot of information out of him. He claimed to have forgotten who taught it to him, but his eyes were flickering around in that I’m-not-being-truthful way. Fine, I get it. He doesn’t want to get this particular kid in trouble. Snitches get stitches or whatever.
So he knew the ‘F’ word — not only knew it, but knew the proper inflection and everything. Now it was one of those parenting moments that had to be handled immediately, and handled well …
How did I handle it? Continue reading in my weekly parenting column, The Mom Scene …
Replacing your kitchen sink and faucet … all by yourself
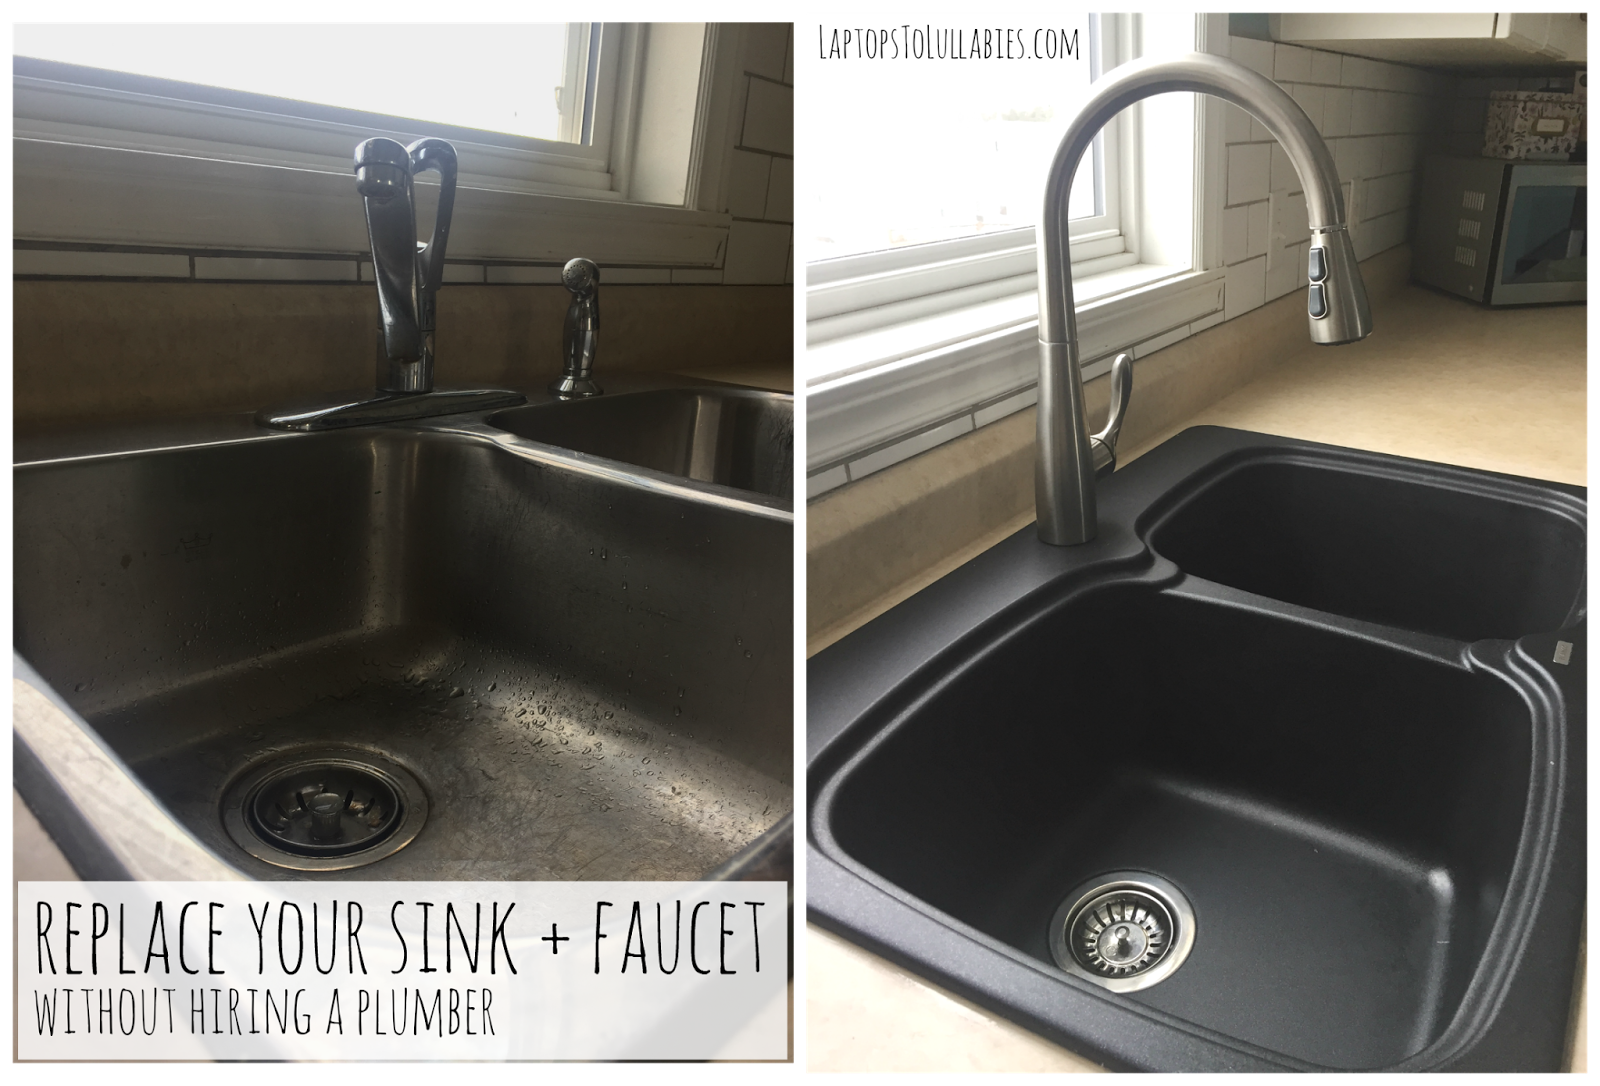
When our kitchen faucet started leaking beyond repair, it was clear we needed to buy a new one. But if we were going to replace the faucet, it made sense to get rid of the perpetually grimy (not-so-stainless) stainless steel kitchen sink.
We knew we did not want stainless steel after five years of staring at the scratches and stains on our current one.
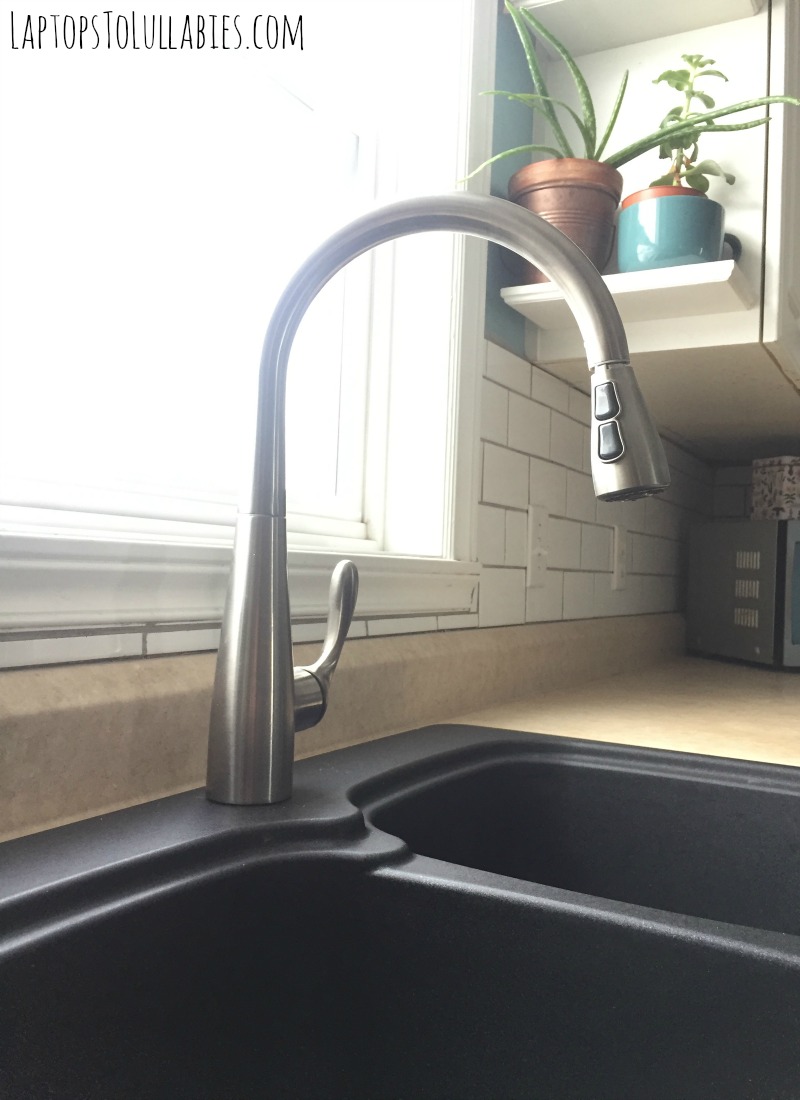
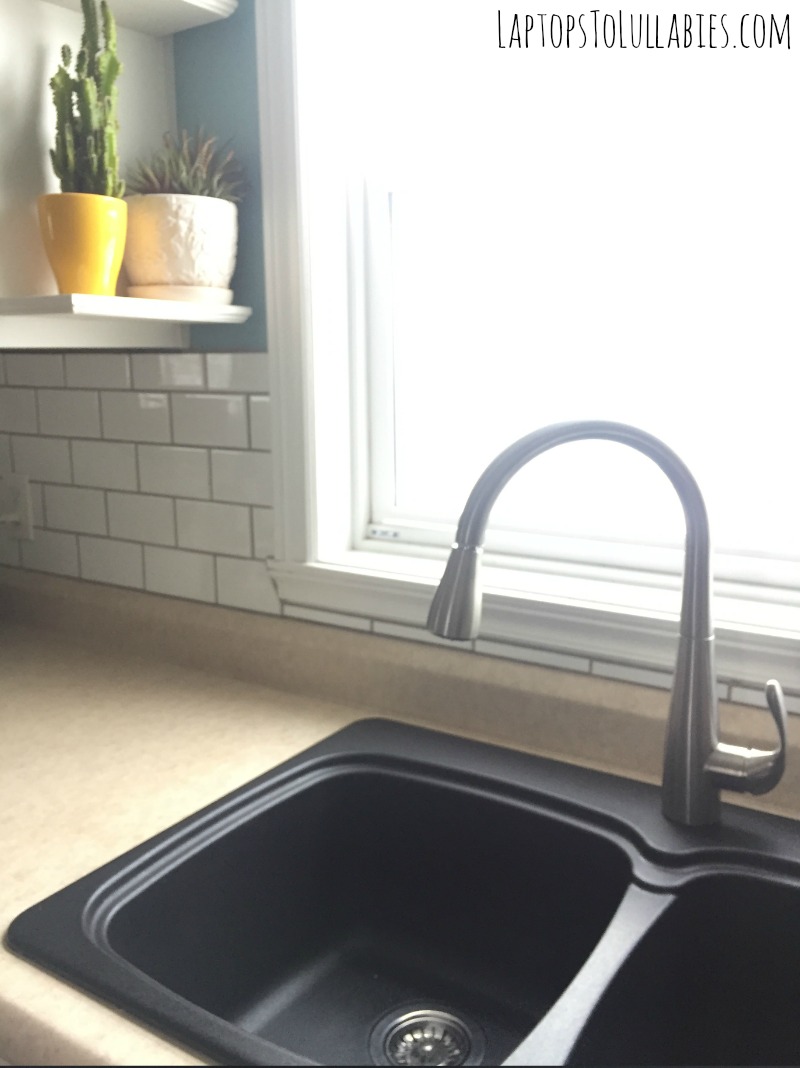
We went to Kent and chose a chip-resistant BLANCO Vienna two-bowl granite kitchen sink and a Taymor faucet with a really high arc.

The boxes were barely in the house before we excitedly dove into the project.
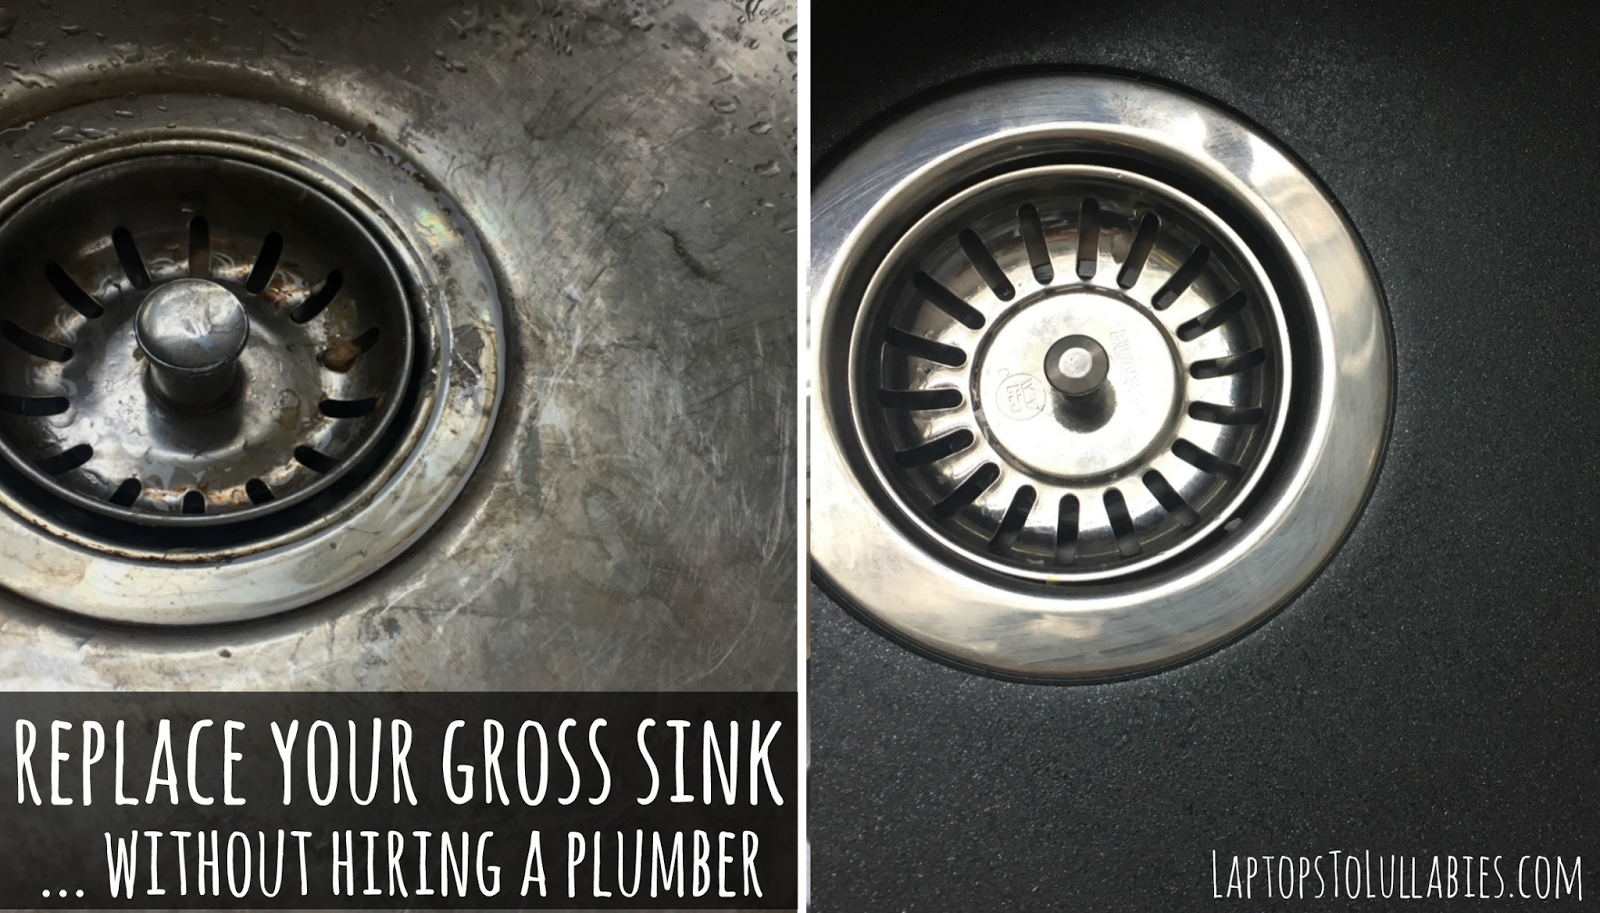
After the plumbing was unhooked it was time to take out the yucky old sink. We ran an X-acto knife around the lip to break the seal and lifted it out pretty easily. The hole it left behind looked huge and it was strange seeing sunlight peeking through the crack between the cabinet doors.
There was a minor hiccup when we went to hook up the new faucet: the water lines were too low so we needed to extend them. It required a quick trip back to Kent for a CinchClamp kit and a second set of shut-off valves, but the modification went smoothly.
Then it was time to dry-fit the sink — exciting! We’d hoped it would drop in smoothly because we were nervous to cut into the countertop, but it needed some extra room around the top. I used a Sharpie to trace the paper template that came in the box and my handy husband carefully jigsawed out a hunk of countertop we didn’t need.
The real trouble started when it came to putting the plumbing back together. One pipe was too short and another was too long. We bundled up the kids and ran back to Kent in search of “join-y bits” so we could modify the pipes.
I found something called a union and we figured it was what we needed, along with a spare ABS pipe and some stinky yellow glue for sealing it all together.
Back at home, I put the kids to bed while my husband sawed new lengths of pipe and tried to reassemble the drainage system. He got it all put back together, ran the water . . . and it leaked.
There was cursing.
“But you did 95 per cent of it perfectly!” I was practically wringing my hands at this point, wondering if it was time to call in a professional.
“It doesn’t matter! It either works or it doesn’t!”
He was right, even though he could have done without the dramatic toss of the dish towel.
There was more fiddling with pipes, more leaking and more cursing. He’d fix one spot and then suddenly things wouldn’t line up under the other sink. Let’s just say it was a difficult evening that tested our marriage, OK? …
Continue reading in my weekly DIY column, My Handmade Home

Continue reading in my weekly DIY column, My Handmade Home
Thanks to Kent Building Supplies for providing us with the BLANCO Vienna sink so we could tackle this project (we purchased the faucet ourselves). As always, all opinions and plumbing mishaps are my own.
New year, new project!

Happy New Year, everybody!
It’s hard to believe that I started Laptops to Lullabies waaaay back in 2009, exactly eight years ago today. (I’d link back to those first pathetic posts, but yikesssss you might not want to read them.)
I’m not going anywhere — and neither is this blog — but I *did* start a second little project today. Apparently Jan. 1 is the only day I start blogs, so I pretty much had no choice!
It’s called Heather’s Handwriting and it’s a blog entirely WRITTEN (as in, using a pen, not typed).
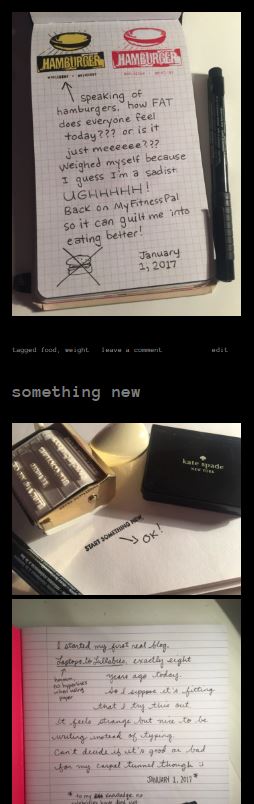
There are just a couple of posts so far, since it literally was born today, but I like it already. It’s weird and casual and is bound to end up with a bunch of bizarre doodles everywhere, so it’s very much ME.
Why start another blog, when this one keeps me busy? I talk about it over there, but I guess it was part of a feeling of wanting to simplify and slow down a bit. Working on a handwritten blog means I’ll be getting my hands on a real-life pen at least once a day, and sitting down (preferably in a comfy chair) to write in a real-life notebook — not a flashing computer screen.
I’m THAT person who needs to put down the phone, step away from the computer, shred the to-do list, take myself less seriously, stop stressing, and take a zillion deep breaths. Constantly.
I’m hoping this handwriting project reminds me to do all of the above.
(Plus I get to use all of the pretty notebooks I’ve been hoarding for a special day/occasion/project/I have no idea. Pretty notebooks are everythinggggg.)
Why half-birthdays are more fun than REAL birthdays

A kid’s birthday without any gifts to buy, invitations to create and mail, huge party to plan or guest list to wrangle? Yes, please!
They’re called ‘half birthdays’ and they’re soooo much simpler than real birthdays. I’m quite a fan.
Our son’s real birthday is June 6 and our daughter’s is April 25, so the official half-birthdays in our house happen on Dec. 6 and Oct. 25. Oh, and the puppy’s birthday is July 2 so I suppose we’ll have her first half-birthday on Jan. 2.
(No, my husband and I don’t feel the need to celebrate turning 30-muffle-muffle AND A HALF.)
So what does a half-birthday involve? Whatever you want! In our house, there aren’t any gifts but we treat the day with a lot of fanfare — and there is certainly cake.
The kids get to choose what kind of cake (or cupcakes) they’d like to have, and the youngest and I do the baking while the eldest is at school.
As soon as the bus drops the elementary-schoolers off in the afternoon, we round up our neighbours and bring everybody over for a slice of cake (or a cupcake) and a glass of milk.
The kids crowd around the table, we all sing Happy Half-Birthday To You and then we dive into the homemade buttercream (which is divine, if I do say so myself — I use the Cake Boss recipe).
I also started breaking one candle in half to show the “half” they’ve achieved, so our son loved blowing out six and a half candles on Dec. 6. (Note to self: find better way to do this because a tiny stub of a candle quickly gets melted wax all over the icing.)
We’ve only celebrated two half-birthdays so far (one per kid) but it’s definitely a tradition we’re going to continue. I was surprised by how VERY excited they got to have a second “special day,” and it was a nice way to mark the fact that they really were halfway to turning a year older.
I’d slipped a tiny birthday card in our son’s lunch on the morning of his half-birthday. It was the size of a gift tag and I’d just thought it was a cute gesture — a message quickly printed out before we rushed out the door for the bus.
He carried it around with him all day, and even wrote “I love you too” on the bottom of it. We went out for dinner and he brought it with him to the restaurant, standing it up on the table so he could see it while he ate his hamburger and french fries. He told us, over and over, that it was “the best day ever.”
I noticed the little card, days later, carefully propped up on his nightstand. It was worn around the edges from being in his pocket, and he picked it up and read it out loud to me for the dozenth time.
To me, his half-birthday hadn’t been all that different than a regular Tuesday afternoon. There’d been school and deadlines and cleaning up and rushing around. I’d forgotten to ice his chocolate cake until 10 minutes before it was time to get him at the bus stop, so there was even more rushing.
But to him, that Tuesday had been a momentous celebration of the fact that he was getting closer to being seven years old. And he was absolutely right.

DIY photo ledges for just $15

Our living room was boring.
More specifically, I was bored with the white floating shelves that had been hanging in our living room for a good three years, maybe four? I’d decorated them with black and white photos in black frames with white mats and what seemed “classic and modern” at the time now felt stale.

Now, I’m a person who likes a lot of visual interest on the walls. Bring on the gallery walls, the statement pieces, the 3D elements — I love it all. The trouble with being this kind of person is that your walls are constantly being patched and repainted because there are so many frickin’ holes.
Because I’d committed myself to a black-and-white theme, I never changed out the photos or added anything colourful to those (really dusty) shelves. It just seemed like too much effort, so our neatly-arranged family photos remained frozen in 2012.
The obvious solution, once I thought about it, was to make it easier for me to swap out pieces and keep the walls (somewhat) intact.
On a whim last weekend I took down the floating shelves, patched the living room walls and repainted the wonky areas. (The light blue wall colour is CIL’s Bear Run and I still love how it pops against the white trim and accessories.)
Now, these floating shelves were kind of pricey (for our DIY-loving budget, at least) so I’ll use them somewhere else. But the crazy thing is how cheaply I was able to make the photo ledges that replaced them. Are you ready? Fifteen dollars for two four-foot ledges, including the hardware!
The ledges themselves were incredibly easy to build, too. I took two 1×2” boards (each 8’ long) and used my mitre saw to chop them in half, giving me four 4’ sections of 1×2” (which are less than $2.50 each, if you buy them that way).
Then I just held one board so it was standing upright against the edge of a board that was lying flat (making an L) and screwed them together, making two long ledges.

I gave each ledge a quick sand and painted them with two coats of white paint (Fusion Mineral Paint in “Casement”).

Then I screwed an L-bracket on each end and secured the ledges to the wall, one above the other, making sure to leave lots of room in between for large canvases or frames …
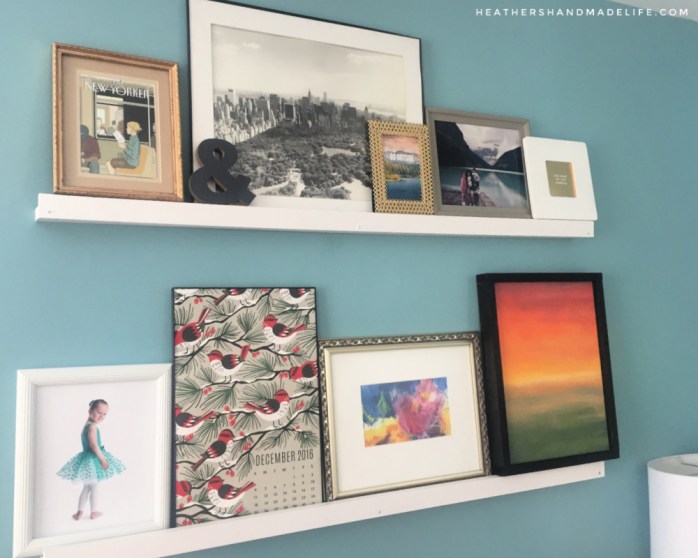
Grey ampersand: Michaels
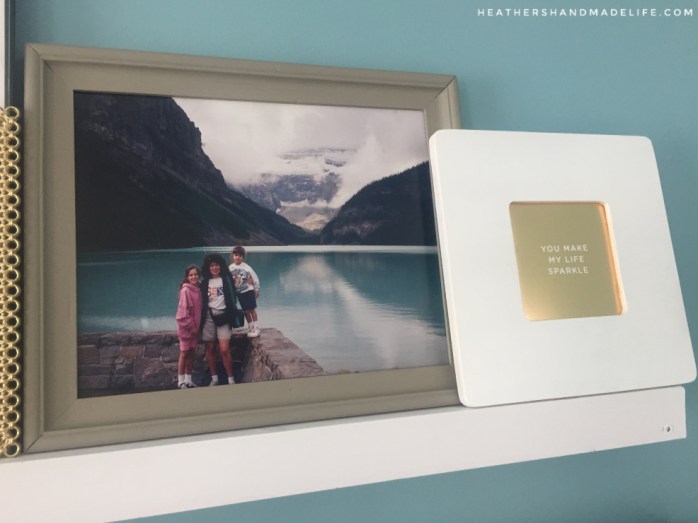
Grey frame: Yard sale find painted with Fusion Mineral Paint in “Algonquin”)
Gold frame: Winners (on clearance for $4 because the glass is missing)
My ballerina beauty: Taken by Portraits by Johanna
Calendar art: Rifle Paper Co. calendar framed in a glass-less Walmart frame
Watercolour: Original by Halifax painter Susan Hubley
Sunset painting: Made by me, handmade frame (tutorial coming soon)
(Full disclosure: I can only use frames that are fairly slim, otherwise I’m worried they might tumble off the front of the ledges. If I were to do this project again, I’d make the ledges a little deeper — likely using 1×3” boards. Then I could have larger frames and they’d have plenty of room to lean back safely against the wall.)
Filling up those ledges was SO much fun as I figured out the best way to display the paintings, photos and prints. I can change them as often as I want without worrying about more holes in the wall, and mixing and matching frames has given me a lot of breathing room.

It’s a more casual look and I’m loving it!
*** UPDATED in 2019 ***
I still love these skinny ledges in our living room, and I’ve made them for other people’s homes, too.
Here they are in Sylvia’s master bedroom …


And in Lila’s bedroom …

And then I decided to branch out into making LARGER ledges that could hold more than frames …
I built them the same way — one “front” board screwed into a “flat” board — except I made the flat board deeper, usually around 6″, like these ones for Laurel’s bedroom …


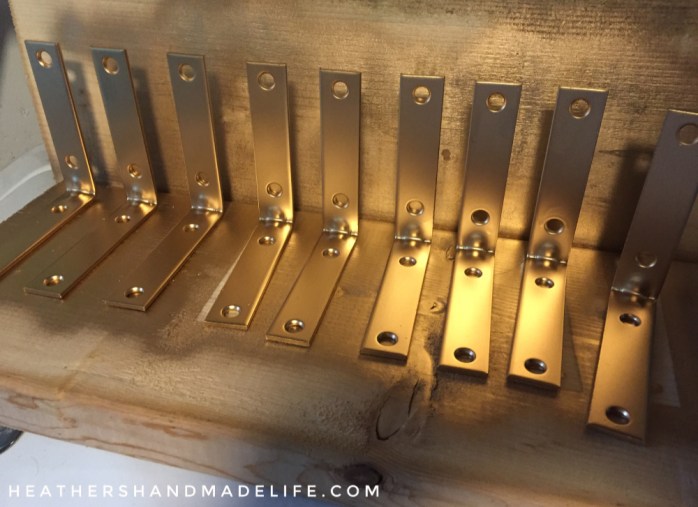
Because the ledges are thicker — and much heavier! — my Handy Husband insisted on using chunky brackets that would support their weight, and putting them UNDERNEATH each ledge so they’re properly load-bearing.
I didn’t love that idea — usually the brackets are hidden behind the items on the ledges — but spray-painting them gold did make me feel better. 😉
We made a similar set of wide ledges for Katie’s bedroom, and they look fantastic there, too …

Making thicker ledges increases the cost because the brackets are more expensive and so are the thicker boards.
However, you’re able to load them up with plenty of items — making them a good idea for rooms with a lot of “stuff” that needs an organized home, like piggy banks, books, plants, dolls, stuffed animals, LEGO sets, and just about anything else.
But if you’re just looking to display photos in slim frames, scroll up to the top and follow the instructions for skinny $15 photo ledges. They’re classic, super affordable, and easy to put together.
Happy building!
xo


As featured on …


