
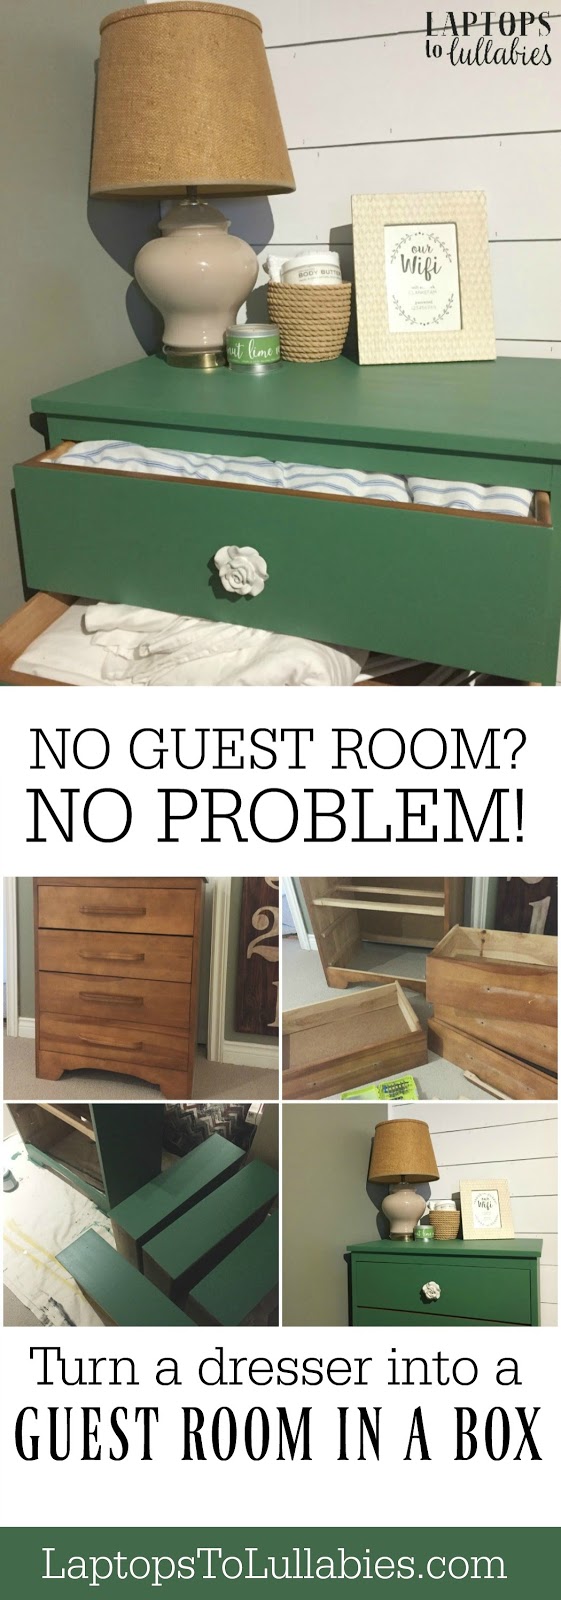
Guest room in a box

I used to dream of having a dedicated guest room to decorate. It seemed like such a luxury to have a room that could be perpetually ready for a surprise round of company — already pristine with fresh linens and towels, and no last-minute rustling for a set of sheets.
 |
| This is NOT an actual guest room. Clearly. |
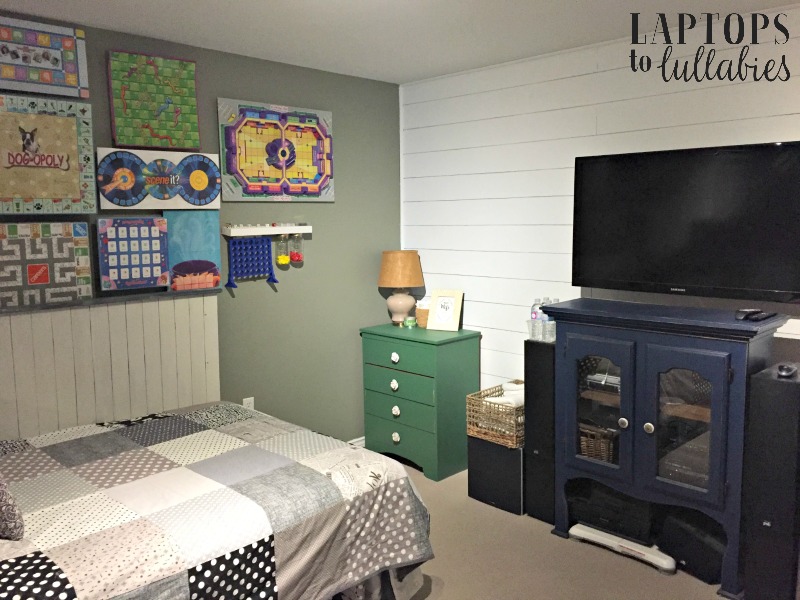
Our three-bedroom, four-person house means we don’t have a guest room — and maybe never will — so our visitors have to stay in our family room in the basement.
It’s a busy room with board games on the walls and toys from floor to ceiling. Not exactly the peaceful guest room I’d always wanted, but at least it has its own bathroom. Last year, we swapped the back-breaking pull-out couch for a DIY daybed that has a comfy pillow-top mattress, but we didn’t go any further.
Up until recently, my pre-guest routine was to run two floors up to the linen closet and load my arms with sheets, pillows, quilts, towels and facecloths. I couldn’t carry everything comfortably at once, and I’m a weird ‘One-trip! I can make it!’ person, so I’d literally throw most of it down the stairs. Then I’d pick it back up on the main level and throw it down the second set of stairs to the basement. Five-star service all the way, here.
Once I met up with the tangle of linens in the basement, I’d strip the grey fitted sheet off the daybed (which stays on when it’s a ‘couch’ with throw pillows) and make it up as a guest bed. Then I’d fold the towels that had been hurtled down two flights of stairs, stack them on the media cabinet and grab some hangers from the laundry room.
Once our company went home and I’d washed everything, I’d truck it all back upstairs to the linen closet until next time. I’d thought about storing it in the basement somewhere, but there wasn’t a good spot — and all of the linens should be in the linen closet, right?
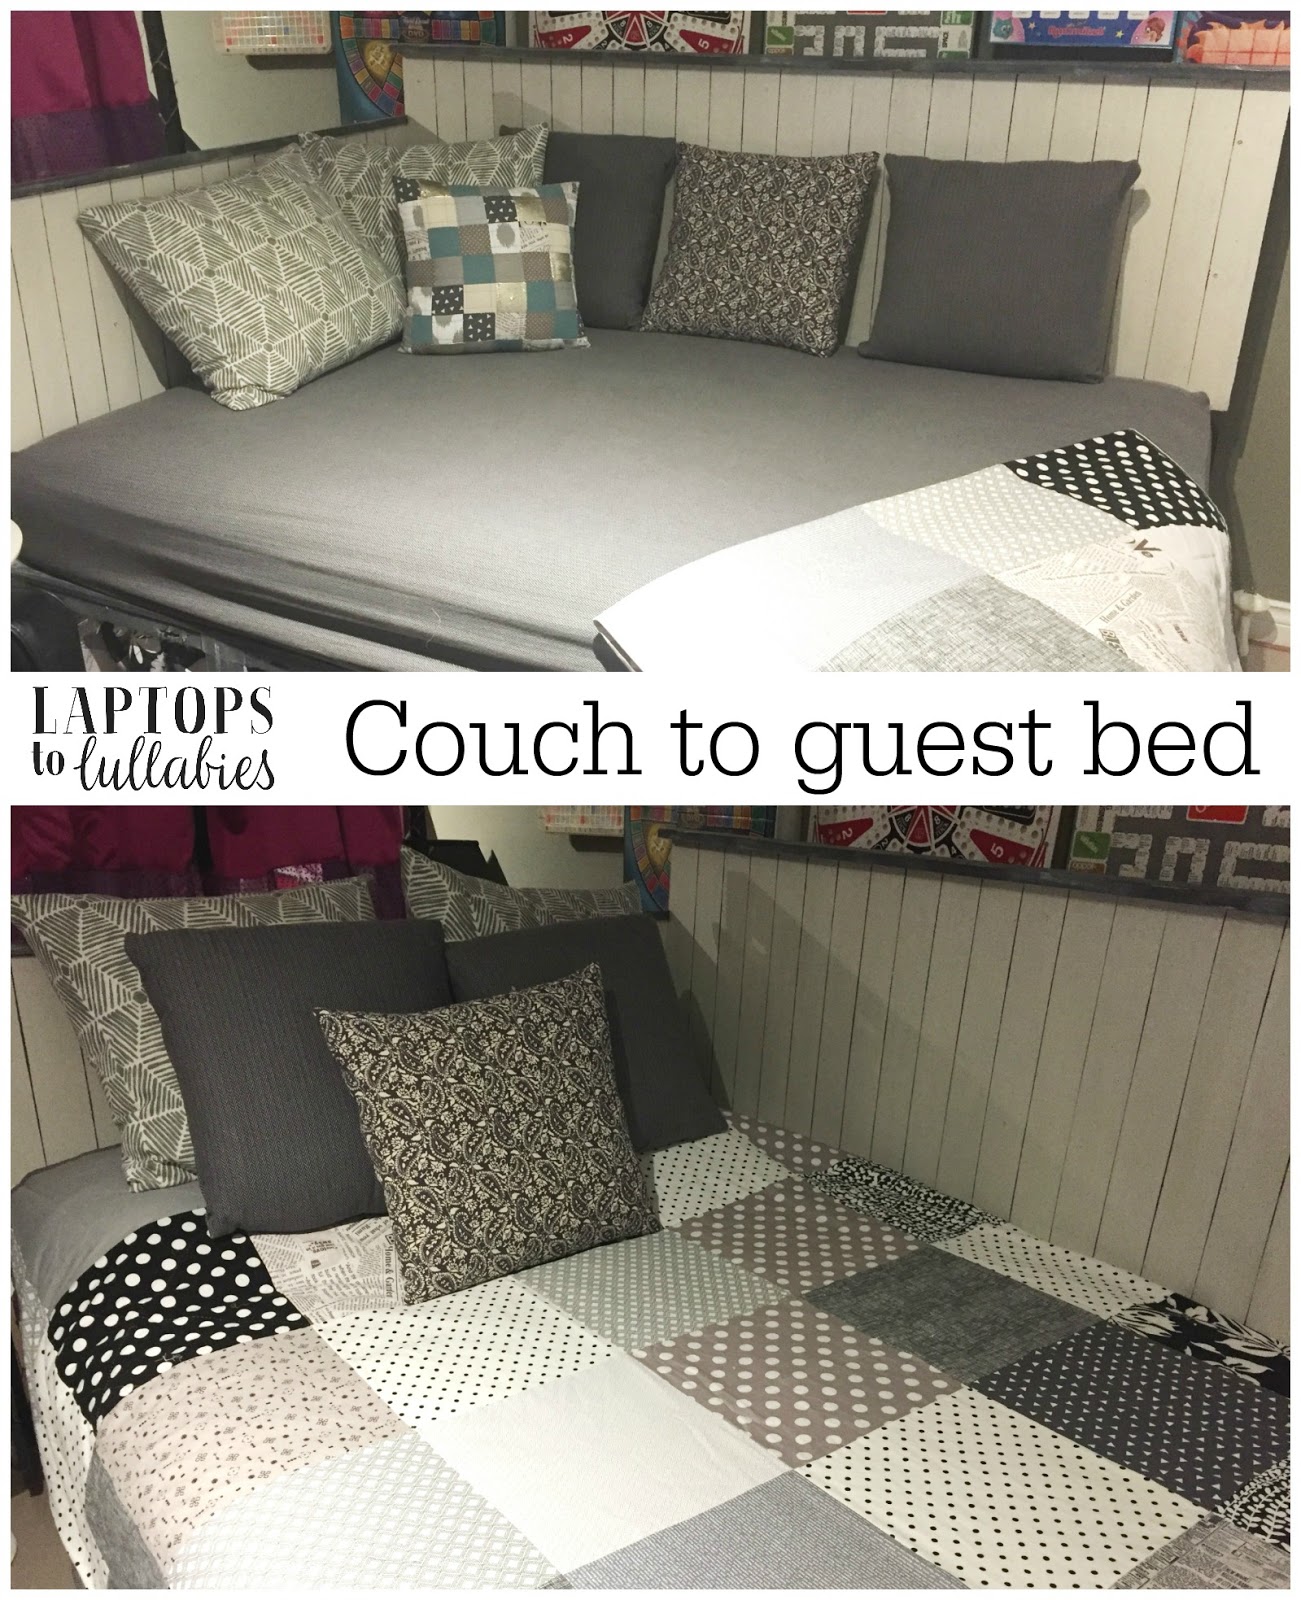 |
| I’m a bed! I’m a couch! I’m a bed! I’m a couch! |
Everything changed when we re-did our daughter’s room and she no longer needed her smaller dresser.
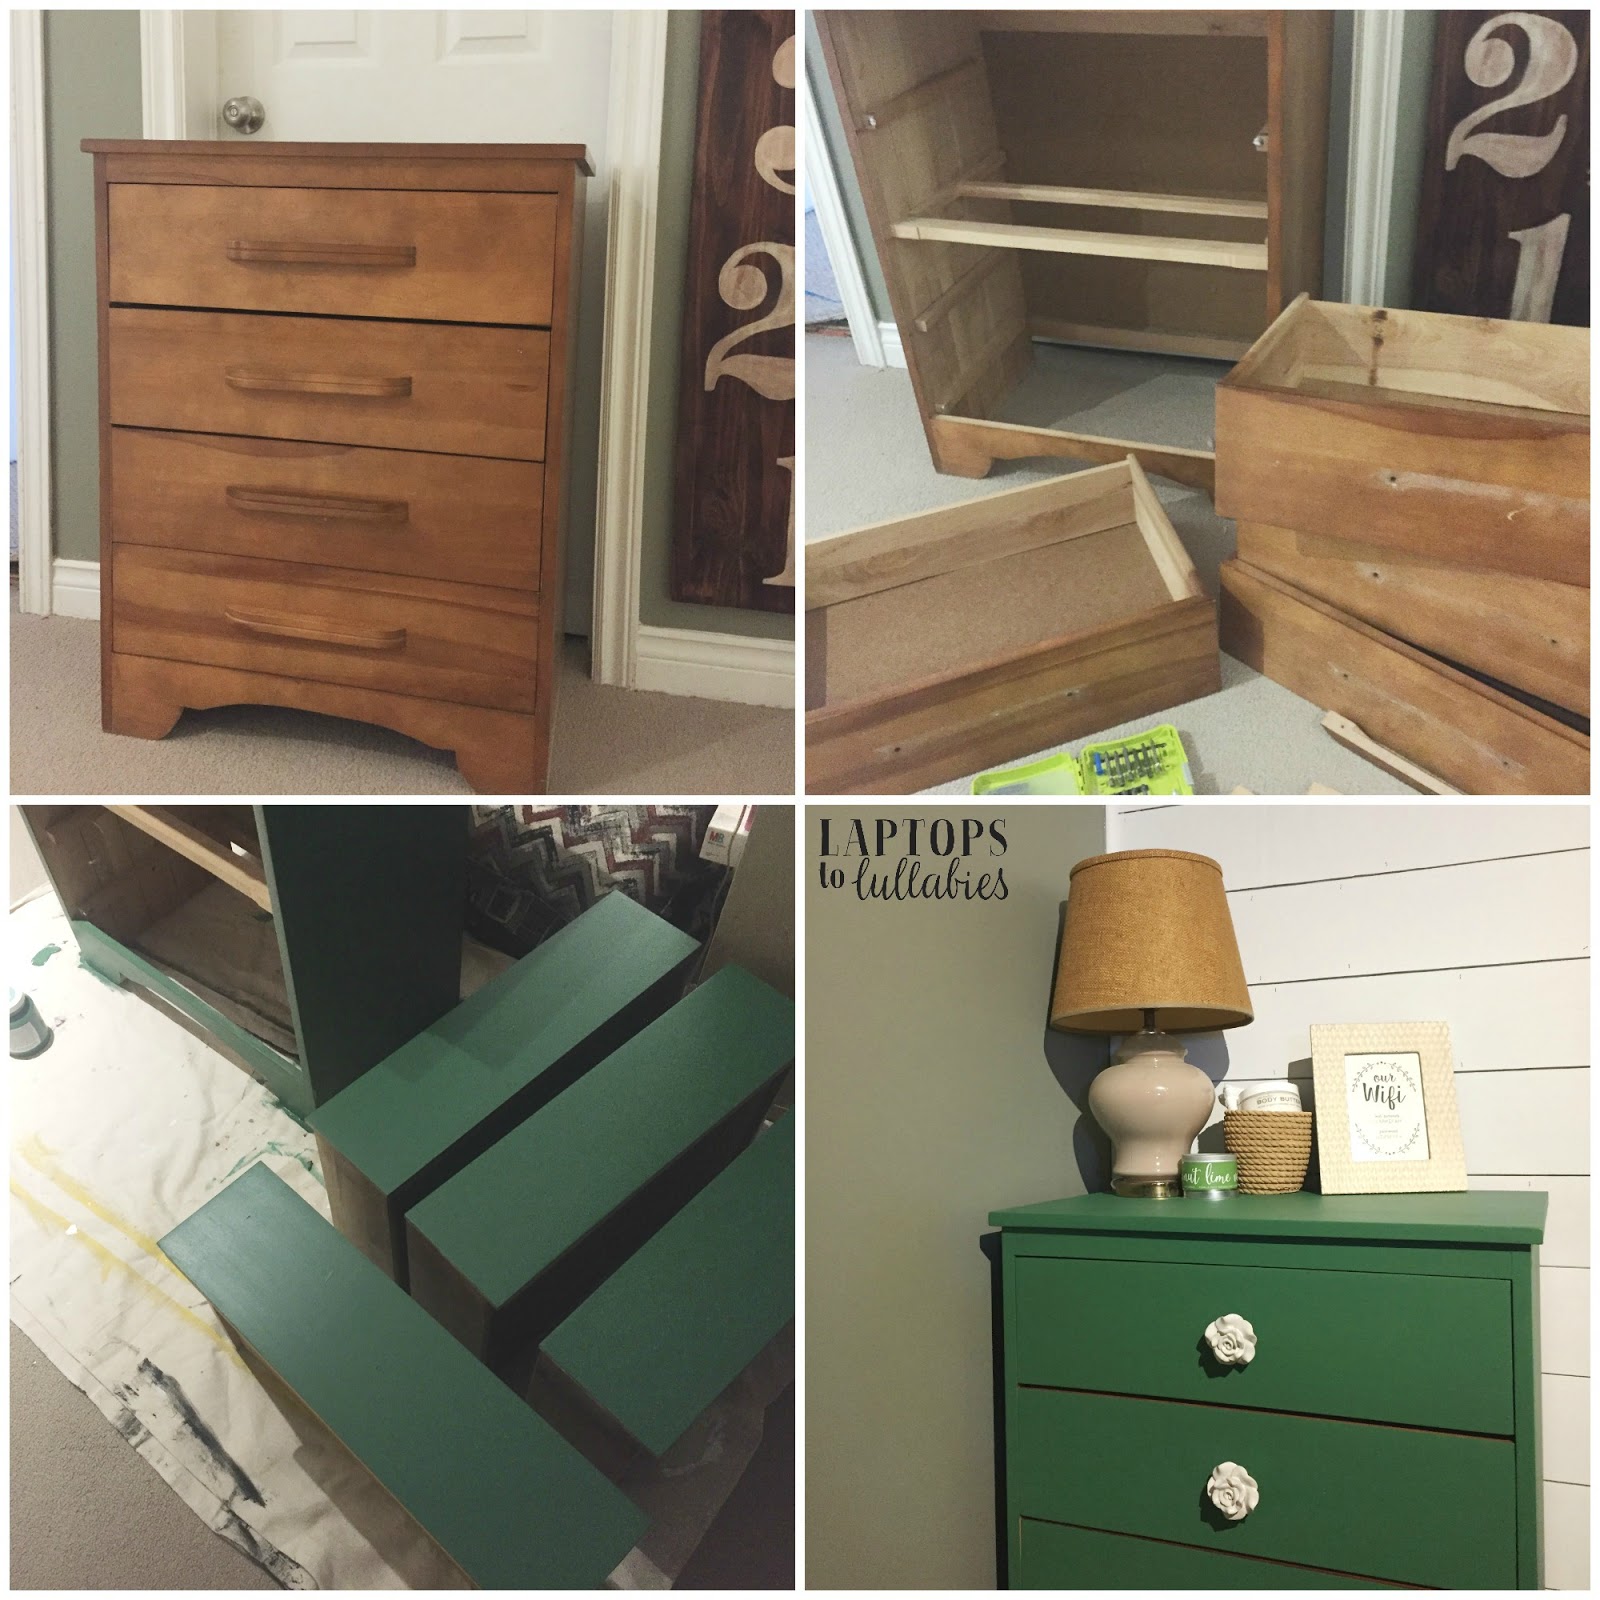
I got the idea of turning it into a ‘guest-room-in-a-box’ that would store all of the guest linens and double as a spot for them to actually put their clothes away — what a concept for a dresser! …
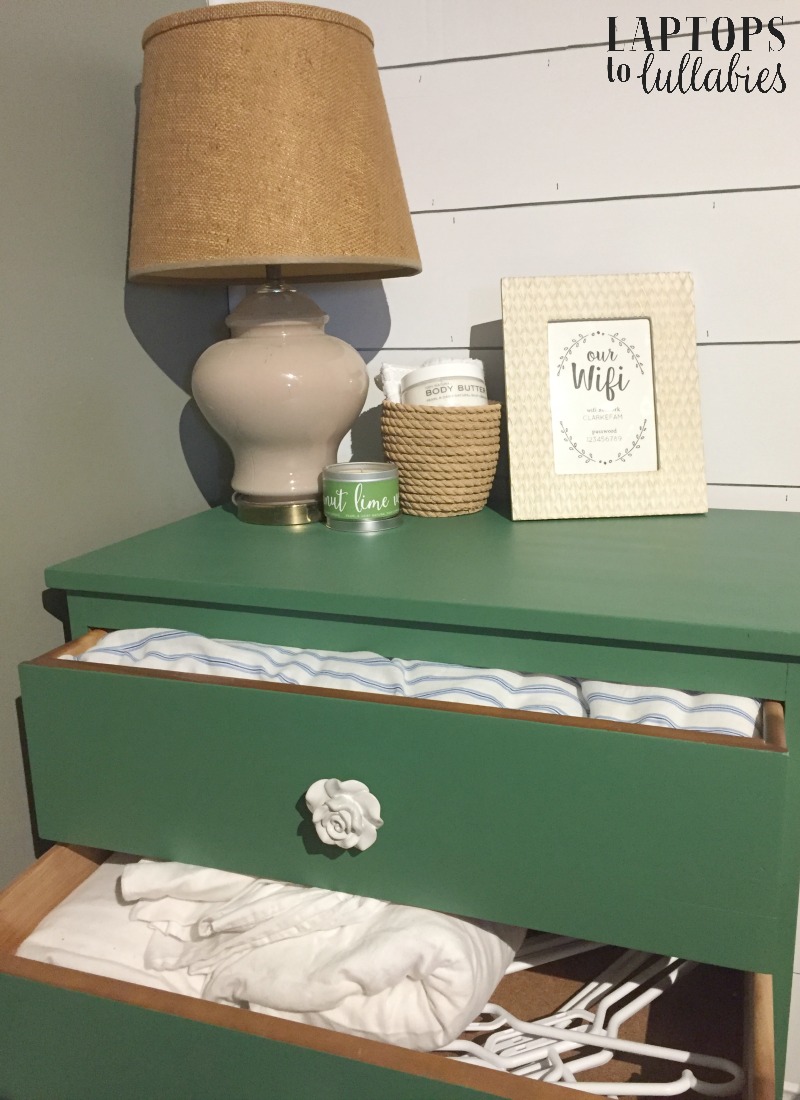 |
| A place for sheets, pillows, quilts, hangers and a hairdryer! |
 |
| The WiFi password is something a guest always needs to know. |
I took out the drawers, removed the old hardware, filled and sanded the holes, and painted it with two coats of the most luscious green (“Park Bench” by Fusion Mineral Paint). Instead of replacing the old hardware, I swapped it for beautiful white ceramic knobs from Phillips & Chestnut Victorian Salvage and Decor here in Truro.
Styling the little “guest room” was fun. I paired a neutral lamp with a burlap shade (both from thrift stores) and found a little ceramic rope-textured basket at Atlantic Fabrics to hold locally handmade toiletries — a delicious-smelling vanilla mint body butter and a lime verbena candle, both from Pearl & Daisy.
The WiFi password frame was something I’ve wanted to make for ages. I found a free printable on Pinterest and just edited the photo to add our network name and password. Our very first guest, the same day, spotted it right away and said “I was just about to ask you for that!”
Next to the dresser, I parked a large rattan basket that stores our guest towels. That way they’re easy to spot and they don’t take up room in the dresser that could be used for our guests’ clothes. I also added a smaller rattan basket with bottled water.
We may not have a real guest room, but I’m glad we now have a “guest-room-in-a-box” that keeps all of our guest linens handy for whenever we need them.
Maybe I’ll have to start putting mints on the pillows and sliding a room service menu under the door? Nah, I’ll settle for picking up the toys so our guests don’t step on anything on their way to the bathroom.
xo
Room sources:
Shiplap: Tutorial here
Media cabinet: Hutch was from a friend and we redid it. Details here.
Daybed: Tutorial here
Black, white and grey quilt: Handmade by me
Board game wall art: Tutorial here
Green paint for the dresser: Fusion Mineral Paint’s “Park Bench” from Phillips & Chestnut Victorian Salvage and Decor
Dresser: Hand-me-down
Lamp: Thrift store
Frame: Atlantic Fabrics
Ceramic faux-rope basket: Atlantic Fabrics
Free WiFi password printable: Pinterest (broken original source)
Candle: Lime Verbena from Pearl & Daisy Natural Soap Company
Body butter: Vanilla Mint from Pearl & Daisy Natural Soap Company
Hardware: My favourite white ceramic roses from Phillips & Chestnut Victorian Salvage and Decor
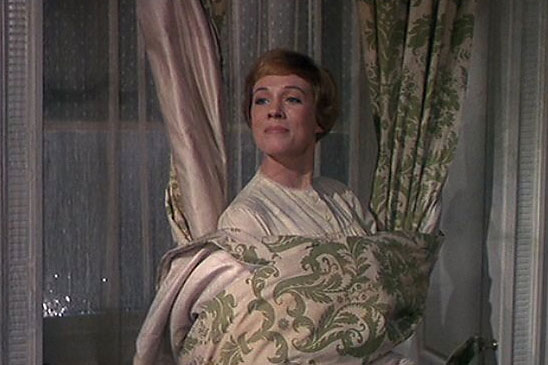
I’ve gone full von Trapp

//platform.instagram.com/en_US/embeds.js
//platform.instagram.com/en_US/embeds.js
//platform.instagram.com/en_US/embeds.js
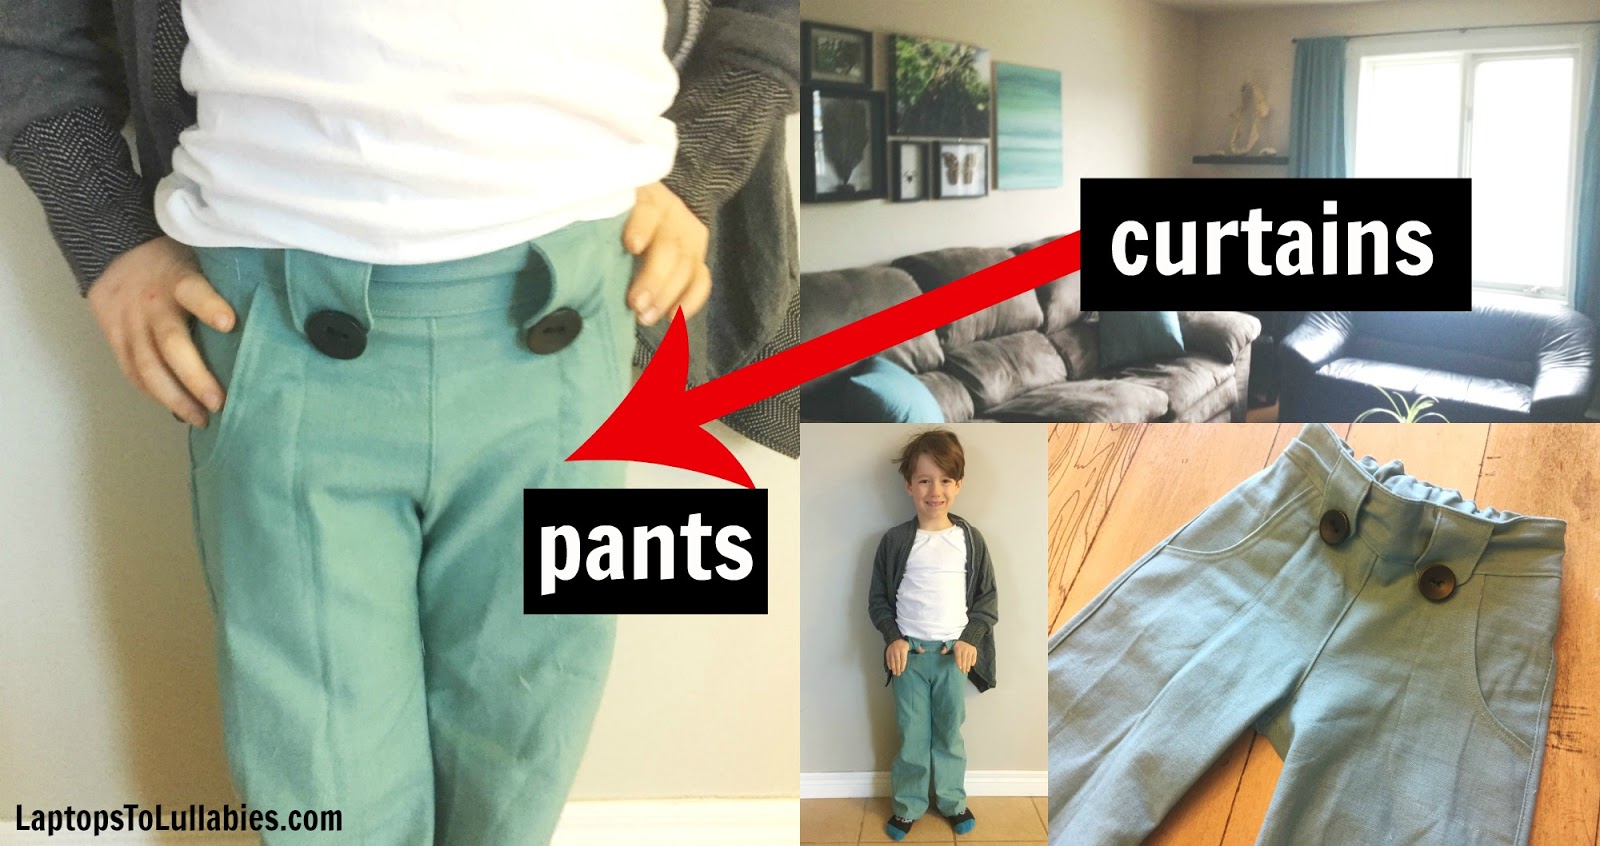
But this was the first time I turned curtains into pants!
Nowhere Man Pants, to be exact.

It was a total von Trapp moment.

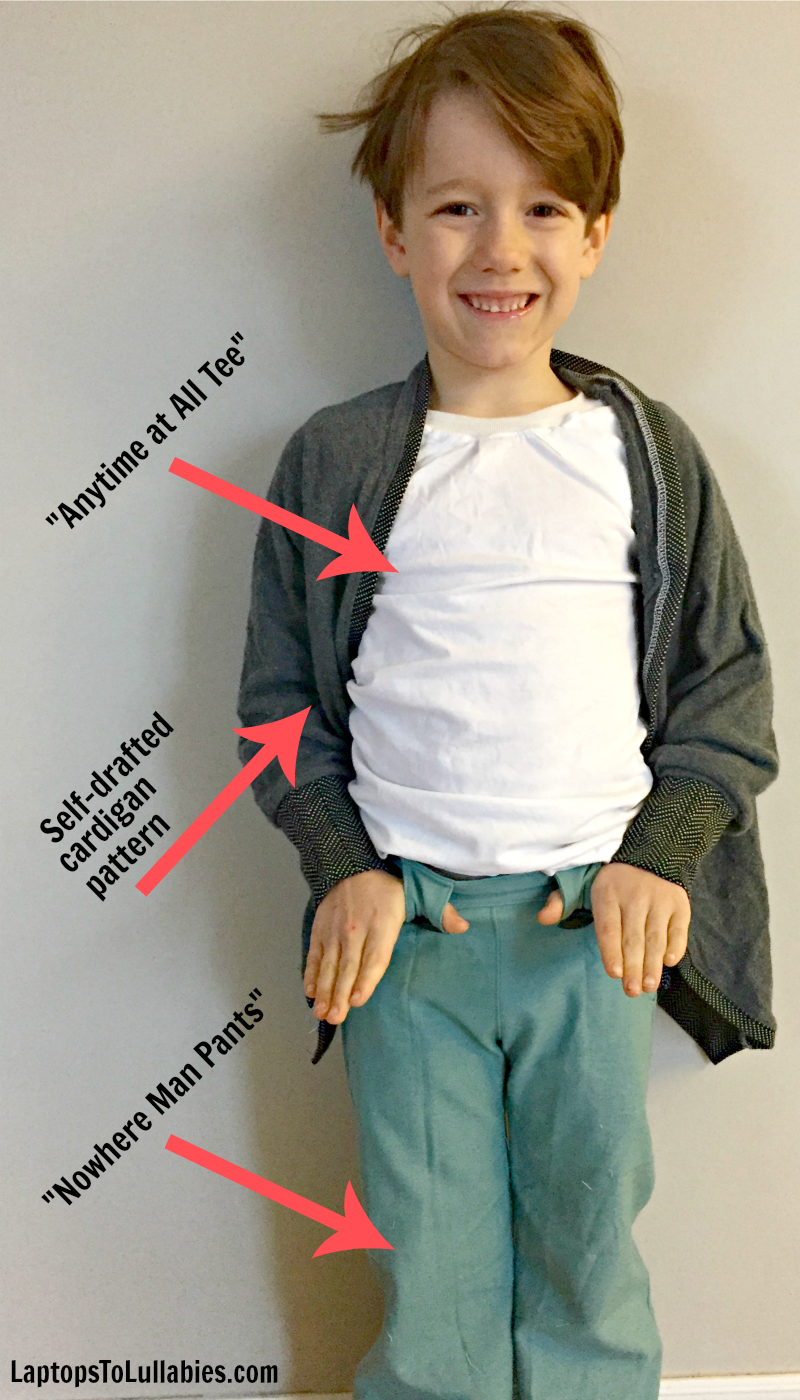
And look how cute this little bedhead-ed man looks in his “curtains.”
(I also made the tee from this pattern, using an old adult-sized T-shirt, and the cardigan from one of my old sweaters.)
 |
| Pants pattern |
 |
| T-shirt pattern |
Believe it or not, it was my first time making pants that weren’t leggings. (I make a LOT of leggings. For both kids. Except I sometimes call them “Sporty Pants for Active Boys” when D is concerned.)
I had one oopsie while I was sewing, but it was easily fixed with my trusty seam-ripper.
There are four pockets (double-stitched, even) and they’re so cute!

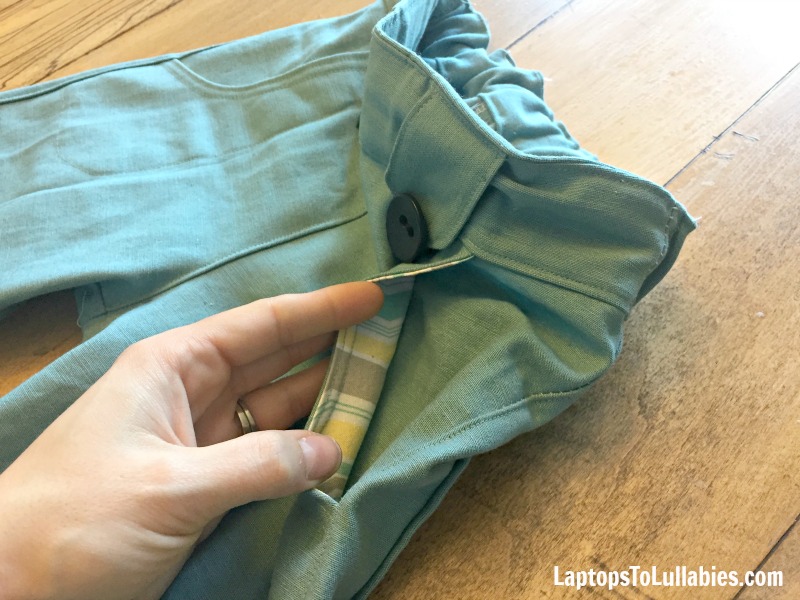
The lined pockets are my favourite part.

I’m pretty proud of my curtain-pants.
What’s next, I wonder? Throw pillows into sweaters? Turning the pelmet boxes into underwear, maybe?
I sniffed every Scentsy fragrance and I’ll tell you what they REALLY smell like

Our new neighbour sells Scentsy, which I’ve always wanted to try but somehow never made it to a party. I have hella-bad allergies to certain scents — deodorant with baby powder gives me a horrible headache, for example — so I knew I needed to sniff everything before ordering it.
Luckily, she has this cute little “borrow basket” so she brought it to the bus yesterday morning. It was like a million little lip glosses! Except not, as I kept reminding my daughter.
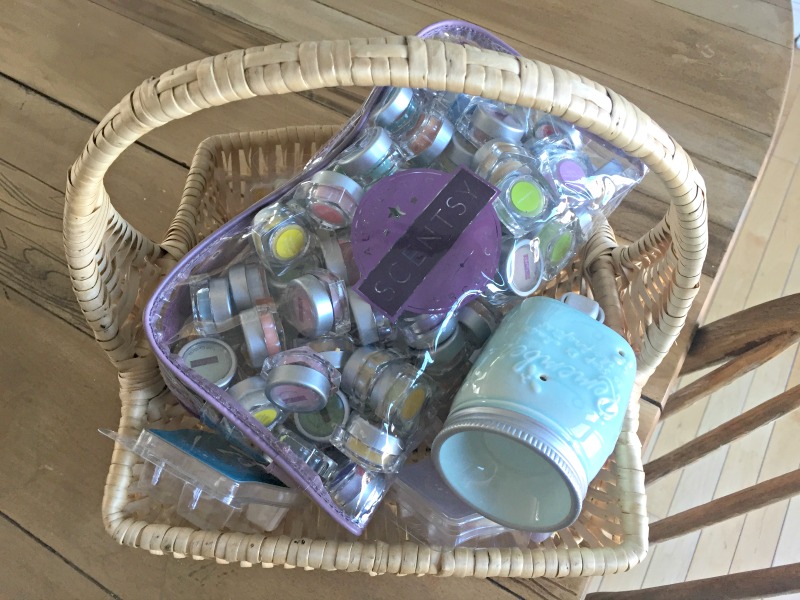 |
| How cute is this?! |
We spent a very happy 45 minutes together, unscrewing the containers and sniffing them all to see which ones we liked. I’d share her favourites but she liked ALL OF THEM with the exception of anything that smelled like coffee, tea, blueberries, cheesecake or pistachios.
(She thought this was the best game EVER, so I highly recommend a borrow basket if you want to feel like an excellent parent for a morning.)
There were a lot that made me feel allergic (twitchy-nosed, to be precise) so I won’t harp on some of those scents. I did make up some pretty great nicknames for them, though. (“Uncomfortable Aunt You See Once a Year.” “Dentist Who Gets Too Close.” “Musky Elevator Stranger.”)
I selected a personal favourite Top 18, in the name of OCD, since they lined up in a nice little 3×6 grid.
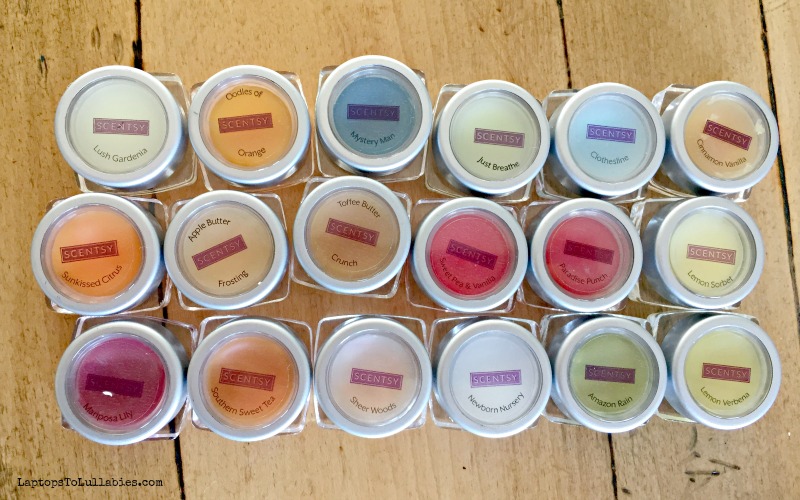 |
| Meet your Top 18 |
Are you ready for this?
SCENTSY SHOWDOWN: ROUND ONE
*ding ding!*
Lemon Verbena: Pioneer school-teacher I can’t tell if I like this one because of the name. Remember in Little House on the Prairie when Ms. Beadle used lemon verbena perfume and Laura loved the way she smelled? Yeah, I thought you might.
Lemon Sorbet: Lemons and ice water. To my uneducated nose, it smells like like Lemon Verbena. I don’t know. Lemon-y. Mostly I like that my house would smell clean even when it’s not.
Amazon Rain: Limes and clean clothes. Pleasant but I’m not obsessed with it.
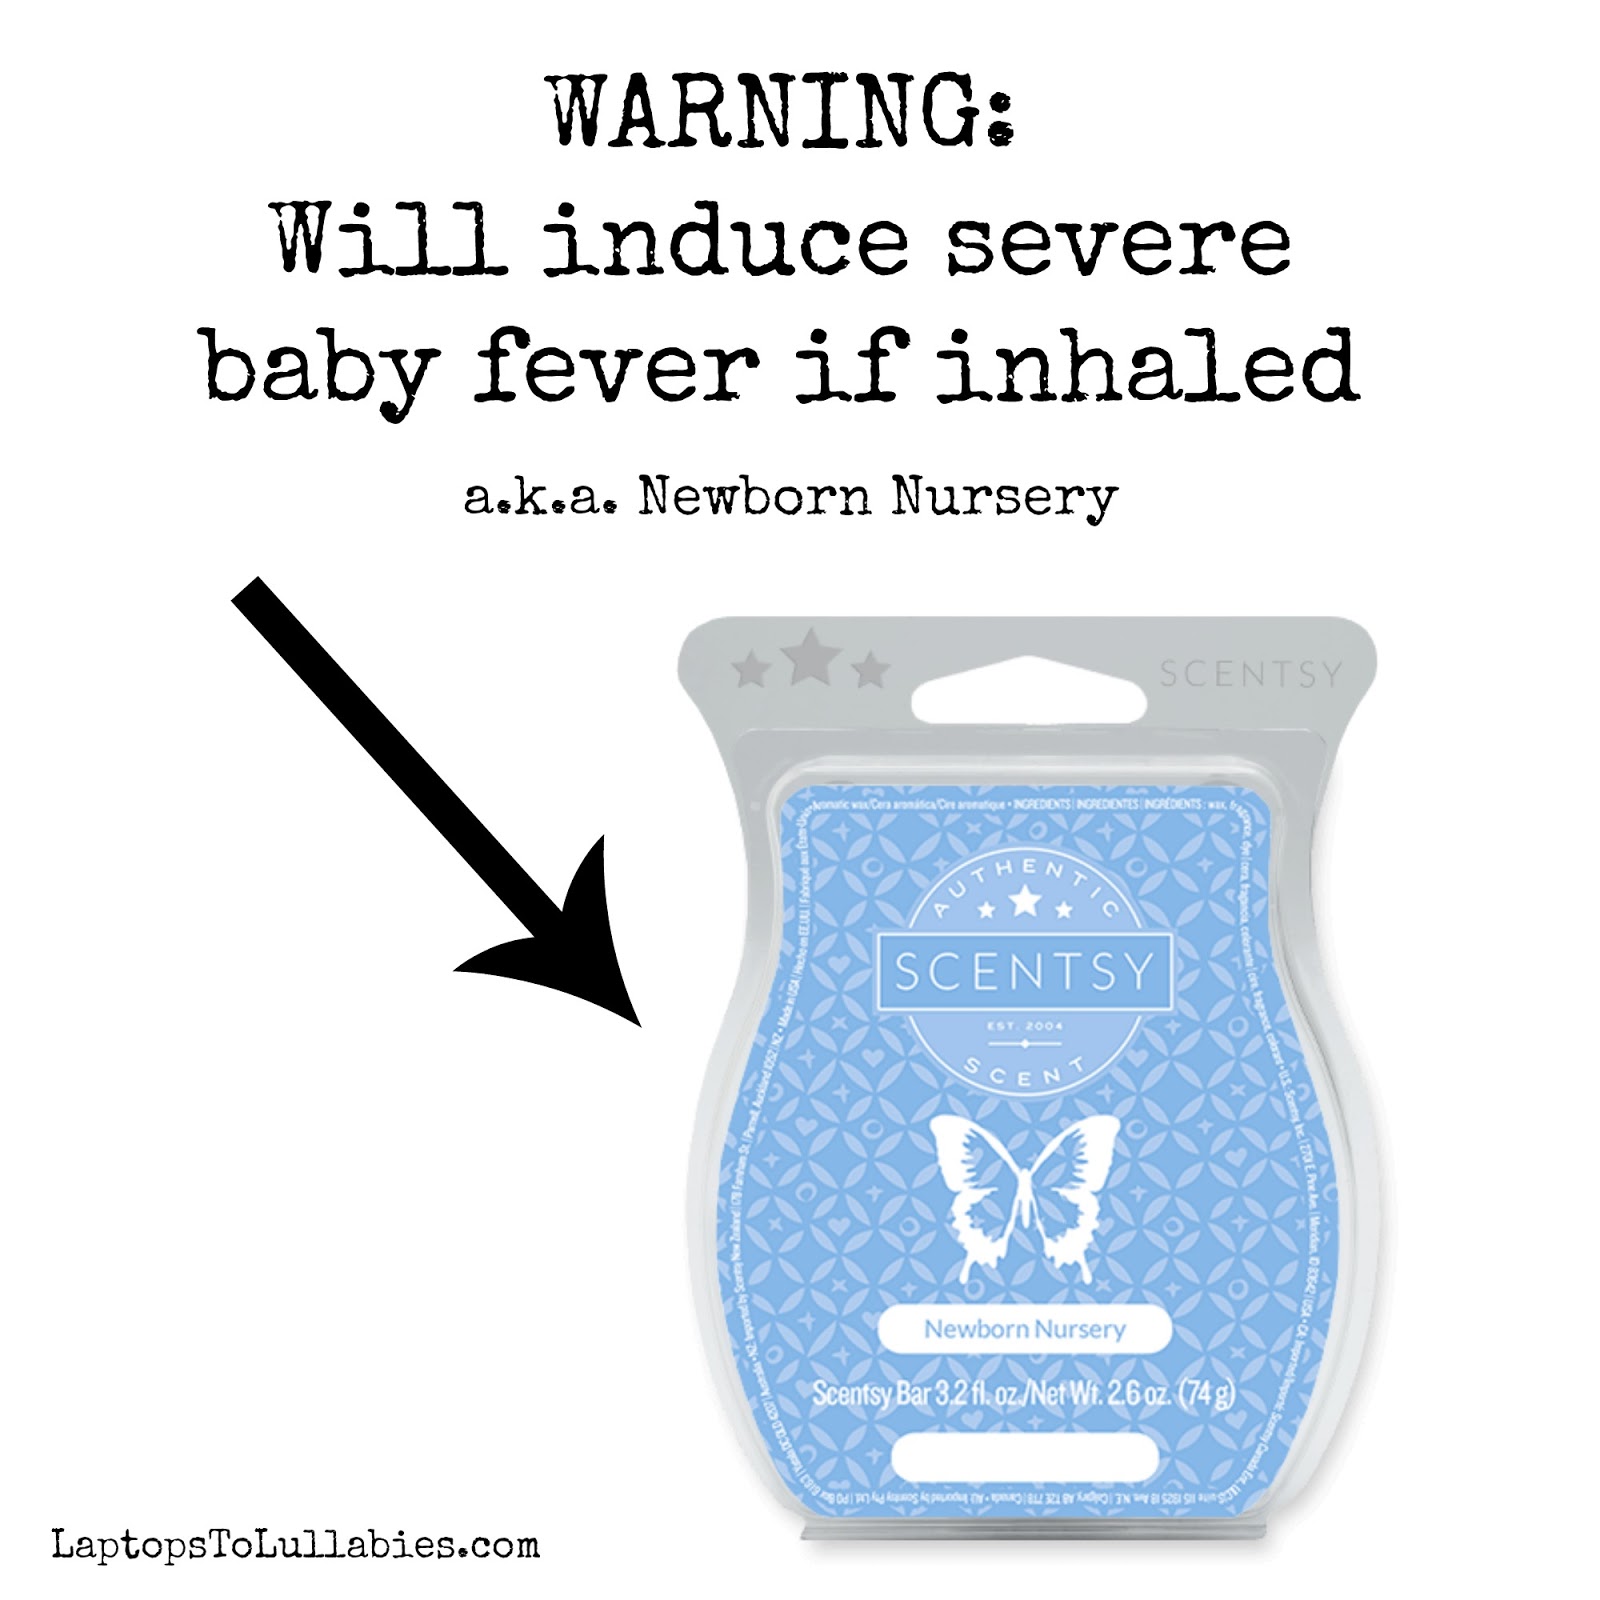
Newborn Nursery: Johnson’s Baby Lotion. Delicious but could possibly make you want more babies. Should come with a warning label.
Sweet Pea & Vanilla: Fruit punch. It’s fine but I’m starting to really dislike the name. I hate peas of all types.
Paradise Punch: Fruit punch, the sequel. I don’t like fruit punch but this is a nice fresh smell.
Sunkissed Citrus: My hands when I volunteer at the school’s breakfast program. I get very sticky from cutting up oranges. I love this smell but would it remind me of early-morning manual labour?
Toffee Butter Crunch: Werther’s. My house would smell like a grandma’s pocket. Might not be a bad thing.

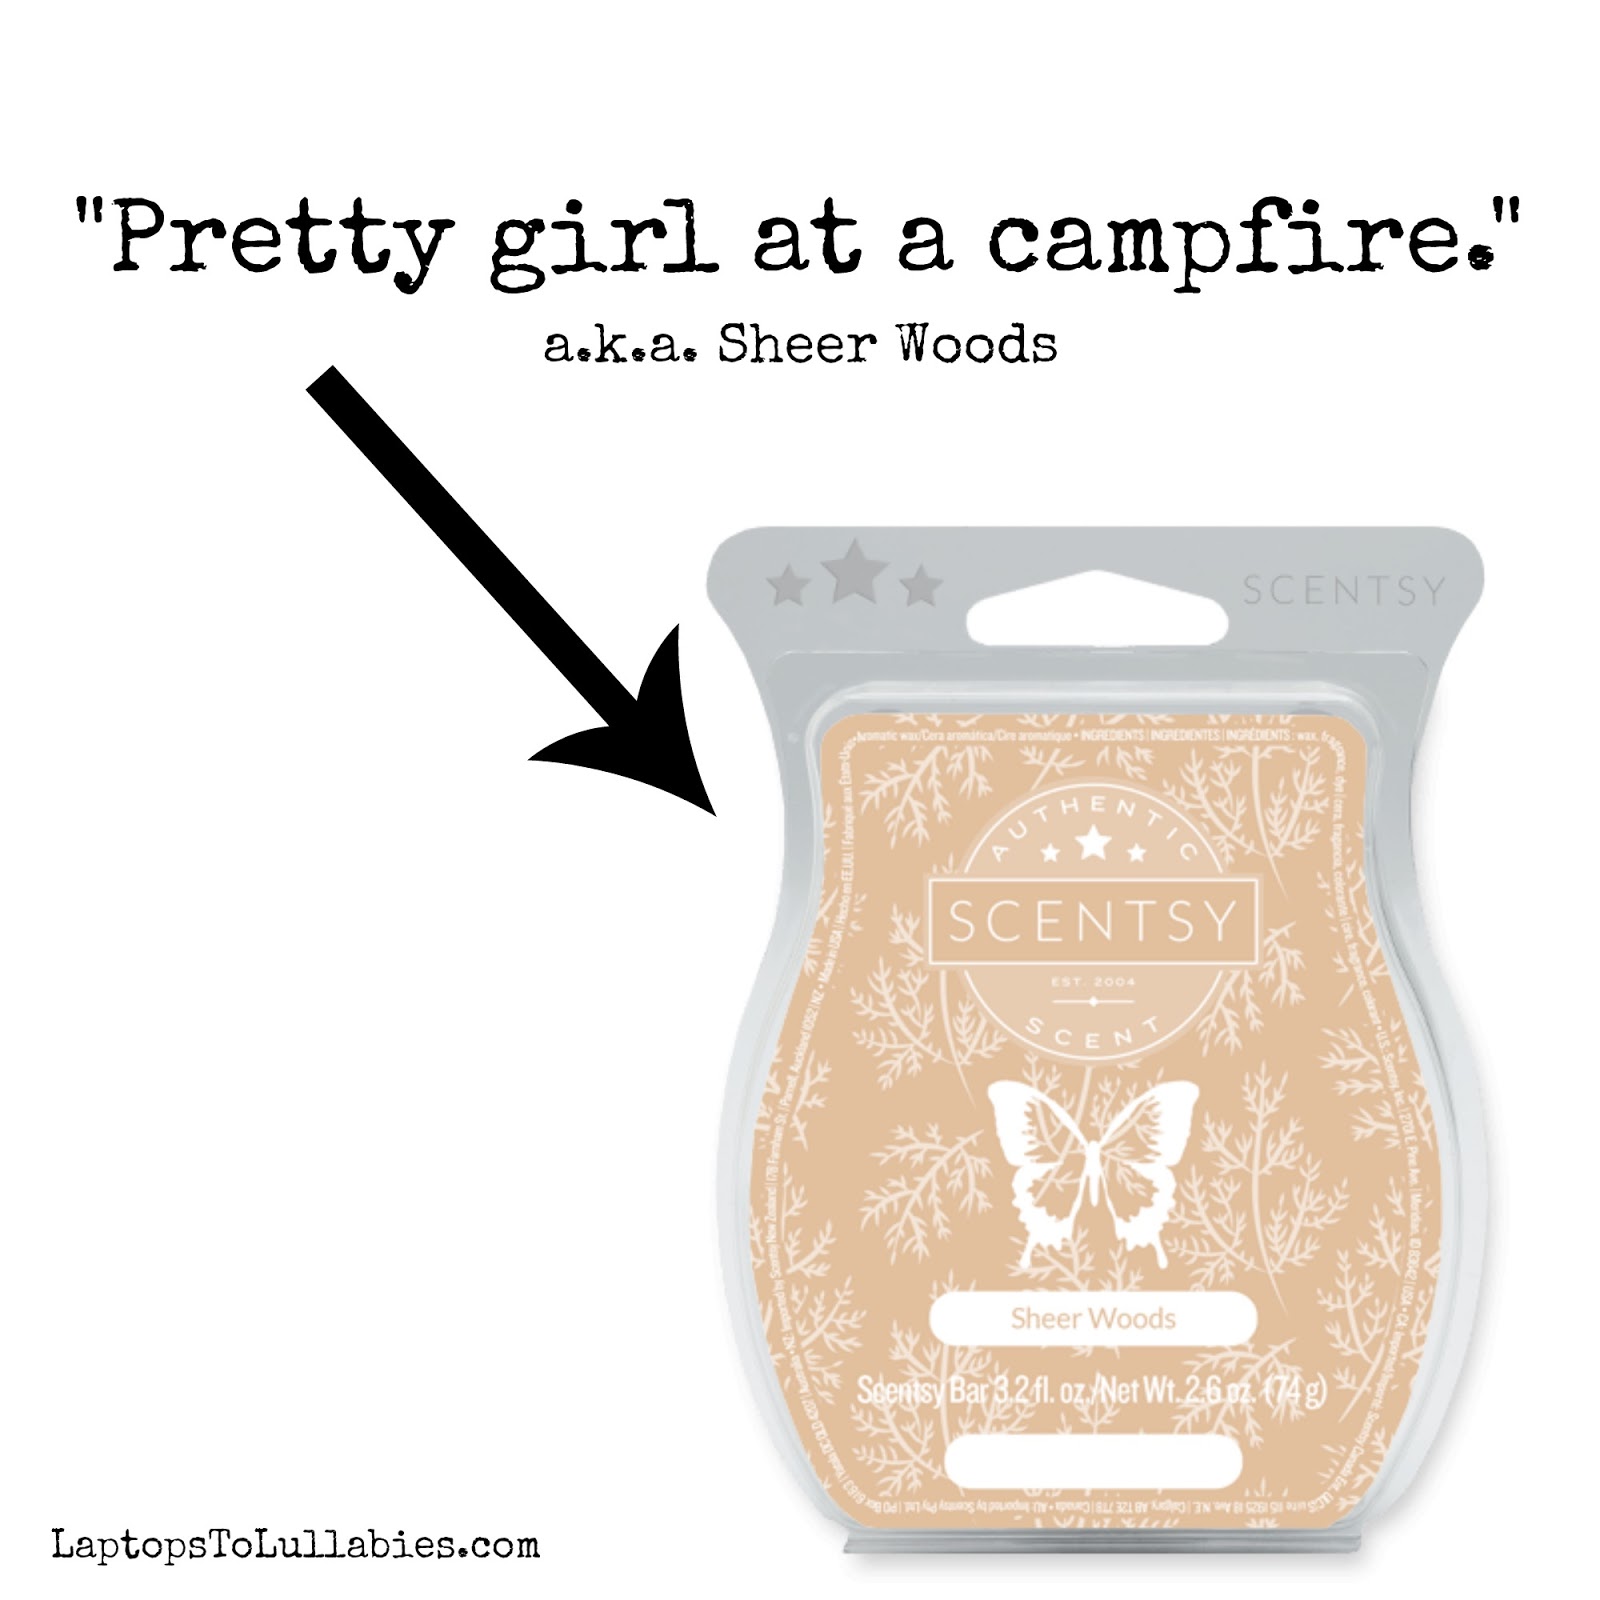
Sheer Woods: Pretty girl at a campfire. I like it but I’m not sure I want my house to smell like a girl named Kristin who’s hoping to kiss a boy in the woods.
Oodles of Orange: Orange Crush. Delicious. I love orange-y smells. But do I want the house smelling like orange pop? Possibly.
Cinnamon Vanilla. Baking. Way more cinnamon than vanilla which is nice.
Mystery Man: Sexy man. This could be a good fragrance for a bedroom. Rowrrrrr. (No! Stop! Dad’s probably reading this. Hi, Dad.)
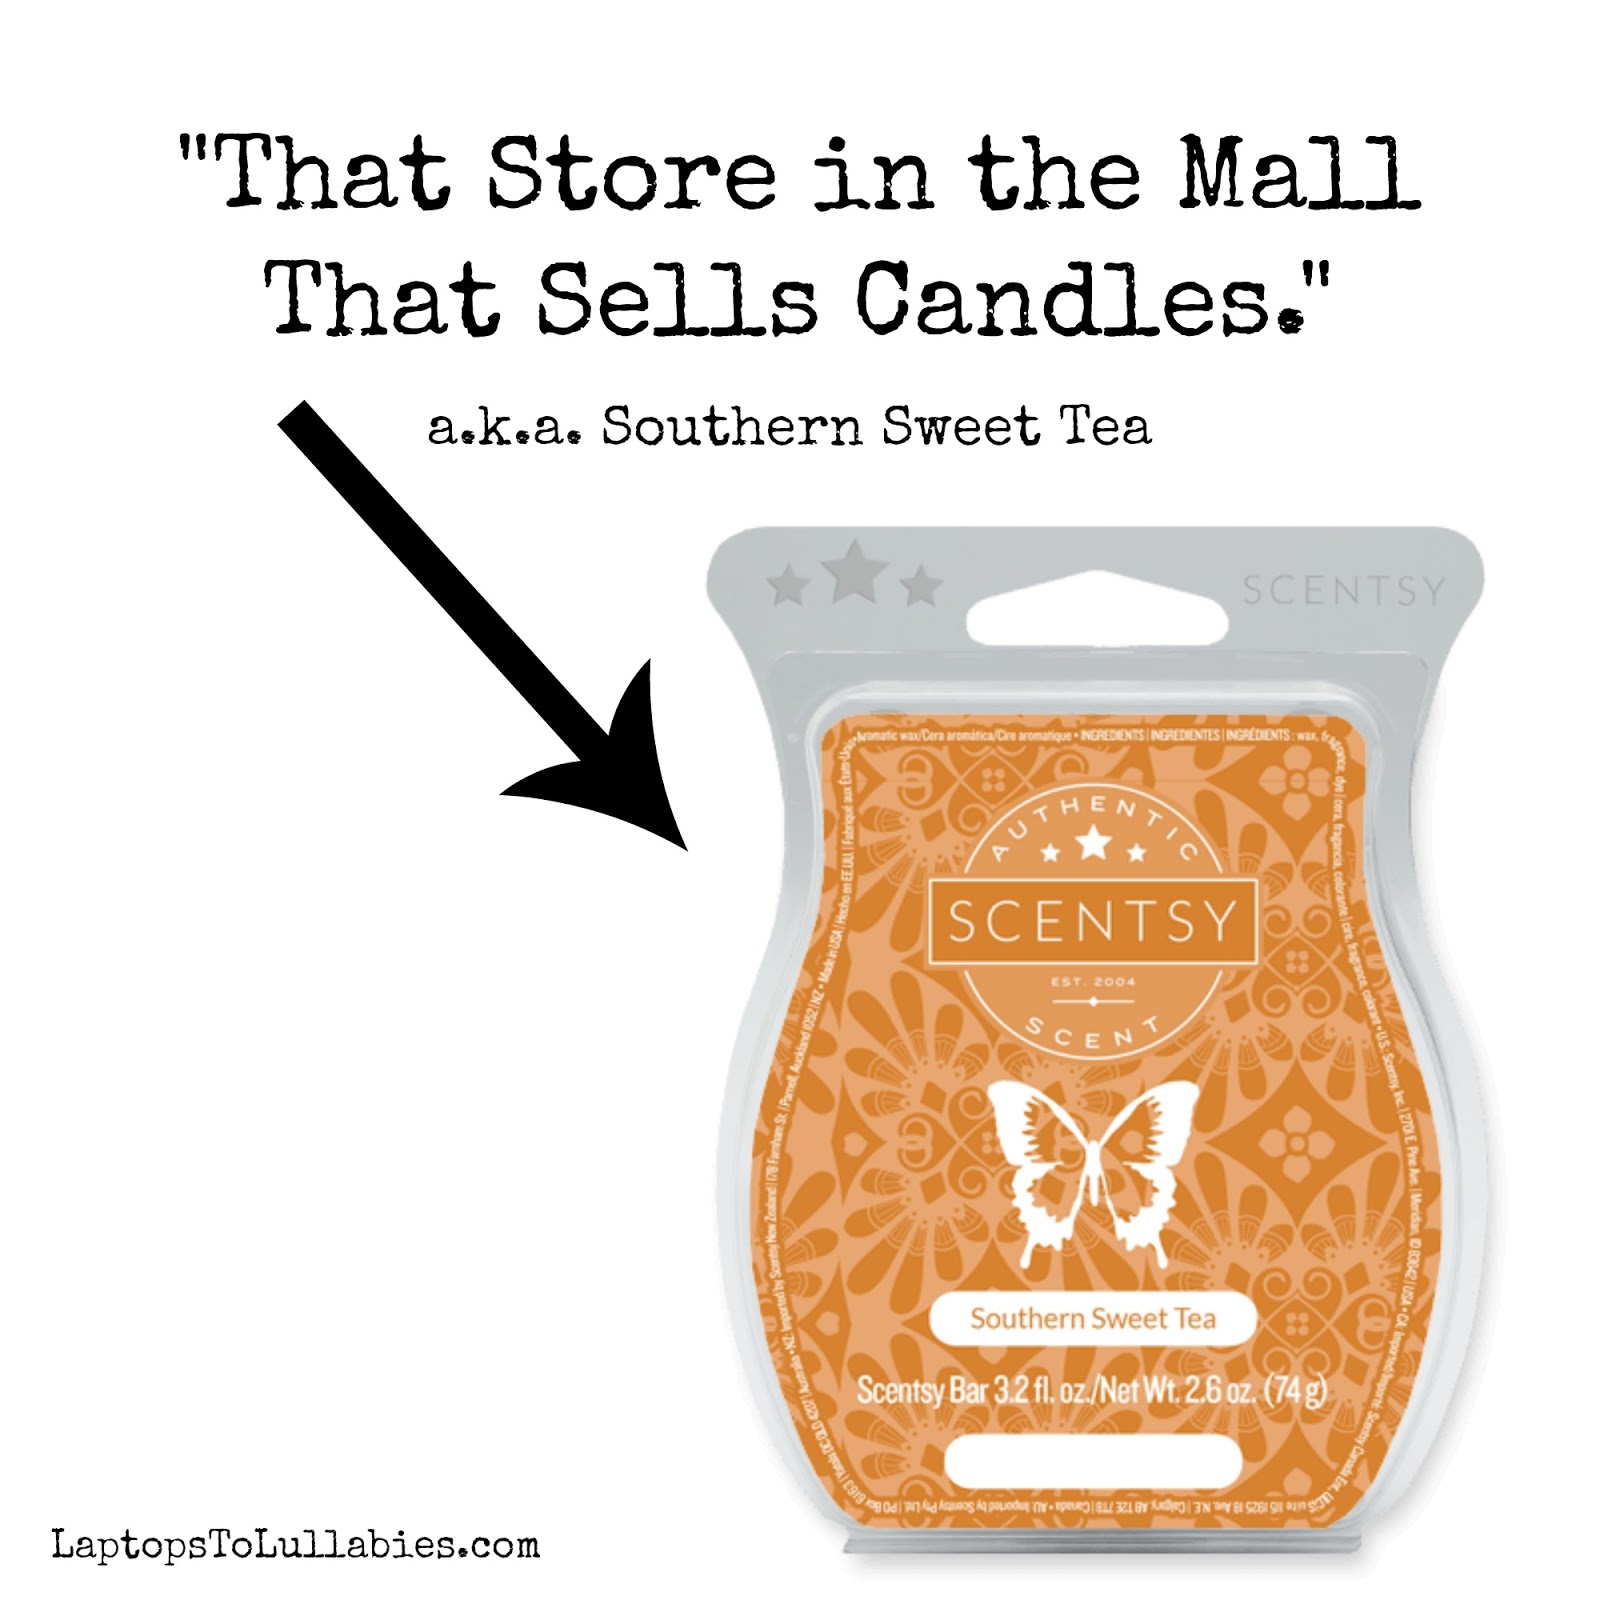
Southern Sweet Tea: That stores in the mall that sell candles. I think I like the name of this one more than the smell. I like the idea of my house smelling like a southern plantation, not Pumpkin Village.
Apple Butter Frosting: A coffee shop. I don’t eat apple pie or apple cake or anything apple-y, but it does smell nice. More importantly, it doesn’t make me sneeze.
Lush Gardenia: The bosom of the woman who tightened my braces. She’d basically get me in a headlock every month at the orthodontist’s office and this reminds me of her. Also of the Mandy Moore song lyric “I’m the one who likes gardenias.” I like this one.
Just Breathe: Gain laundry detergent. Again, I’m really bad at identifying smells. But this one is awesomely good without being easy to pinpoint.
Clothesline: Dryer sheets. I like this one, too. It has that nice clean smell.
Mariposa Lily: Victoria’s Secret employee. My whole house would smell like Sales Associate Wearing Too Much Makeup.

***
SCENTSY SHOWDOWN: ROUND TWO
This is getting intense. Using only my notes above, I’ve narrowed it down to five finalists …
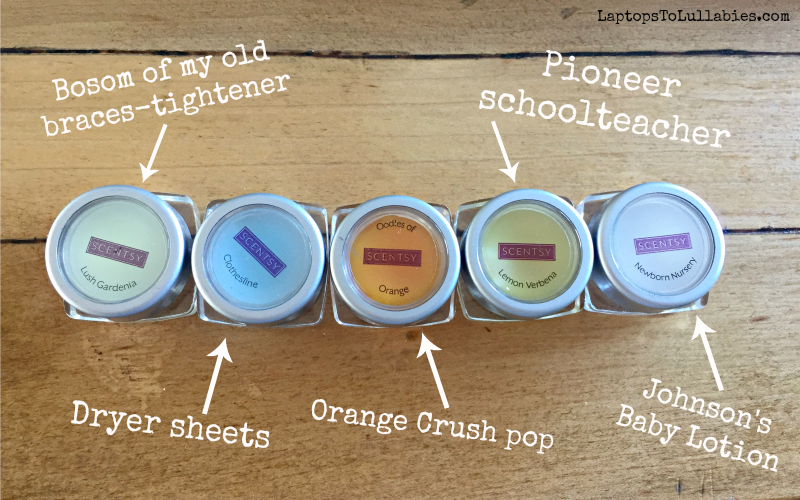
1. Bosom of braces-tightener. (Lush Gardenia)
2. Dryer Sheets. (Clothesline)
3. Orange Crush pop. (Oodles of Orange)
4. Pioneer school-teacher. (Lemon Verbena)
5. Johnson’s baby lotion. (Newborn Nursery)
***
SCENTSY SHOWDOWN: ROUND THREE
I guess it’s a matter of what I want my house to smell like, right?
Clearly we’ve established that I don’t like the really fruity or flowery smells (hello, allergies) and the baking smells are just too “regular.”
(I own exactly two candles at the moment and both are labeled “Sugar Cookie.” I need something NEW if I’m going to break into this whole Scentsy world.)
BUT WHAT SHOULD A HOUSE SMELL LIKE? I HAVE NO IDEA.
Should I get a warmer for the kitchen that smells like something food-related, though? Should I get ones for the bathrooms so they always have that just-cleaned smell? What about the living room? Don’t I want something relaxing so I actually sit down and STOP DOING THINGS? I fee like the orange smells would invigorate me and keep me buzzing around constantly.
***
SCENTSY SHOWDOWN: WINNERS
Let’s put our hands together for our big winners, “Dryer Sheets” (Clothesline) and “Bosom of braces-tightener” (Lush Gardenia).
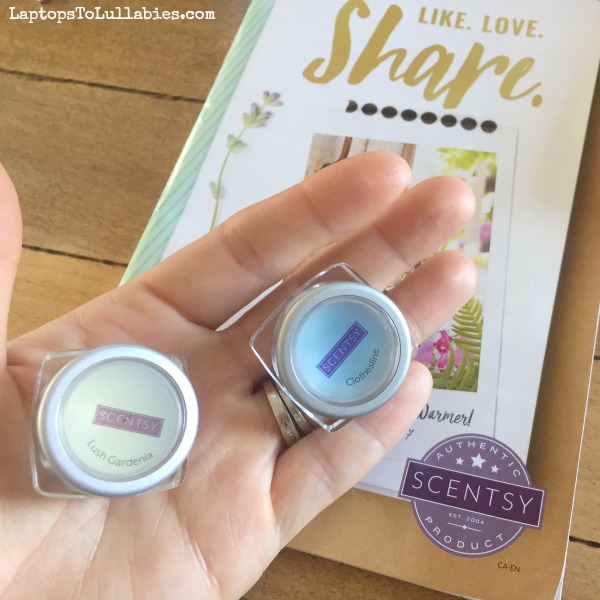
I’ve decided to get “Dryer Sheets” for the powder room to make it all fresh, clean, and company-ready at all times.
And “Bosom of braces-tightener” will go nicely in the kitchen, I think, providing it doesn’t give me acid flashbacks to being a nerdy 12-year-old with bad teeth.
***
This post was NOT in any way sponsored by Scentsy. I don’t think they’d like me renaming their fragrances after orthodontic professionals, anyway.
Mom confession: I suck at buying boots

I think I’m a pretty good parent. But there’s one area in particular that I’m a complete failure — and it’s to do with my children’s boots.
I mean, they have boots. It’s not like they’re freezing in a pair of sneakers all winter. It’s just that I keep making the same three mistakes every single year.
The first mistake is that I cheap out. I can’t help it! Boots are expensive! I don’t cheap out on their snow pants and winter jackets, but for some reason I become a total miser when I have to buy tiny boots.
I’ve scoffed at $60 pairs of kids’ boots and been certain I could find a better deal. Most of the time, I’ve ended up buying boots in the clothing section of the grocery store. Sometimes they’re $20 and sometimes they’re $40, but they are never very good.
Last winter, I thought I was being smart by buying a more expensive pair for our son — I think they were $45 — with the plan to pass them down to his sister. I even smartly chose plain black instead of camo or royal blue (which would never match her pink and purple snowsuits).
But, of course, the boots are still junk and will be tossed at the end of this winter. We’re constantly taking the soaking-wet liners out to throw in the dryer, and now I’m reverting to the old “Sobeys-bag-over-your-socks” method of ’90s parents.
Cheap rubber boots, I’ve learned, are just as frustrating because the heels get little cracks that let in all of the water. A rain boot can be perfectly good except for the heel, and then you might as well send your kid out in a pair of Jellies (speaking of ’90s trends).
The second mistake I keep making is buying boots a size or two larger than my kids’ feet …
Continue reading in my weekly parenting column, The Mom Scene …

Continue reading in my weekly parenting column, The Mom Scene …
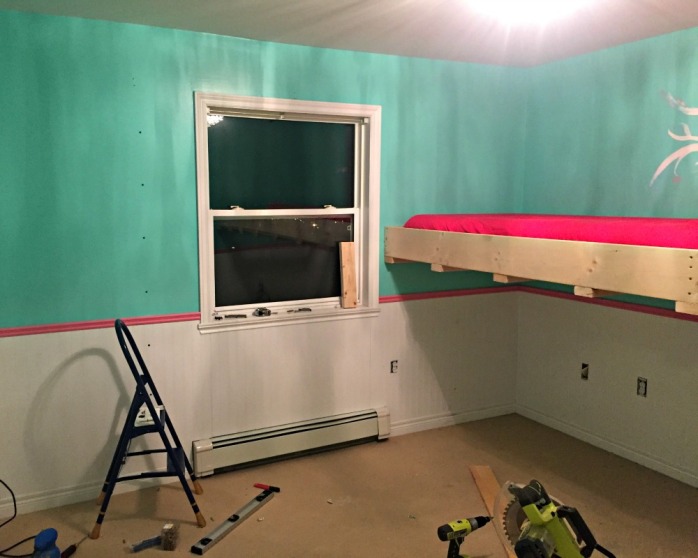
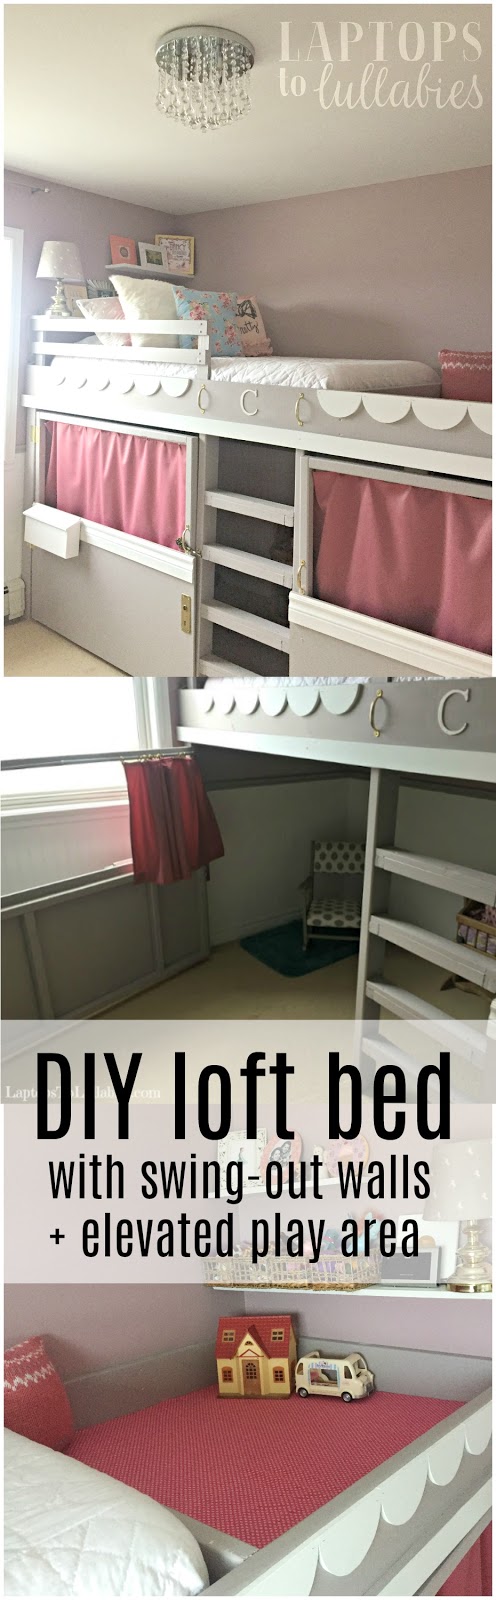
DIY loft bed, playhouse and reading nook


Now, this may seem like a huge project — and it was — but it wasn’t especially complicated. Even though this is a large structure with lots of moving parts, we built the entire thing in less than 24 hours thanks to my mom taking the kids for a sleepover. (I think we went to Kent four times and ate four meals of take-out burgers. It was awesome.)
The first step was finding the studs and securing 2×8 boards to the walls to support the loft bed. We used more than 100 screws for this step alone, just to make sure it wasn’t going anywhere — no matter how many kids piled onto the bed.

We originally planned to close off the lower play area just with curtains, but then I got the brilliant idea — mid-project, as usually happens — to build huge doors that would swing out into the room.
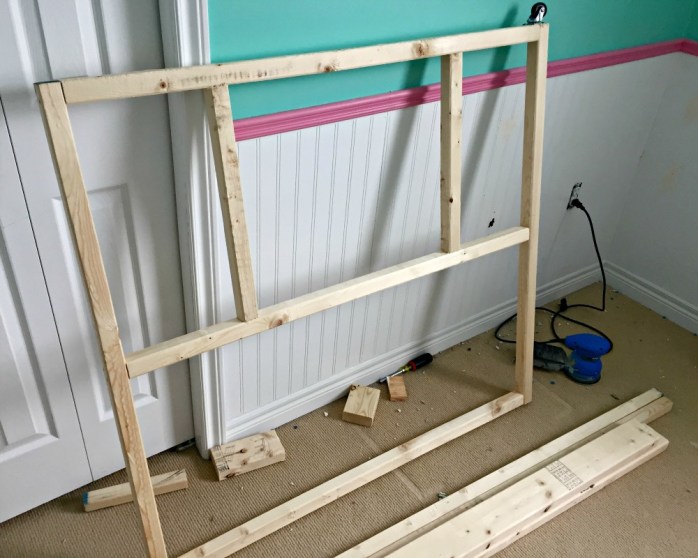
By having doors instead of curtains, I could add all kinds of fun details like house numbers and a mailbox. My ever-patient husband agreed and helped me draw up new plans, and we made an evening run back to Kent.
The plan changed again once we got there.Instead of having the doors be solid plywood and then cutting out windows, it was going to be far cheaper to make half-doors out of half-sheets of plywood and leave the top of the doors open — framed with 2x2s. We put casters on the bottom of the doors so they’d slide more easily and not put too much weight on the hinges.

We designed the swinging doors to be exactly the same size, to make things easier, and left enough room in the centre for the ladder. Typically, a bunk bed ladder leans out into the room so you can climb on a comfortable angle. But our kids have been climbers since they were babies so we knew we wanted to build a somewhat challenging ladder: straight up and down.
(The bonus was that it wouldn’t take up any more floor space, because the bed was looking more and more gargantuan as we worked.)

The final step of construction was adding a simple safety rail near the top of the mattress so our daughter wouldn’t tumble out of bed at night — it would be a seriously long, hard fall.
We kept the bottom of the bed open, since that’s where it met with the ladder, and decided not to put a rail around the play area. Since there’s no mattress there, the kids have somewhat of a natural ledge to keep them in.
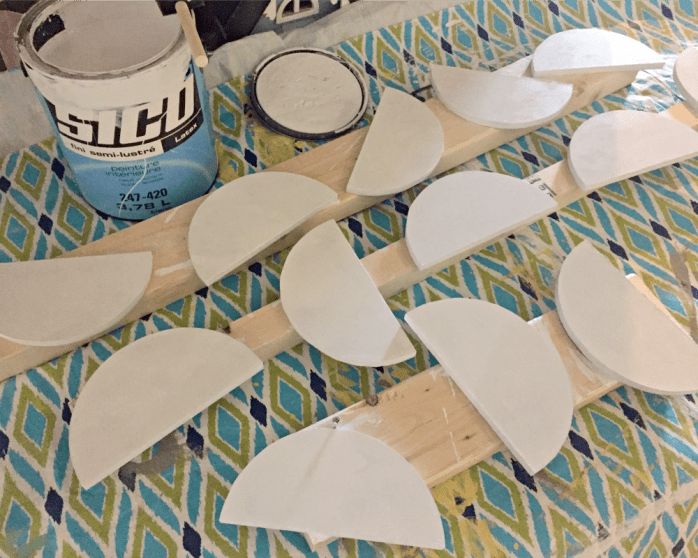
While the construction was pretty easy, it was priming and painting that monster that took most of the effort. As much as I really, really didn’t want to have to prime it, the associate at Kent gently convinced me that it was the best way to make sure the paint wouldn’t chip or flake. And so I primed . . . and primed . . . and primed.

We chose a soft grey for the bed colour (PPG’s Rice Chips) to go with the new blush-coloured walls (PPG’s Pinot Noir), and we used SICO Furniture & Cabinet paint to ensure we’d get a durable finish.

For a finishing touch, I nailed some thick trim on the doors and painted some of the trimwork a glossy un-tinted white. I traced a small dessert plate again and again on a sheet of MDF and my husband cut them out with his scroll saw to create the cutest scallop detail.
I also added a shiny white metal mailbox, a vintage lock plate from Phillips & Chestnut Victorian Salvage and Decor, and house numbers sprayed gold inside a white oval frame.


I hung cafe curtain rods inside each of the doors and used gold metal clips to hang homemade curtains in a beautiful deep rose. It really looks like a sweet little playhouse under there.
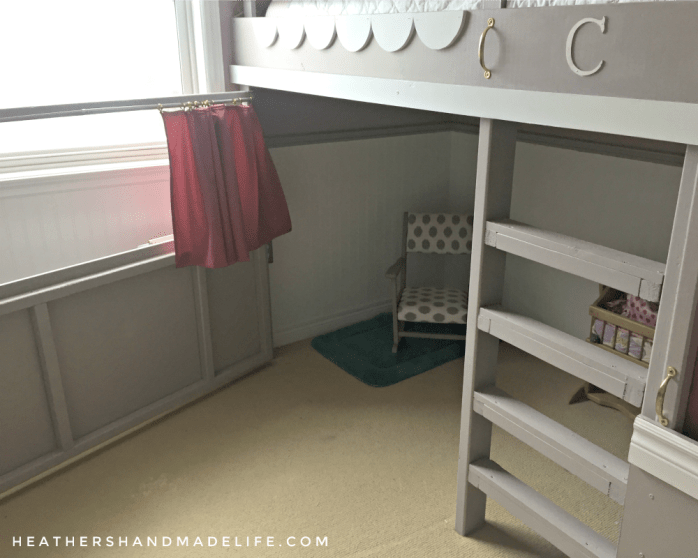
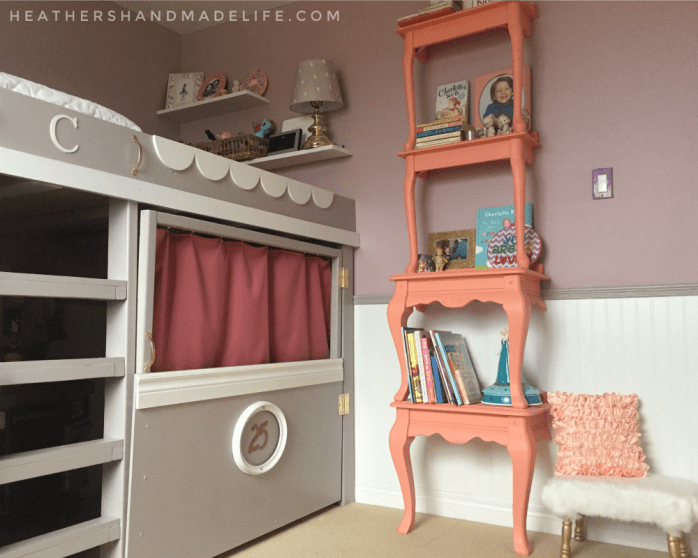

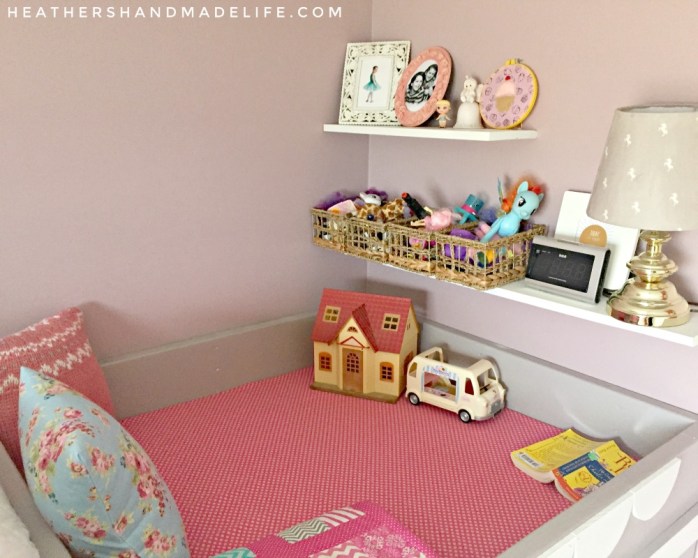
For the elevated play area, I just covered the MDF ‘floor’ with some pink cotton fabric and stapled it tightly underneath — rather than painting the MDF and worrying about it getting scratched up underfoot. With a few throw pillows and rattan storage bins, it’s the perfect spot for our daughter’s Shopkins collection and other small toys. She loves playing up there, and the best part is that I don’t care how messy it gets because you can’t see it!


Even though our daughter’s new loft bed is massive, it doesn’t feel like it takes up the entire room because it’s so multi-functional. The rest of her room is empty — except for the coral bookcase built from end tables that I showed you a few weeks ago — so there’s plenty of breathing room.

And the details! Oh, the little details …


What started off as an idea for a simple loft bed turned into something much more involved, but I’m so happy with how it turned out. By thinking vertically, we were able to double the available play-space while also hiding the toy clutter. I swear, her bedroom has NEVER stayed this clean — or looked this beautiful.
Thank you to Kent for sponsoring this project — providing the paint and a portion of the lumber. All repeat trips (sometimes twice a day) prove how much we really, really love shopping there.
Product sources:
White faux fur pillows: Handmade, fabric from Atlantic Fabrics
Loft bed paint: PPG’s “Rice Chips” from Kent
Wall colour: PPG’s “Pinot Noir” from Kent
Blush-coloured fuzzy throw: HomeSense
White wooden “C”: Michaels
Floral pillow: Handmade, fabric is from the Anne of Green Gables collection at Atlantic Fabrics
Vintage lock plate: Phillips & Chestnut Victorian Salvage and Decor
White powder-coated mailbow: Kent
Chandelier: Canarm Daya flushmount light from Kent
 |
| DIY bookcase from end tables |
 |
| How to replace a light fixture |


As featured on …


