
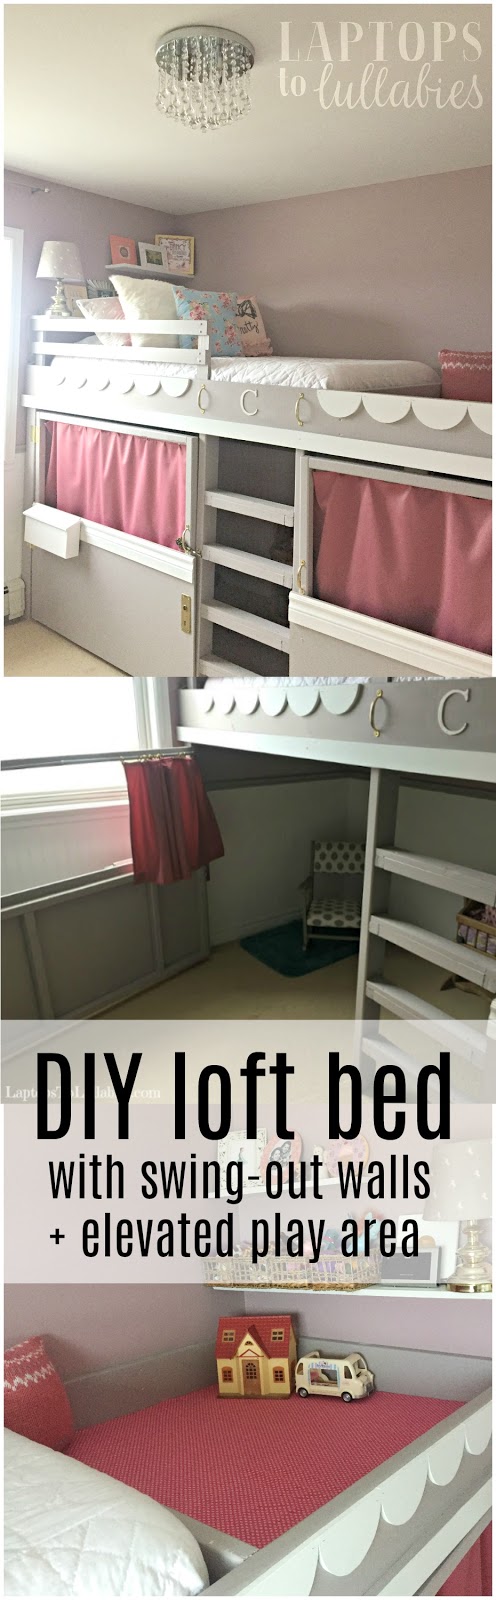
DIY loft bed, playhouse and reading nook


Now, this may seem like a huge project — and it was — but it wasn’t especially complicated. Even though this is a large structure with lots of moving parts, we built the entire thing in less than 24 hours thanks to my mom taking the kids for a sleepover. (I think we went to Kent four times and ate four meals of take-out burgers. It was awesome.)
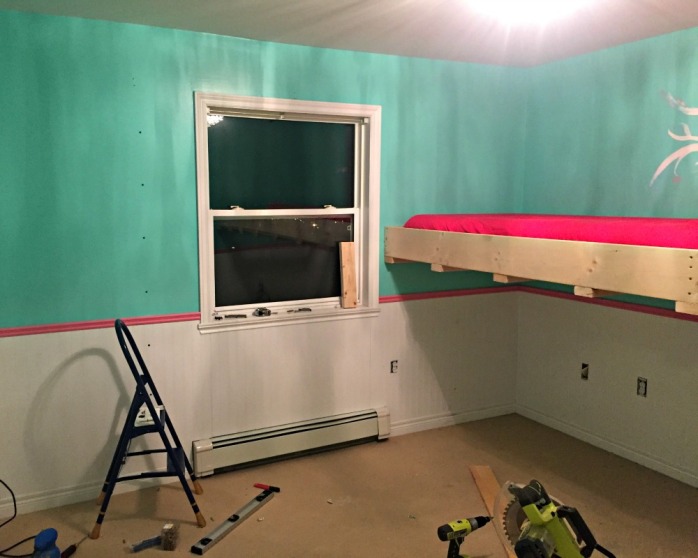
The first step was finding the studs and securing 2×8 boards to the walls to support the loft bed. We used more than 100 screws for this step alone, just to make sure it wasn’t going anywhere — no matter how many kids piled onto the bed.

We originally planned to close off the lower play area just with curtains, but then I got the brilliant idea — mid-project, as usually happens — to build huge doors that would swing out into the room.
By having doors instead of curtains, I could add all kinds of fun details like house numbers and a mailbox. My ever-patient husband agreed and helped me draw up new plans, and we made an evening run back to Kent.
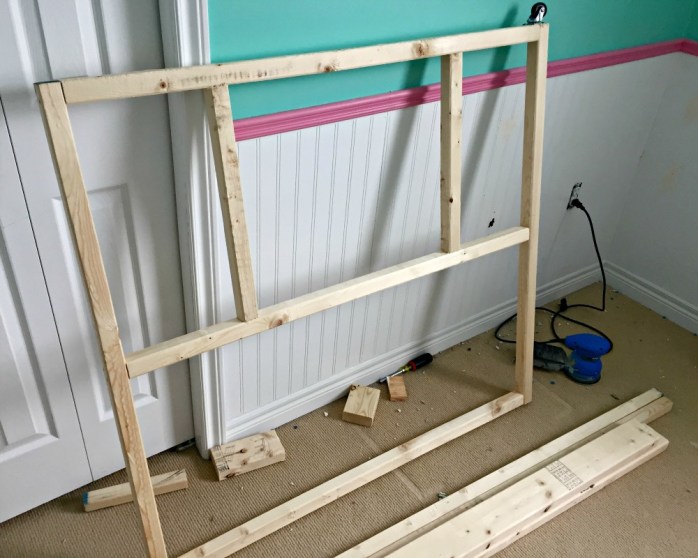
The plan changed again once we got there.Instead of having the doors be solid plywood and then cutting out windows, it was going to be far cheaper to make half-doors out of half-sheets of plywood and leave the top of the doors open — framed with 2x2s. We put casters on the bottom of the doors so they’d slide more easily and not put too much weight on the hinges.

We designed the swinging doors to be exactly the same size, to make things easier, and left enough room in the centre for the ladder. Typically, a bunk bed ladder leans out into the room so you can climb on a comfortable angle. But our kids have been climbers since they were babies so we knew we wanted to build a somewhat challenging ladder: straight up and down.
(The bonus was that it wouldn’t take up any more floor space, because the bed was looking more and more gargantuan as we worked.)

The final step of construction was adding a simple safety rail near the top of the mattress so our daughter wouldn’t tumble out of bed at night — it would be a seriously long, hard fall.
We kept the bottom of the bed open, since that’s where it met with the ladder, and decided not to put a rail around the play area. Since there’s no mattress there, the kids have somewhat of a natural ledge to keep them in.
While the construction was pretty easy, it was priming and painting that monster that took most of the effort. As much as I really, really didn’t want to have to prime it, the associate at Kent gently convinced me that it was the best way to make sure the paint wouldn’t chip or flake. And so I primed . . . and primed . . . and primed.

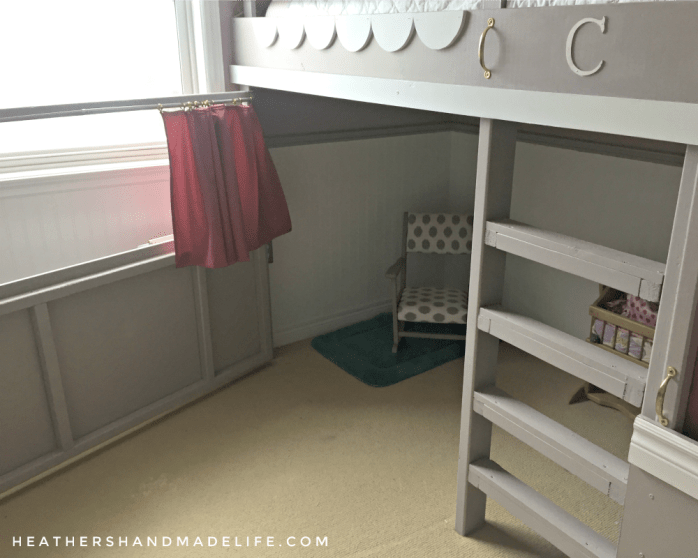
We chose a soft grey for the bed colour (PPG’s Rice Chips) to go with the new blush-coloured walls (PPG’s Pinot Noir), and we used SICO Furniture & Cabinet paint to ensure we’d get a durable finish.

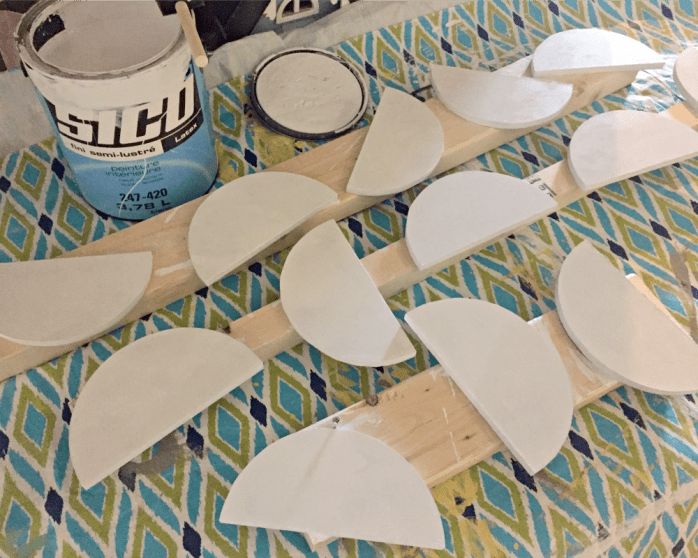
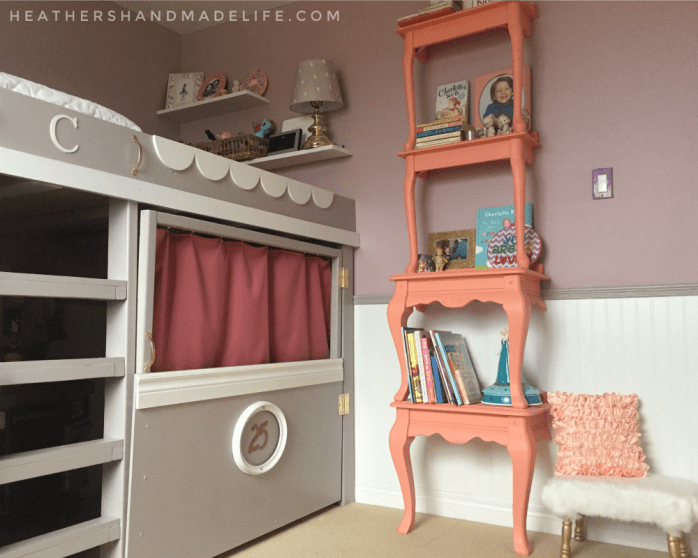
For a finishing touch, I nailed some thick trim on the doors and painted some of the trimwork a glossy un-tinted white. I traced a small dessert plate again and again on a sheet of MDF and my husband cut them out with his scroll saw to create the cutest scallop detail.
I also added a shiny white metal mailbox, a vintage lock plate from Phillips & Chestnut Victorian Salvage and Decor, and house numbers sprayed gold inside a white oval frame.


I hung cafe curtain rods inside each of the doors and used gold metal clips to hang homemade curtains in a beautiful deep rose. It really looks like a sweet little playhouse under there.

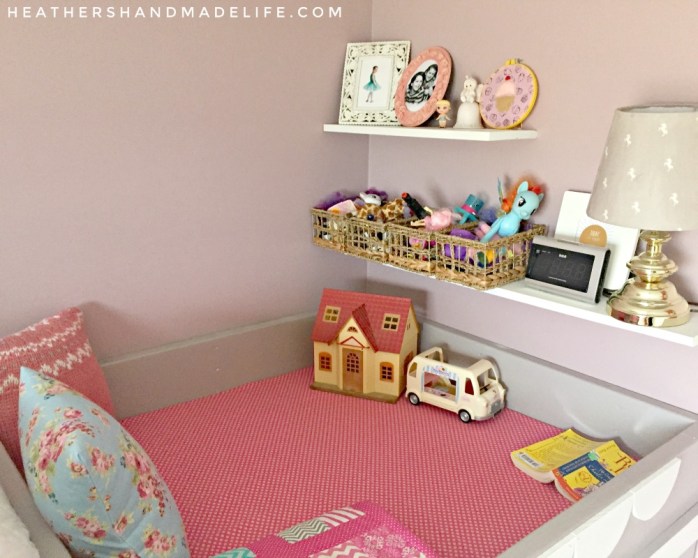
For the elevated play area, I just covered the MDF ‘floor’ with some pink cotton fabric and stapled it tightly underneath — rather than painting the MDF and worrying about it getting scratched up underfoot. With a few throw pillows and rattan storage bins, it’s the perfect spot for our daughter’s Shopkins collection and other small toys. She loves playing up there, and the best part is that I don’t care how messy it gets because you can’t see it!


Even though our daughter’s new loft bed is massive, it doesn’t feel like it takes up the entire room because it’s so multi-functional. The rest of her room is empty — except for the coral bookcase built from end tables that I showed you a few weeks ago — so there’s plenty of breathing room.

And the details! Oh, the little details …


What started off as an idea for a simple loft bed turned into something much more involved, but I’m so happy with how it turned out. By thinking vertically, we were able to double the available play-space while also hiding the toy clutter. I swear, her bedroom has NEVER stayed this clean — or looked this beautiful.
Thank you to Kent for sponsoring this project — providing the paint and a portion of the lumber. All repeat trips (sometimes twice a day) prove how much we really, really love shopping there.
Product sources:
White faux fur pillows: Handmade, fabric from Atlantic Fabrics
Loft bed paint: PPG’s “Rice Chips” from Kent
Wall colour: PPG’s “Pinot Noir” from Kent
Blush-coloured fuzzy throw: HomeSense
White wooden “C”: Michaels
Floral pillow: Handmade, fabric is from the Anne of Green Gables collection at Atlantic Fabrics
Vintage lock plate: Phillips & Chestnut Victorian Salvage and Decor
White powder-coated mailbow: Kent
Chandelier: Canarm Daya flushmount light from Kent
 |
| DIY bookcase from end tables |
 |
| How to replace a light fixture |
2 Comments on “DIY loft bed, playhouse and reading nook”
So what do you think?


As featured on …


Wow, this is absolutely amazing! I love it! My daughter would go crazy over a space like this. It might be a good solution for our play room, actually.
LikeLike
Thanks, Sarah! It’s helped her room a LOT to get more play-space.
LikeLike