
Easy-to-sew swim shirt + modest bathing suit

This project has been sponsored by Atlantic Fabrics’ six locations across Nova Scotia, including the newest store on Parkland Drive. All opinions and freezing-cold backyard photo shoots are my own.
Somewhere between my own childhood and becoming a parent myself, everybody started putting their children in swim-shirts (sometimes called “rash guards”) that protect their chests, backs and arms from the sun. They’re made of stretchy swimsuit material and either have short sleeves or long sleeves. Go to any outdoor pool or splash pad, and you’ll see plenty of them.

There was no such thing when I was a kid. The girls wore spaghetti-strapped one-pieces or bikinis and the boys had bare chests above their swim trunks, and we all got very, very tan. (My own mother once didn’t recognize me, after two weeks away, because I was so dark.)

Rash guards are really a genius invention. I hate greasing up my children with sunscreen, and less exposed skin = less sunscreen required. The kids put on their rash guards without a second thought — partially out of habit, but also because they don’t have to suffer through a long sunscreen application. Everybody wins.
Now, rash guards are easily $20-$40 depending on the store. Short-sleeved ones are cheaper, but I like the long-sleeved ones with a bit of a turtleneck — which means you only need to sunscreen their faces and legs.
 |
| (It was freezing when we did this photoshoot. I had to bribe her with candy, as you do with most models I’m sure.) |
After spending $50 on two rash guards online, because I thought there must be special UPF/SPC magic in the fabric, I realized they were made from the same kind of swimwear fabric they sell at Atlantic Fabrics.
Lesson learned! From then on, I’ve been sewing my own rash guards for far less money …


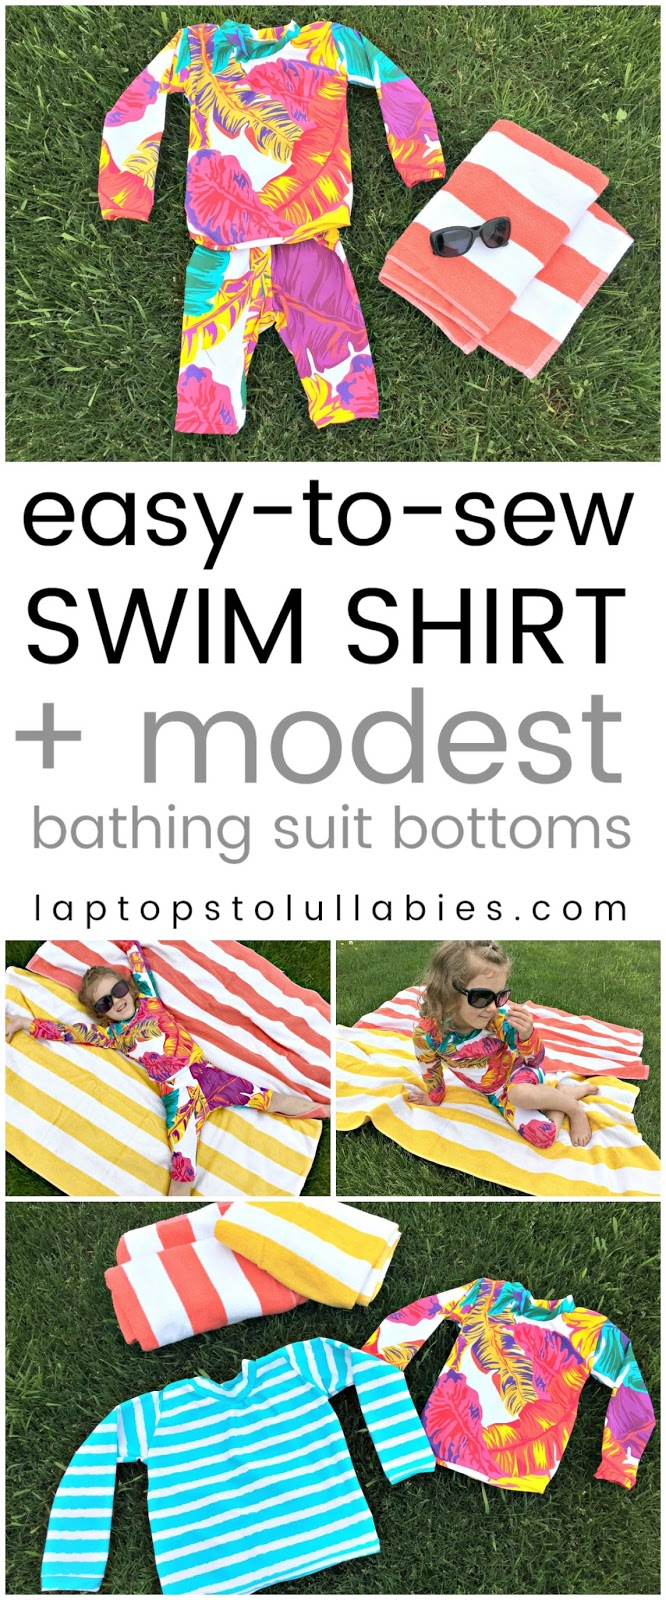 |
| Pin this project for later! |
Ready to start sewing?
Here’s how to use an existing T-shirt that fits your child to create a rash guard/swim shirt for them …
Start by folding your bathing suit fabric in half, and then folding their T-shirt in half. Line them up together (folded edge against folded edge) and tuck the arms of the T-shirt underneath so you can trace around the body of the shirt …

This is what you’ll cut out. It helps to make it slightly bigger than their T-shirt, so it’s easy to pull on and off when it’s wet.

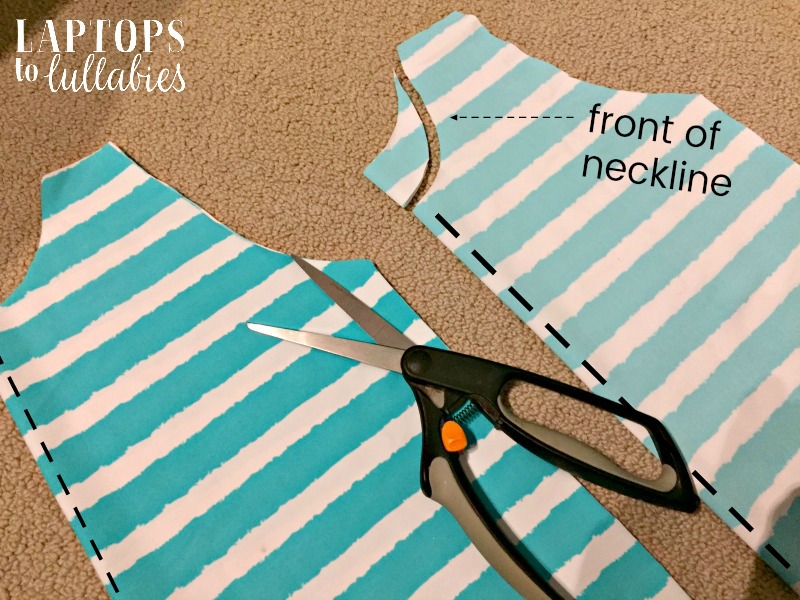
Trace a second “body,” and trim one of the necklines down a bit. The one with the lower neckline is the front — but for a swim shirt, it doesn’t matter if they’re both the same!
Trace the sleeve of their long-sleeved T-shirt twice to get two new sleeves.

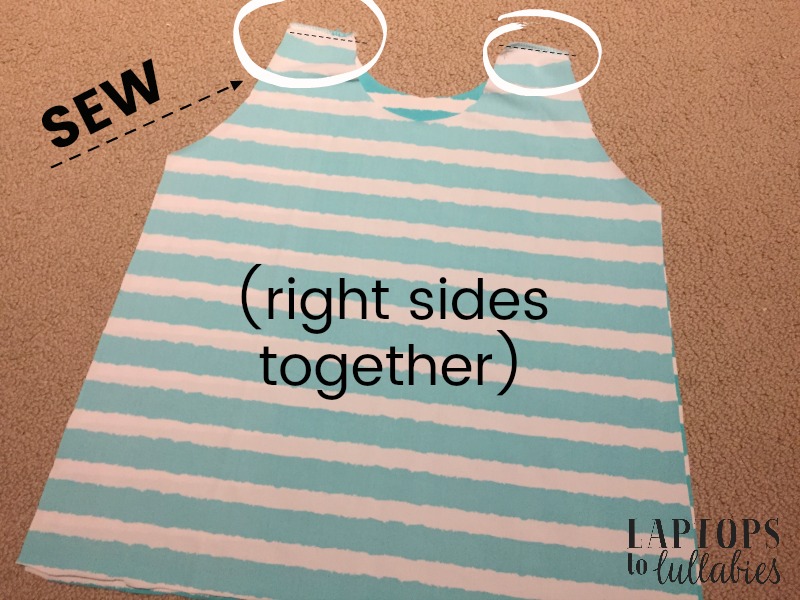
Sew the two “body” pieces together at the shoulders. Make sure the “right” sides of the fabric are touching so your sewing is hidden on the inside when you’re done.
NOTE: I used my serger but you can totally use a regular sewing machine. Just pick the stretch stitch or zigzag stitch.
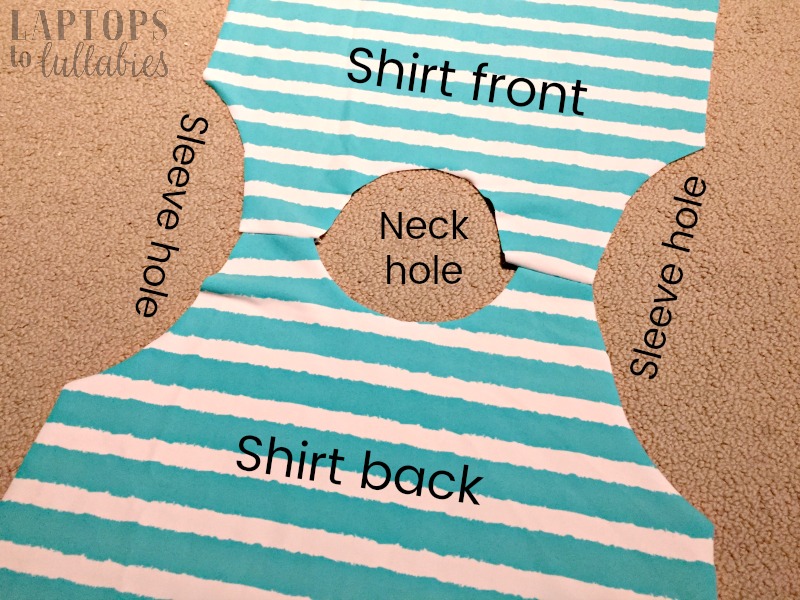
Flip the whole thing right-side-out and it’s looking pretty weird. Lie it flat on the floor or a table, and you can see there’s definitely a neckline and two curvy arm-holes.
So how do you attach those arms? This next picture looks right because the pieces seem to fit together, but it isn’t (unless you want inside-out sleeves).
You want to do the SECOND picture, with the checkmark. That means you’re lining up the centre of the arm curve with the centre of the sleeve curve (right sides together).
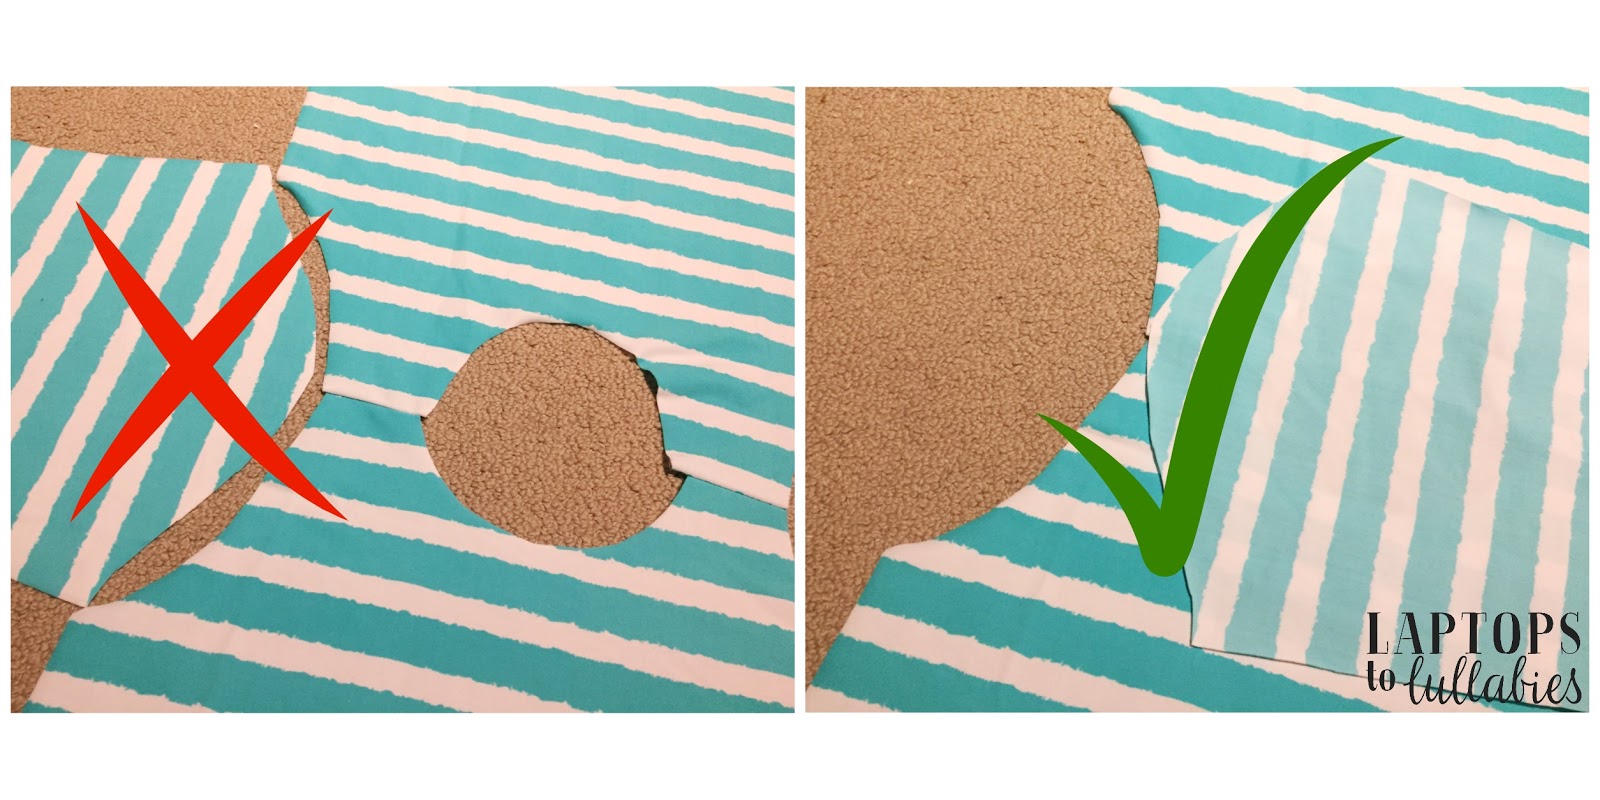
It feels really wrong the first time you do it, but trust me …

And it looks like a hot mess when you pin it together, with those curves struggling to curve against each other, but it’s right …
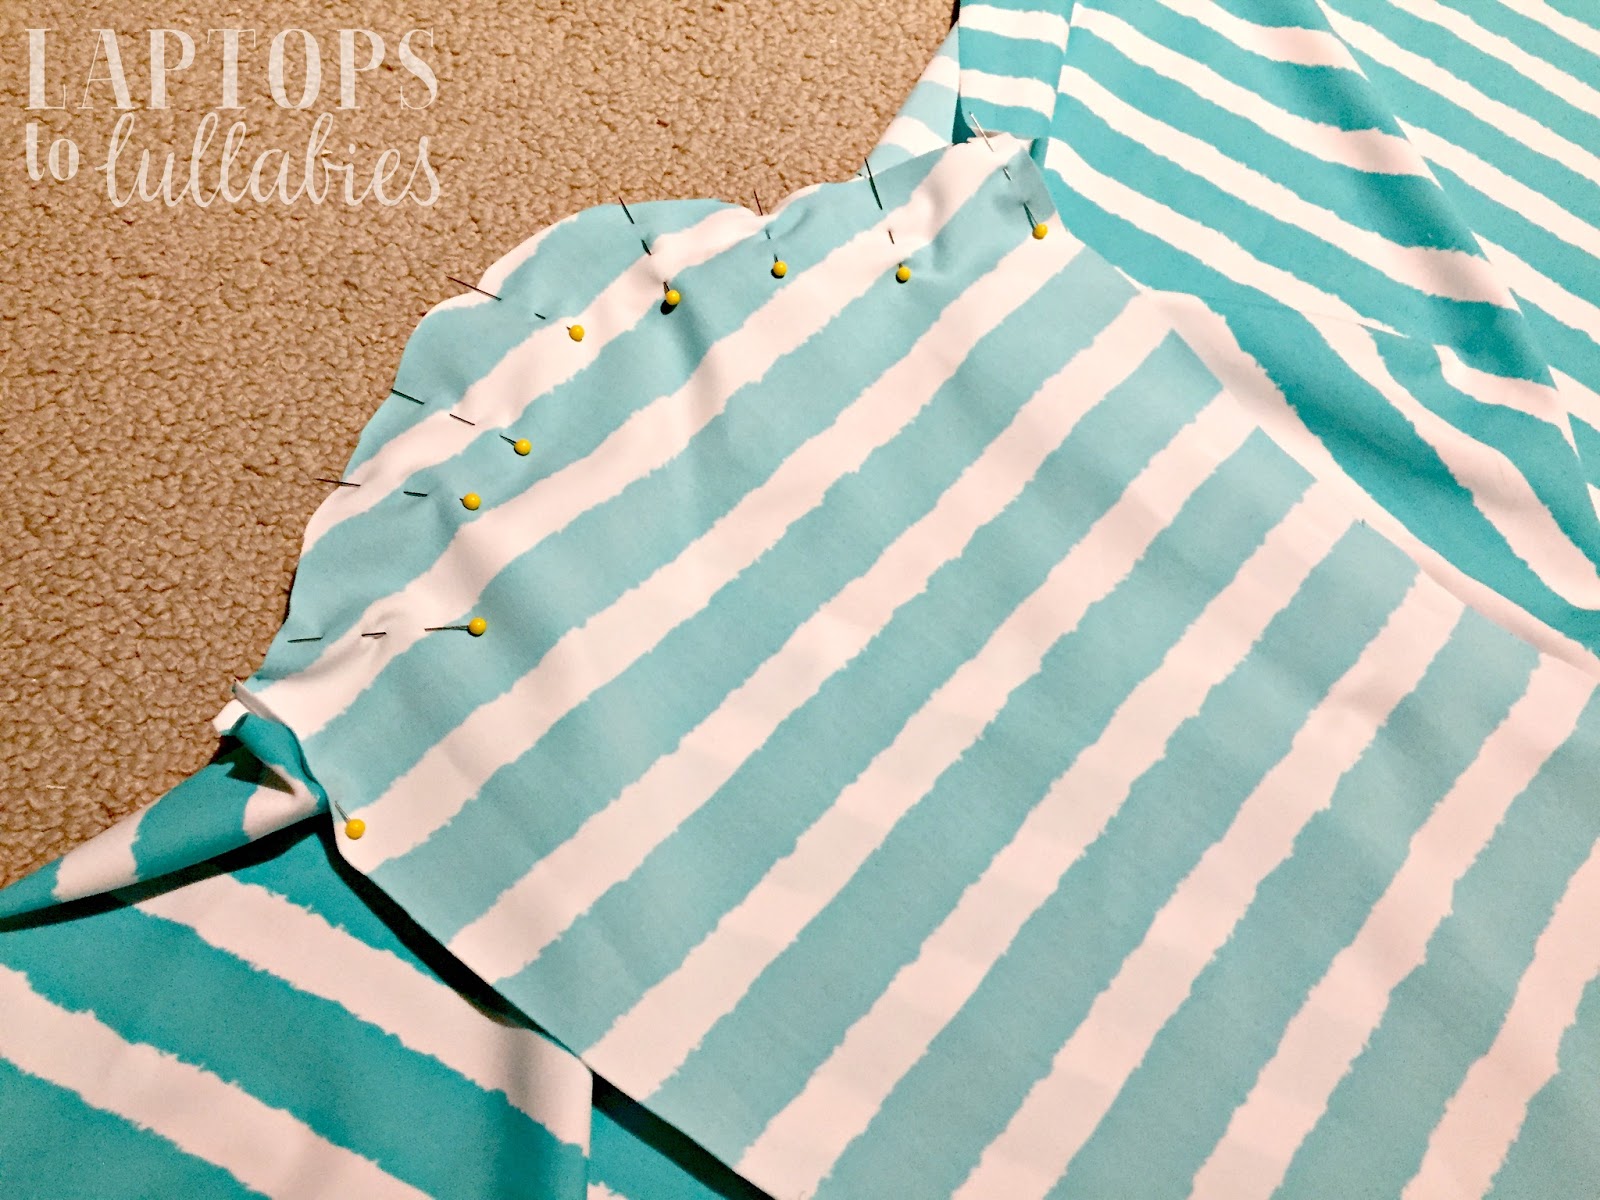
Once you’ve sewed the arms in place, it looks more like a shirt. Now you just need to sew from each wrist all the way up to the armpit, then pivot (hee, pivot) and sew down from the armpit to the waist.

Your shirt’s a shirt! Crazy, right?
Now it’s time to do the neckline, but you can skip this step if you want. Stretchy bathing suit fabrics don’t fray, and your kids won’t care.
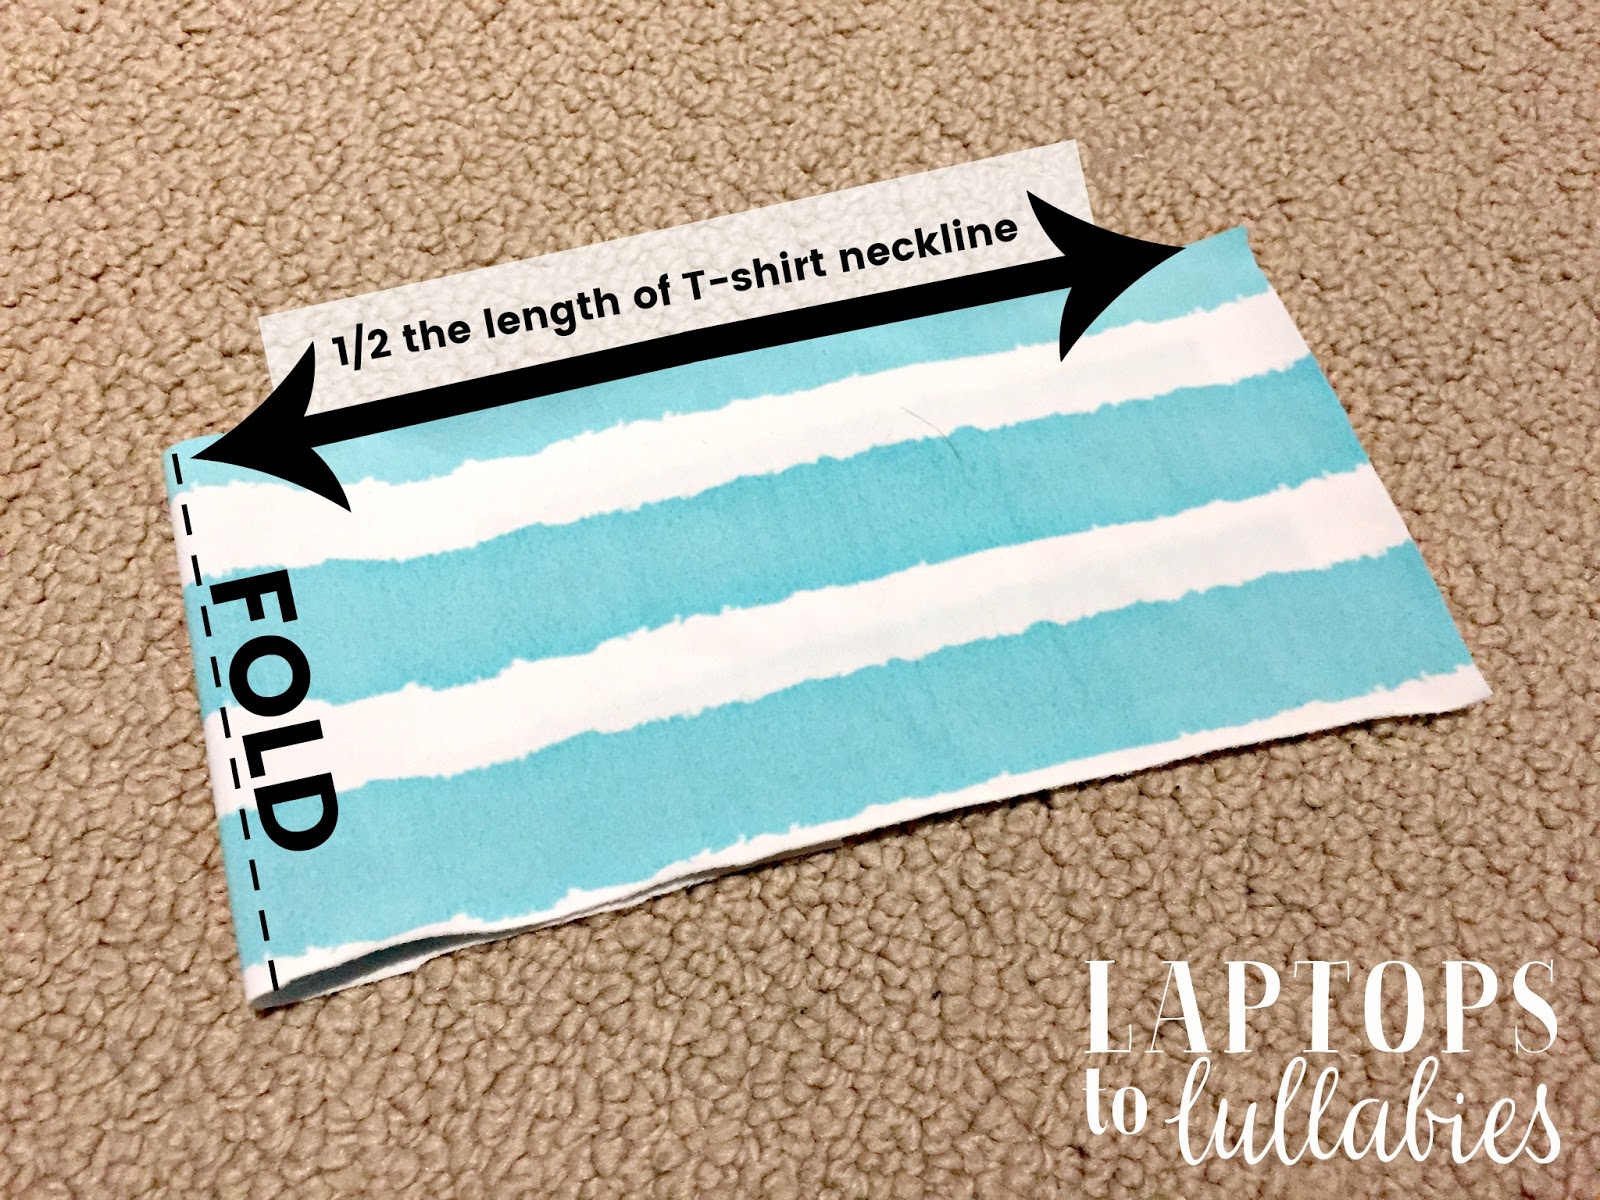
Cut a strip of your stretchy fabric that’s about as long as the neckband on your sample T-shirt and 3-4 inches wide. Totally eyeball it, it doesn’t matter.

Fold your little rectangle in half, lengthwise, so the right sides are together. Now it’s half as long as the T-shirt’s neckband, and there’s a fold at one end.
Now you’ll sew along the short end to make a tube. The tube is your neckband! It’s a little tall, so you’ll want to turn it right-side-out and then fold it down, like you’re turning it into a taco.

Doesn’t it look more like a headband than a neckband? Don’t worry. (And don’t mind my pyjama pants in the background.)
Take your shirt and put a pin in the centre of the neckband at the front and at the back. You can also put a pin in the front-centre and back-centre of your neckband, if you want. This will help you get the neckband on evenly.

Pin your neckband to the shirt’s neckline by matching up the pins. Then you’ll sew the two together. You’ll actually be sewing through three layers, since you folded the neckline, and this will neatly keep all of the raw edges together.

If you were sewing a traditional T-shirt, you might then flip the neckband around and top-stitch, but I like having the neckband of a swimming shirt be a little more like a turtleneck — it protects those little necks from sunburns!
Here it is …

For instructions on making cut-off leggings to use as modest bathing suit bottoms, check out my post on sewing your own leggings.

 |
| Pin these instructions for later! |
DIY Canada Day wooden art

So let’s get started!
I decided to try out my spectacular new RYOBI ONE+ 18-Volt cordless Orbital Jig Saw and make a wooden Canada flag.
 |
| Hello, gorgeous! |
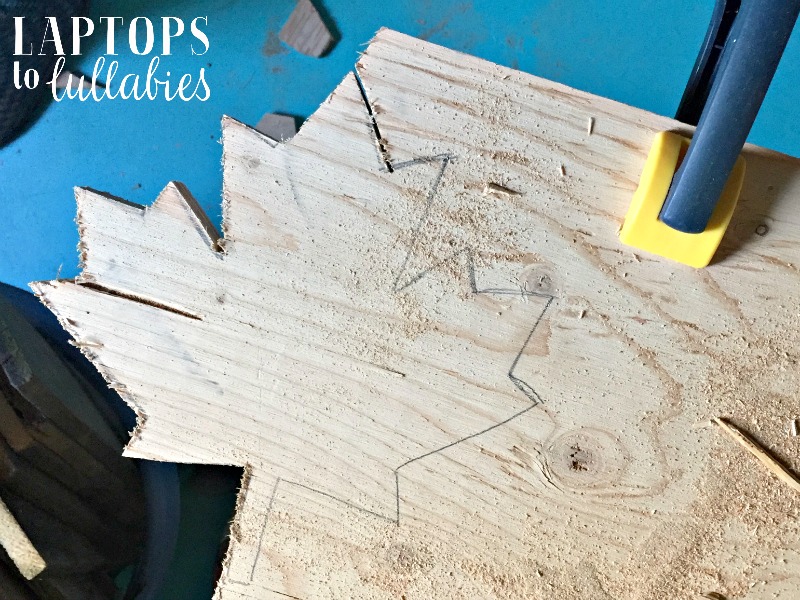
Once I’d printed out a maple leaf (just the outline to save on that toner $$$) and traced it onto a scrap of plywood, it actually was very quick to cut out.
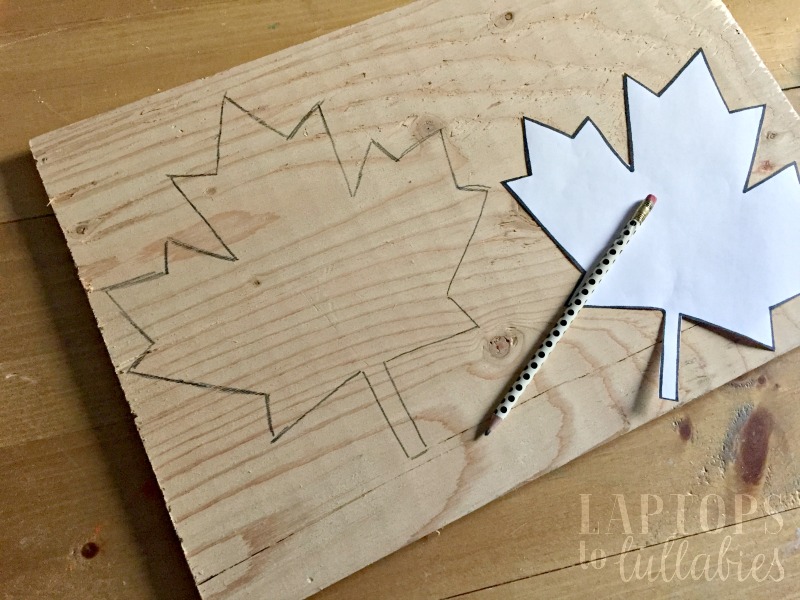
I clamped it to my little work table and just shifted it around once I couldn’t cut anymore on a particular side. Gotta love all of those straight lines — it’s the ideal first jigsaw project, really.

I was sad when a little splinter of wood shot out, leaving a bit of a crack in my maple leaf, but I guess that’s just #plywoodproblems for you.
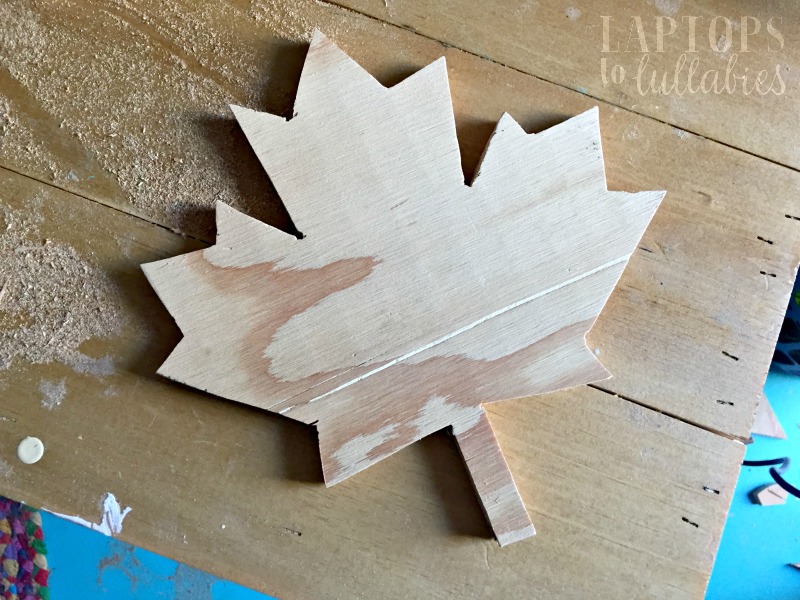
Look! A maple leaf!
Since I already had my jigsaw out, I used it to cut two rectangles for the sides of the flag. I didn’t measure these — just eyeballed them based on the size of the maple leaf. (“A little taller than the leaf, but not as wide — looks good.”)
I also used the jigsaw to trim a larger piece of pine to be the back of the flag.

After all four pieces got a quick sand, I took them outside to stain. It was a gorgeous day and Darling Husband was working on a HUGE project (stay tuned) that I wanted to see.

I used light stain (Minwax’s Golden Oak) for the back of the flag, that would normally be white, and dark stain (Minwax’s Dark Walnut) for the parts that would normally be red.
Once the pieces were dry, I screwed the “red parts” into the background from the back, so you wouldn’t see any screws, and slicked on a few coats of poly to protect it.
Then it was ready for its closeup!

I walked around the yard for a minute trying it in different spots.


Then it ended up back inside!

I hope you give this Canada Day decor a try, especially if you’re looking for an alternative to red-and-white everythinggggg.
Thanks for stopping by, and I hope you keep clicking to see what my friends are writing about #Canada150 today!
Epic laundry room makeover
Thanks to Kent Building Supplies for providing us with the laundry cabinet for this room makeover. As always, all opinions and bumpy drywall jobs are my own.
We gained an entire room in our house without building an addition (or kicking out one of our children). Seriously — I now spend time, every single day, in a brand-new room that never existed before.
Well, it technically existed, but it was not a room. It was a tiny cement hovel with an oil tank, a bunch of pipes, a washer and dryer, a deep-freeze and all of the garbage in the world.
Old speakers, boxes that needed to be broken down, beach coolers, sports equipment, half-finished DIY projects, random cans of paint, cleaning supplies — you name it, it was in that pit.
 |
| Yes, it was really this bad. No, we couldn’t really use the door. |
We attempted to clean it a few times a year, but only when it got so full that I had trouble wading through the junk to do laundry. Most of the time, we’d open the door and toss — garbage bags, recycling bags, random household items that didn’t have a home — and not care where it landed.
After getting my own power tools for my birthday last summer, I’d been doing all of my woodworking and DIYing in the kids’ carpeted playroom. Not ideal. There was always sawdust everywhere, and I was getting tired of snipping paint drips out of the carpet — even when I used a dropcloth!
One morning, back in the winter (Jan. 29 to be exact), I cleared a space on the deep-freeze and sat in that depressing little utility room — notebook and pen in hand. I looked past the heaps of garbage, the unfinished walls and the overall hideousness. I started to make lists and sketch out what the room could become if I was willing to do a lot of work.
//platform.instagram.com/en_US/embeds.js
So over the past few months, I’ve been picking away at the room — little by little — to transform it from a disgusting utility room to a fresh laundry room/DIY studio.
I started by taking everything out of the room and heaping it into the adjacent playroom. Then I took down all of the haphazard shelving we’d installed over the years until the walls were bare.
Some walls were partially drywalled but not taped or mudded, and other walls had nothing but studs. I bought a couple of drywall sheets — along with a massive pail of dust-control joint compound and a roll of drywall tape — and started my drywalling adventure …
//platform.instagram.com/en_US/embeds.js

 |
| We painted the cement floor “Naples Bay” 6149-42 by SICO |
 |
| How difficult was it to paint the floor? More details coming this week! |
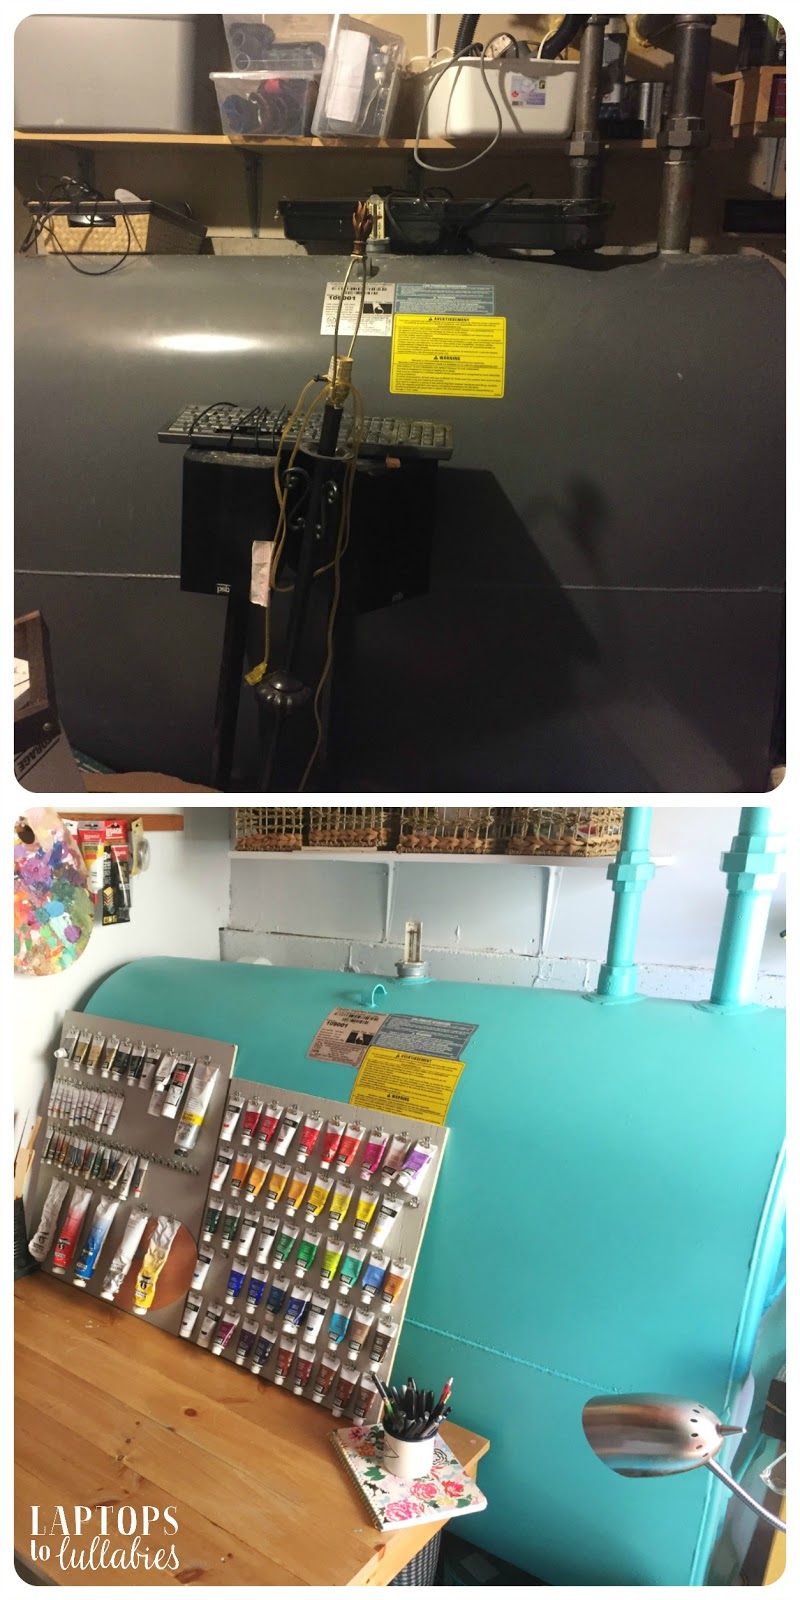 |
| Yup, you can paint your oil tank! More details to come! |
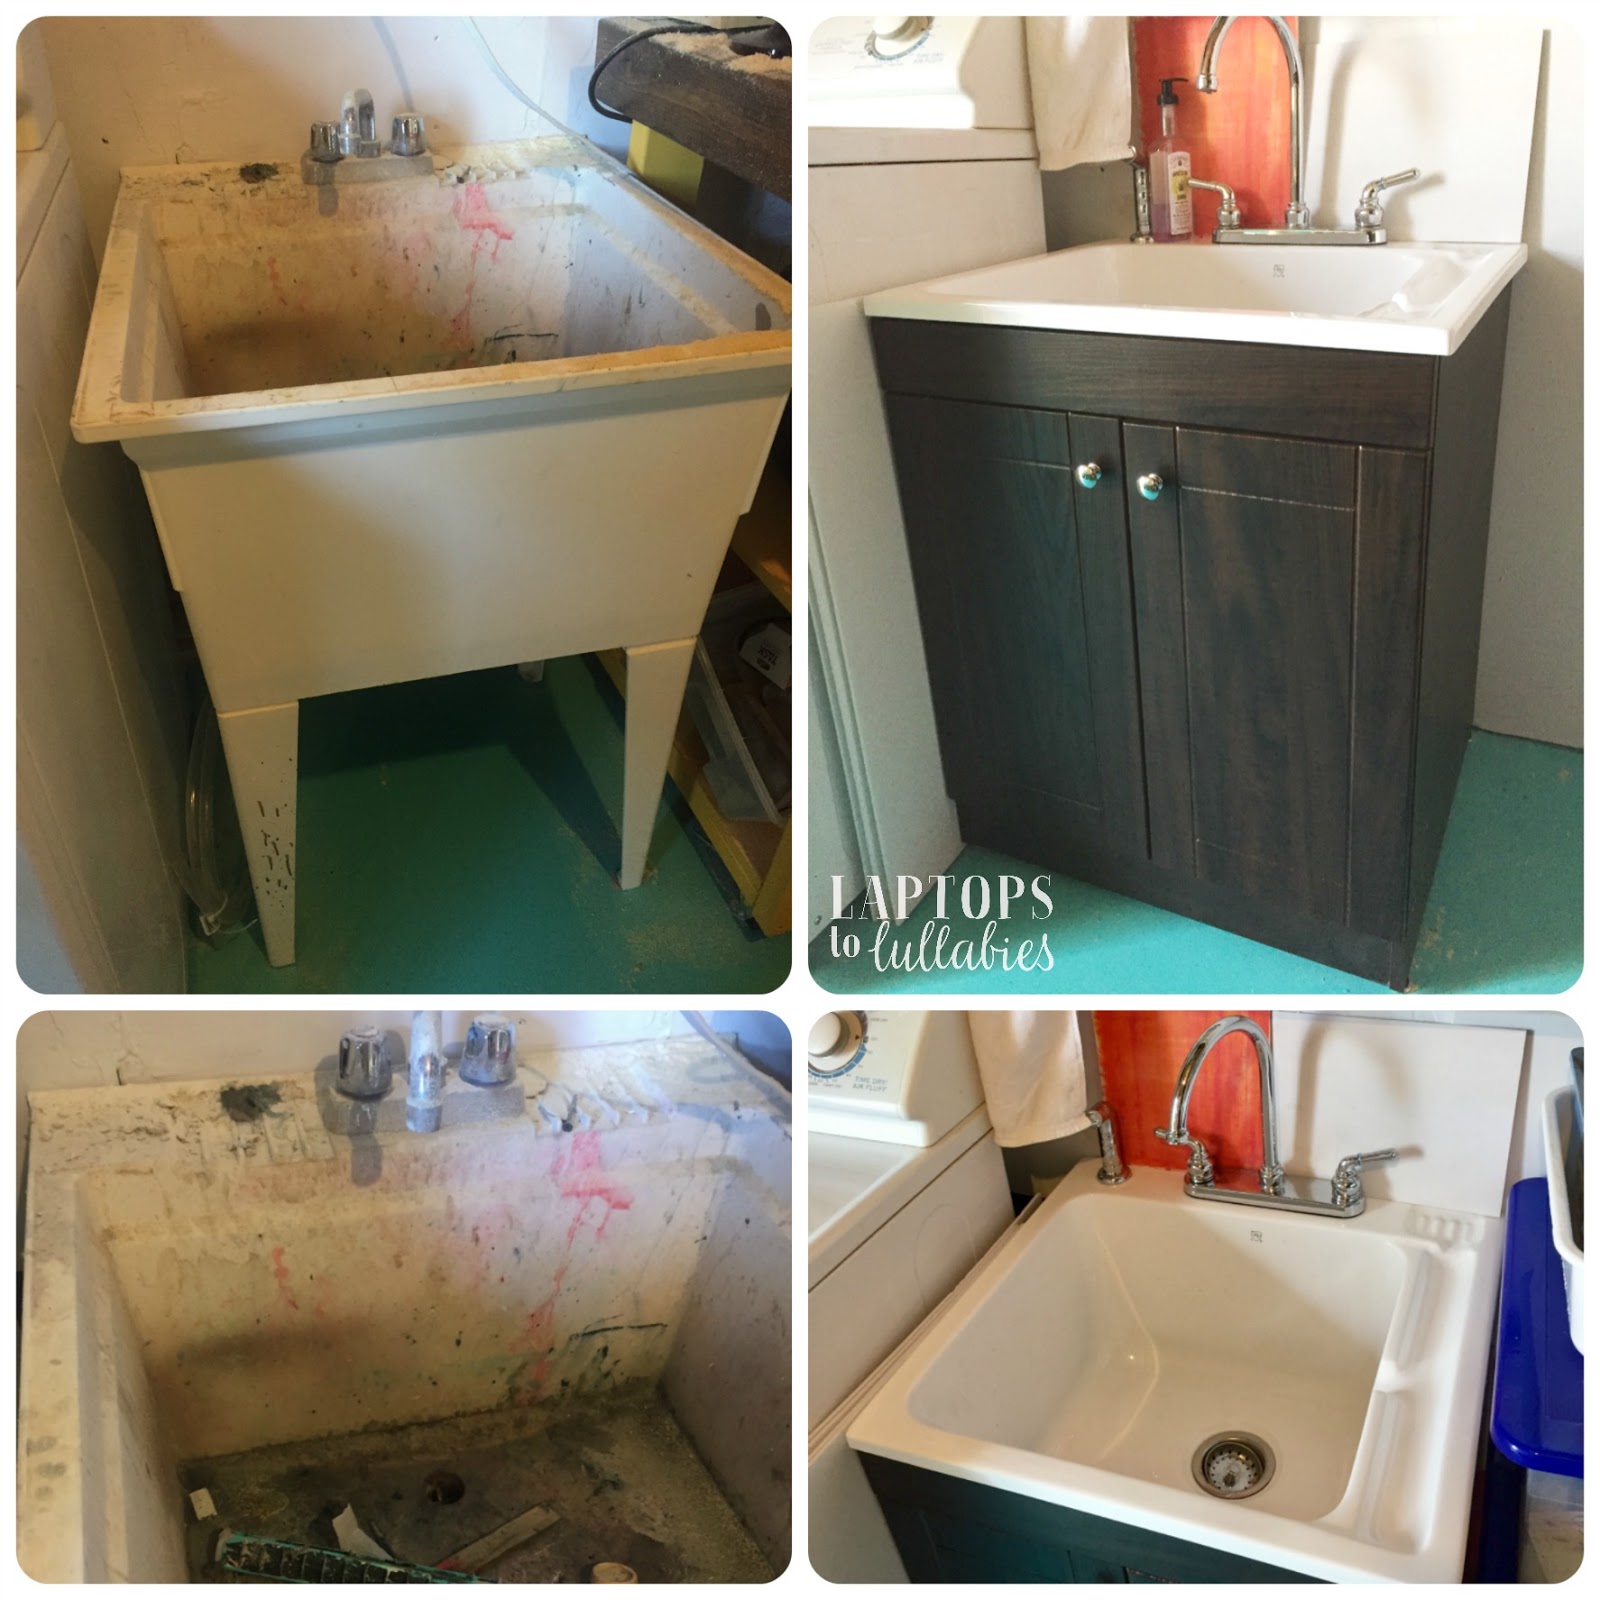 |
| How badly did our laundry sink need to be replaced?! |
 |
| Gorgeous 24″ Espresso Laundry Cabinet donated from Kent |
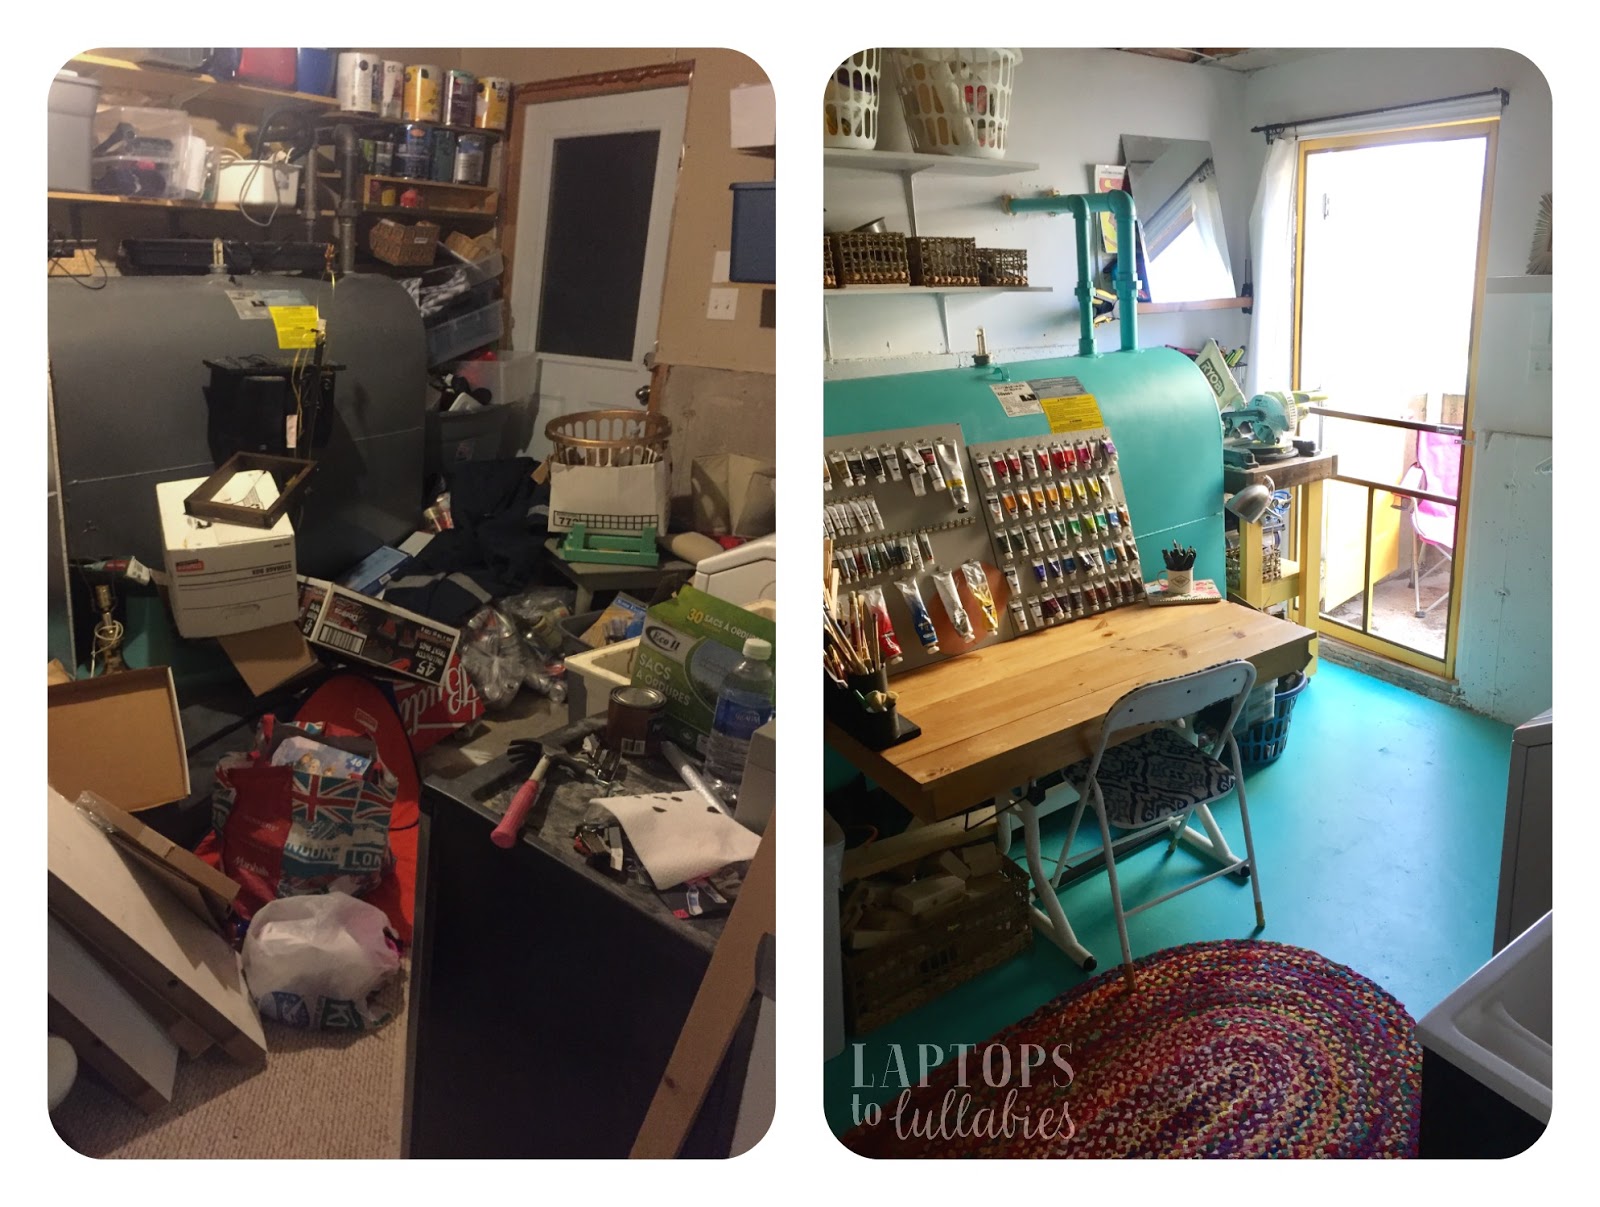
 |
| Can you even BELIEVE this before-and-after comparison? |
//platform.instagram.com/en_US/embeds.js
 |
| I call this “the pretty wall.” Much prettier than extra 2L pop bottles and junk, right? |
//platform.instagram.com/en_US/embeds.js

 |
| I painted the doors SICO’s Egg Yolk 6093-54 in SICO’s Evolution ultra-scrubbable interior latex paint |
//platform.instagram.com/en_US/embeds.js

 |
| Hand-braided rug from Wayfair (bought on sale for $69.99) |

 |
| Pin this project for later! |
Nine years / 17 years
June 9.
I love this day.
I love this man.
I was 16 when we officially became a couple on June 9, 2000 and 24 when we got married on June 9, 2008 .. in a drive-thru wedding chapel in Las Vegas …


We were married alone, under the early-afternoon sun in a city that was clear across the continent from our families.
Only a handful of people knew what we were doing, and we were giddy with secrecy and independence. We met the pastor right before the ceremony and our witness was a stranger named Missy who worked the drive-thru window at the chapel.
I was 24 years old, with shiny rings on my fingers and an even shinier future ahead of me.
We developed our wedding film at a nearby Walgreens. We ate cheeseburgers and fries at In-N-Out Burger for our reception. I traded my poufy gown for a white sundress and we rode the roller coaster at the New York New York Hotel & Casino.
We took our rented Corvette for a long drive through the desert, got lost on the way to Red Rock Canyon, and didn’t care. It was a perfect day …
 |
| Read more about our drive-thru wedding |
The (very) last day of preschool


As featured on …


