
A sneaky way to remake a $3 footstool

Footstools are apparently the unsung heroes of the thrifted furniture world. They’re cheap, quick to make over and I can’t get enough of them.
My obsession started when I tucked a low footstool under my desk a few months ago. I couldn’t believe how much more comfortable I felt with my knees slightly raised. I felt like one of those happy 90-degree-sitting stick figures in an occupational therapy brochure on workplace health.
I marveled over that secondhand footstool and asked my thrift-savvy mama to keep her eyes peeled for more of them.
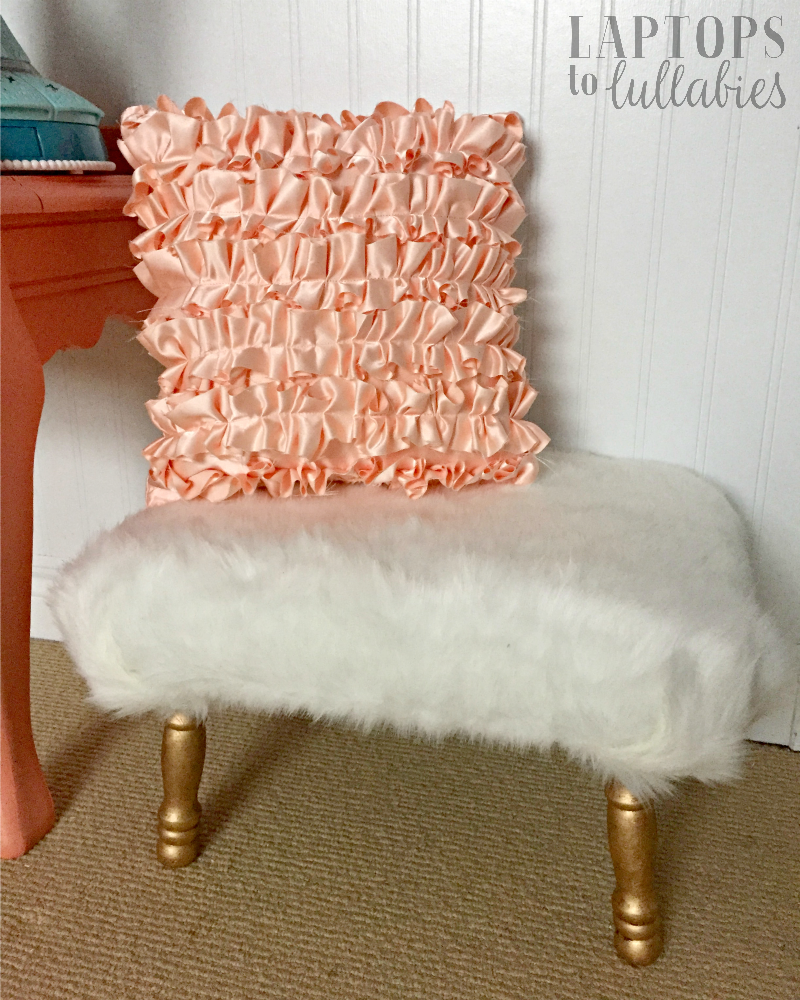
I redid one for our daughter’s bedroom — painting the legs gold and covering the top with fluffy white faux fur — but then she delivered one that had me stumped.
The price was right — three dollars — but it the foam was severely dented on one side, like the previous owner’s feet had stuck to a single position for years or even decades. If I was going to redo it, it was going to need a life-saving foam transfusion — stat!

After a couple of coats of white paint on the wooden legs (Casement by Fusion Mineral Paint), it was time to fatten up the footstool’s cushion.

I had two squares of foam leftover from another project (remember those extra-long window seat cushions?) but neither was large enough to cover the top of the footstool.
I didn’t want to be wasteful, so this is where I got a little daring and decided to see if math would be my friend (for the first time ever).
I cut both foam squares diagonally so I had four triangles, and then fit the triangles together to make one big square.

Then I laid the footstool on top, traced a circle around it, and cut it out.

I didn’t even bother gluing the pieces of the circle together — just carefully transferred the whole thing onto the fabric (wrong side up) and laid the footstool back on top.

Reupholstering a chair seat or a footstool is easy because you’re just wrapping it in fabric and stapling the underside. I pull the fabric tight on each side and do four preliminary staples, and then continue around — pulling and stapling — until the whole piece is wrapped snugly.

When I flipped the footstool right side up, it was looking great. I’d picked 0.75m of black and white fabric with a tiny gingham print from Atlantic Fabrics, since I planned to use the footstool in the basement near the daybed — which has grey, black and white cushions and quilts.
There was just one problem: you could kind of tell I’d cheated with the foam. From a distance, it looked fine. But up close, you could see the lines where the four triangles met to form the circle. Arghhh!
I had an idea to fix it, but was I brave enough? There was a good possibility I’d ruin the whole thing in the process. I took a couple of “after” pictures — just in case the next step really did wreck everything — and hunted for a very long screw and a white button. I was going to attempt an unconventional “tufting” method, and I had no idea if it was going to work.

I used my drill to turn the button’s two holes into one larger hole (big enough to fit the screw), and then screwed straight down into the middle of footstool — fabric, foam and all. It took a couple of tries to get all the way down to the wood at the bottom, but eventually I had a deep tuft. The button prevented the top of the screw from busting up through the fabric, and also faked the look of a true needle-and-thread tufting job. Pretty sneaky, right?
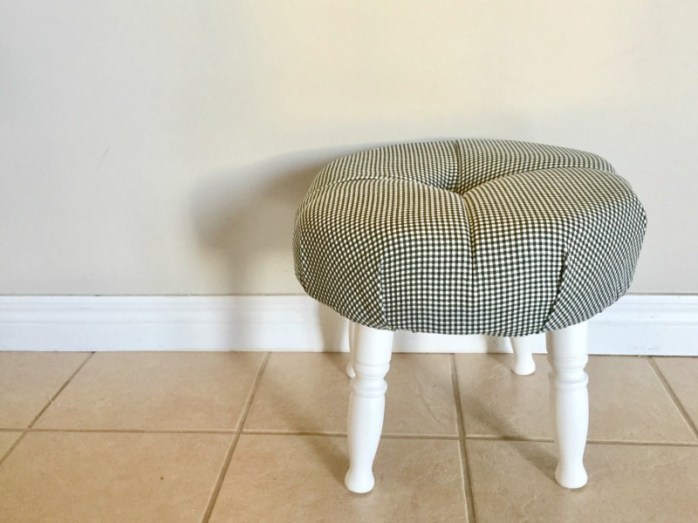
Relieved I hadn’t destroyed the footstool, I snapped another set of “after” photos and then settled it in front of our black armchair. It’s a tall footstool so it’s perfect for propping up your feet while you lean back.
Mom, if you’re reading, keep looking for secondhand footstools, please — I can’t get enough of them!


Indoor solutions for ‘Mom, I’m bored!’

As much as I remind my children, “only boring people get bored,” they still complain of boredom — especially during the summer when they don’t have school, their usual activities are on hiatus and many of their friends are away at their cottages.
If it were up to my kids, they’d happily watch television (or YouTube videos, in my daughter’s case) until their eyeballs melted. While I do think a bit of extra screen time is OK during the summer — after all, it’s their vacation — it’s still only a small portion of the day. And those summer days? They can be looooooong.
We spend a lot of time outside in the summer, (A LOT) but there are also times when I need to keep the kids entertained inside — and without me — since I work from home.
So here are 13 ways I’ve answered the moans of, “I’m bored,” and I plan on using every single one of them this summer.
1. “Put on a performance.”
Our dress-up clothes don’t get a lot of use anymore, so I’ll tell them to find costumes and put together a play for me. We also have a kid-friendly keyboard and microphone, so maybe there will be a concert as part of the performance.
2. “Make a circuit.”
Our son’s been talking about circuits ever since the Discovery Centre re-opened. Every time I Google how to make our own, I get icky flashbacks to Grade 6 science. But I’m determined to get the basics this summer — battery, light bulb, bulb holder, insulated wires — and see if we can make it work.
Continue reading my other 11 ideas in my weekly parenting column, The Mom Scene …
Converting a child’s closet to built-in shelves

When faced with a mess, it’s often our instinct to conceal with storage bins or doors. But in the case of our son’s closet, the answer was actually to remove the doors completely.

While it wasn’t a wreck of hidden dirty laundry and broken toys — like his sister’s closet — his closet did have some serious issues:
- He had way more hanging-up space than he needed for his 10-15 button-up shirts
- He couldn’t even reach the hanging bar (Don’t you love when kids yank on the bottom of a shirt until it pops off the hanger?)
- The single (too-high) shelf was heaped with bins of clothing and books nobody could reach
- The side shelves were a useless mess of more books
His dresser needed to be in the middle of the closet in order for the drawers to open without hitting the closet doors, leaving dead space on either side (and black holes for random items of clothing).

So one Saturday morning, I tore every single thing out of his closet until I was staring at white walls, a hanging bar, a too-high shelf and two random MDF shelves jutting out of one side.
I stood there and looked at the closet for a long time, trying to figure out what was going to work for it.

The answer, I decided, was to take off the bi-fold doors and transform it from a closet into more of a built-in nook …

Continue reading in my weekly DIY column, My Handmade Home …


How (and why) we taught our kids to cross the street

It was a big step — about 15 little kid-sized steps, actually — letting our kids cross the street without an adult.
I had no idea at what age it was supposed to happen, but I didn’t think it would be so soon. It’s different for every family, likely, because it depends on the traffic of your street. Oh, how I wish we lived on one of those sleepy cul-de-sacs where every driver slows to a crawl.
Our street has a lot of cars whipping around corners at high speeds, and it’s always made me nervous. So many drivers don’t seem to be paying attention. Between the puppy and the kids, it feels like I’m constantly making sure nobody’s chasing a ball into the street.
Ever since we’ve lived here, whenever the kids wanted to go across the street to see their buddy, one of us held their hands and walked them over. When they were ready to come home, we’d go retrieve them or my friend would walk them back.
The trouble with that, though, was that the kids slipped their hand into ours and crossed without paying attention — eager to get to the other side of the street and play. Even though I made a point of stopping at the curb and doing an exaggerated look in both directions (“Look both waaaaaays!”) they didn’t need to look because I was doing the looking for all of us.
So this past spring, as the kids began hanging out even more, my friend and I decided our kids (aged five, five and seven) were probably old enough to cross the street alone. It wasn’t that we didn’t want to walk them back and forth — it was more that we wanted them to know how to safely do it by themselves …
Continue reading in my weekly parenting column, The Mom Scene …
Y O U M A Y A L SO L I K E …
 |
| Learning to ride a two-wheeler |
 |
| How our 2010 kids are becoming ’90s kids |
 |
| Why we’re trying Dutch parenting |
DIY monkey bars

Three summers ago, we added a slide to our back deck. Two summers ago, we built a wooden teeter totter. Last summer, we bought a secondhand play structure and the kids enjoyed the novelty of having their own swings.
But every time we went to a park or a school playground, they were completely obsessed with something we didn’t have: monkey bars.
I knew we needed to build our own, but it seemed . . . difficult. Where would we get the bars? How would we make sure they didn’t tip over? The local stores only seemed to sell swings, slides and climbing rope systems — no monkey bars to be found.
I was at the point when I thought it would be an impossible DIY when I saw a monkey bar kit* on Pinterest — just six bars and a little bag of screws — for around $40 CDN with free shipping. I ordered it when I was half-asleep one morning and almost forgot about it until they arrived three weeks later.

I wasn’t expecting the set to come with instructions — I just figured my handy husband would rig something up — but it did, and he followed them to a tee. (Not my style, but it works for him.)
The kit didn’t include the wood or most of the hardware, so we needed to buy four five-inch carriage bolts, four washers, four nuts, 44 2 1/2-inch screws, pressure-treated lumber (two 2” x 4” x 8’ boards for the steps, two 2” x 6” x 8’ boards for the bar supports, four 4” x 4” x 8’ posts) and four fence post holders (giant spikes) to fit around the 4×4 posts.
This project barely even requires any cuts, since the 4” x 4” x 8’ posts are already the right height for monkey bars and the 2” x 6” x 8’ boards are already the right length. The only boards that need to be cut are the two 2” x 4” x 8’ boards — from which we cut four steps (each 23 1/4” long) and eight little supports (each 3 1/2” long).
So my handy husband started the build by marking where the six rungs needed to be — exactly 12 inches apart, starting 12 inches from one end — and attaching them to the 2” x 6” x 8’ boards to make what looked like a giant ladder.
(Because the monkey bars were designed to attach to an existing play structure, there’s a 24-inch gap on one end between the last bar and the end of the monkey bars. The bigger kids can still reach the steps from that last rung, and the gap didn’t seem worth modifying the plans.)
Connecting the ‘ladder’ to the four 4” x 4” x 8’ posts wasn’t difficult — and now they really looked like monkey bars — and neither was building the steps using the pieces of 2’ x 4.’ The tricky part was getting the massive fence post holders into the ground in exactly the right spots, at exactly the right angle.
These huge metal spikes went 18 inches into the lawn and it wasn’t a picnic getting them perfectly in place. My handy husband finally used scraps to build a spacer — two chunks of 4’ x 4’ post separated by the width of a step — so he could pound the posts into the ground knowing everything would line up properly.
Despite the minor post hiccup, the monkey bars were up in less than a day — which happened to be our son’s seventh birthday. Swarms of kids were all over them immediately and I had to wait for an afternoon when no one was around before I could stain them (Sico’s Autumn Brown).
I love seeing the kids fly across the bars — you should see their callouses — and hanging by their knees with delighted smiles. I have no idea what we’ll build next summer to top this, but it’s going to have to be really, really good.










As featured on …