
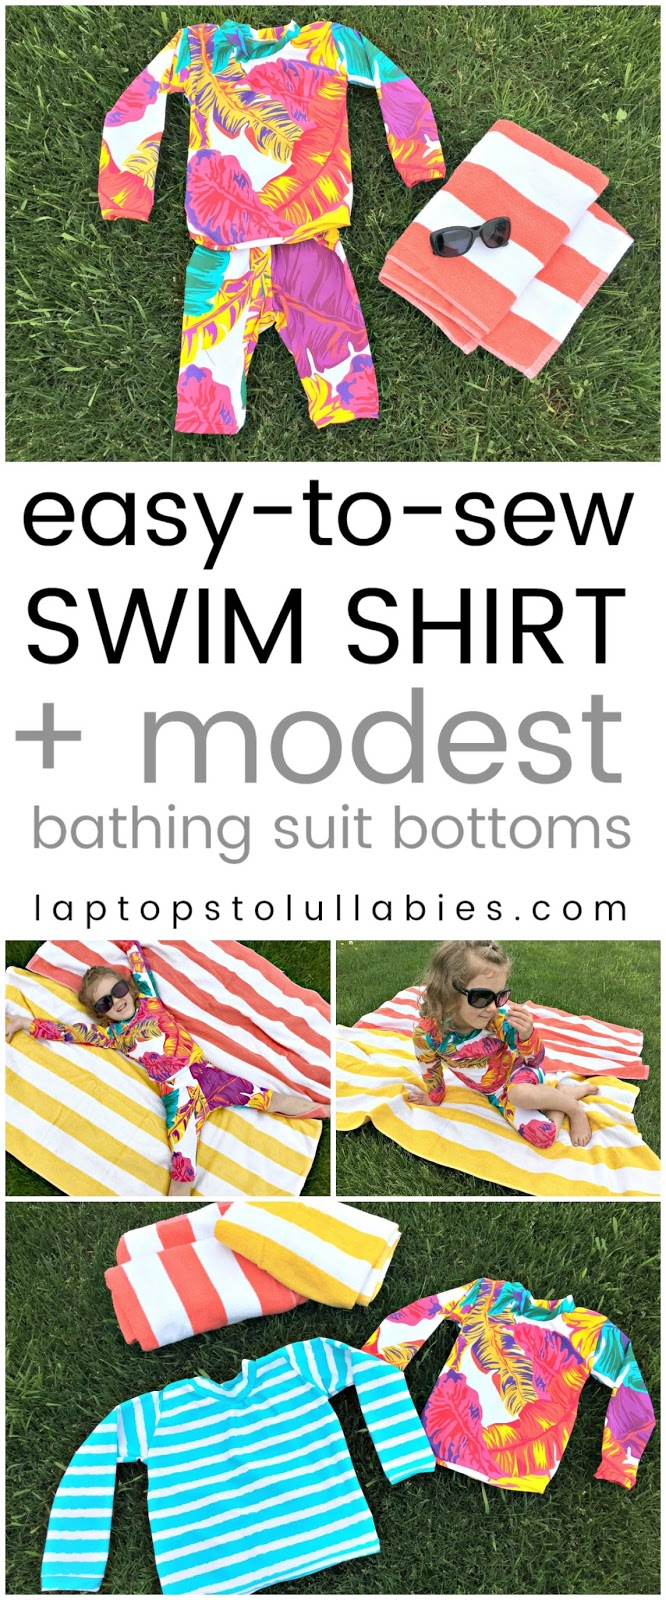
Easy-to-sew swim shirt + modest bathing suit

This project has been sponsored by Atlantic Fabrics’ six locations across Nova Scotia, including the newest store on Parkland Drive. All opinions and freezing-cold backyard photo shoots are my own.
Somewhere between my own childhood and becoming a parent myself, everybody started putting their children in swim-shirts (sometimes called “rash guards”) that protect their chests, backs and arms from the sun. They’re made of stretchy swimsuit material and either have short sleeves or long sleeves. Go to any outdoor pool or splash pad, and you’ll see plenty of them.

There was no such thing when I was a kid. The girls wore spaghetti-strapped one-pieces or bikinis and the boys had bare chests above their swim trunks, and we all got very, very tan. (My own mother once didn’t recognize me, after two weeks away, because I was so dark.)

Rash guards are really a genius invention. I hate greasing up my children with sunscreen, and less exposed skin = less sunscreen required. The kids put on their rash guards without a second thought — partially out of habit, but also because they don’t have to suffer through a long sunscreen application. Everybody wins.
Now, rash guards are easily $20-$40 depending on the store. Short-sleeved ones are cheaper, but I like the long-sleeved ones with a bit of a turtleneck — which means you only need to sunscreen their faces and legs.
 |
| (It was freezing when we did this photoshoot. I had to bribe her with candy, as you do with most models I’m sure.) |
After spending $50 on two rash guards online, because I thought there must be special UPF/SPC magic in the fabric, I realized they were made from the same kind of swimwear fabric they sell at Atlantic Fabrics.
Lesson learned! From then on, I’ve been sewing my own rash guards for far less money …


 |
| Pin this project for later! |
Ready to start sewing?
Here’s how to use an existing T-shirt that fits your child to create a rash guard/swim shirt for them …
Start by folding your bathing suit fabric in half, and then folding their T-shirt in half. Line them up together (folded edge against folded edge) and tuck the arms of the T-shirt underneath so you can trace around the body of the shirt …

This is what you’ll cut out. It helps to make it slightly bigger than their T-shirt, so it’s easy to pull on and off when it’s wet.

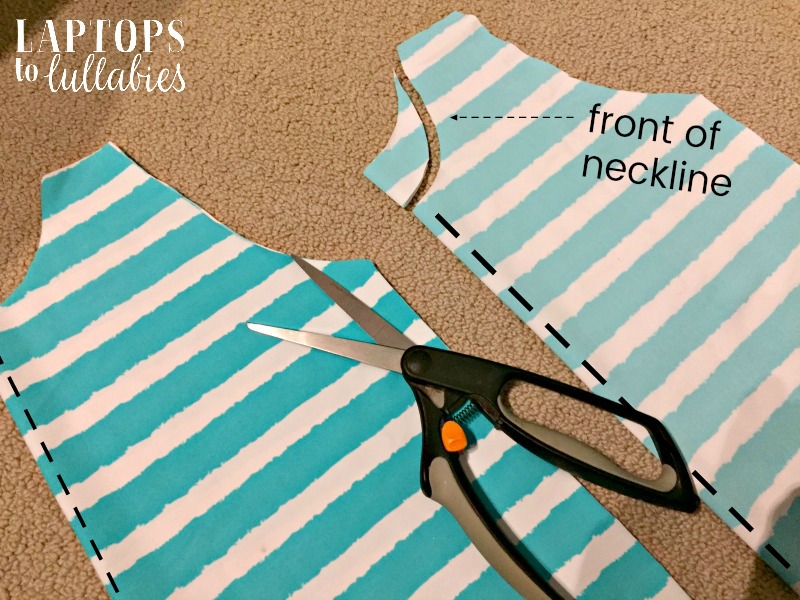
Trace a second “body,” and trim one of the necklines down a bit. The one with the lower neckline is the front — but for a swim shirt, it doesn’t matter if they’re both the same!
Trace the sleeve of their long-sleeved T-shirt twice to get two new sleeves.

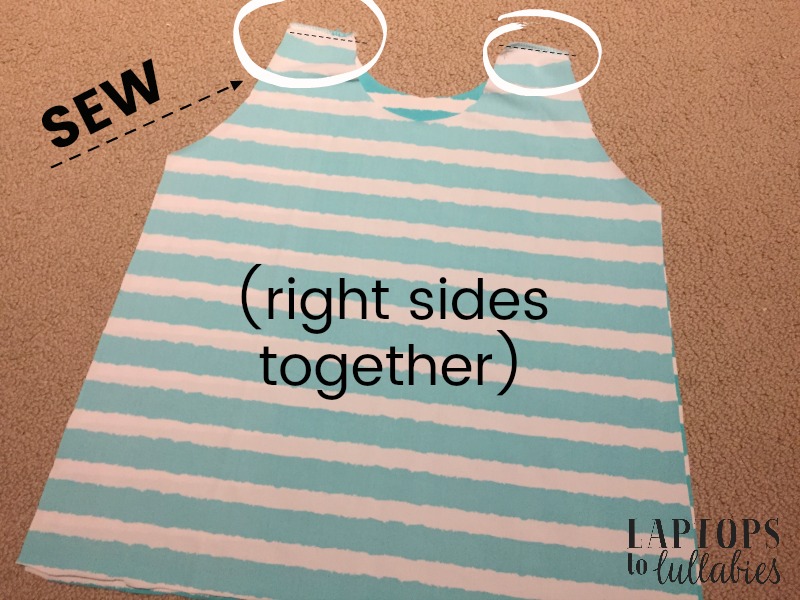
Sew the two “body” pieces together at the shoulders. Make sure the “right” sides of the fabric are touching so your sewing is hidden on the inside when you’re done.
NOTE: I used my serger but you can totally use a regular sewing machine. Just pick the stretch stitch or zigzag stitch.
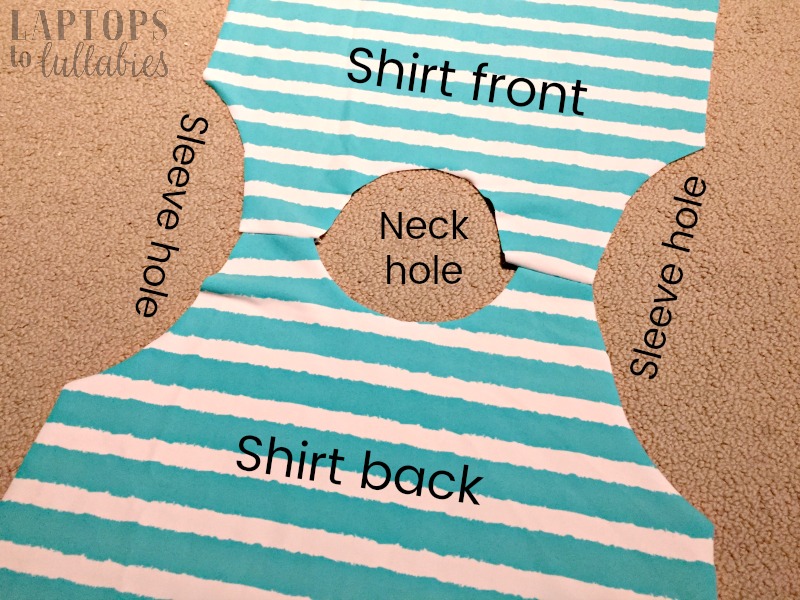
Flip the whole thing right-side-out and it’s looking pretty weird. Lie it flat on the floor or a table, and you can see there’s definitely a neckline and two curvy arm-holes.
So how do you attach those arms? This next picture looks right because the pieces seem to fit together, but it isn’t (unless you want inside-out sleeves).
You want to do the SECOND picture, with the checkmark. That means you’re lining up the centre of the arm curve with the centre of the sleeve curve (right sides together).
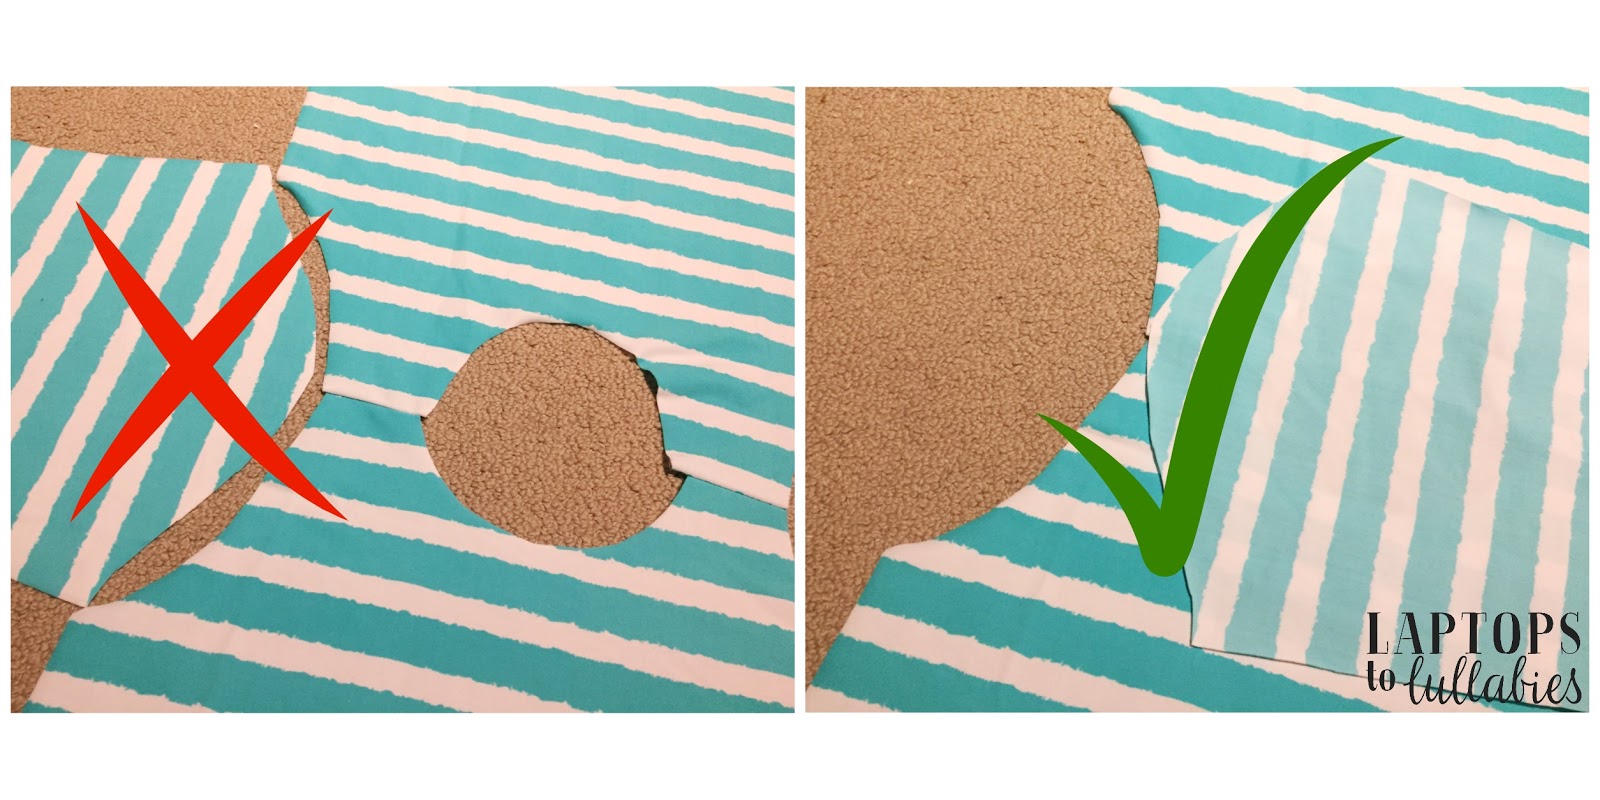
It feels really wrong the first time you do it, but trust me …

And it looks like a hot mess when you pin it together, with those curves struggling to curve against each other, but it’s right …
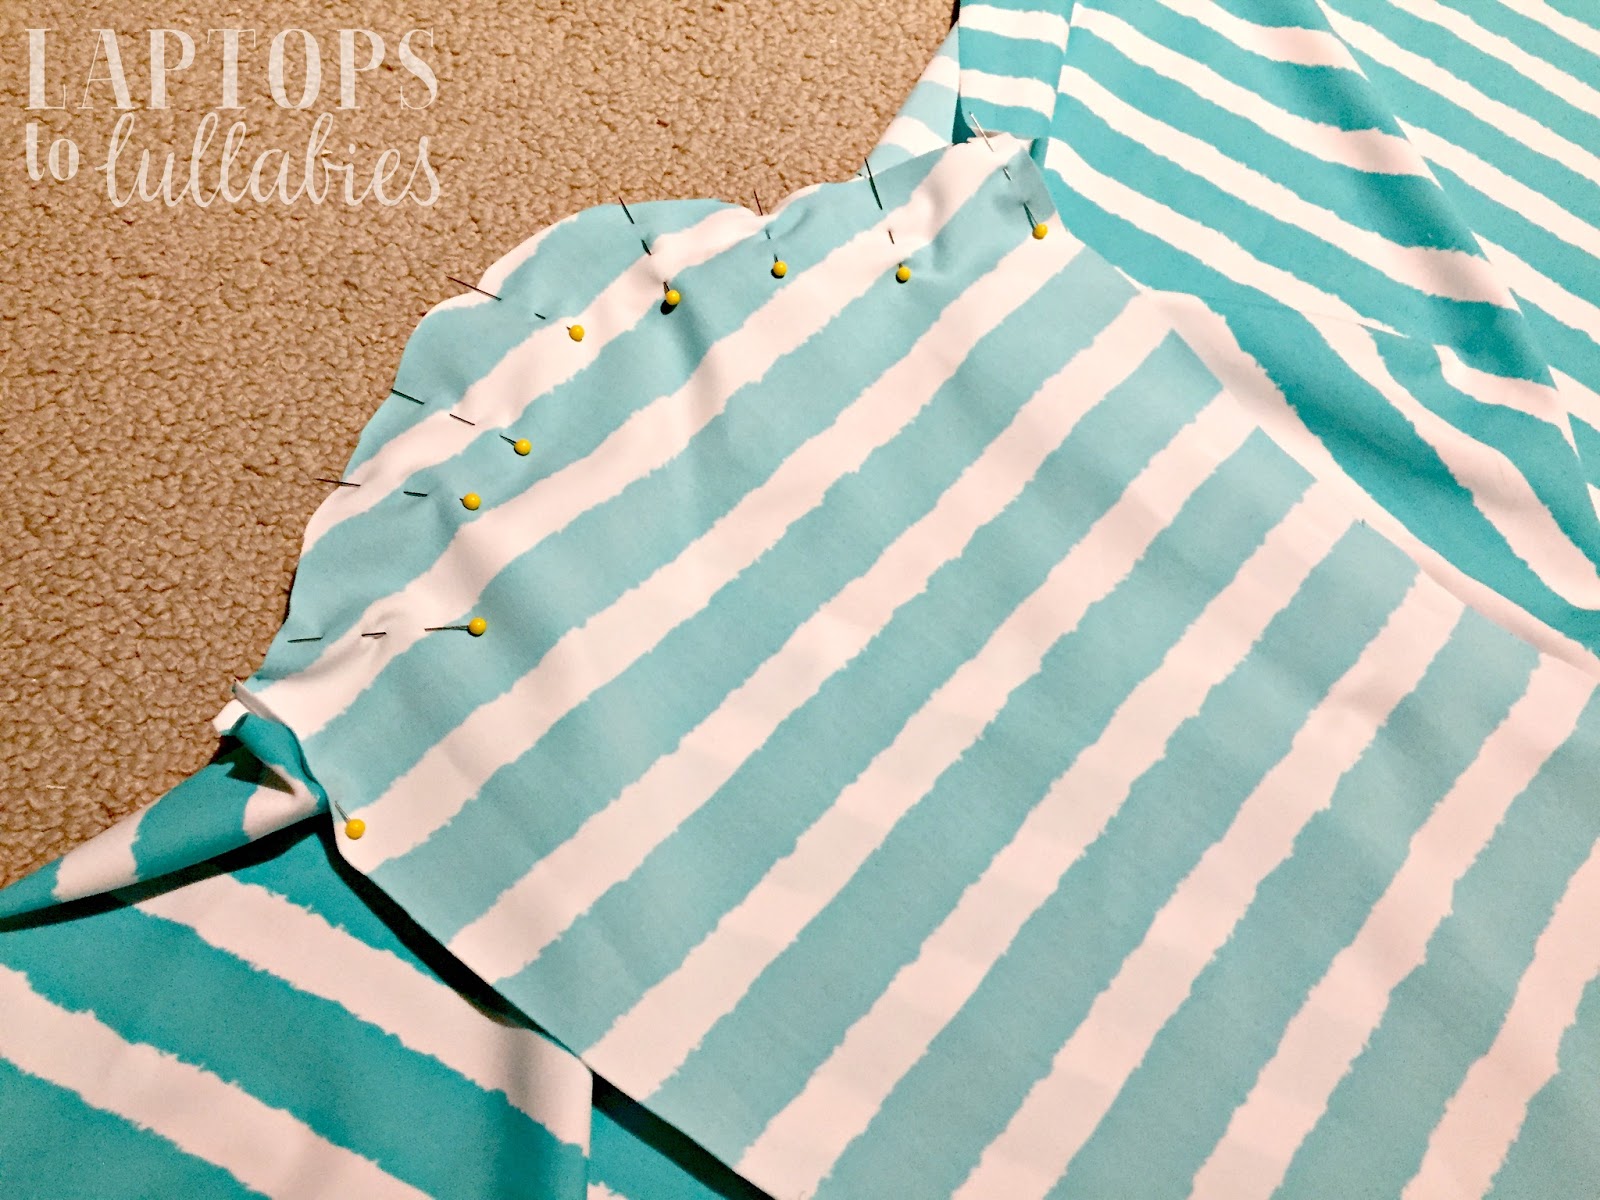
Once you’ve sewed the arms in place, it looks more like a shirt. Now you just need to sew from each wrist all the way up to the armpit, then pivot (hee, pivot) and sew down from the armpit to the waist.

Your shirt’s a shirt! Crazy, right?
Now it’s time to do the neckline, but you can skip this step if you want. Stretchy bathing suit fabrics don’t fray, and your kids won’t care.
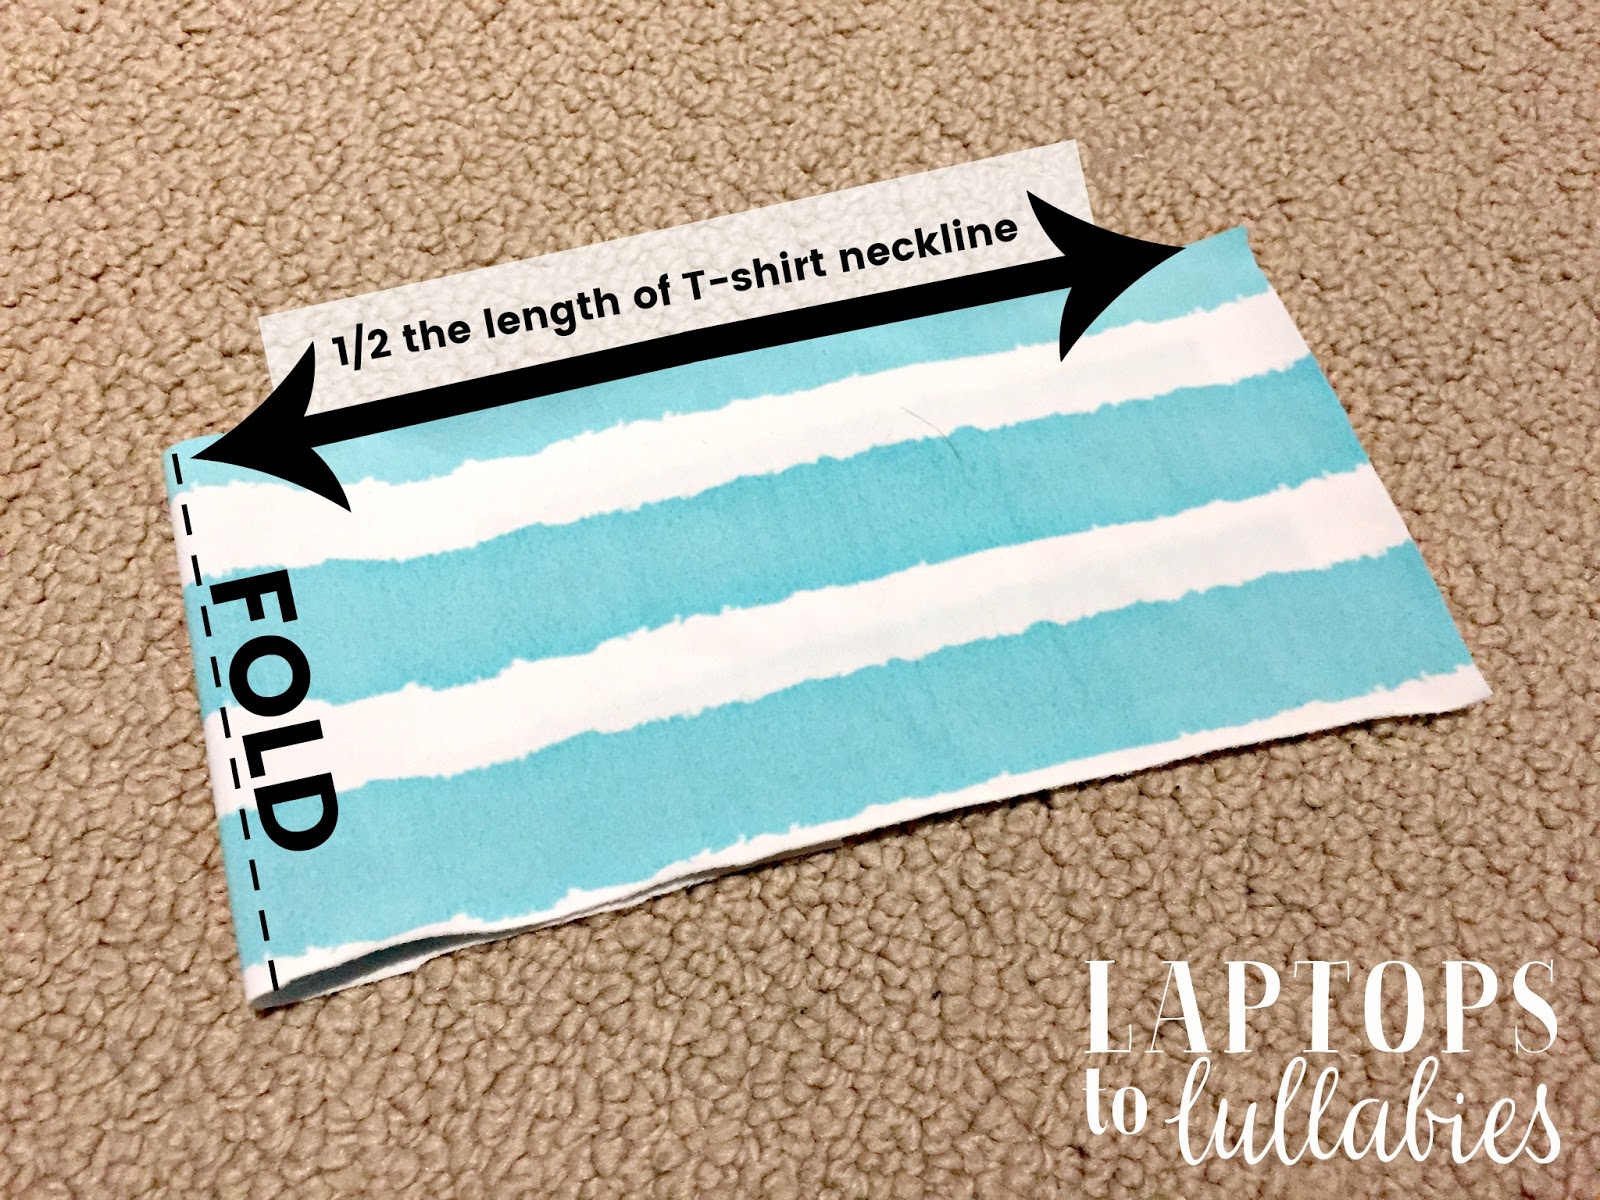
Cut a strip of your stretchy fabric that’s about as long as the neckband on your sample T-shirt and 3-4 inches wide. Totally eyeball it, it doesn’t matter.

Fold your little rectangle in half, lengthwise, so the right sides are together. Now it’s half as long as the T-shirt’s neckband, and there’s a fold at one end.
Now you’ll sew along the short end to make a tube. The tube is your neckband! It’s a little tall, so you’ll want to turn it right-side-out and then fold it down, like you’re turning it into a taco.

Doesn’t it look more like a headband than a neckband? Don’t worry. (And don’t mind my pyjama pants in the background.)
Take your shirt and put a pin in the centre of the neckband at the front and at the back. You can also put a pin in the front-centre and back-centre of your neckband, if you want. This will help you get the neckband on evenly.

Pin your neckband to the shirt’s neckline by matching up the pins. Then you’ll sew the two together. You’ll actually be sewing through three layers, since you folded the neckline, and this will neatly keep all of the raw edges together.

If you were sewing a traditional T-shirt, you might then flip the neckband around and top-stitch, but I like having the neckband of a swimming shirt be a little more like a turtleneck — it protects those little necks from sunburns!
Here it is …

For instructions on making cut-off leggings to use as modest bathing suit bottoms, check out my post on sewing your own leggings.

 |
| Pin these instructions for later! |


As featured on …


