
How to cook bacon in the oven


1. Stove-top bacon often needs to be cut in half so it fits in your pan.
2. Halved bacon does not taste as good as full bacon.
3. Not only is the bacon cut in half, but it shrivels up in the pan and gets even smaller.
4. It feels like you’re eating far less bacon. Which means you eat MORE bacon because it’s tiny bacon.
5. You have to wait for the grease to cool and then scrape the yucky white fat into the compost bin, ew ew ew.
6. It makes a goddamn mess of your stove-top and the dials. Grease city.
7. You’re going to get burned from splatter at least once.
8. It takes many, many batches to cook a full package of bacon in that one pan.
9. It’s hard to cook all of the pieces consistently.
10. I … just feel like lists should have an even number of items.
Cooking bacon in the oven is FAR superior because …
* You can cook the whole package at once!
* You don’t get splattered with hot grease
* No dirty pan to clean
* Your bacon stays nice and flat (and whole)
* It’s more like “restaurant bacon”
Ready to learn how?
1. Preheat your oven to 400F
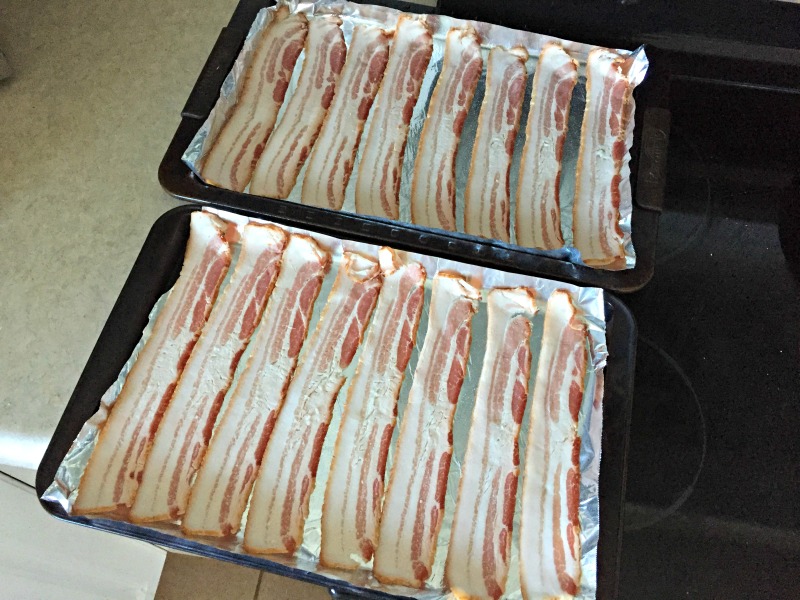
2. Cover 1-2 cookie sheets (with edges) with tinfoil.
No need to use nonstick spray because bacon is greasy AF, naturally.
3. Lay your bacon strips on the tinfoil.
Any direction is fine. I like to use two pans that fit side-by-side in the oven, which allows me to cook a whole package without any of the strips touching each other.
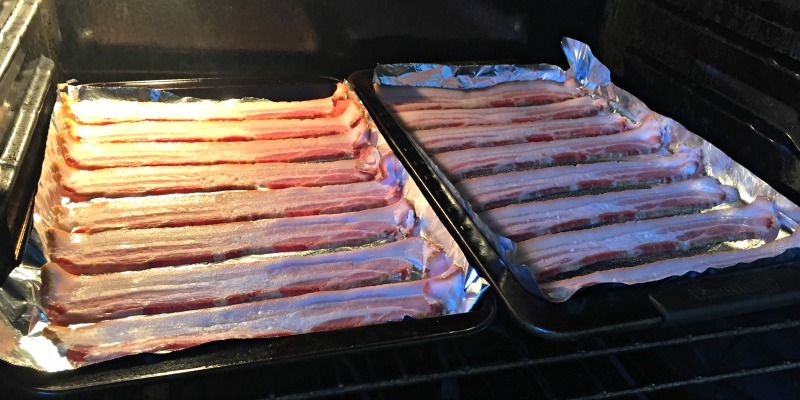
4. When your oven is preheated, slide the pans inside and set the timer for 15 minutes.
This is the point when you’ll want to check the bacon, because EVERY package is different — even if it’s the same brand. It depends on how the bacon-cutter has cut the bacon. Some packages have skinny slices (and more of ’em) and other packages have thick slices.
If your bacon looks perfect, take it out.
If it looks like it needs a few more minutes, try flipping it over with a pair of tongs first. Depending on what pan you’re using, this can be just the trick.

5. When your bacon looks just right, lift the pieces onto paper towels.
For me, perfect bacon is “bendy but firm.” If you leave your bacon in the hot pan, even just on top of the stove, it’ll continue to cook and get too crispy.

Once the pans cool, you can ball up that tinfoil and throw it straight into the garbage — and then put the cookie sheets back in the cupboard.
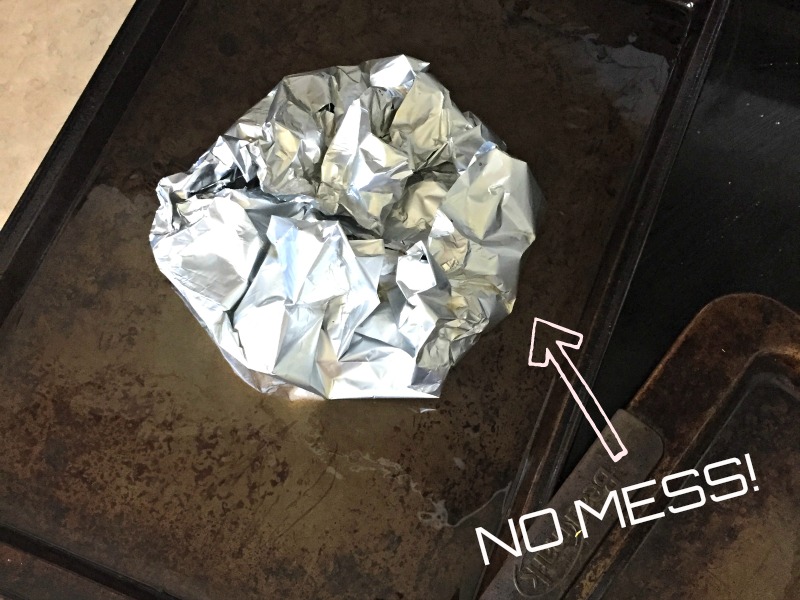
NO! WASHING! DIRTY! BACON! PANS!

The next time you’re cooking up some bacon, try doing it in the oven and let me know how it goes!


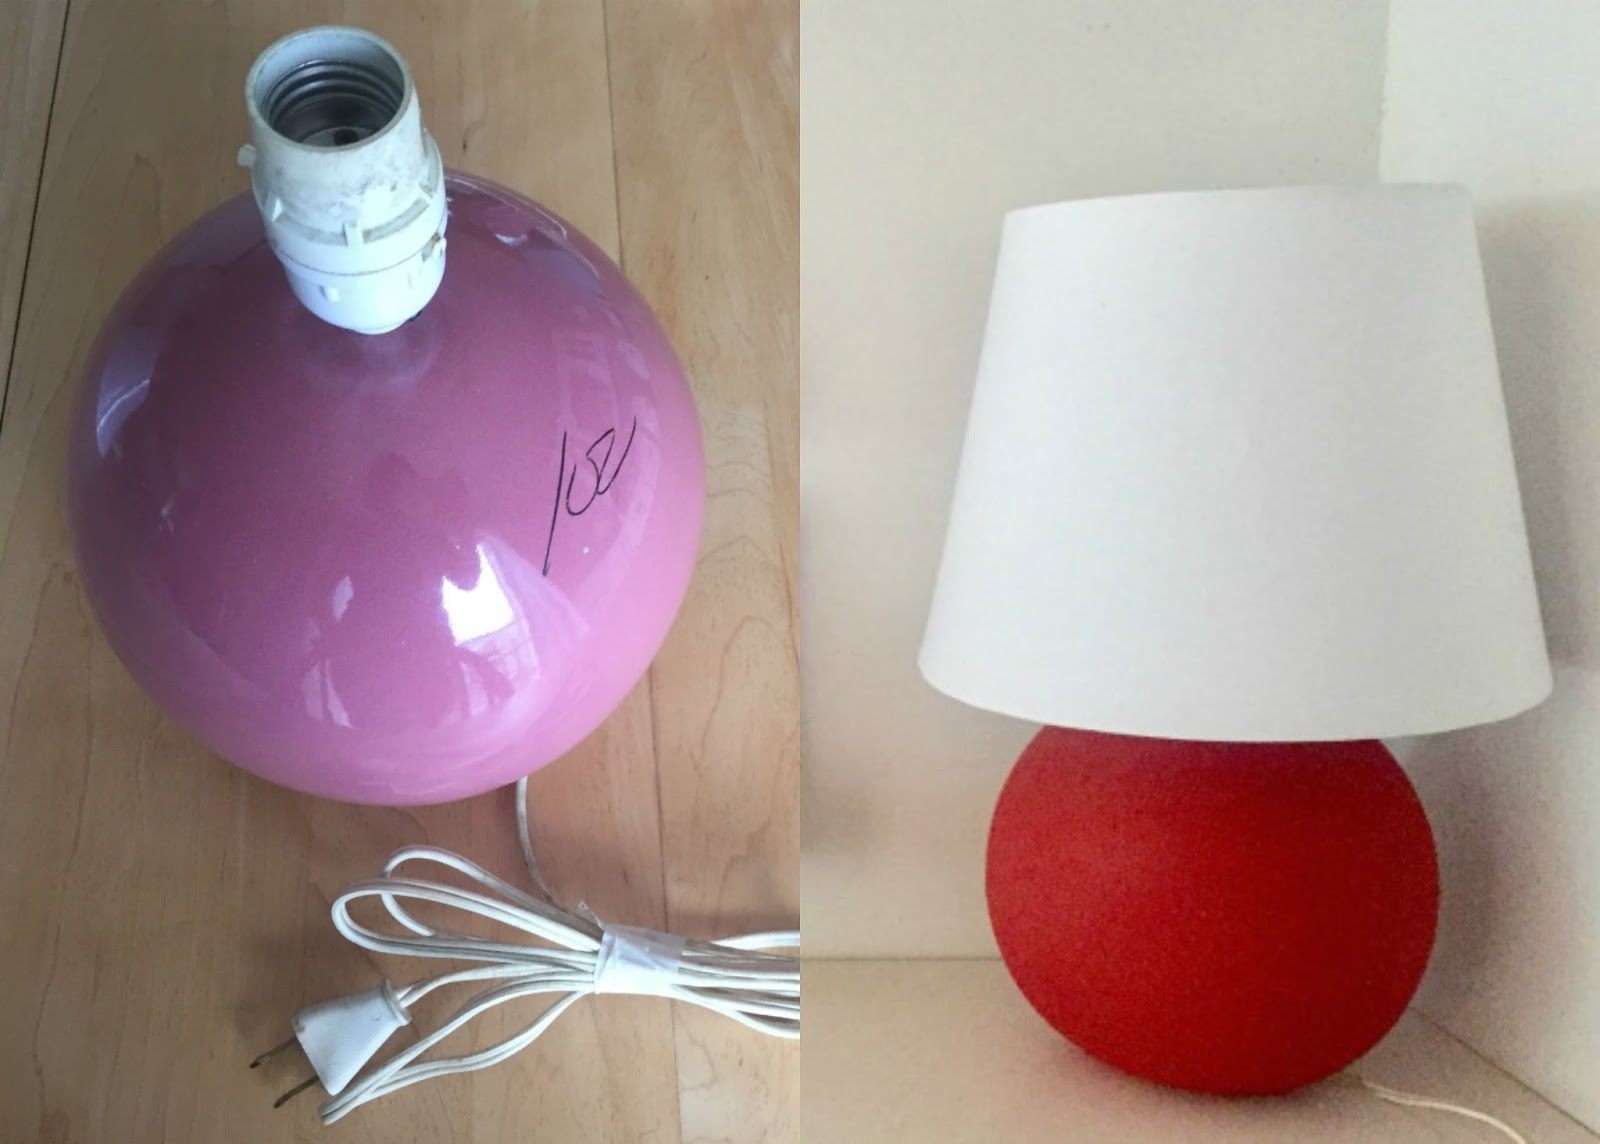
Refreshing a $1 lamp with chalk paint


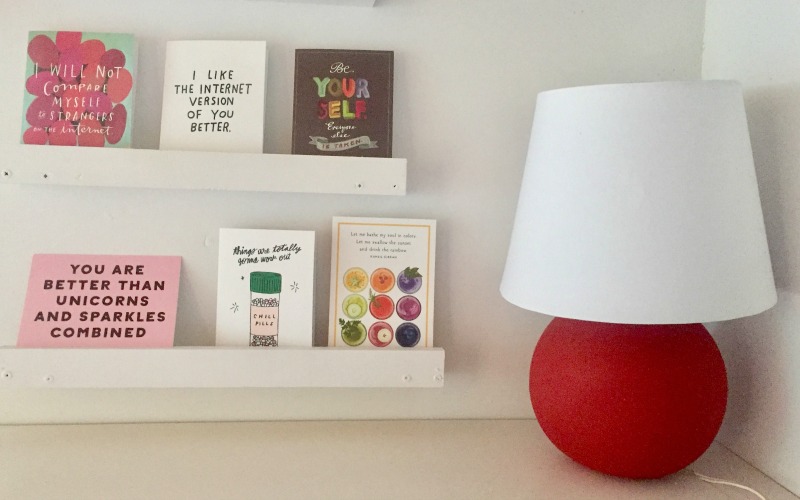
It’s the perfect cheery addition to this corner of my all-new DIY studio, but who knows if it will stay here forever.
That’s the beauty of lamps like this! They take about three minutes to paint, and you can repaint them and re-home them for years.

Quite the transformation, huh?
That was $1 well spent.
Don’t forget to check out the fun flea market furniture flips my friends are doing!

Click on the thumbnails to take a virtual lil’ round-trip:
document.write(”);
 |
| Pin this project for later! |
Finances on a Friday

Our daughter cried when we told her we wouldn’t be able to go to PEI this summer.
It hadn’t even been on our radar, but apparently it had been on her little barely-five-year-old mind. She looks at our photo books constantly and loves seeing the happy pictures of vacations past.
She must have been looking at the book from a couple of summers ago, when we went on our one-and-only family vacation to PEI for three (or was it four?) nights of camping by the ocean.

She cried when she brought up PEI and I had to tell her it wasn’t happening.
She cried, and so did I.
Right there in the accountant’s parking lot.
***
Nope, this isn’t the light “Happy Friday” post that so many bloggers reserve for the TGIF-iest of days.
Talking about money is hard.
Harder than it should be.
Harder than it NEEDS to be.
***
We have been struggling lately because of Reasons and those Reasons were the yucky beyond-our-control kind of Reasons.
(Those are the worst, aren’t they?)
Financial worries have ruined a lot of days for us, mainly me, lately. I have had dark, terrible days when it seems like nothing will ever be OK again. I have let the worry consume me.
We are not out of the woods yet, but today we made some decisions that have me feeling a little lighter inside.
I’m grateful for the caring professionals who have helped us figure things out. I’m also grateful to have a partner who is equally determined and disciplined (mostly, unless the dream of a truck is involved) when it comes to Being Responsible With Money.
***
Money is hard, but in the end it really is JUST MONEY.
You’re likely never going to be an ideal financial situation, or maybe you are, but it will kill you slowly if you let it fog up your mind.
Sometimes you pay things you don’t want to pay, but it’s for the best.
You take money from an account you really don’t want to take it from, but it’s for the best.
It’s all digital “money” organized into different digital folders in your online banking profile, and just because it doesn’t look the way you envisioned it doesn’t mean it’s “wrong.”
Sometimes you have to take a deep breath and realize you are — as difficult as it feels — on the right path, and that it’s just going to take MORE time and MORE discipline to get where you need to be.
xo
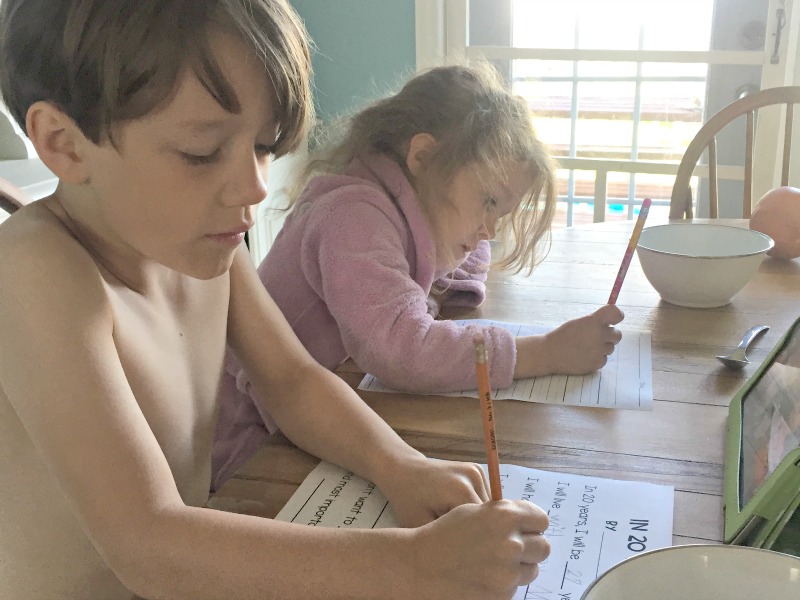
Why schoolwork is saving our summer vacation
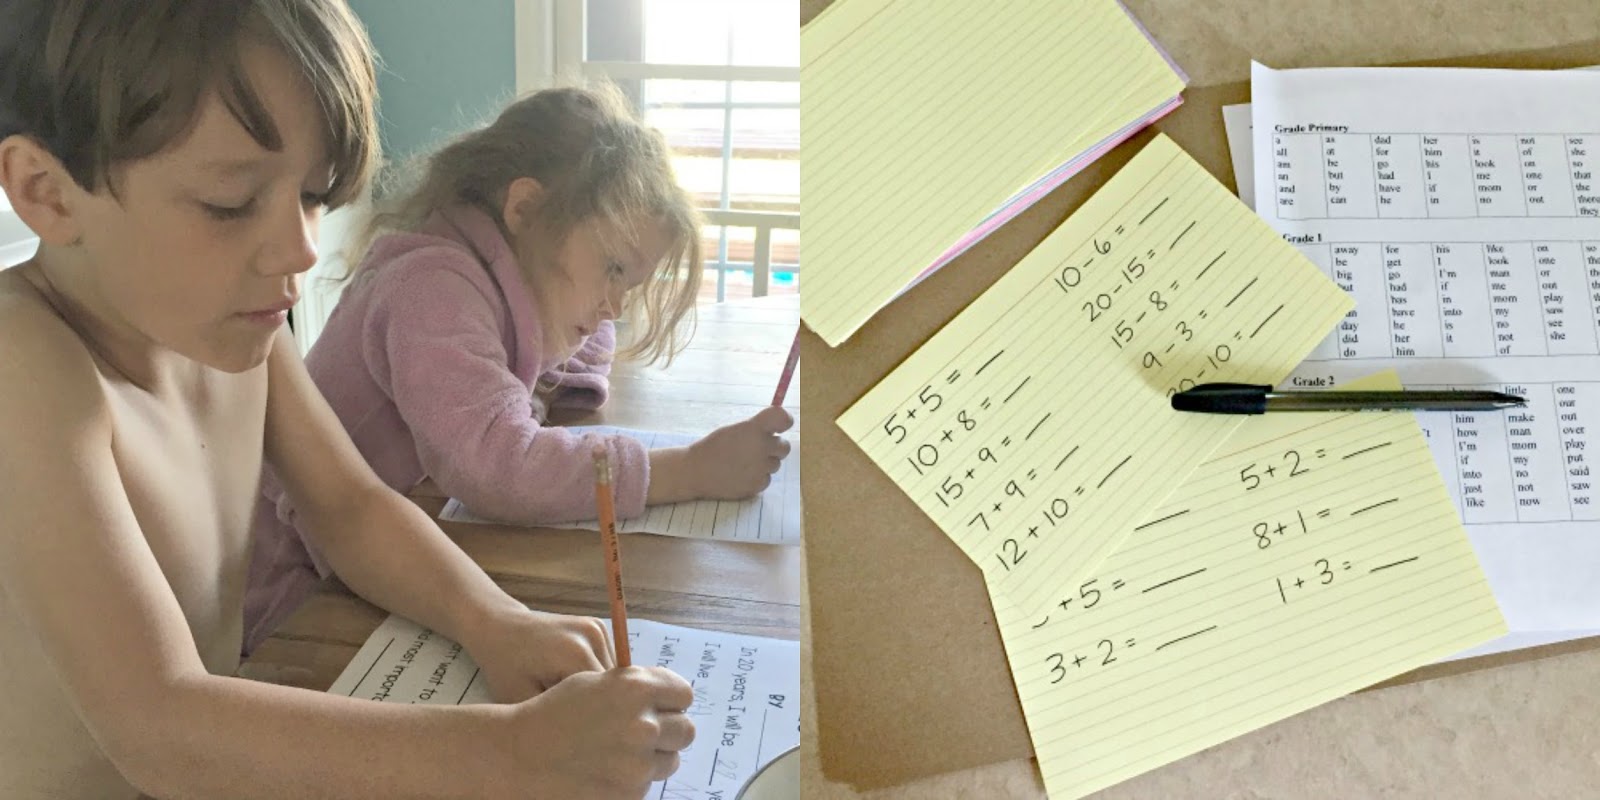
One of the most fun summer activities at our house isn’t swimming in the inflatable pool, playing on the new monkey bars or having water fights with the neighbours.
It’s a daily spelling test.
It all started exactly one week into summer vacation. The kids were staying up much later than usual because of the summertime backyard merriment. Dinner was served later because everyone was playing happily with friends and then bedtime was delayed because everyone had gathered in the yards to chat and watch the dogs run around.
The much later bedtime meant everyone was too tired for our nightly reading practice with our soon-to-be Grade 2 student. After a full week without him reading to us, I knew we had to change things up. If nighttime could no longer be reading time, then I’d move it to the morning when everyone’s fresh and awake.
Then I decided to go even further. After all, I reasoned, his reading’s good but his writing and spelling could use work. What if I changed the kids’ summer morning routine from lazing in front of the iPad to a casual form of, dare I say it, homeschooling?
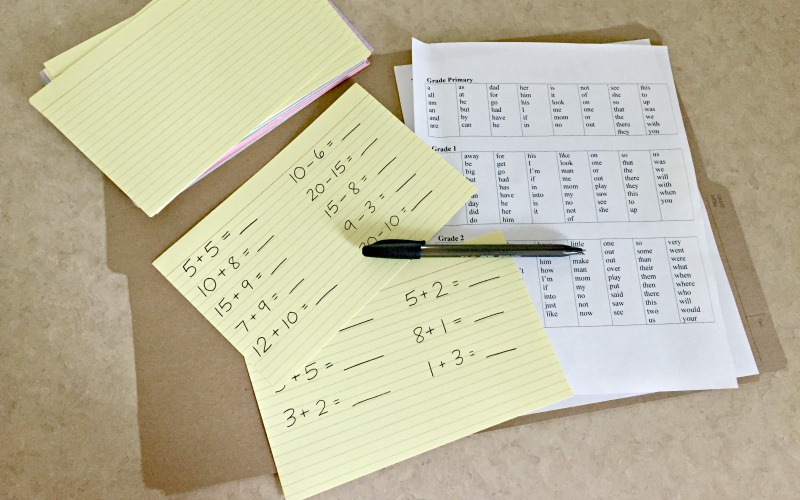
I announced the change that evening.
“When you wake up in the morning, no iPad or TV — or any screens,” I added. “Instead, you’re going to read one long book (or two short books) to your sister and then we’re going to do some writing or spelling or math together. Fun, right?”
Continue reading in my weekly parenting column, The Mom Scene …
A sneaky way to remake a $3 footstool

Footstools are apparently the unsung heroes of the thrifted furniture world. They’re cheap, quick to make over and I can’t get enough of them.
My obsession started when I tucked a low footstool under my desk a few months ago. I couldn’t believe how much more comfortable I felt with my knees slightly raised. I felt like one of those happy 90-degree-sitting stick figures in an occupational therapy brochure on workplace health.
I marveled over that secondhand footstool and asked my thrift-savvy mama to keep her eyes peeled for more of them.

I redid one for our daughter’s bedroom — painting the legs gold and covering the top with fluffy white faux fur — but then she delivered one that had me stumped.
The price was right — three dollars — but it the foam was severely dented on one side, like the previous owner’s feet had stuck to a single position for years or even decades. If I was going to redo it, it was going to need a life-saving foam transfusion — stat!

After a couple of coats of white paint on the wooden legs (Casement by Fusion Mineral Paint), it was time to fatten up the footstool’s cushion.

I had two squares of foam leftover from another project (remember those extra-long window seat cushions?) but neither was large enough to cover the top of the footstool.
I didn’t want to be wasteful, so this is where I got a little daring and decided to see if math would be my friend (for the first time ever).
I cut both foam squares diagonally so I had four triangles, and then fit the triangles together to make one big square.

Then I laid the footstool on top, traced a circle around it, and cut it out.

I didn’t even bother gluing the pieces of the circle together — just carefully transferred the whole thing onto the fabric (wrong side up) and laid the footstool back on top.

Reupholstering a chair seat or a footstool is easy because you’re just wrapping it in fabric and stapling the underside. I pull the fabric tight on each side and do four preliminary staples, and then continue around — pulling and stapling — until the whole piece is wrapped snugly.

When I flipped the footstool right side up, it was looking great. I’d picked 0.75m of black and white fabric with a tiny gingham print from Atlantic Fabrics, since I planned to use the footstool in the basement near the daybed — which has grey, black and white cushions and quilts.
There was just one problem: you could kind of tell I’d cheated with the foam. From a distance, it looked fine. But up close, you could see the lines where the four triangles met to form the circle. Arghhh!
I had an idea to fix it, but was I brave enough? There was a good possibility I’d ruin the whole thing in the process. I took a couple of “after” pictures — just in case the next step really did wreck everything — and hunted for a very long screw and a white button. I was going to attempt an unconventional “tufting” method, and I had no idea if it was going to work.

I used my drill to turn the button’s two holes into one larger hole (big enough to fit the screw), and then screwed straight down into the middle of footstool — fabric, foam and all. It took a couple of tries to get all the way down to the wood at the bottom, but eventually I had a deep tuft. The button prevented the top of the screw from busting up through the fabric, and also faked the look of a true needle-and-thread tufting job. Pretty sneaky, right?
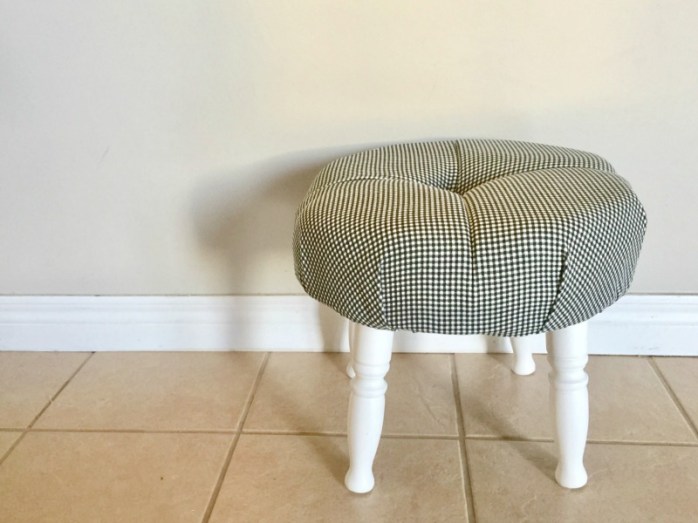
Relieved I hadn’t destroyed the footstool, I snapped another set of “after” photos and then settled it in front of our black armchair. It’s a tall footstool so it’s perfect for propping up your feet while you lean back.
Mom, if you’re reading, keep looking for secondhand footstools, please — I can’t get enough of them!


As featured on …


