
Five quick ideas

2. Make veggie skewers
D is funny about vegetables — sometimes he loves them, sometimes it’s a battle. I was amazed when Darling Husband got the idea to make these cute little skewers about a month ago. D positively GOBBLED them down, while we watched in awe. We’ve done this trick since then, and it doesn’t always work, but it seems to have pretty good results.

3. Organize puzzles in plastic containers
D loves doing puzzles, but I quickly got tired of the ratty boxes (which would sometimes “eat” pieces because they would get stuck under a flap). So I bought some containers at the local Dollarama (LOVE Dollar Stores, love ’em) and got to work snipping out a little “preview” to tape on the top, as well as a larger “preview” to tape on the inside of the lid. Works like a charm!

4. Make BabyLegs from old socks
I bought these socks a couple of years ago, and they were one of my fave pairs. Hot, hot pink with grey stripes — and KNEE-LENGTH at that? Amazing. (Don’t worry, I only wore them under pants). I didn’t want to part with them when the toes wore out, so I cut off the feet to make BabyLegs for C. She’s already worn them a few times, and they’re awesome!

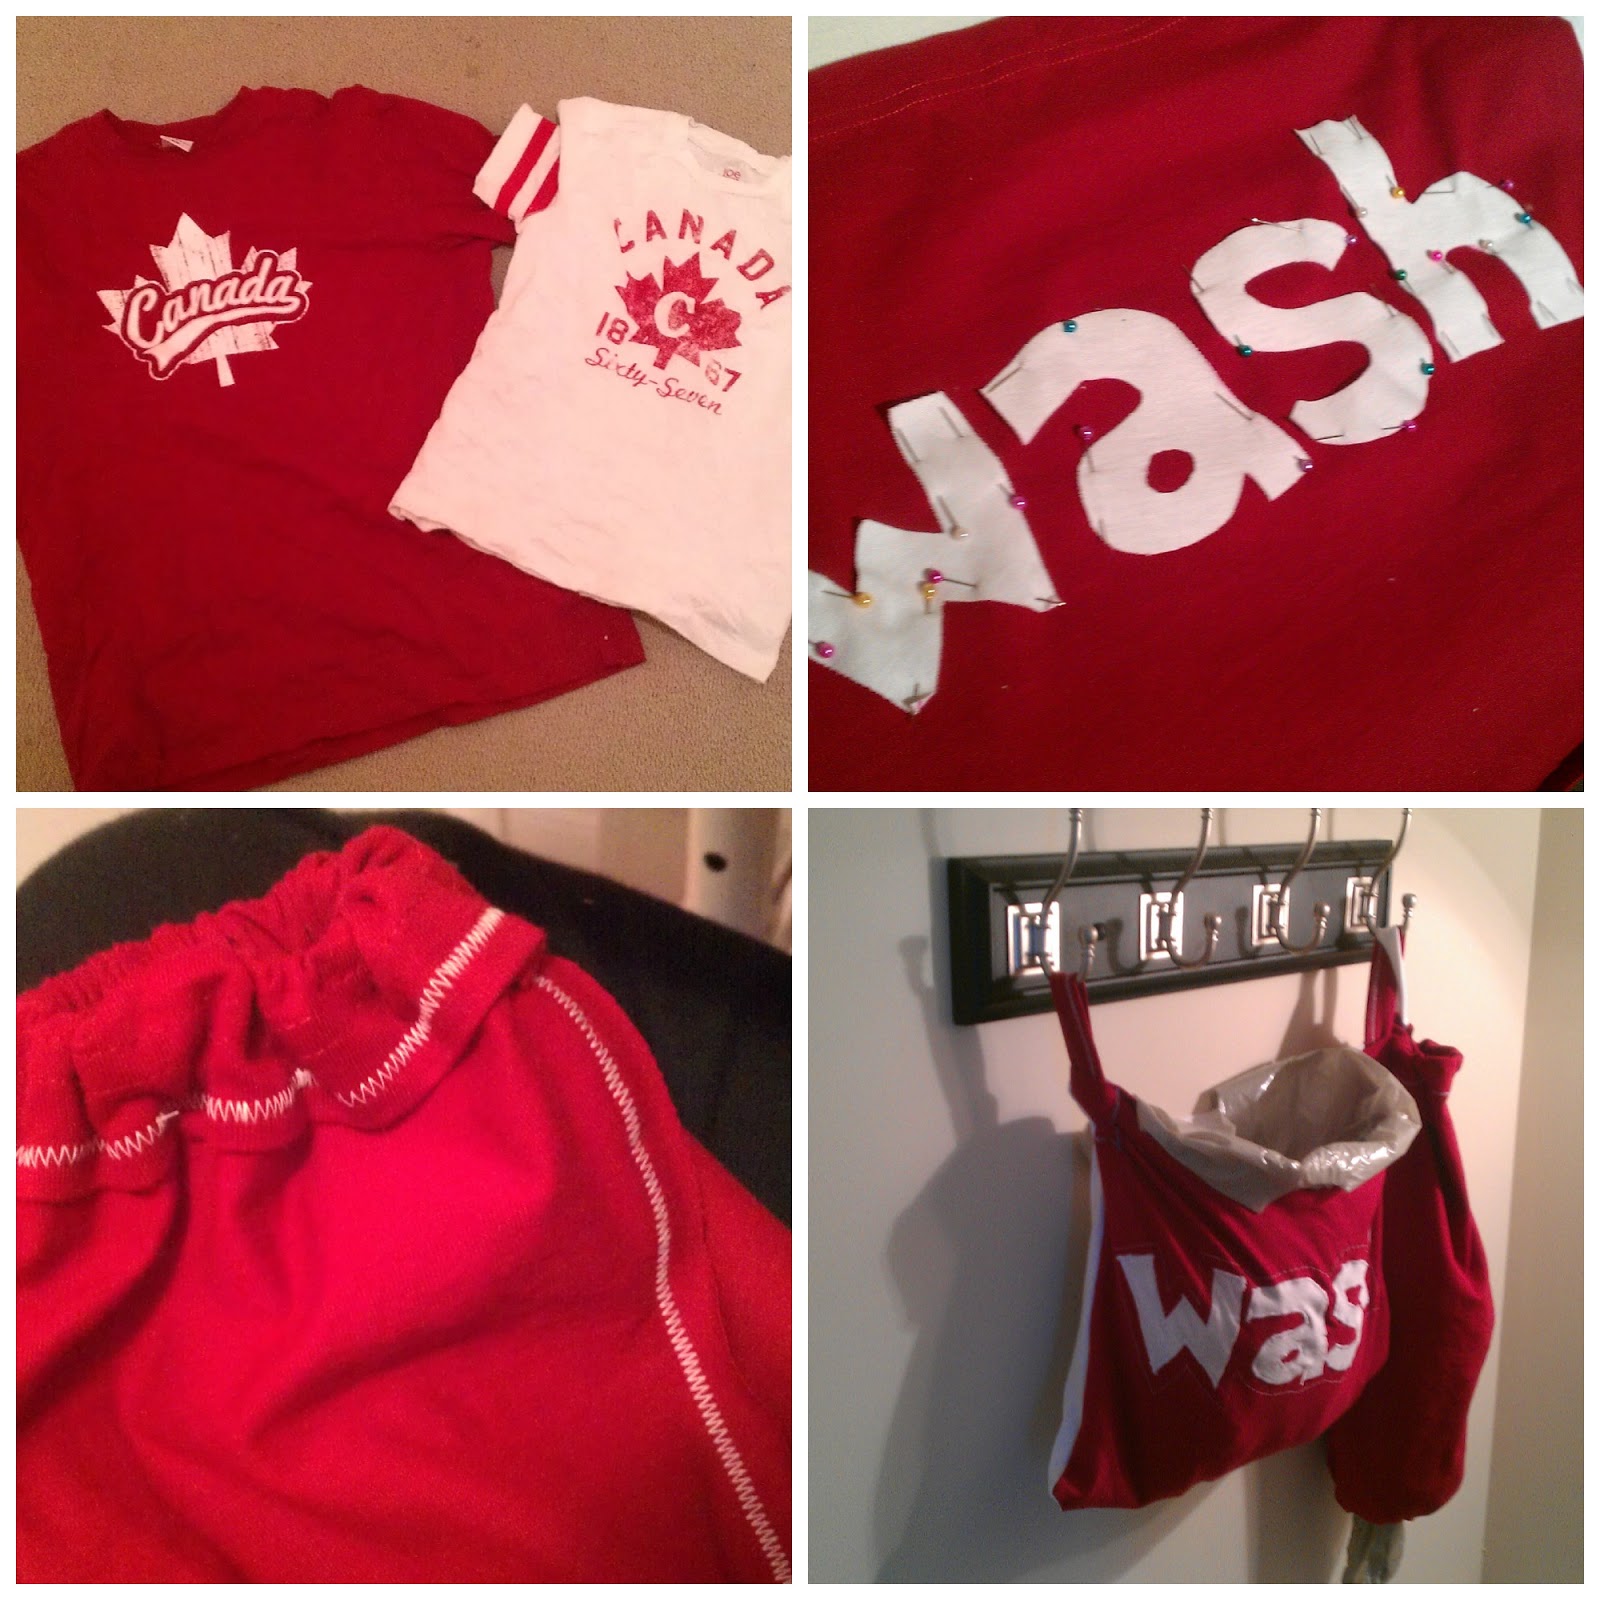
5. Make a laundry bag and a plastic bag dispenser from old T-shirts
We have a set of hooks just inside our basement door (off the kitchen), and I used to hang a grocery bag there for all of my “kitchen laundry” — dish towels, dish cloths, bibs, baby washcloths. I also had another grocery bag there to hold — wait for it — empty grocery bags. It looked pretty crappy. So I grabbed some old T-shirts one Sunday during naptime, and threw together a laundry bag and a tube-like bag dispenser. (I still use a plastic bag INSIDE the laundry bag, so that I don’t have to wash the laundry bag) I’m not crazy with how the appliqued letters turned out — stupid stretchy T-shirt fabric — and now that the basement is painted, I may make a different set, but it’s still a big improvement from plain old grocery bags.
Little projects are sometimes the most satisfying, because you can do them quickly and start appreciating the results right away — don’t you think?
xoxo
A modern-day tale of loaves and fishes
 |
| Homemade hamburger buns OMGGGGG |
 |
| Sloppy Joes fit for a Queen! |
 |
| Teeny tiny pizzas are a favourite around these parts |
 |
| They were delicioussssss |
 |
| I just put dough-balls into my mini-muffin pan, brushed them with melted butter, sprinkled them with garlic powder and parm, and let them work their magic! |
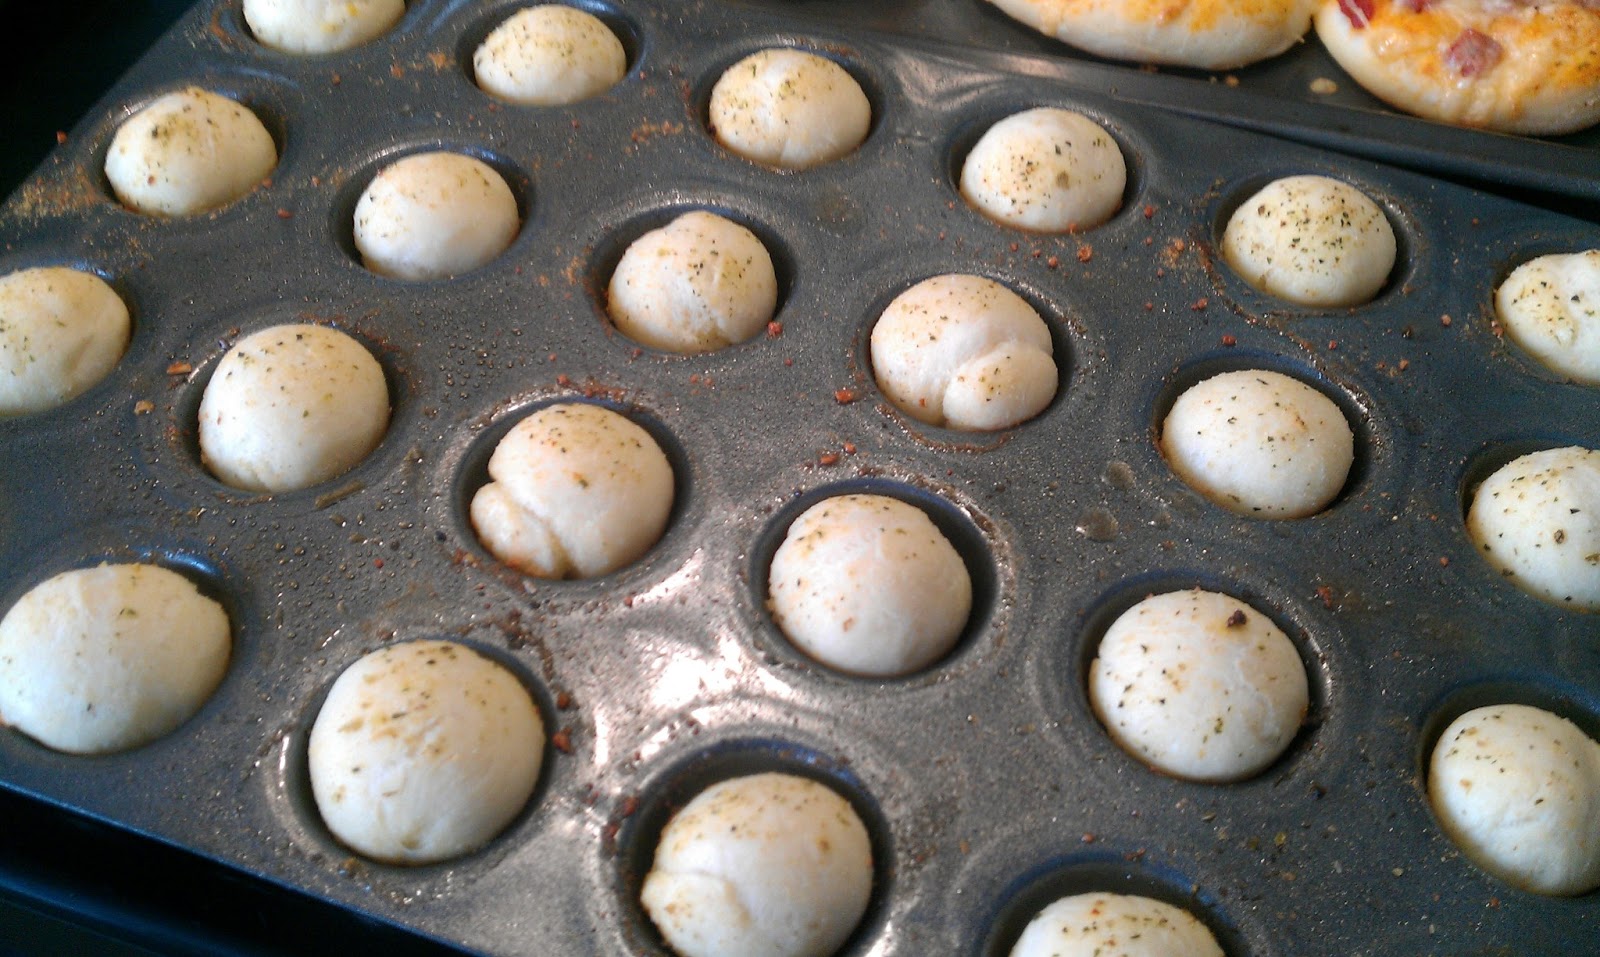 |
| Heavenly little pizza bites, hot from the oven! |
 |
| We ate these dipped into leftover pizza sauce. Little D went nuts over them! |
 |
| One breadmaker dough recipe = three delicious dinner options! |
I have to say, I get a LOT of use out of my breadmaker — and we almost never, ever use it for bread. Ours is this one — the Black and Decker All-in-One — and it makes the bread kind of strange-shaped. It doesn’t fit into our toaster, anyway.
But it’s awesome for making cinnamon buns, pizza dough (our recipe makes THREE huge pizzas), hamburger buns, rolls, demented bunny/cat buns, and any other carb-y deliciousness you could want. (And yes, Lindsey, you really should buy one! I know you’re reading this and thinking about it again!)
The breadmaker? Yeah, I’ve got it mastered.
But that’s about the height of my culinary talents at this point!
When your Pinterest recipes are FAILS …
 |
| This is what I TRIED to make. It’s called Man-Pleasing Chicken, and those of you who are cooking-inclined can find the recipe here at Witty in the City. |
 |
| My first mistake (of many) was probably not using chicken thighs, as the recipe suggested. We only buy boneless chicken breasts, but I *thought* it wouldn’t be a big deal. (Truthfully, this probably would not have mattered to a real cook, and I’m sure my major mistakes came later …) |
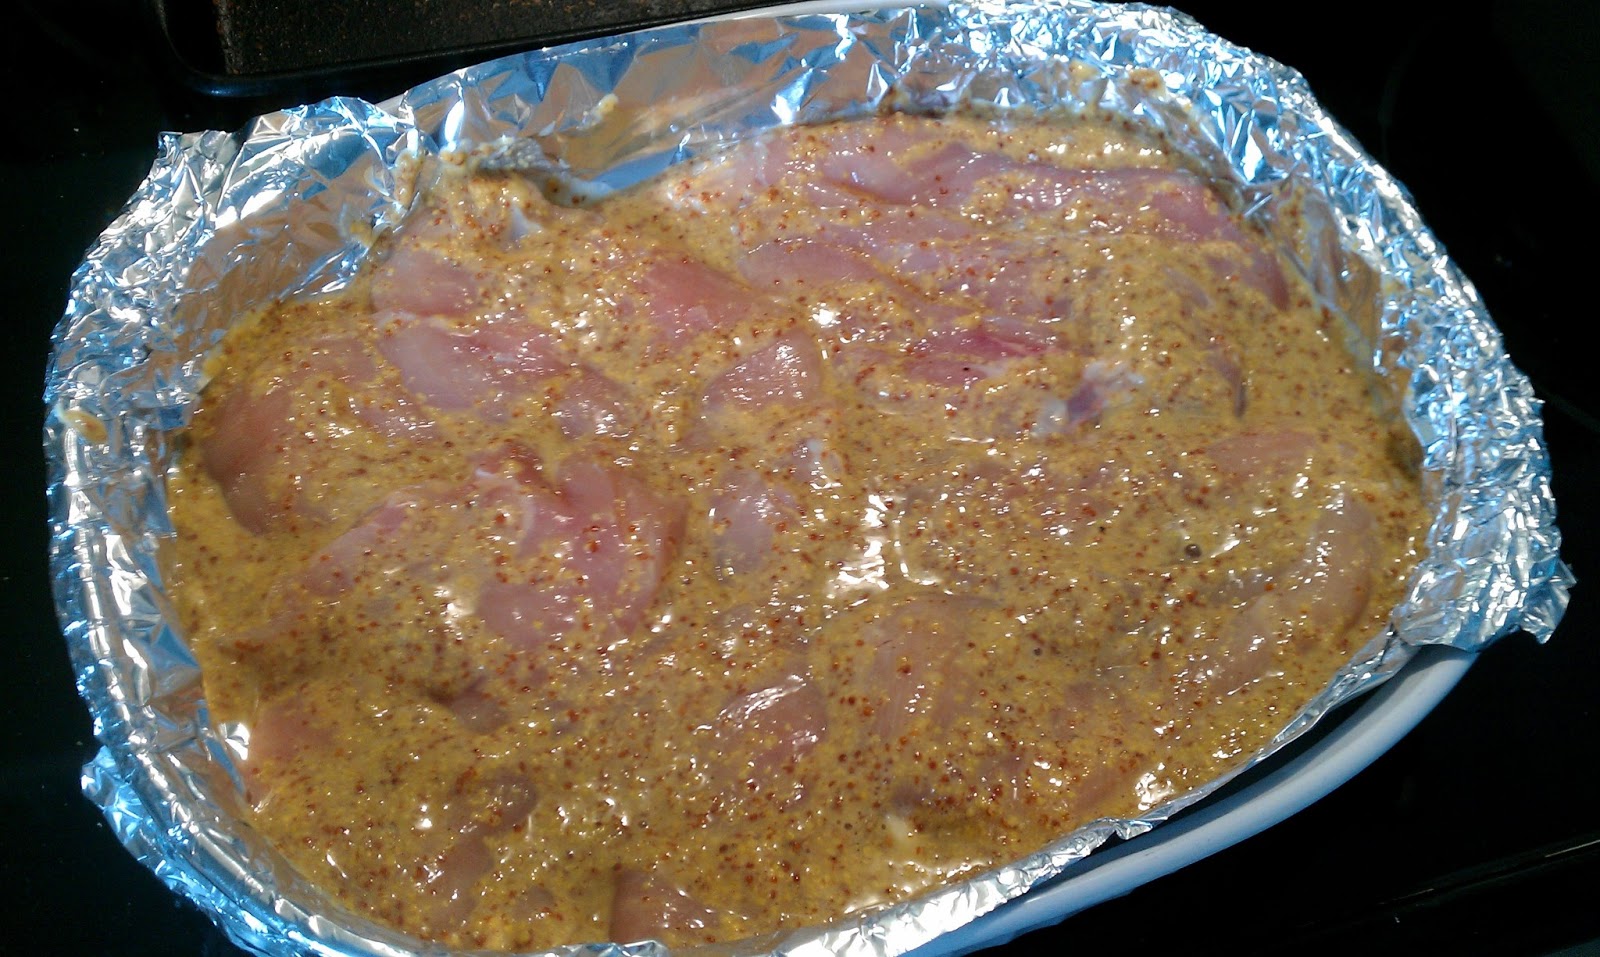 |
| I mixed up a goopy mixture of Dijon mustard, maple syrup, rice wine vinegar, fresh rosemary, and salt and pepper. Except our grocery store didn’t have rice wine vinegar, so I used regular white vinegar (oops). And we didn’t have fresh rosemary |
 |
| Um, believe it or not, this is a shot of the cooked chicken. Doesn’t exactly look like the picture, does it? |
 |
| Here it is, cut up for Baby C. Looks more appetizing when you can’t see the gross pan-ful of it, doesn’t it? |
 |
| C thought it was good, but that girl will eat anything. |
 |
| The real man-pleasing chicken versus MY crappy version. FAIL. Darling Husband and I decided we didn’t like it mostly because we have never eaten Dijon mustard before, and apparently we don’t like it. So, um, if you don’t like Dijon mustard, you won’t like this chicken? I guess?
(Luckily, we were able to salvage it by scraping off the mustard-y coating and chopping it up for wraps) |
 |
| Next on my list was Chicken Tamale Pie from Pinch of Yum. I thought FOR SURE we would like this recipe, because we adore Mexican food (and eat it like twice a week). Plus, I liked the idea of a cornbread-y delight on the bottom of the pie. Mmmm. |
 |
| If you’re in Canada, this probably the only “corn muffin mix” you will find. Apparently we don’t eat much cornbread up here? |
 |
| I mixed up a bunch of stuff (um, here are the more specific terms) including cornmeal muffin mix, taco seasoning, and cream-style corn (I’d definitely never bought that before). |
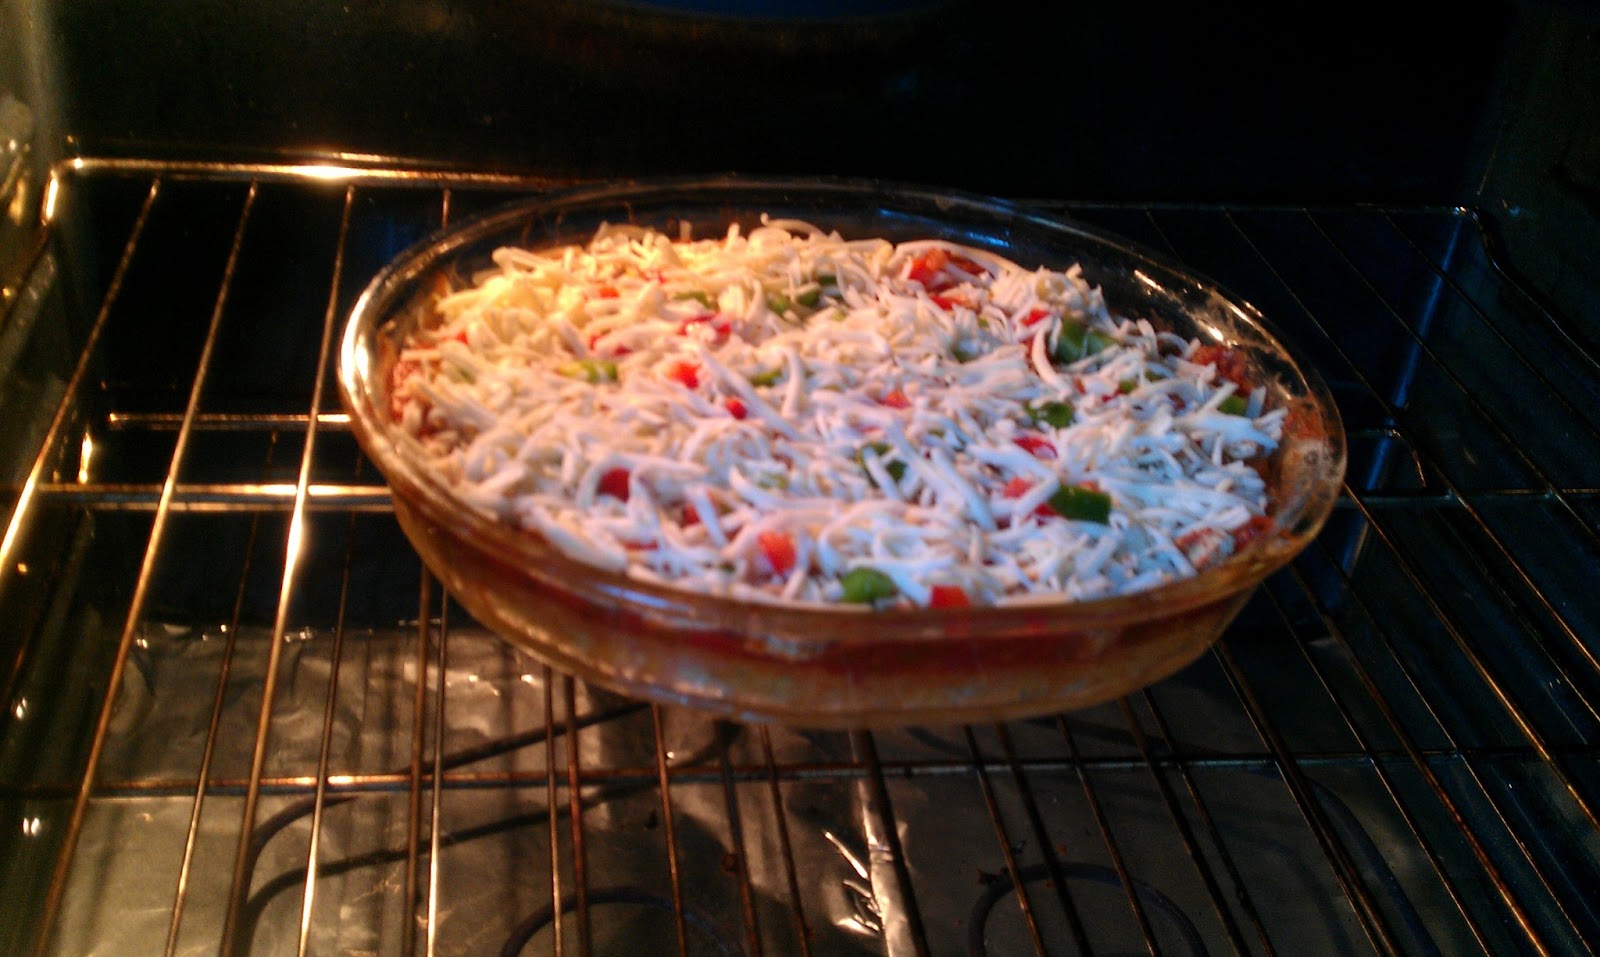 |
| Basically, you make a “pie crust” from the muffin mix and mushy canned corn, and then you add your toppings and re-bake everything. I made some MAJOR cheese substitutions (oops) because what the hell is Raclette? Or Cotija? I’m sorry, but we buy mozzarella, cheddar, or marble. We are not fancy.
Oh, and get this! The grocery store employees could not locate enchilada sauce! I swear, I’ve bought it before, but I had no less than four employees come up empty-handed. They were all doofy teenage boys who looked at me like I was asking for chicken eyeballs or something, and asked what it was. I was like “Um … enchilada sauce? It’s for making enchiladas? They’re like … Mexican chicken cheesey lasanga? Sort of? …” Long story short, I had to use salsa instead (oops). |
 |
| The finished pie! Yeah, it didn’t look like the picture, but it was super-cheesy. SURELY, it can’t be bad? … |
 |
| Something is definitely not right here. Maybe it was the lack of whatjamacallit? Raclette? Cotija? |
 |
| It may look OK in this picture, but it was absolutely TERRIBLE. The bottom of the pie was extremely mushy and gloppy (which is normal, according to the recipe — “it should be similar to a masa-type corn cake or corn pudding”). It was absolutely inedible. So Darling Husband and I did the mature thing and scraped off the top (which was just chicken, cheese, salsa, peppers, etc.) and ate that. And it was good. |
 |
| For my final “new recipe attempt,” I decided to make these adorable Easter Bunny Rolls that everybody and their dog was pinning.
However, when I went to one of the (many) (different) pins with this exact photo, it was actually for some kind of Asian roll that used a papery substance as the top layer. So I grabbed this Betty Crocker Bread Machine Dinner Roll recipe instead. The dough was super-easy to throw together, and it rose beautifully. |
 |
| But as you can see, um, shaping them into bunnies was not easy. |
 |
| I made a few into Grumpy Cat, because they were heading that direction anyway. |
 |
| I see that some of the pinned versions out there talk about “smoothing the ears” before baking so you don’t get “devil horns.” I clearly did not read those versions until JUST NOW WHILE WRITING THIS POST. (Oops).
Word to the wise: do NOT bite into one of these suckers before removing the horns. I hurt the roof of my mouth on those bad boys. OW! |
 |
| Evil, evil little bunny/cat/devils. |
 |
| These two got a little frisky in the oven. |
 |
| Probably my most hilarious cooking fail to date, BUT they were still 100% delicious. I would highly recommend the Betty Crocker Bread Machine Roll recipe, and I’m going to make them again (just not in this particular evil form). |
***
Have you ever tried to make a recipe from Pinterest and failed SPECTACULARLY like me? Please tell me that you have, so I can start building up my cooking confidence again!
xoxo
Live More With Less: Week 7 (Basement)

- My messy master bedroom closet
- My two-year-old’s bedroom
- My 10-month-old daughter’s bedroom
- My home office/craft room
- My kitchen/dining room
- My bathroom cabinets
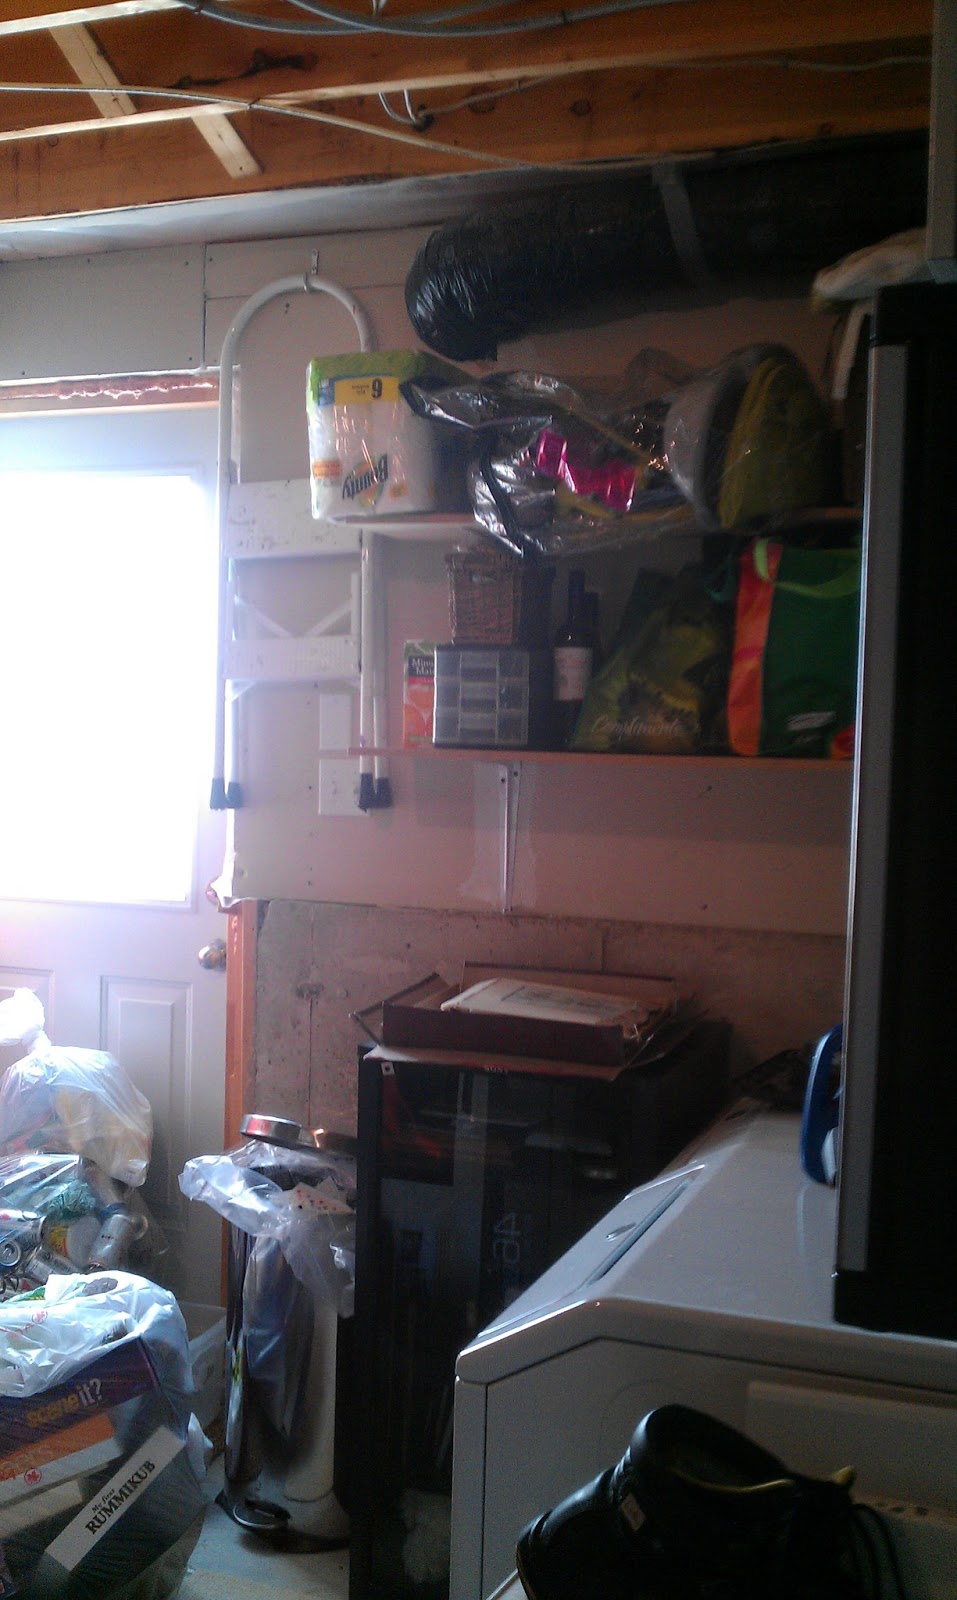 |
| Here’s our creepy utility room’s “before” shot. I could never find ANYTHING in there! |
 |
| So I bought a hanging shoe rack (thank you, Pinterest), hung it on the back of the door, and got to work organizing all of the essentials that I could never find (duct tape, zip ties, measuring tapes, etc.) |
 |
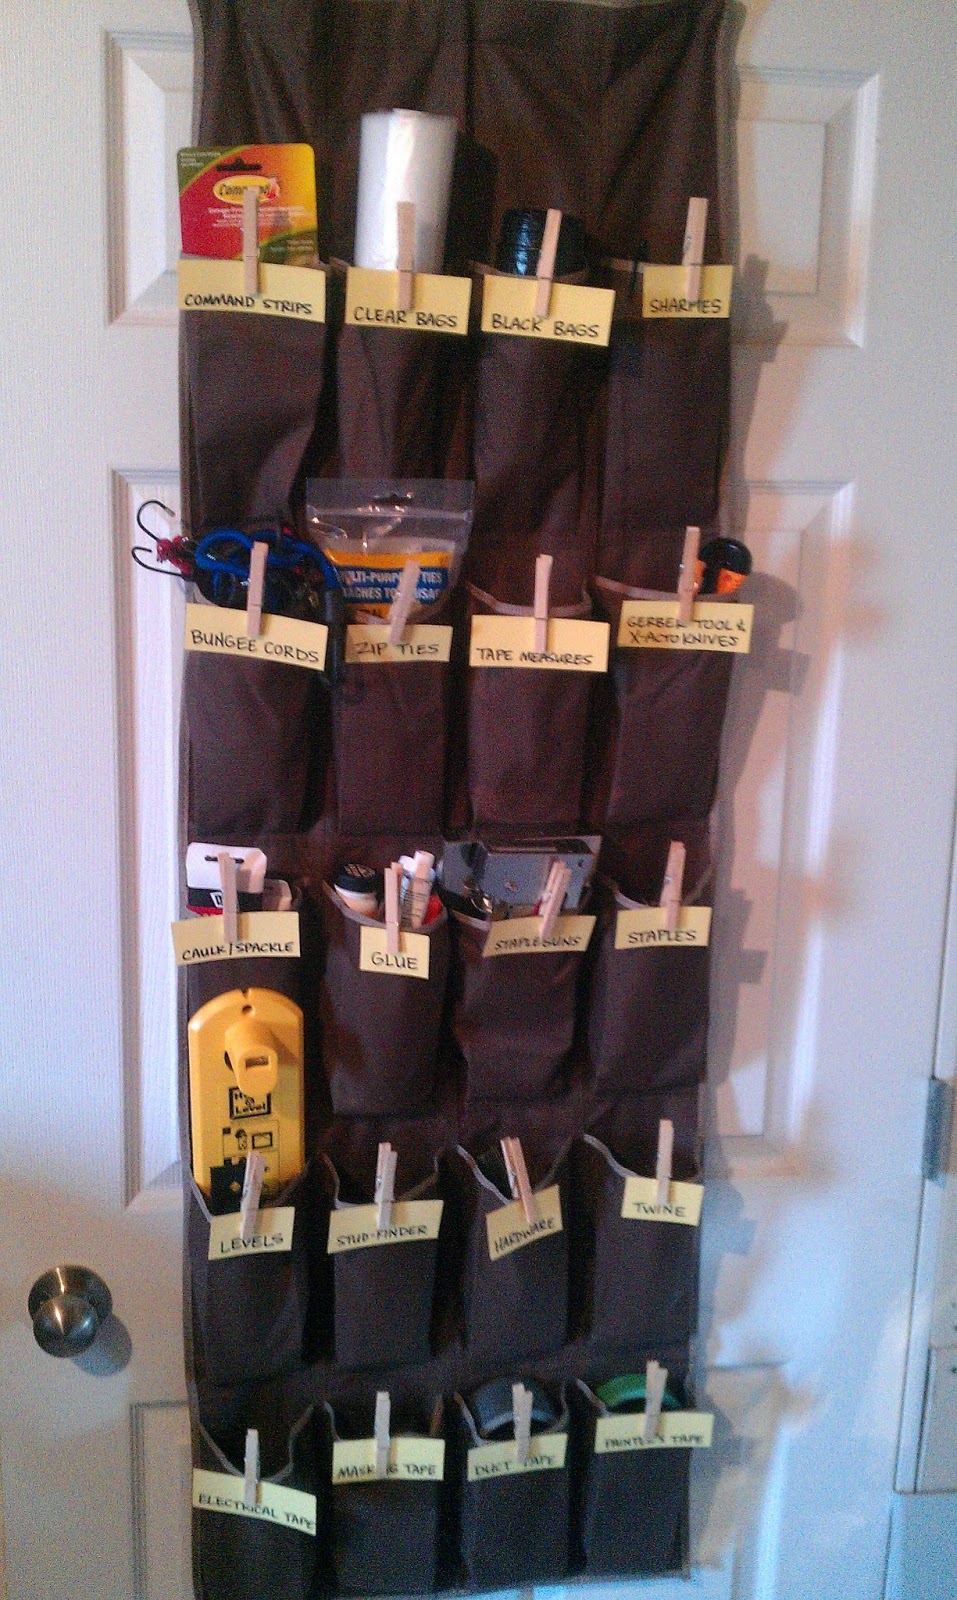
| It kind of makes my heart sing! (Bonus: Darling Husband grudgingly admitted it was a lot easier to find things!) |
 |
| Darling Husband is kind of bad for tossing things into drawers/buckets/bags/containers and not caring if things get mixed up. As we all know, that gives me major anxiety. So I helped him out! Tee hee. |
 |
| Can I just tell you how GOOD IT FELT to know exactly where the tape-dispenser was? And be able to use it, put it back, and know I’d be able to find it again someday? Seriously, GOOD FEELINGS ALL AROUND. |
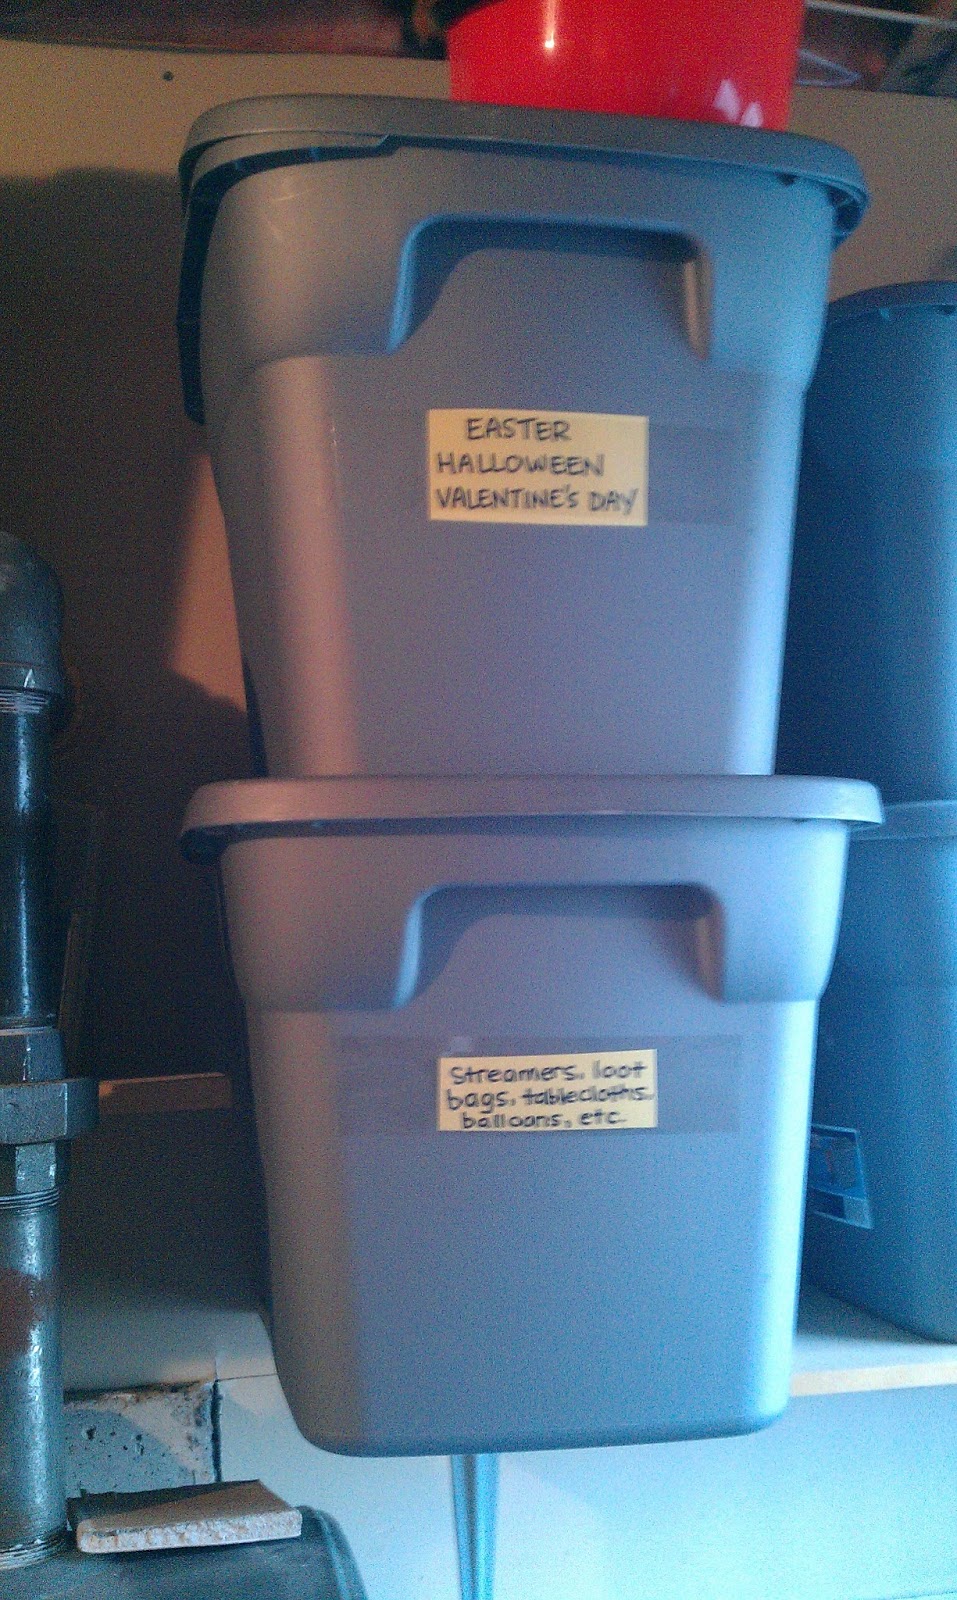 |
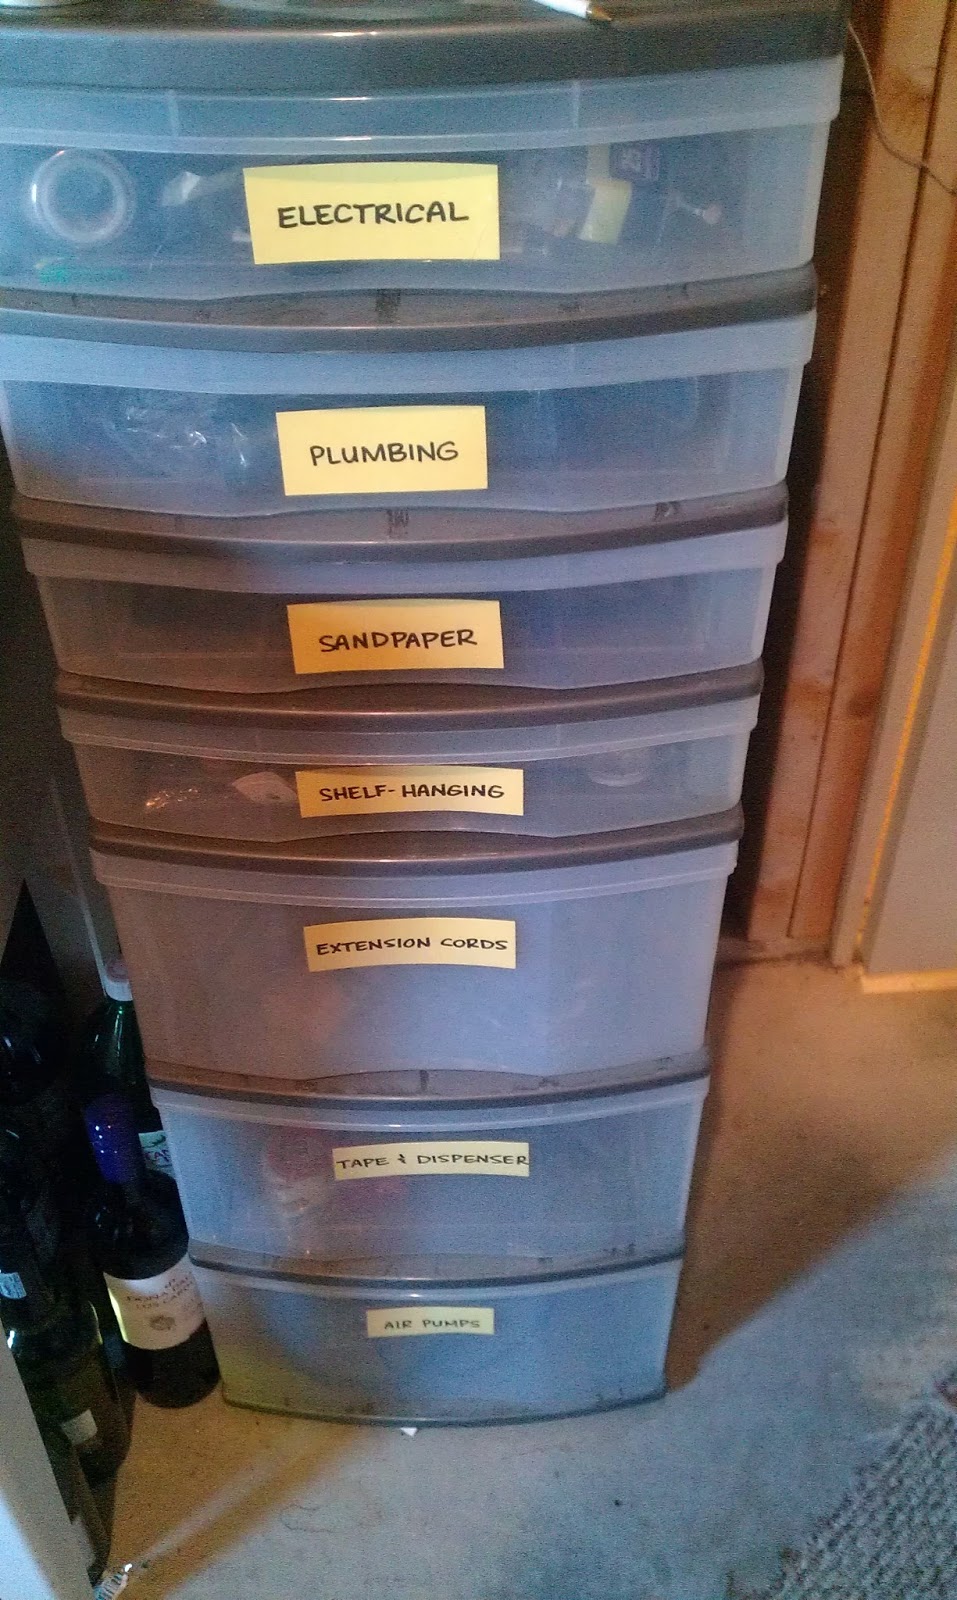
| I also made labels for our large totes (which sit on shelves Darling Husband installed). NOTE: Some of these items (holiday decor) have since been relocated to our newly-organized master closet. |
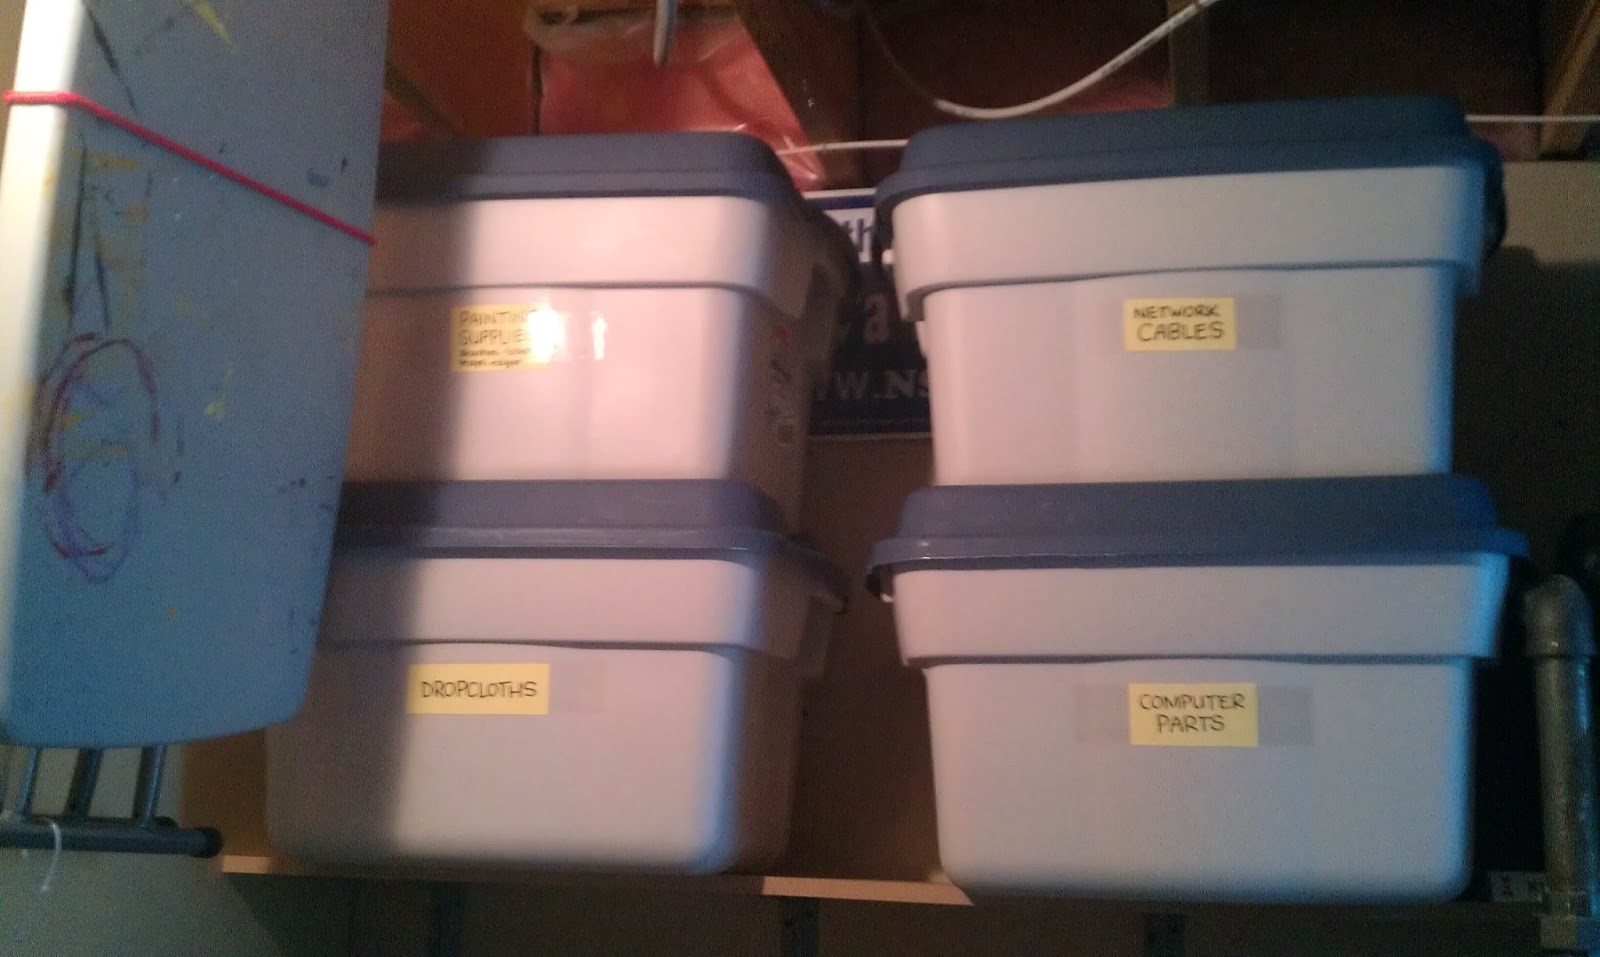 |
| I literally used to guess which bin held the paintbrushes, and yank it down (hoping I wasn’t accidentally grabbing the heavy bin of computer parts), because I kept meaning to make labels. I’m glad I finally got around to it! |
 |
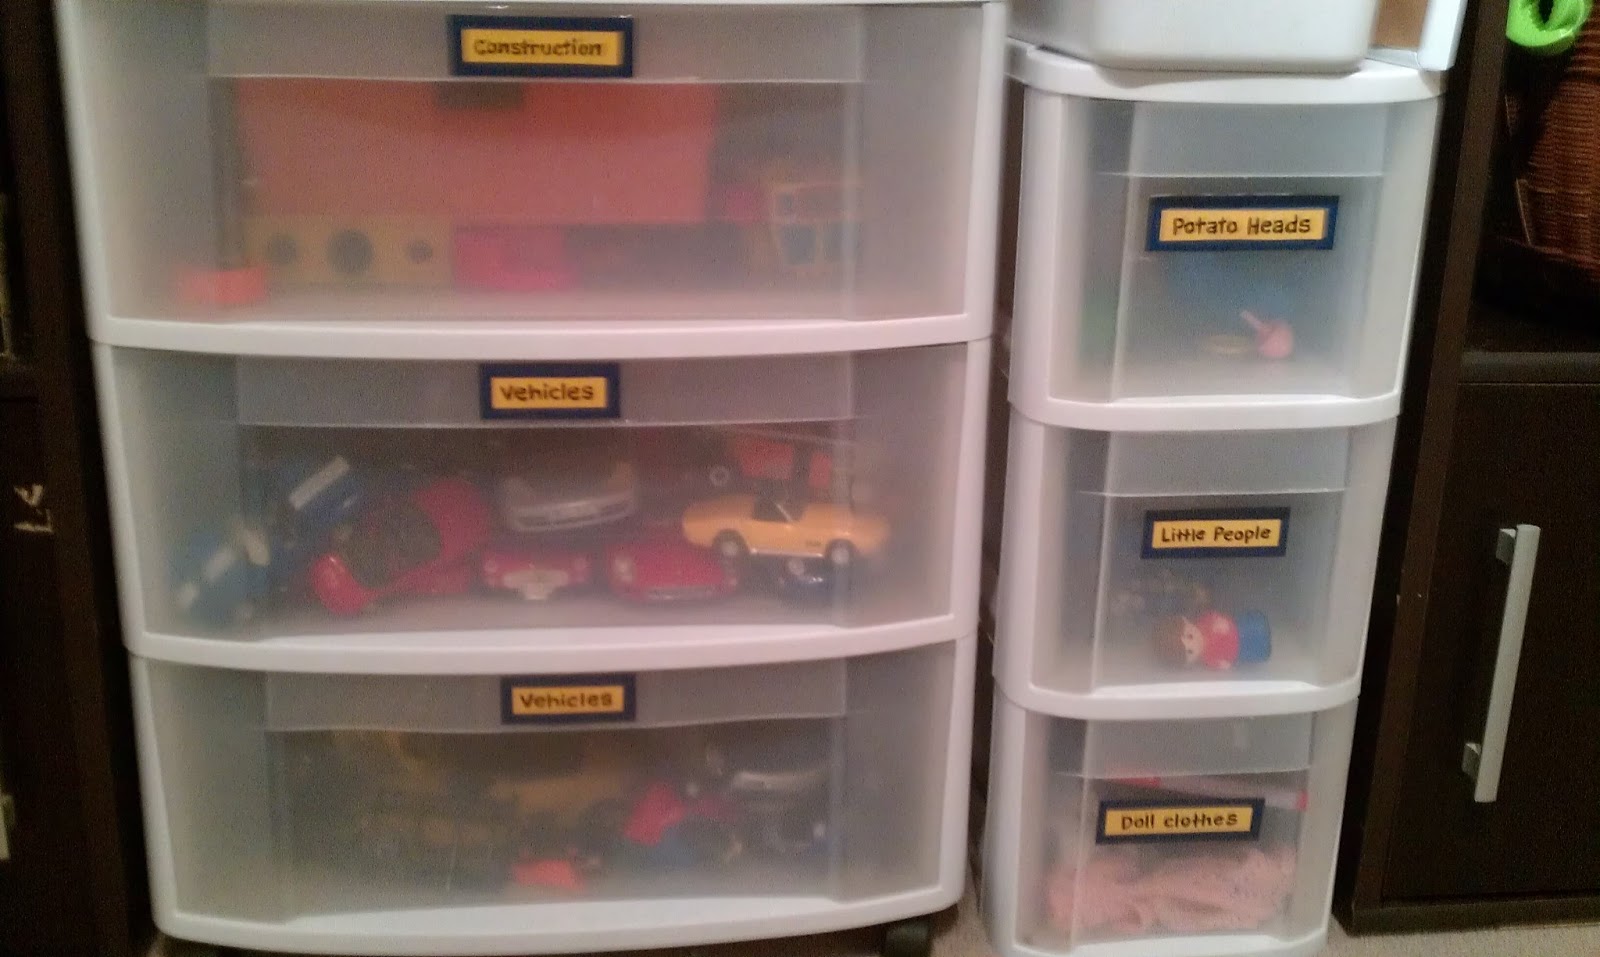
| Darling Husband bought this handy little screw? nail? organizer at Canadian Tire, and did a great job putting away all of the itty-bitties. I couldn’t help myself and made labels for the two large drawers, since those were items I might go looking for at some point. |
 |
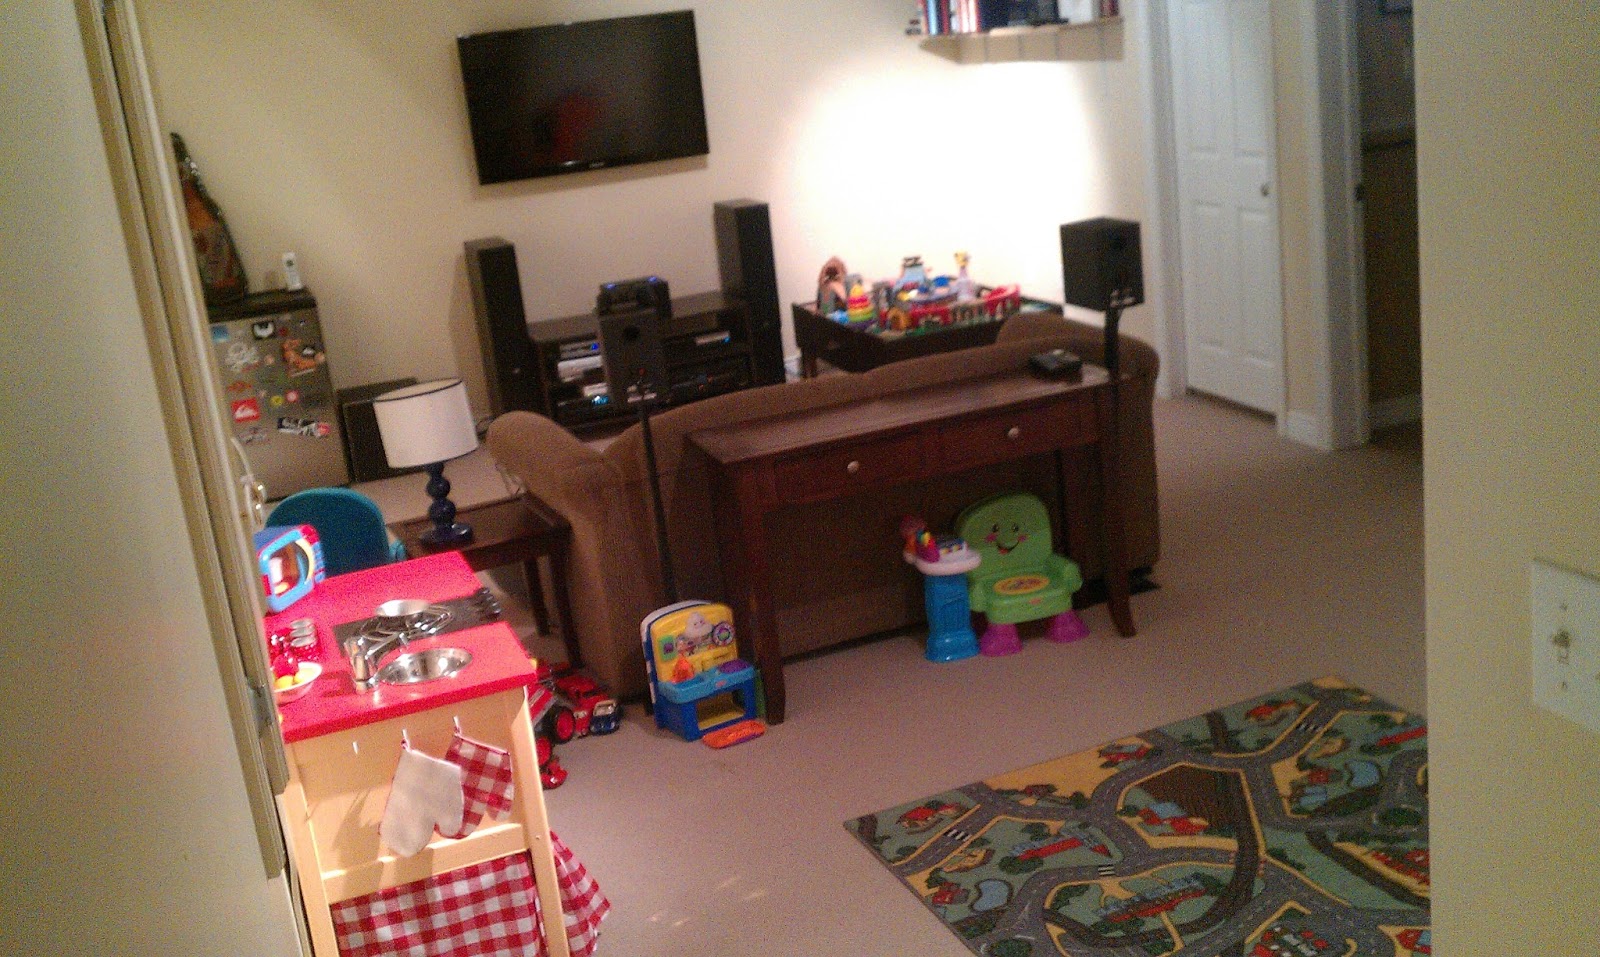
| Now to the main part of the basement. Here’s the “before” — we reused our old entertainment centre to make a “toy wall,” as I described here. |
 |
| It was very functional, but a bit *heavy* on the eyes … |
 |
| Ah, labeled perfection .. |
 |
| On the other side of the room, things were Dullsville. It was supposed to be our “adult” side of the room, but there was absolutely zero prettiness or interest. |
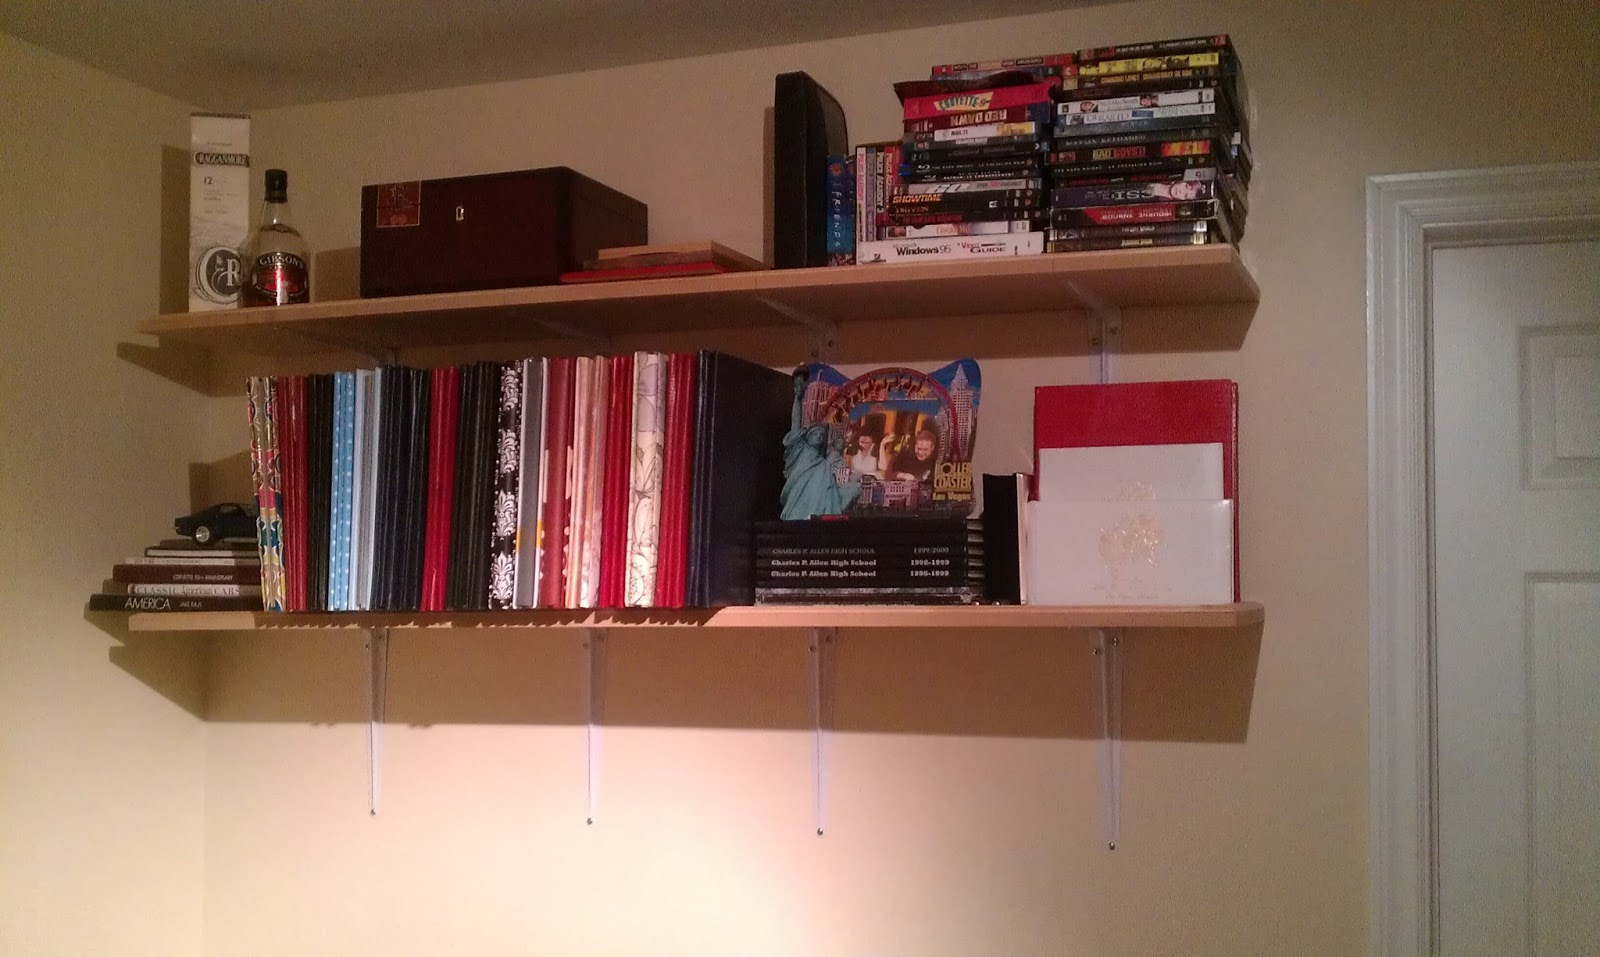 |
| These shelves drove me nuts, because they were unpainted and TOO CROWDED. |
So Darling Husband and I got to work! It’s not quite ready to reveal yet, but here’s a little teaser of what we have going on in the basement now …
 |
| Hints: chalkboard paint, emerald green (Pantone’s colour of the year for 2013), and an old IKEA shelving system my mom graciously donated to the cause. |
***
Thanks for stopping by to check out my basement organization, and I hope you also go see all of the other ideas Emily and co. will be uploading at Imperfect.
Thanks again to Emily for hosting this challenge. I’ve loved organizing all of the problem spaces in my home, and it’s really changed the way I feel about purging and living with less “stuff.”
Happy Organizing!
xoxo
Live More With Less: Week 6 (Bathrooms)

Confession time, guys! This was definitely my least productive week so far in Emily’s Live More With Less: 7 Weeks to a Clean and Decluttered Home, One Room at a Time challenge over at Imperfect.
But I guess it’s like how people who go on runs are lapping everybody on the couch (me). Organizing something is better than organizing nothing (or making more of a mess), right?
So far during the challenge, I’ve organized:
- My messy master bedroom closet
- My two-year-old’s bedroom
- My 10-month-old daughter’s bedroom
- My home office/craft room
- My kitchen/dining room
How come this week’s results are so lackluster? Well, because I’m cheating (!) and also working on the family room in the basement, which is technically next week’s project. And that final challenge is a biggie, because it’s a full makeover that involves painting the entire basement (and stairwell), painting a ton of frames, making art, sewing pillows, etc.
I’m still not sure if the room will be 100% finished by next Wednesday, but here’s hoping. The utility room will be looking good, at least, and who doesn’t like looking at photos of organized duct tape and zip ties?
So this week, I was scheduled to clean and organize my bathrooms. But I cut corners and only focused on the one people see (the powder room), which also happens to be the only decorated bathroom thus far. Remember my adventures in painting chevrons in a single evening?
So here’s how I did a little under-the-sink organization in our pretty powder room …
 |
| I heart chevrons (and Pinterest-inspired paintings) |
 |
| My little lovies |
 |
| Here’s what the powder room cabinet looked like “before.” It was a mess of extra liquid soaps (for all of the bathrooms), medical supplies, medicine, nail polish and removers, and who knows what else? |
 |
| Ah, nice and empty. |
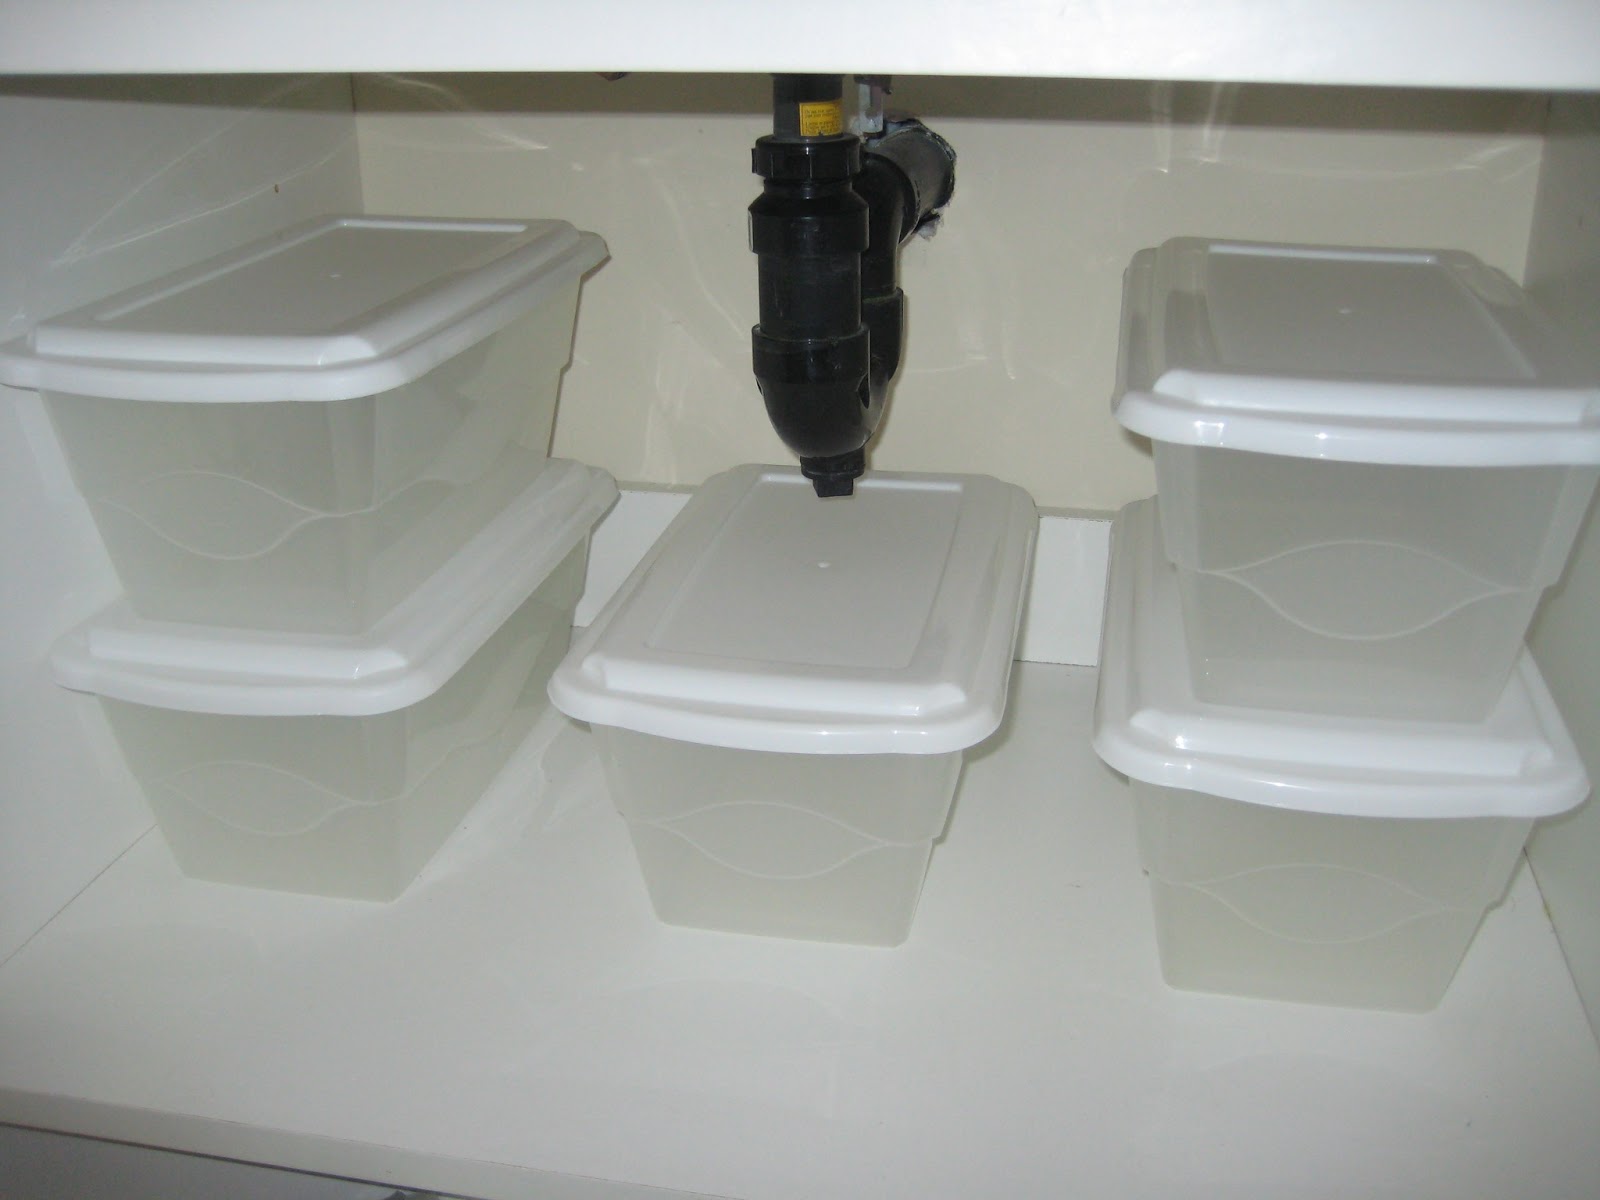 |
| I bought a bunch of $1.50 containers from Dollarama, and played around to see how they fit. This photo actually relaxes me. It’s just so … perfect. Unfortunately, the layout wouldn’t work, because it didn’t fit my nail polish trunk. |
 |
| Ta-da! Here’s how it looked once I got everything into place. God bless label-makers. |
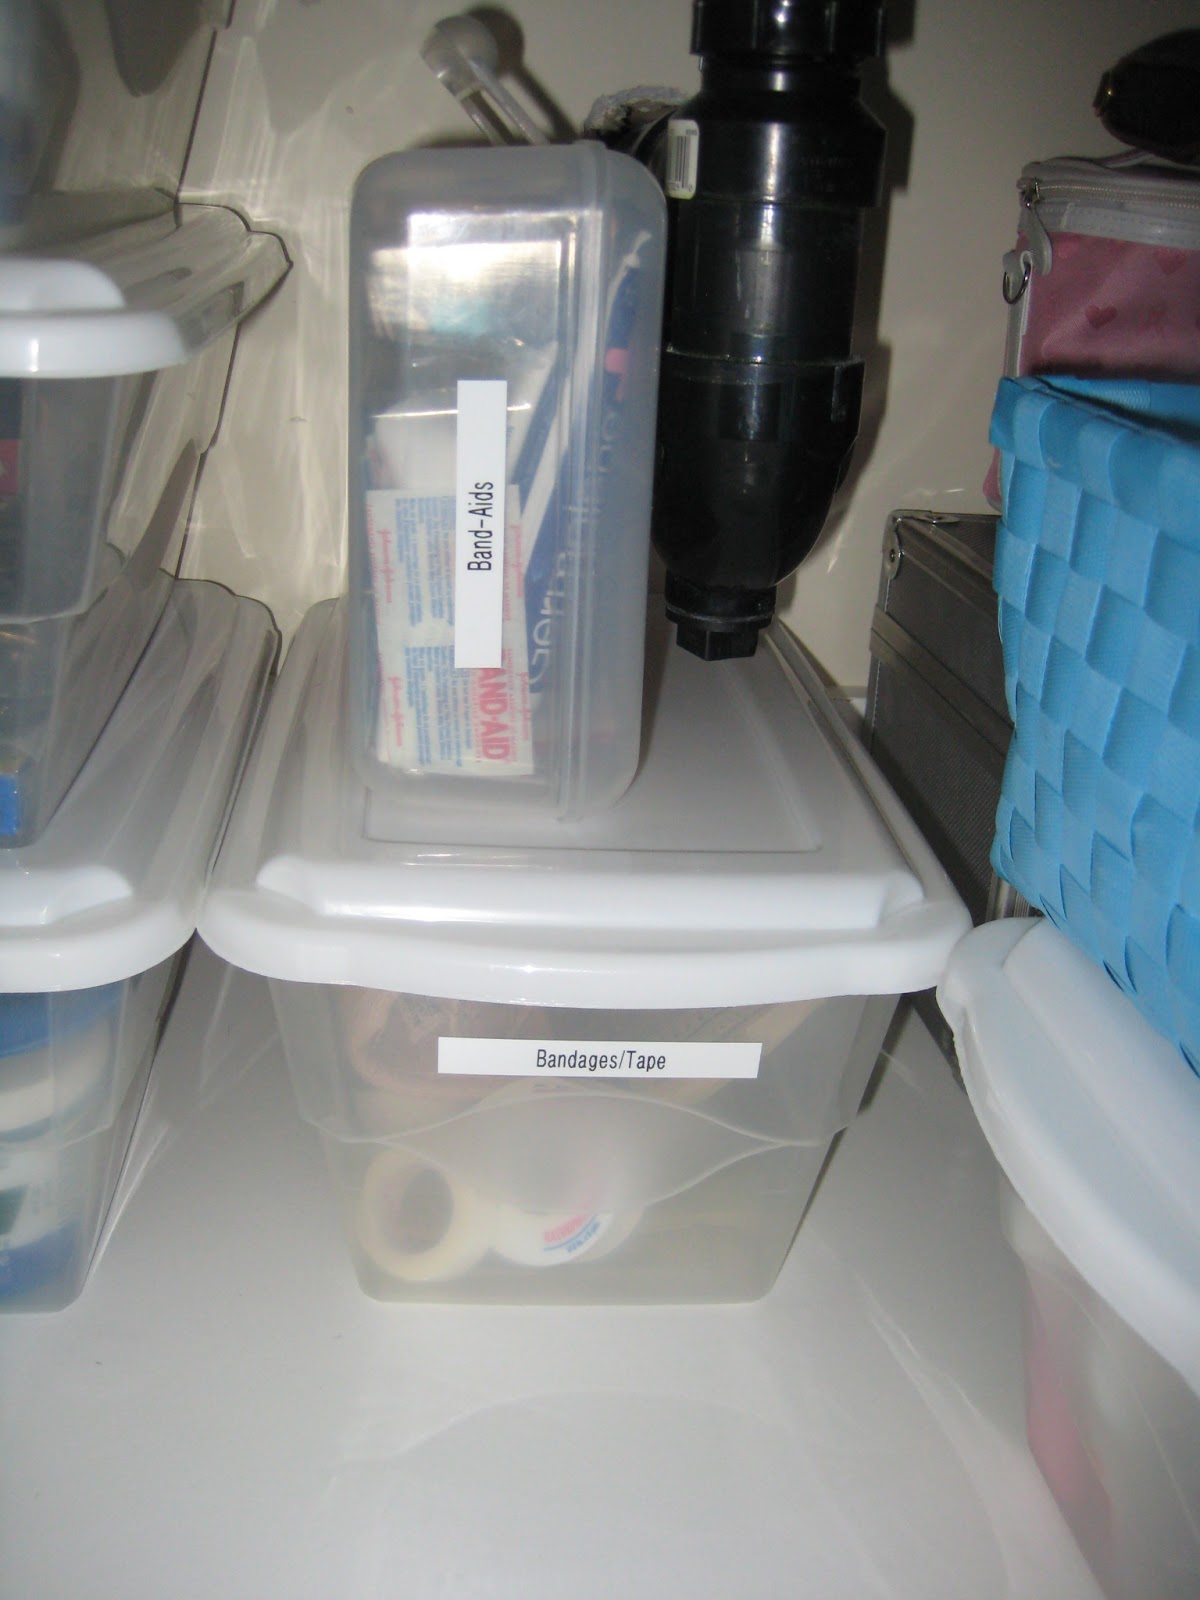 |
| I put all of the Band-Aids and “little” first aid items in the first aid kit (what a novel idea, Heather! Tell me more!) and only the big stuff (tape rolls, large bandages) is in the large plastic container. |
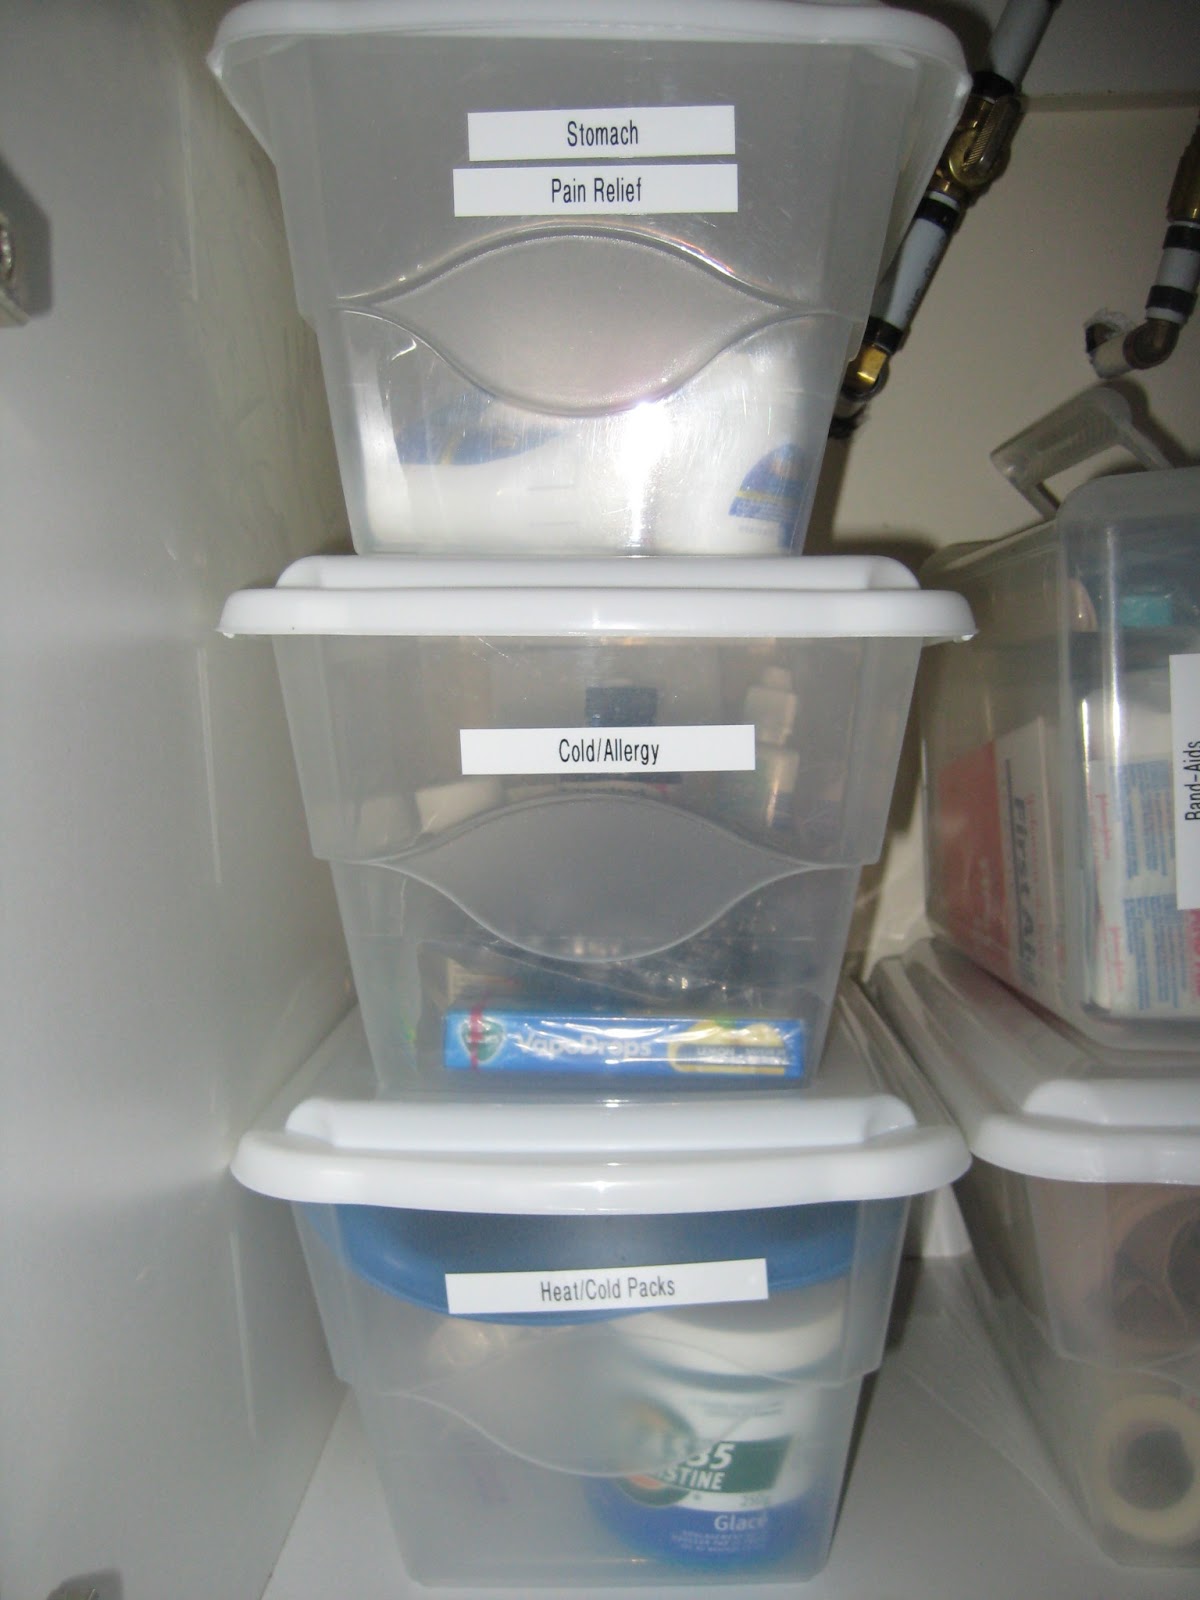 |
| I used to store the different medicines in large ziplock bags, according to category, but they were messy-looking. Now we have one box for “Stomach/Pain Relief,” one for “Cold/Allergy,” and one for “Heat/Cold Packs.” It’s the darn hot water bottle that used to always junk up this cupboard, flopping all over the place, so I’m glad it has a contained home now! |
 |
| The big silver trunk contains all of my nail polish (yeah, I have a lot — but how often do I have time to use it these days?), and the pink case holds all of my nail polish removers, files, etc. The small black makeup case is for hiding those essential monthly girly products that, uh, you don’t exactly want your guests to see! |
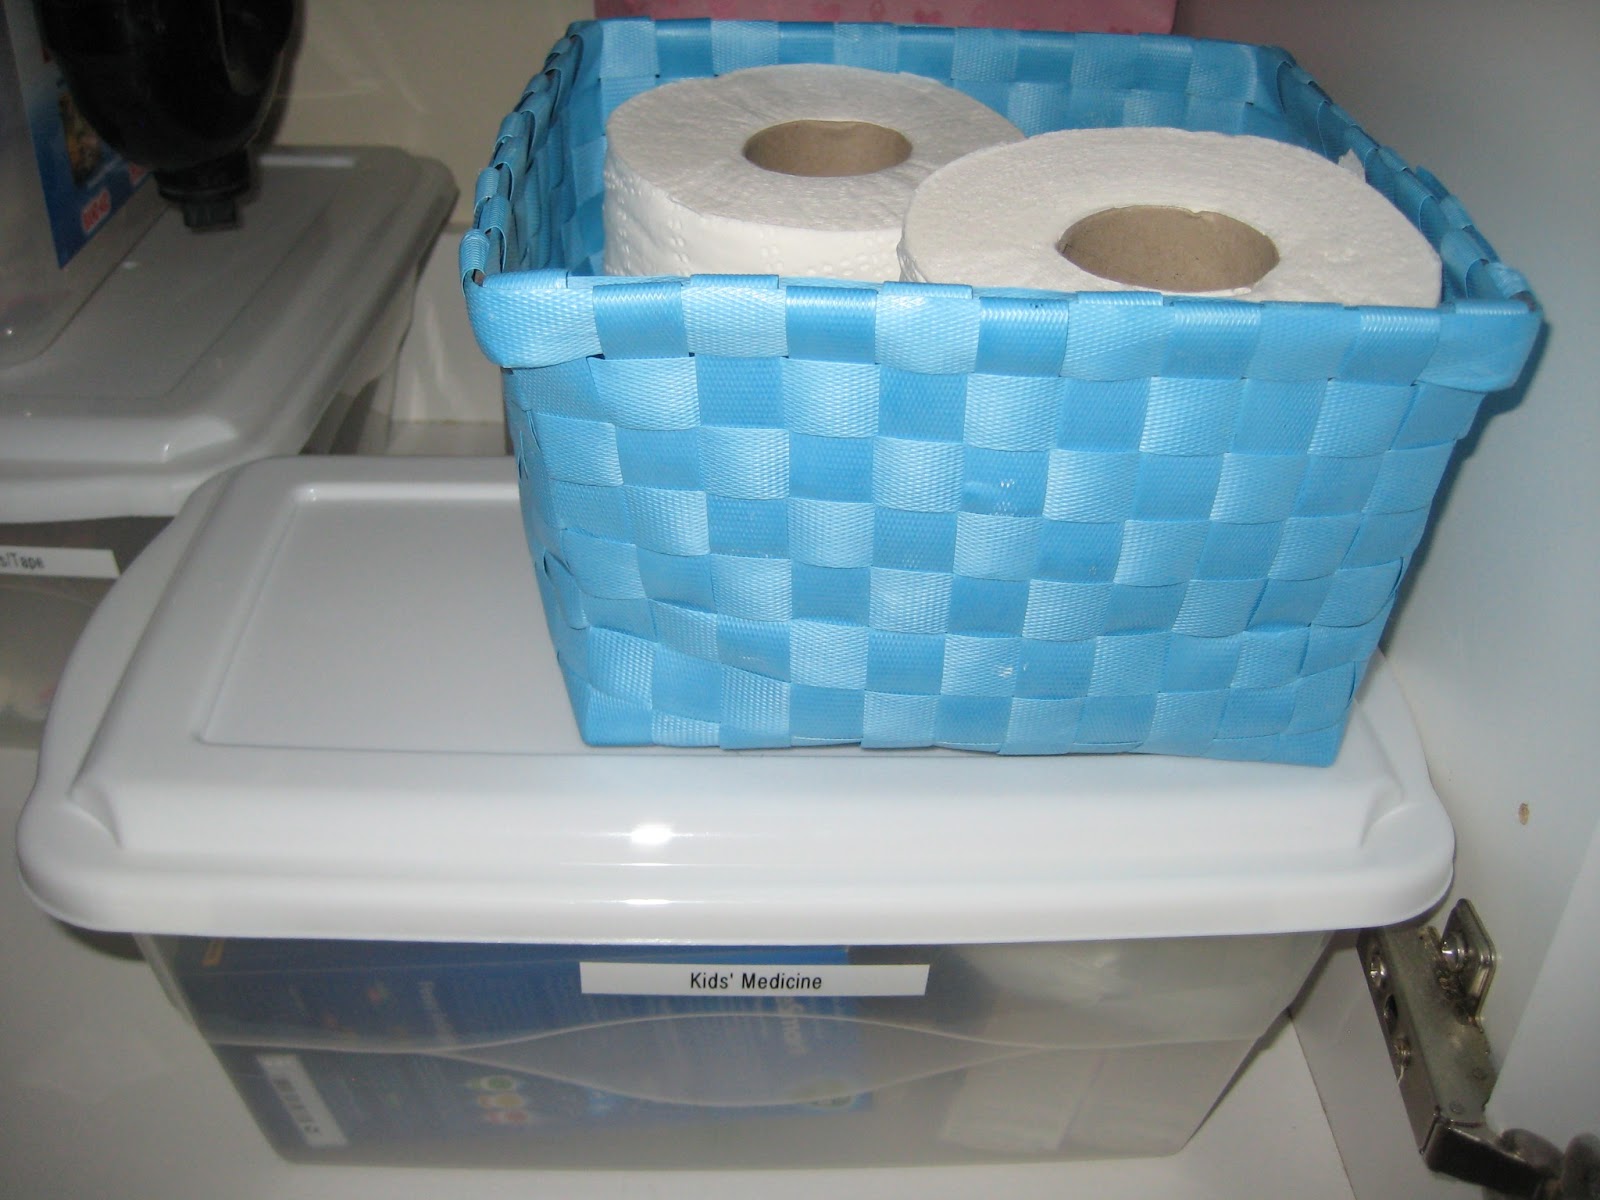 |
| The kids’ medicine is stored in this bin — the whole cabinet has a childproof lock on it, so no worries — and the little blue basket contains extra TP. All of the liquid soap refills are now stored in the kitchen cabinet, as you saw last week when I tackled the kitchen/main floor. |
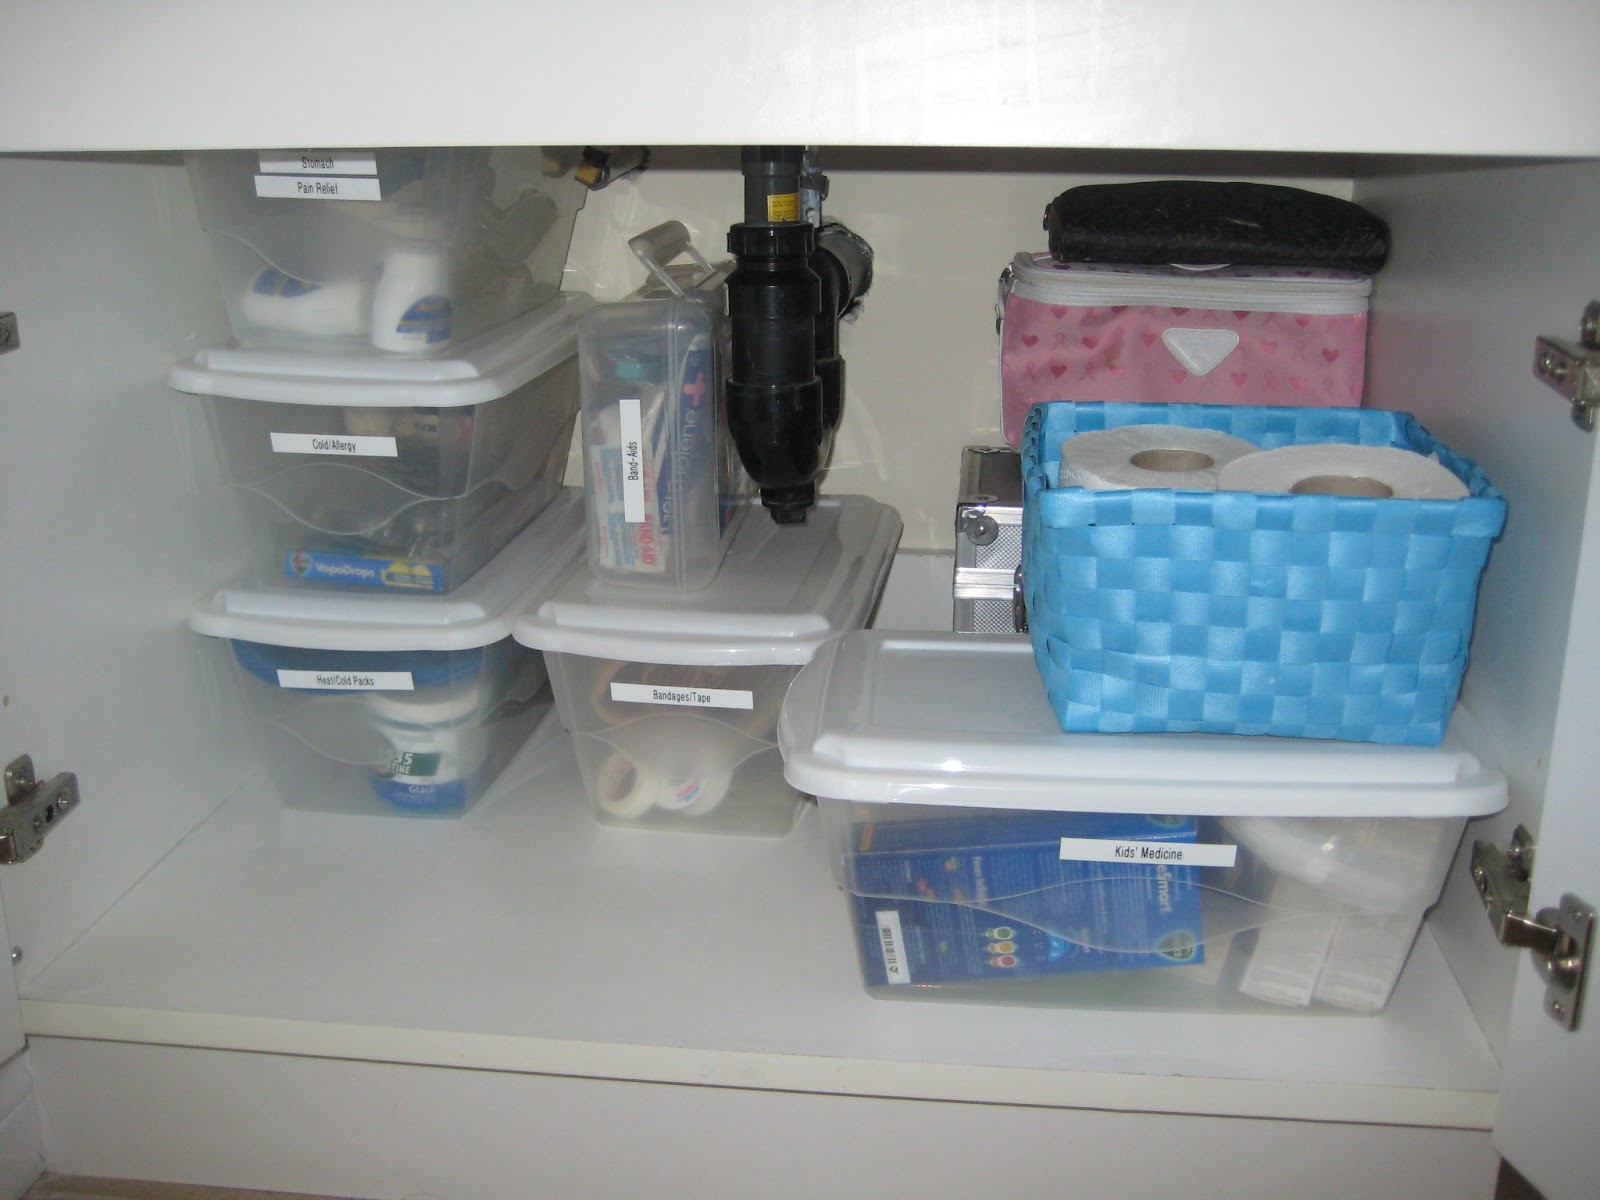 |
| Isn’t she a thing of beauty? |
 |
Thanks again to Emily for hosting this organization challenge! Make sure to check out what she and everyone else have organized this week over on Imperfect.
Happy organizing!
xoxo
***
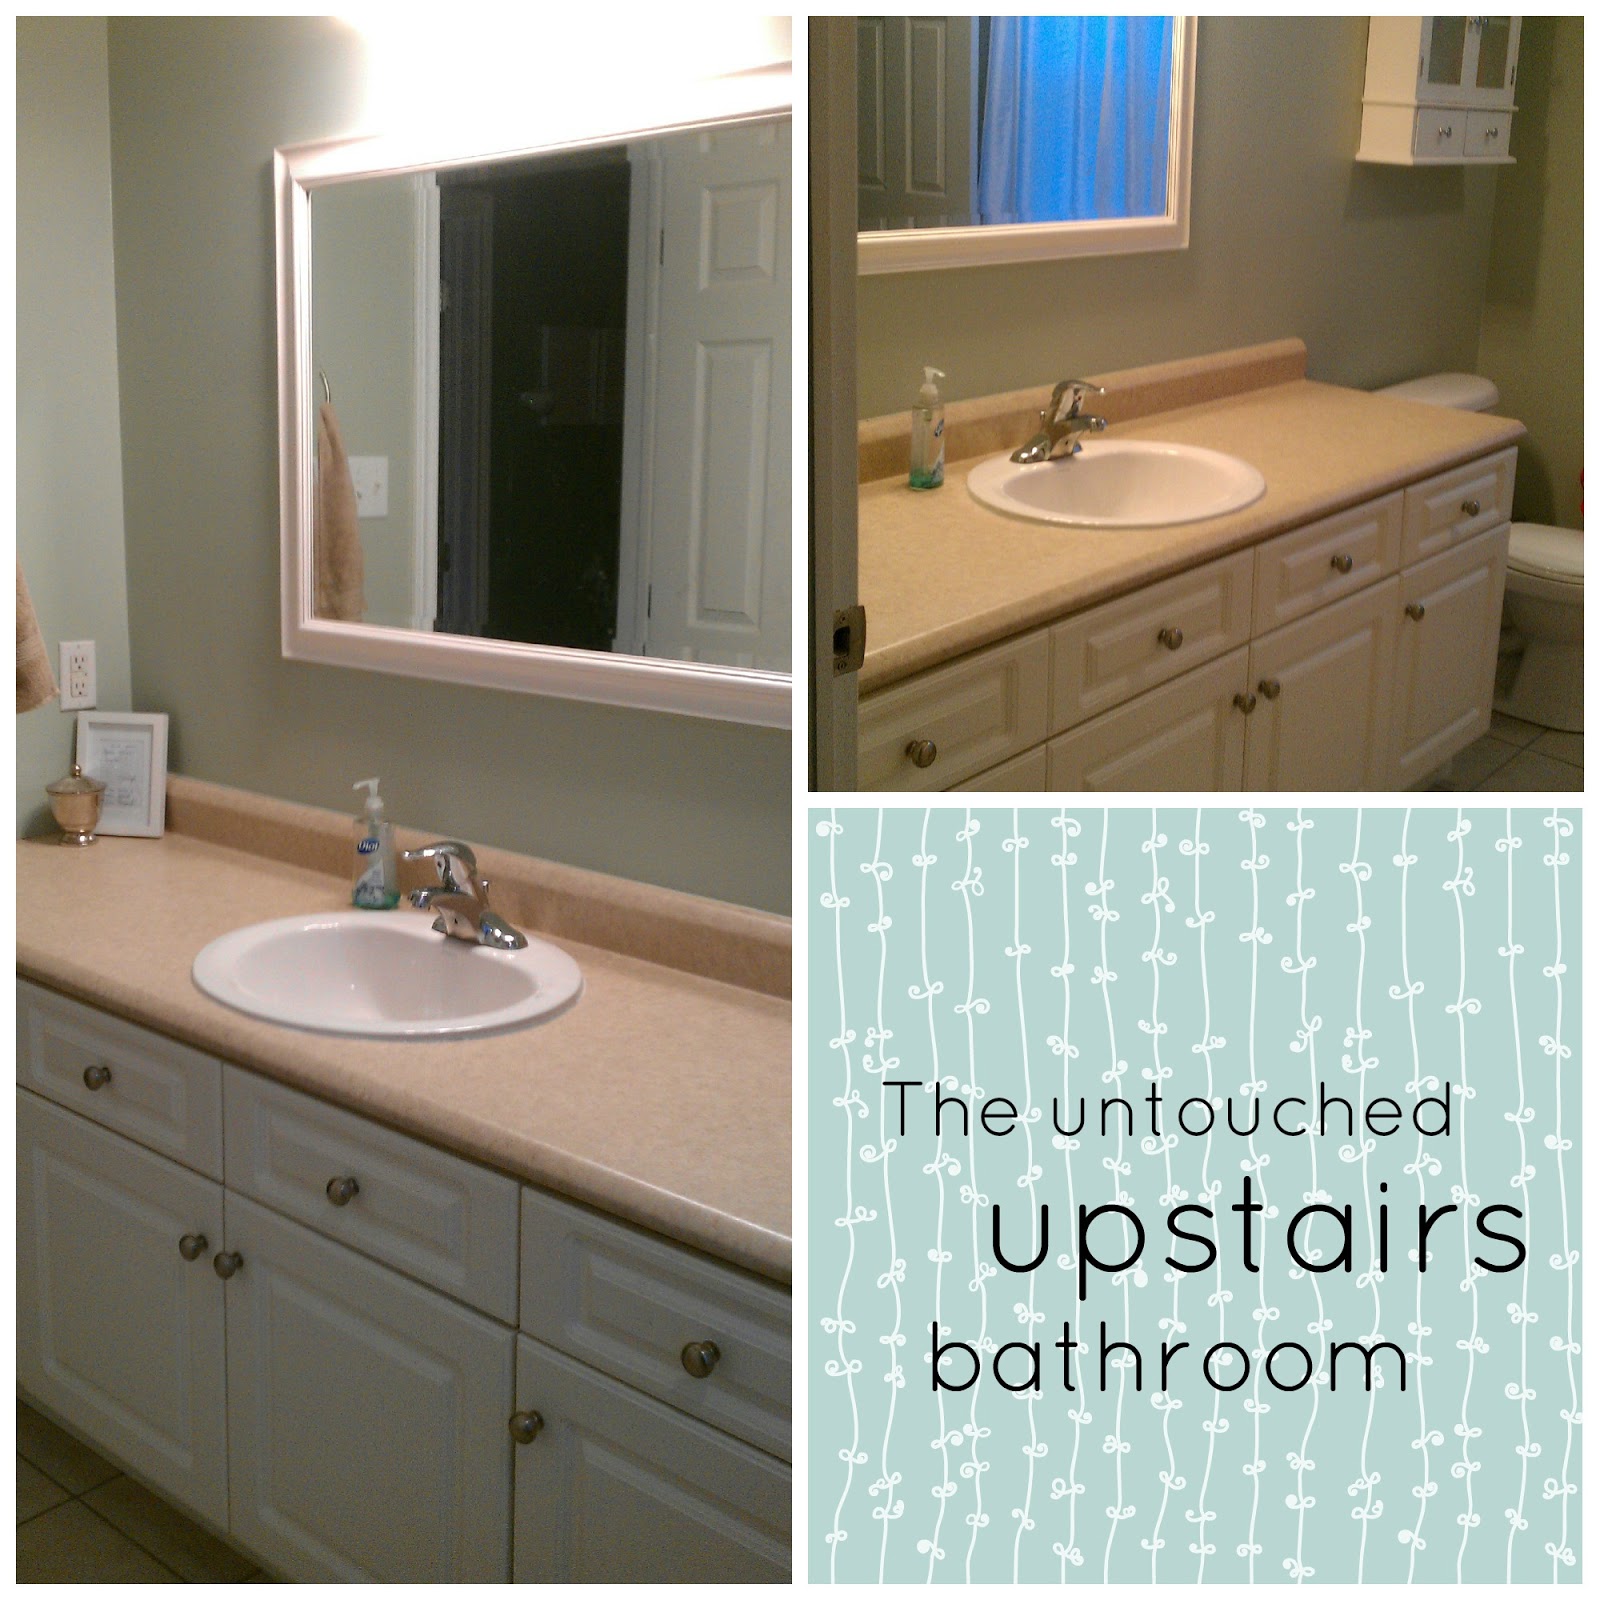
P.S. In the interest of bathroom fairness, I’ll show you our other two bathrooms (even though they didn’t get the star treatment this week). But just know that they’re both in “move-in” condition — we’ve done nothing except hang one photo (in the basement bathroom), and make a piece of dental-themed homemade art (for the upstairs bathroom).
Both of the bathrooms are painted nice neutral colours, so I decided to leave them for the last rooms of the house to decorate. I’m basically waiting to be inspired. Any thoughts on what I should do?


As featured on …


