
Dear Primary parents

Dear first-time Primary parents,
This is a big week for you, isn’t it? The first day of school is creeping up. You’re probably alternating between thrilled — pinning healthy lunch ideas and painting a chalkboard for them to proudly hold during those first-day-of-school pictures — and completely terrified that your baby is leaving you for seven long hours.
I know, because that was me last year. I surprised myself by not crying at the bus stop — mostly because I was so focused on being really, really excited so my son didn’t get nervous — but then I walked back home and had mild panic attacks all day. What was he doing? Was he having fun? Was he scared? Before it was time to pick him up at the bus stop, I’d volunteered for a weekly gig at the school because I was so desperate to get inside that big building that had stolen my baby.
Several of my friends have little ones going off to Primary for the first time in a couple of weeks, so I have thought a lot about what to tell you during these emotional few weeks.
The first thing (and the most important thing) is that your life might feel totally overwhelming until October. I was exhausted, my son was exhausted, and it took that full first month for all of us to get the hang of this elementary school thing. A few mornings of a week of preschool is nothing compared to the day-in, day-out tedium of getting a small person to and from school five days a week. It’s like the bone-deep tiredness you feel when you start a new job. Everything is different and it takes time to adjust.
For us, the biggest thing was getting everyone to bed earlier — myself included. I’d thought 7:30 p.m. was a good bedtime for a five-year-old, but it wasn’t early enough to combat his exhaustion from a long day at school. We scaled it back to 7 p.m., and often put him to bed as early as 6:30 p.m. if he seemed tired. I forced myself to start going to bed by 9:30 p.m. so it wasn’t as painful to get up in the morning, and it helped.
There is a lot of new stuff flying at you when your oldest goes off to Primary. There’s a flurry of paper coming home — calendars, reminders, permission slips, agendas to sign — and it kicks your butt to get organized. You need to remember which days they have to wear gym clothes and which day to send back the library books. Don’t get me started on all of the “theme” days that ask them to dress in pink or as a superhero or as their favourite piece of abstract expressionist art.
Don’t worry — you’ll come up with a system. A bulletin board, a chalkboard, a calendar. You’ll start waking up on Wednesday and Thursdays and automatically think “Gym day.” You’ll flip the right page in the agenda and scrawl your name on the pen you keep by the backpack specifically for that purpose.
And yes, making lunches is just as much of a pain as you’ve feared. I’m here to assure you, though, that it does get a lot easier. Your standards drop, too, which helps. I was such a keener in September, but trust me that teachers are not going to admire your carefully-prepared bento box and take note of your spectacular parenting. They probably won’t even see it — and if they do, they’ll laugh and take bets on how long you keep it up.
By May, I was throwing a single-serve package of croutons into his lunch bag as “filler” and I’d stopped caring if the teacher judged me for packing chewy fruit snacks every day. You figure out how much food they’ll actually at school — for us, that’s a main, two snacks and a bottle of milk with a shot of Quik syrup — and packing lunches gets less daunting.
If you have an entree-loving kid like mine, go back and read my piece on “lunch pucks” so you can have frozen servings of pasta ready at all times. (My kid is thoroughly looking forward to daily thermoses of hot spaghetti after a summer of lazy lunches. “Here’s some cheese and a piece of bread and … a piece of leftover chicken?”)
As you settle into life as a Primary parent, you’ll pick up little tricks that make school easier on your family. For me, that’s setting three different alarms on my phone — one to wake up, one to make sure we’re all dressed/brushed/combed and downstairs, and one to leave for the bus stop. My kids are like Pavlov’s dogs when they hear that specific trilling noise: they drop their dishes on the counter and run for the closet to put on their shoes. They’re usually waiting for me on the porch while I fill a travel mug with tea and slap on some blush.
(I started the year in full makeup and real clothes for the bus stop, and by about December it had dwindled to PJs under my coat and sunglasses to hide my squinty morning eyes.)
You’ll miss them terribly at first, but your heart will adjust to watching them zoom away on the bus every morning. You’ll learn to ask the right questions to find out what they did for those seven long hours (“I’m not sure”) and you’ll marvel as they come home suddenly able to READ AND WRITE ACTUAL WORDS. You’ll burst with pride over report cards and clap until your hands hurt as they sing off-key in the holiday concert.
They’re going to do great, and so will you.
Sincerely yours, A first-time Grade 1 parent

P.S. I’m going to round up all of the Primary-related posts I can find here on the ol’ blog, in case you’re in the mood for a little related reading …
 |
| Lunch pucks for school thermoses |
 |
| When school kicks your butt and you’re exhausted |
 |
| Why you should date your child |
 |
| A letter to my son’s Primary teacher |
 |
| When your kid learns to read (and it blows your mind) |
 |
| Lunch hacks for busy parents |
 |
| Talking about your day (a.k.a. interrogation) |
 |
| When you JUST NEED TO KNOW WHAT HAPPENED during every moment of their day: A Nosy Parent’s Guide |
 |
| DIY family command centre |

 |
| And now, something to amuse and terrify you for the Grade 2 days down the road … |
Give a new mirror a farmhouse finish

I’m deep in the middle of a basement bathroom makeover, and one of my discarded items was a mahogany (well, faux mahogany) mirror from above the sink.
The mirror came with the house and it was completely inoffensive and in perfect condition. Ten years ago, I would have bought it and loved it.
But it just didn’t fit with the urban farmhouse vibe I’ve been going for lately. It was too shiny, too dark, and just too … new-looking.
I’d been hunting for something to hang at the top of our basement staircase, mostly to distract from my less-than-perfect stenciling job the wall. I didn’t want anything too flashy, since the focal point is the gold-and-white wall that stores our cleaning tools. The mirror was fine, size-wise, but the finish needed some work.
If you’ve been in any home decor store lately, you’ve probably noticed a huge array of pieces with what’s called “the farmhouse finish.” It’s anything that has a grey-washed or white-washed look, like it’s been repainted decade after decade. Distressed, battered, sun-baked, chipped and even scraped up — that’s the look we’re paying a lot of money for, apparently.
I may not be able to replicate a stainless steel finish (although I’ve tried), but there’s no way I’m paying $40 for an accessory that looks like it should be going for 25 cents at a flea market.
Luckily, this look is really easy (and FREE) to copycat …
Continue reading in my weekly DIY column, My Handmade Home …


Continue reading in my weekly DIY column, My Handmade Home …
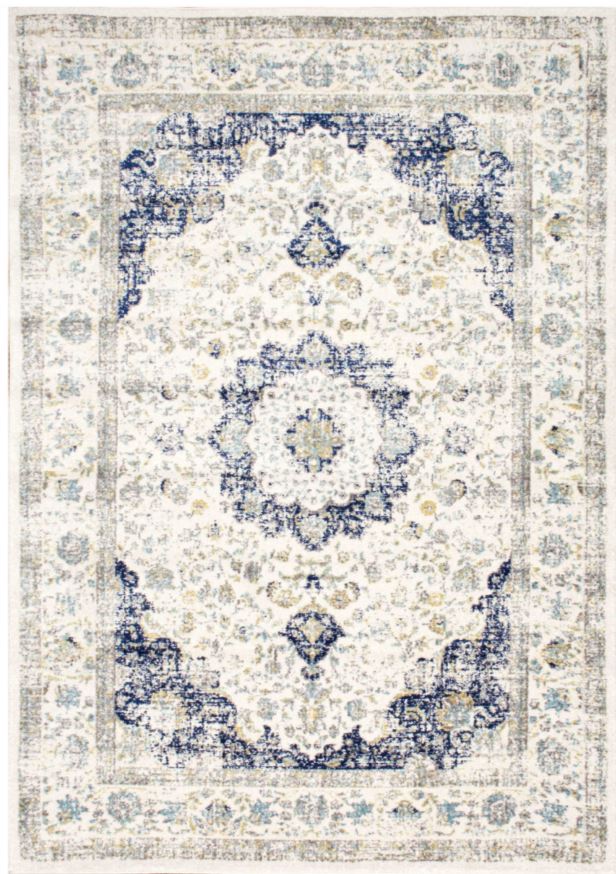
I ordered a rug and now I’m freaking out
After what feels like years of pining after rugs and not being able to pull the trigger, I did it. I used birthday money + a healthy PayPal balance to buy this Verona Blue Area Rug on Wayfair.

DIY cookie stamp
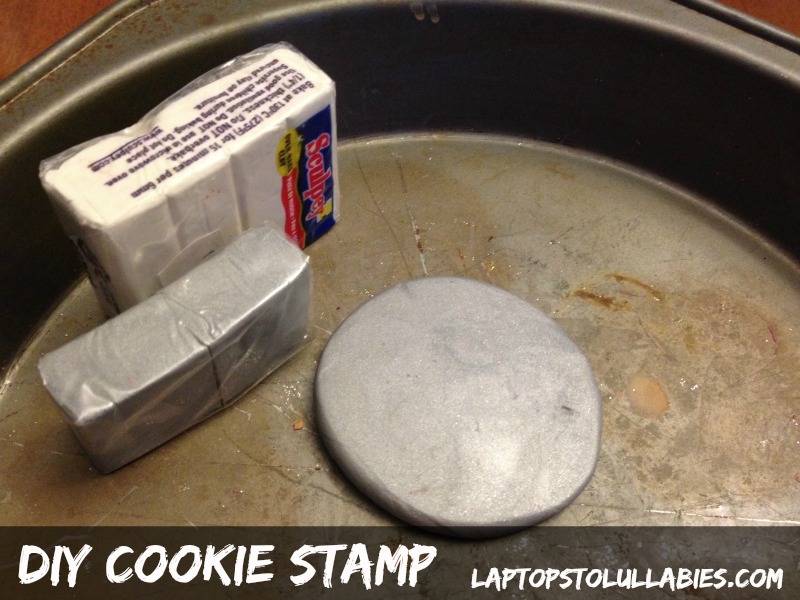
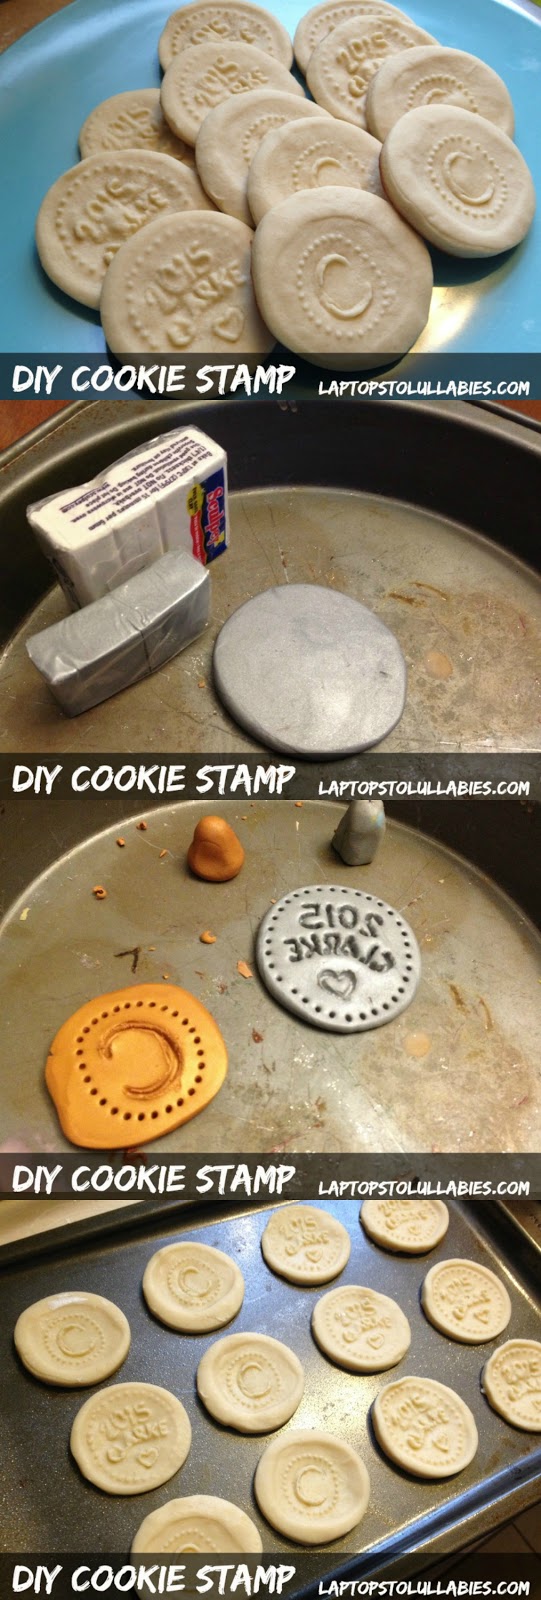
Start by smooshing a bit of Sculpey into a circle. Use whatever colour you want, but don’t take my word for it that this is good for edible stuff. (Hashtag don’t sue?)
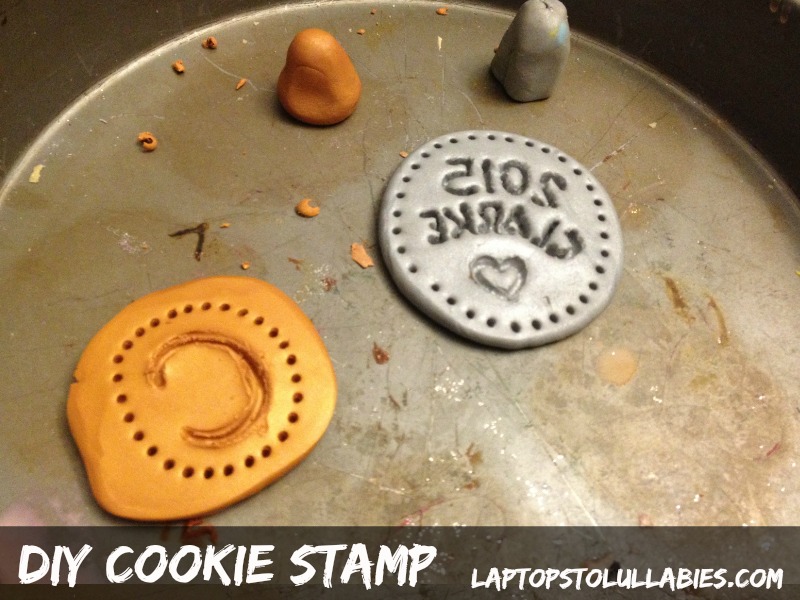
Mould a little handle for each stamp (a lumpy thing is fine — nothin’ fancy) and use pointy clay tools (or plain old toothpicks) to make your design in the stamp. Make sure to do a mirror image of the design you want on the cookie.
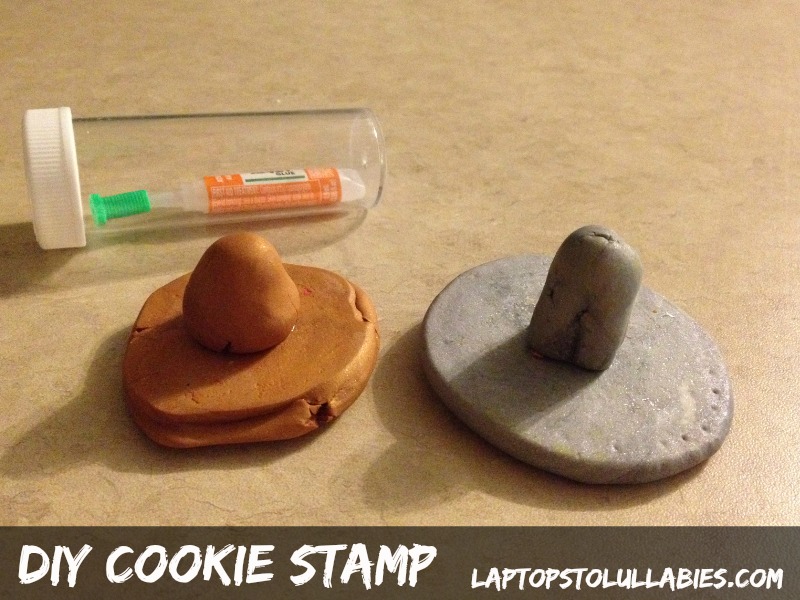
Bake the pieces as directed, let them cool, and then attach the (lumpy) handles with a bit of superglue.
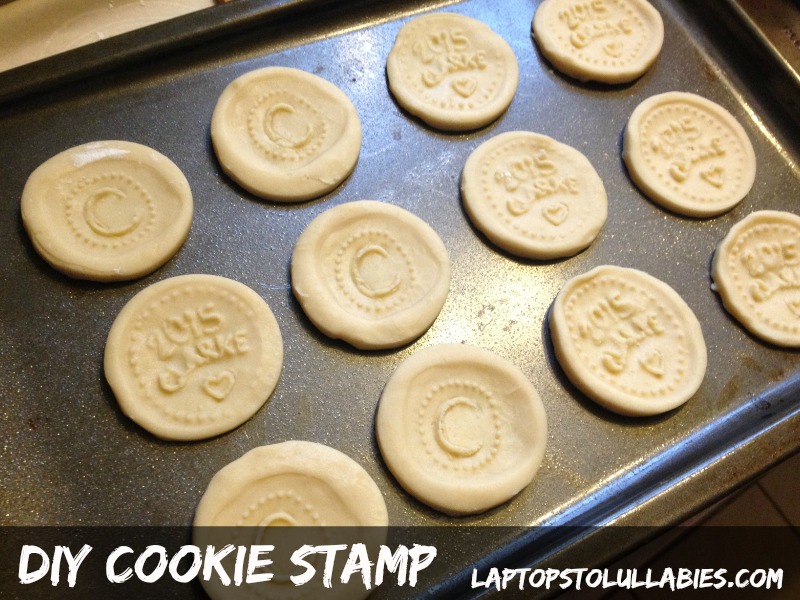
Make your favourite sugar cookie recipe and stamp those suckers!
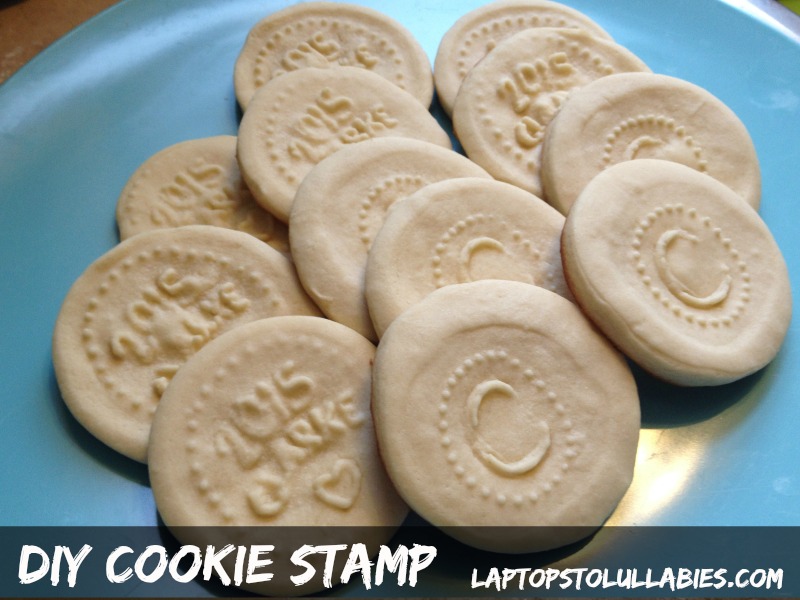
Bake the cookies as directed, and see how your designs turn out. My Cs turned out much better than my “2015 Clarke” cookies, so simple is best.
***
Now, since these aren’t real cookie stamps, they tend to get gummed up between batches. I had to use a toothpick to scrap out bits of dough before re-stamping, and I ended up throwing out the stamps after I finished the last batch.
Anybody try this? Did it work better for you? Or should I just make it my mission to try again and do a better job? #deepquestions
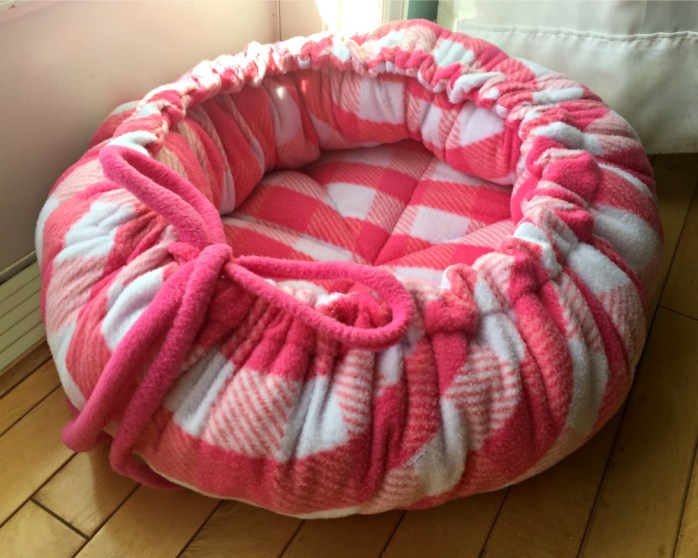
DIY adjustable pet bed

We’re expecting a fuzzy bundle of puppy love later this month, so of course we’ve all been excitedly preparing for her arrival.
The kids and I decided to make a pet bed rather than buy one. We wanted an adjustable bed that would grow as our pup grows, so we decided on a simple little pattern that turned out really well. All you need is a sewing machine, a bit of stuffing or batting and two meters of cozy fleece fabric, like this gorgeous pink and white buffalo check from Atlantic Fabrics.
Start by folding the fleece in half on the floor, right sides together. You want to cut through both layers to make two huge circles. I put a round platter in the center and used it as a guide so I could draw a much larger circle (about 95 centimeters in diameter) with a washable marker.

The kids love pinning, so they got to work pinning both circles together around the edges. Then it was time to start sewing!

First up was a quick seam all the way around the edges to join the circles together, right sides touching. I left a gap so I could turn it right-side out, and then I had what looked like a circle-shaped pillowcase.

The next step was sewing my two inner circles to create a nice padded bottom and squishy padded sides. Using a fade-away fabric marker, I drew another circle about 5cm inside the original circle — forming a pocket that would hold a cord — and another circle 25cm inside — forming the bottom of the bed.
The main thing to remember is not to seal up those circles entirely! Leave a gap in each circle, all lined up, so you can still reach your hand through all of the sections.

Once the circles were sewn, I stuffed a bit of batting inside the inner circle (hmmm, this sounds like some kind of weird social hierarchy) and then sewed that circle closed. I also sewed a few lines across it, almost like pizza slices, to keep the batting in place.

Then it was time to stuff the sides of the bed. More stuffing, all the way around the circle, and then I sewed that circle shut.
The final step was adding the pull-cord so the bed could be ruched together. I already had the pocket — made when I sewed 5cm away from the edge of the bed — so I just used a safety pin to string a long string of fleece inside. Done!

If I pull the strings a bit, the sides of the bed tuck in and make a cozy little nest.

If I pull even tighter, the bed gets smaller with higher sides — perfect for little puppies who want to feel secure.

I can also leave the bed completely flat, like a cushioned mat, which would be a good fit for large pets.

When I have it exactly how I want it, I just tie the ends of the fleece string into a little bow.
This pet bed is really easy to make and it will fit nicely inside a kennel, on a backseat or on a couch to protect it from pet hair. It’s also very popular with my four-year-old and six-year-old, so it looks like I might be making two more …
Don’t forget to pin this project so it helps out another dog-owner or cat-owner!


As featured on …


