Why you should paint your hutch

The only thing that makes a big painting project even more painful is when you drop a jar of paint and it splatters onto your hardwood floors . . . twice.
But let me back up. After deciding I was brave enough to redo our hand-me-down hutches, there wasn’t any question that I was going to paint them a chalky white. I wanted them to brighten up our dining area and go with our white kitchen cabinets and white beadboard peninsula. Plus, I just like painting things white, I think?

I went with Fusion Mineral Paint* since I wanted a matte finish without sanding or priming, and picked Casement* since it’s a neutral, warm white. I didn’t want the hutches to be entirely white, though, so I also picked up a jar of Homestead Blue* for the back paneling.
(Quick backstory: I was really tempted to pick a grey — like Ash* or Pebble* — since the walls are a grey-blue, but in the end I couldn’t resist the contrast of the deep, historical blue against the white.)
I unloaded the hutches onto the kitchen table and onto the floors — hola, giant mess! — and took off every door, knob and hinge. The entire main level became a maze of propped-up doors, errant drawers and wine glasses filled with tiny screws. It was at this point that I realized I’d gotten myself into a really, really big project.
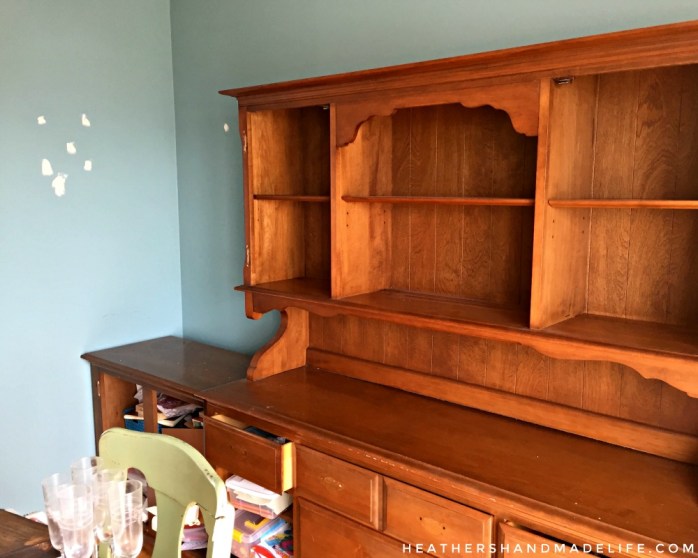
I’m not going to sugar-coat it — the first coat was bad. But I kept reminding myself that I’d been spared the agony of a ton of sanding, not to mention priming (the worst task in the history of DIY). I went back over both hutches a second time and they started to look a lot better.

And then, just as I was about to stop for the night, I fumbled and dropped half a jar of paint.

It splashed all over my feet and the hardwood floors, and I stood in shock for a minute wondering what to do. I didn’t want to waste any so I started dipping my brush into the goopy puddle on the floor and wearily continued painting. I painted until I couldn’t scoop up any more paint, and then I began the messy process of cleaning up my spill.
The painting continued the next evening. I dragged the iPad after me as it dutifully played Friends reruns. I slopped paint onto the glass of the doors, too — knowing it would be easier to scrape it off than to meticulously tape every pane. I realized I’d forgotten about the drawer fronts and moved into the living room to start their first coat.
Then I dropped my second jar of paint on a fresh new patch of hardwood! Argggggh!
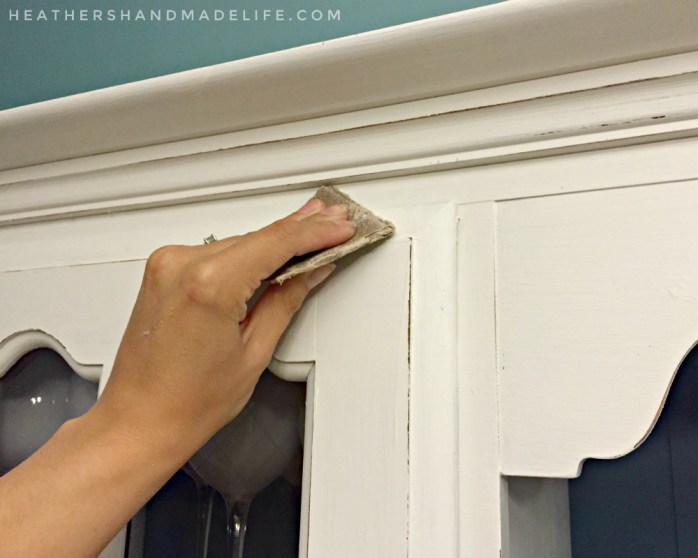
Somehow, coat by coat, both hutches went from dark orange-y wood to a warm, beautiful white. The fun part was using a bit of sandpaper to rough up the edges and show off the details of each curve, each corner, each bit of trim. Not only did the distressing make the hutches look old and interesting, but it also takes the pressure off trying to keep them pristine and scratch-free.
Finally it was time to rehang the doors and get everything back inside. The original hardware was perfectly tarnished and looked much better than any effect I could have tried to achieve with spray paint. They’re like the LEGIT oil-rubbed bronze I keep trying to imitate on other projects!
Now that the back paneling is a gorgeous dark blue, it’s been fun styling the shelves with different pieces — like these ornate white metal frames I bought at IKEA. If I decide I want a different accent colour down the road, it won’t take any time at all to quickly repaint that section.

Most importantly, though, is how much brighter the main level feels now with these white hutches. Instead of a looming wall of wood, we have an airy dining area that reflects the sunshine and still stores all of our junk — mainly glitter glue, scissors and construction paper.

It was scary to paint our dining room hutches, but I’m really glad I did. Yes, there’s a chance that I’ll regret it down the road and spend days trying to sand off the paint. But I think it’s more likely that I’ll get years of enjoyment out of their fresh new look.
xo
Products I used:

*This post contains affiliates*
I’m 32 and sleep with a stuffed animal
… but really, that’s not the point of this post. The point is that MY STUFFED ANIMAL IS HAVING A BETTER SUMMER THAN ME.
Seriously.
It all started when we (ahem, my husband) forgot to pack Billy Bunny when we were heading home from our Ontario vacation at the beginning of July. I kind of freaked at him, but also blamed myself … and, also, was sad. Bitmoji-level sad.

I knew Dad would mail him back so I didn’t want to pester him about it. Plus there was the whole postal strike business at the time, and I certainly didn’t want my beloved Billy B. to be stuck in a box for weeks on end.
(And it’s not like I can’t sleep without him. I can. I just … would feel a lump in the covers and have a momentary flash of thinking it was him, and then remember he was gone and be sad. Normal stuff, right?)
Dad texted me earlier this week to say he was on his way, so I was excited when I saw the box in the mail. Billyyyyyyyyy!
What I wasn’t expecting, though, was this …

My dad (a pilot) and my stepmother (a flight attendant) secretly TOOK BILLY AROUND THE WORLD in July and photographed it all in the most adorable photo album.
*cue squealing*


So my sweet little ratty bunny, Billy B., officially had a better July than me … and probably most of you, too.

Thank you, Dad and Debbie, for giving him the time of his life! He won’t stop talking about the Olympics and is trying to fake a British accent, but I’m so glad he’s home.
xoxo
The rainbow quilt

I finished this quilt in SEPTEMBER but somehow it only made it to Instagram and not the blog. So here it is, better late than never … the rainbow quilt!
It was the very first quilt I ever hand-quilted, so it’s JUST A LITTLE special to me.
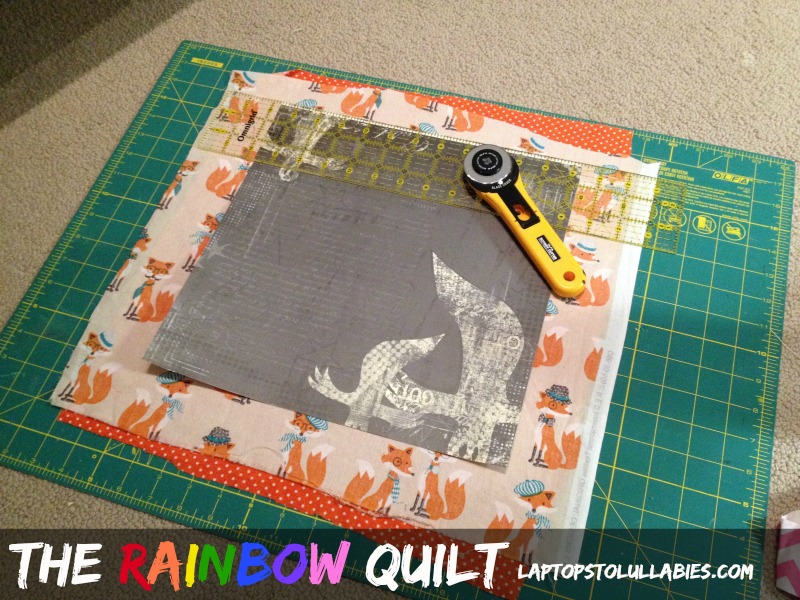 |
| I cut LARGE triangles so I had less piecing. #lazy |
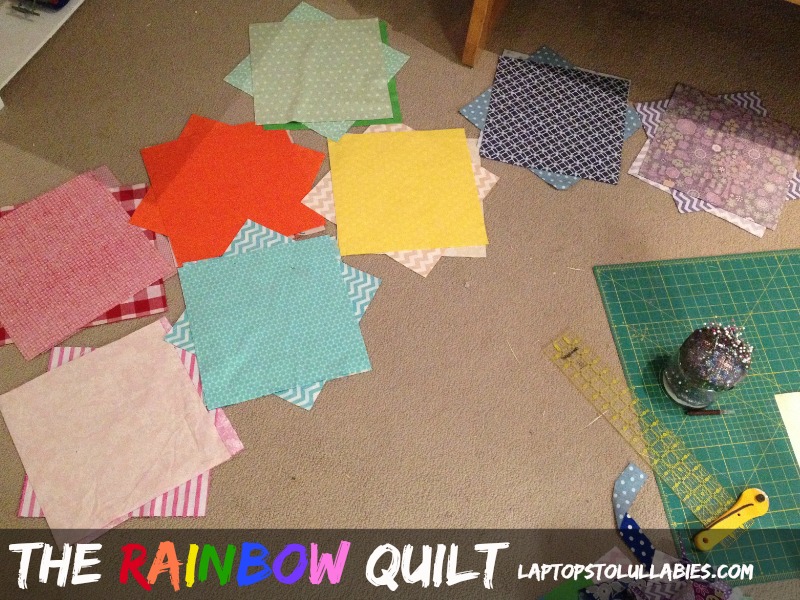 |
| I made a stack of each colour — substituting turquoise/aqua for indigo since I have so many pretty turquoise fabrics. This ENTIRE quilt was made with leftover scraps, except for a couple of purchased fat quarters (in purple) to round out the collection. |
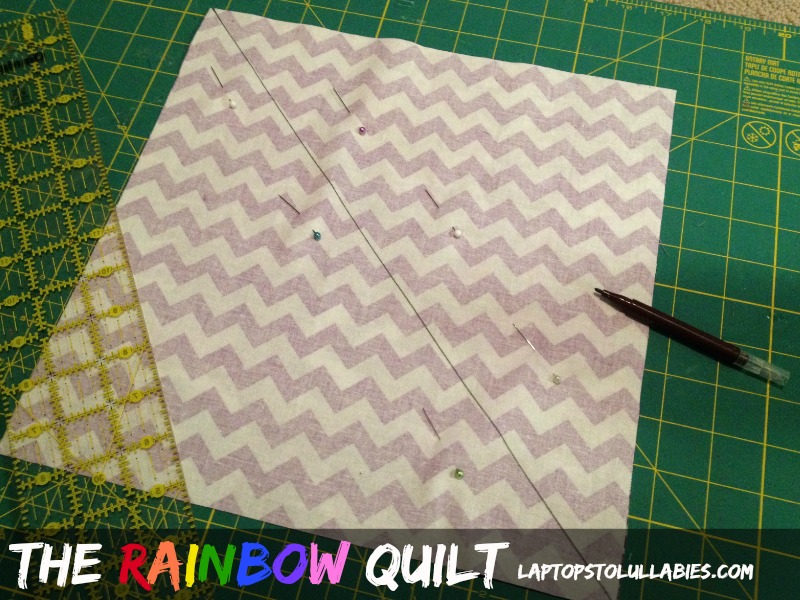 |
| I sandwiched squares together, drew a diagonal line, and cut them into little triangle bundles. |
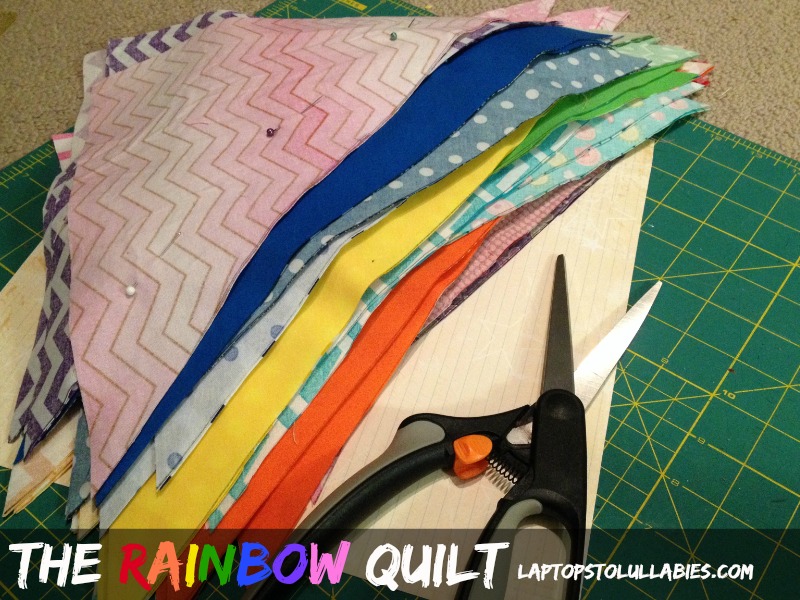 |
| So many triangle bundles, all pinned together! |
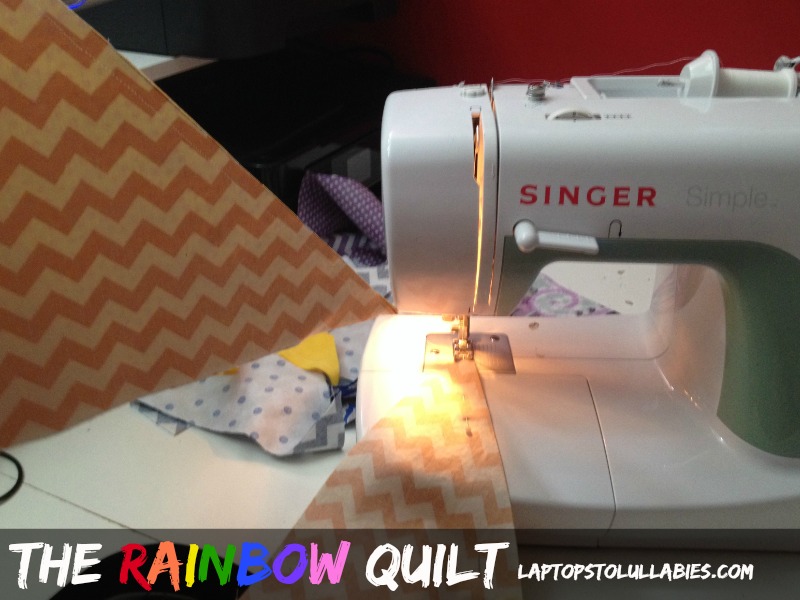 |
| Then I sewed all of the triangles together in one long row, not even bothering to cut the thread between each group. Also: LOOK AT MY OLD SEWING MACHINE! Lookit! It’s like looking at a Play-Doh barbershop! |
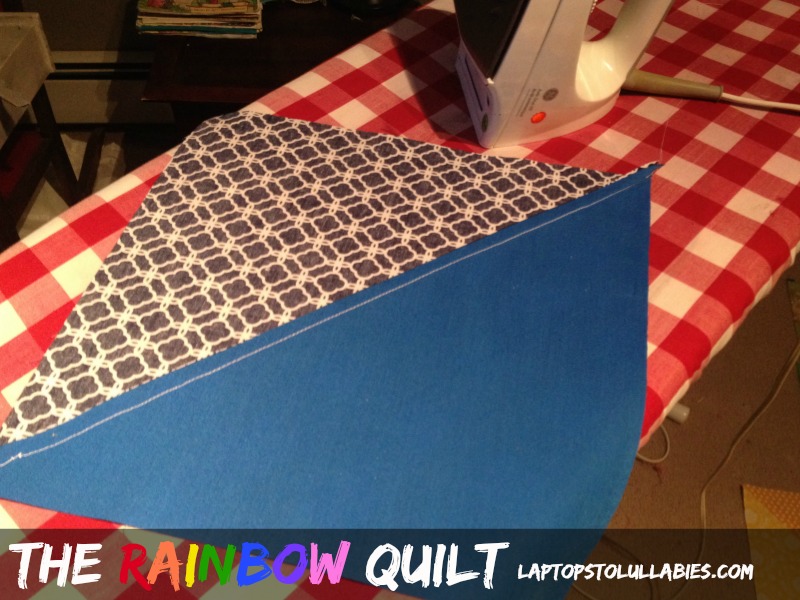 |
| Then I pressed, pressed, pressed those seams. Now I had squares! |
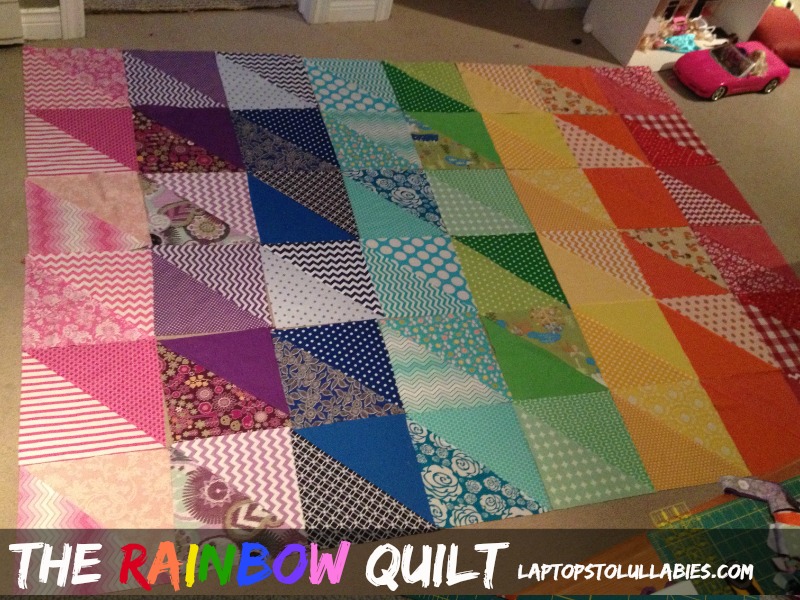 |
| When all of the squares were done, I arranged them on the carpet in order. (Hi, Barbie car in the background.) |
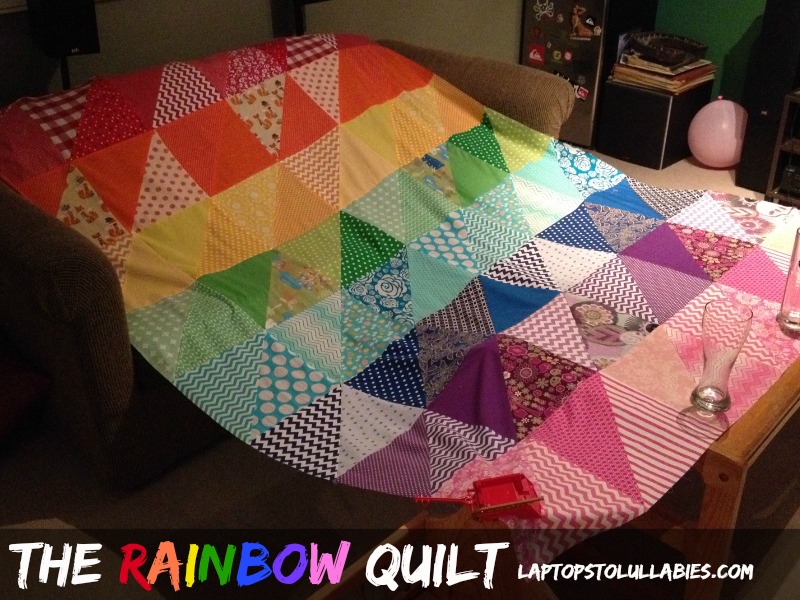 |
| Then I sewed the squares into rows, and attached the rows into the finished quilt top. (Notice the old couch — now sold in order to make room for our DIY daybed — the old coffee table — now painted with matching benches — and a random balloon?) |
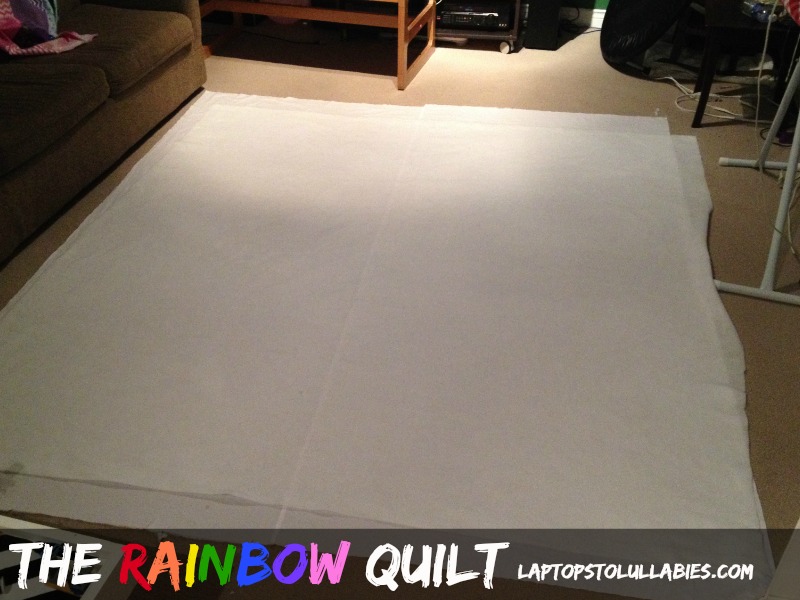 |
| Quilt sandwich time! Backing (two long lengths of white fabric sewn together for width, since this was before I knew you could just BUY backing that was already wide enough) and then batting … |
 |
| … and then the quilt top. |
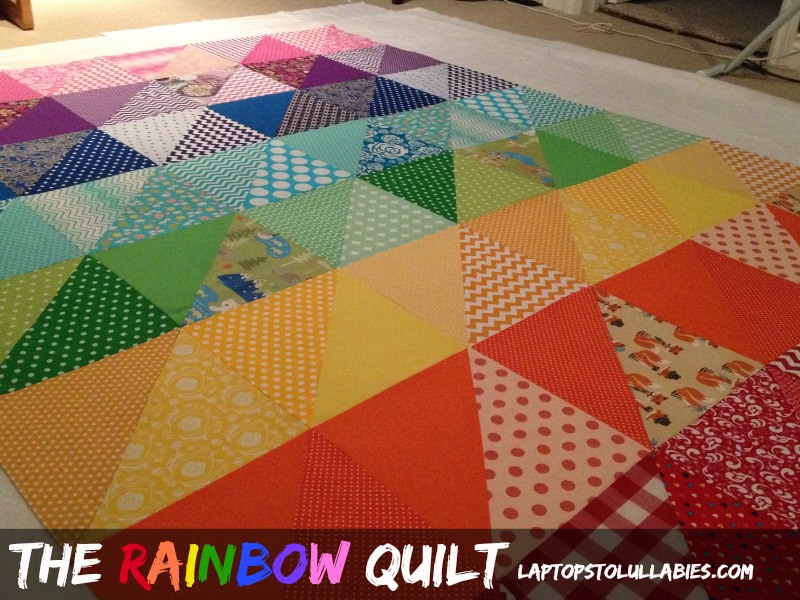 |
| Now for the pins, and then MONTHS of hand-quilting night after night. Seriously. A long time. |
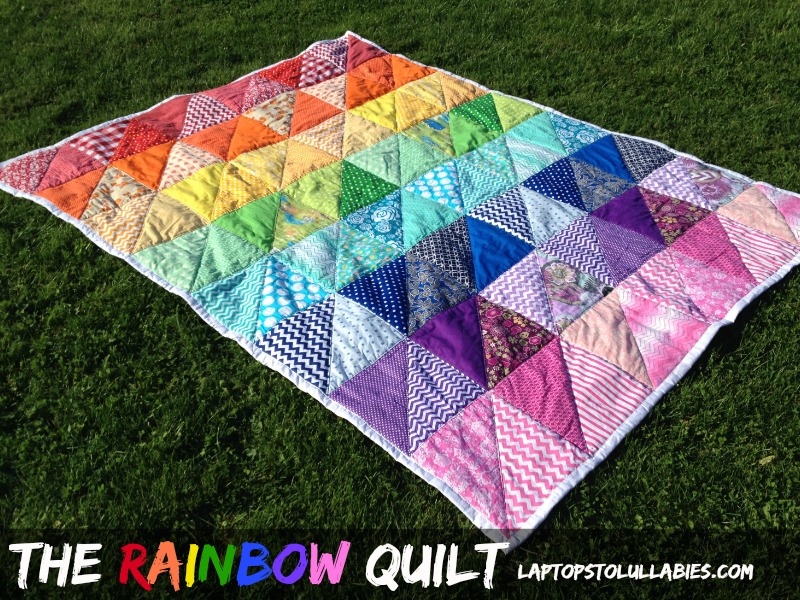 |
| Here she is, all finished — months later! |
I’ve made a couple of new quilts since this rainbow monstrosity, so I’ll share those at some point (possibly 11 months after they were completed, like this post?). I just love the bright colours in this one! It lives in a basket in our living room and it gets lots of use.
Other rainbow projects you may enjoy …
 |
| DIY rainbow canopy bed |
 |
| DIY rainbow organization for craft and sewing supplies |
A tale (tail) of two pups

Before I had my first baby, and my second baby, there was another baby. A fur baby.
Lola kept me company. She rode in a pink stroller. She was my kid-in-training.
She was my snuggle buddy every night (even when my preggo body nearly crushed her). She walked me to the bathroom again and again when I was ready to burst. She patiently walked all over Bedford with me to jump-start my labour.

Things went wrong shortly after our son was born. She’d always had jealousy issues and separation anxiety, but they got out of control. There were threatening phone calls from neighbours, from the condo board. We couldn’t sell the condo. We were trapped.

She grew increasingly aggressive. Growling at us. Snapping. For such a little thing, her jaw strength was terrifying. On one dark afternoon, she bit my hand while I was holding the baby. I put her in her kennel and called my sister — sobbing — for her to come over and just take her. JUST TAKE HER. I CAN’T.
Friends of the family used to have a Miniature Dachshund, so they understood their issues. They lived in a big house surrounded by trees. They could take her everywhere with them. They could give her the home we couldn’t. So they did, happily.
We took a lot of flak for our decision. Jokes about “trading up” for a baby. It killed me to hear it.
Yes, there are plenty of people who Kijiji or Craigslist their pets because it’s not convenient, or they’re moving and don’t want to bring them along.
But there are also people who love their pets desperately — who whisper in their floppy ears and sing them songs and sew them clothes — and still have to re-home them. People who are scared and trying to do what’s best for their (human) baby, and are forever haunted by their decision.
It’s painful to talk about her, and it was almost six years ago.
Time moved on, our son grew older, we finally (finally!) sold that blasted condo, and we moved to our House of Dreams in the country. We welcomed our baby girl and settled into life as a family of four.
All around us, families had dogs. We did not. I wanted one, of course, but I was (A) entirely convinced we couldn’t handle one, with two tiny children, and (B) terrified of going through the same experience again.
I couldn’t fathom picking up poop again with a baby strapped to my chest, or struggling down the sidewalk with a baby, a two-year-old and a leash. I couldn’t handle another responsibility. I just couldn’t.
But I longed a dog. I’ve been a huge dog person since I was eight years old. When we got to choose our own assignments for projects, I used to do mine on the different breeds of dogs and how to take care of them. My dad and stepmother got a beautiful black and white Cocker Spaniel, Bandit, and I was obsessed with him. I called him my husband and mailed him cards that said “To the man I love, on your birthday.” (Creepy, I know.)
My husband had never owned a dog until Lola, and he loved her just as much as me. He was confident that we could have another dog — that it would be good for the kids — but I shut down the idea. No. No. Not again. What if …?
I have seen Lola several times, and it’s clear she is very happy. She is even more spoiled than she was with us (pre-baby) if that’s possible. Her new owners have gotten kicked out of many stores because they insist on bringing her absolutely everywhere, which she adores.
Each time, she has leapt into my arms and smothered me with kisses. It makes me happy that she remembers our time together so fondly. It also hurts, because I miss her. I miss her so much.
Somewhere in the shift of the kids getting older — and our lives getting a little easier — the ice around the doggie-part of my heart started to melt. There weren’t any more diapers to change, there were far fewer bum-wipings in the run of a day. Maybe, yes. It was starting to look like more of a possibility.
My husband has been pushing hard for a dog for the last couple of years. He tells me how much the kids would love it (they would). He points out that we finally have a yard, and we don’t have neighbours on all sides of us like at the condo (true). He adds that since I work from home, the dog would hardly ever be here alone (also true).
The idea has been working its way into my mind — and my heart — for a while now. I still ache for Lola but I know I have love to give to a new dog. There are so many nights when I sit on the couch and can almost feel our future dog snuggled up in my lap. Afternoons when I long for them to be cuddled at my feet, under my desk. Not to mention the fun the kids would have playing with them in the backyard.
Somewhere, too, there was the twinge of sadness that the kids are growing up so fast and they need me less and less. An unexpected surgery took away my ability to have a third baby — although we likely would not have, anyway — and a dog felt like a compromise of sorts. A perma-baby, in a way. A redemption.
We slowly started to do the research. We compared the sizes and qualities and temperaments of countless breeds. We adopted Lola on a whim without absolutely zero forethought, so we knew we couldn’t make that mistake again. We looked at rescue sites and online listings and I waited to feel that spark — to know we were looking at The One.

Things fell into place in exactly the right way, with someone else backing out shortly after I reached out. We drove almost an hour to see her. My knees were shaking as I sank onto the floor of a porch to stroke her fur. I held her warm little body against my chest as she fell asleep on me. I never wanted to let her go. She was mine, instantly.
We bring her home at the end of August. I’m excited and nervous and a little afraid of what people will say, but mostly I can’t wait for her to join our family.
xo
The fixer-upper play set

I called dibs on a neighbour’s play set when their youngest was in Grade 5, and I felt like I’d won the jackpot when they decided they were ready to sell it to us. These wooden play sets can be $1,000 brand new, but we got their well-loved one for a fraction of the cost.
We took it apart, lugged it up the street in a borrowed truck, and put it back together again. The kids were overjoyed but I knew it needed a bit of freshening in order to really look great in the yard.
Here’s what we did to give our new-to-us play set a budget-friendly makeover …


Read the full tutorial over in my weekly DIY column, My Handmade Home …







As featured on …