
DIY dollhouse from old shelves

Good news, DIYers! I’ve found a way to combine the most joyful elements of crafting — brightly-coloured paints, polkadots, pretty scrapbook paper, chevron, gold leaf, stripes and glitter — all into a single project that’s easy to create while watching your favourite TV show.
We’ve been doing a lot of major projects around our Handmade Home over the past couple of months — from making over our master bedroom/bathroom and redoing our kitchen cabinets to turning our entry closet into a mudroom — so this week’s project was a nice break from power tools and hours of manual labour.
As much as I love tackling the big projects on my ever-growing list, it’s also satisfying (and less expensive!) to work on a smaller piece using materials we already have.
Our kids are not lacking for dolls, or dollhouses. We have a secondhand plastic dollhouse in our daughter’s bedroom, and my old Barbie house (built by my husband when we were in high school — awww) in the playroom.
But we were collecting a lot of random little figurines and dolls that didn’t have a home to call their own. Our three-year-old daughter loves playing with tiny figures, and she was always losing them because they didn’t have a designated spot.
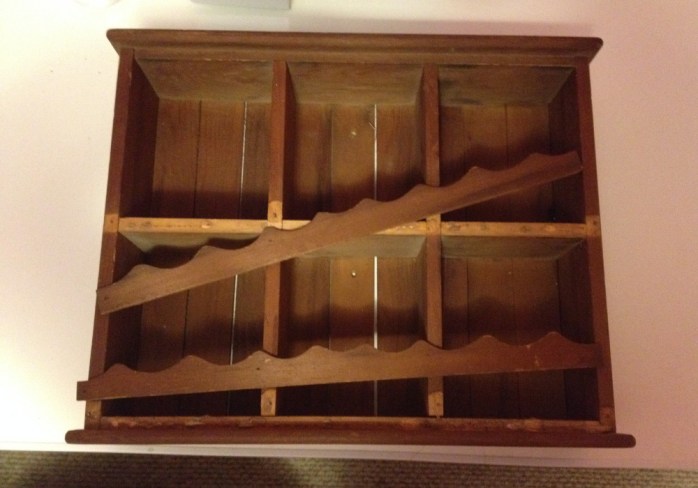
So I decided to turn a beat-up set of shelves (pilfered from my mom’s house) into a cubby-style organizer slash dollhouse for her little treasures.
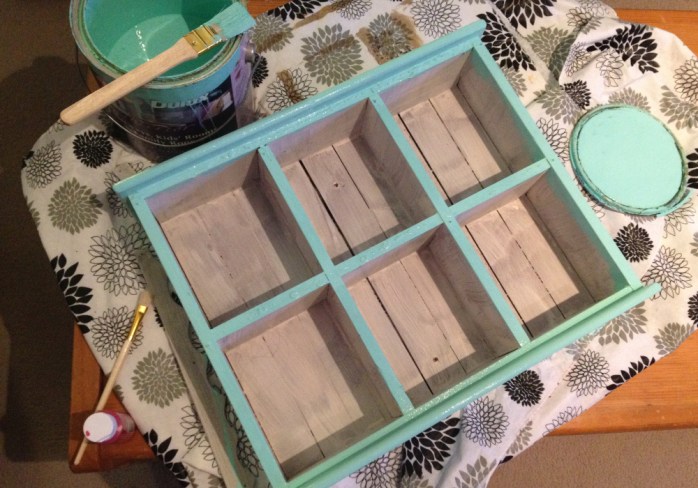
I started by giving the shelves a quick coat of white primer …

… and then painting the outside using some leftover aqua paint from our daughter’s bedroom (CIL’s “Bali Hai”).
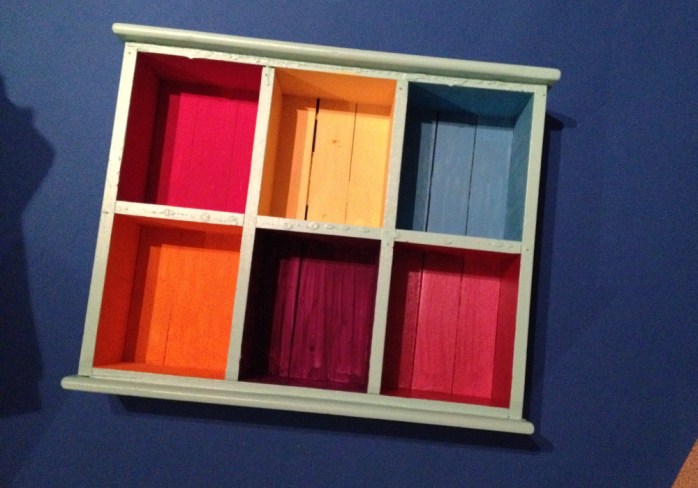
Then I painted the inside of each cubby a different colour, just using random acrylic paints I found deep in my Craft Closet of Mystery.
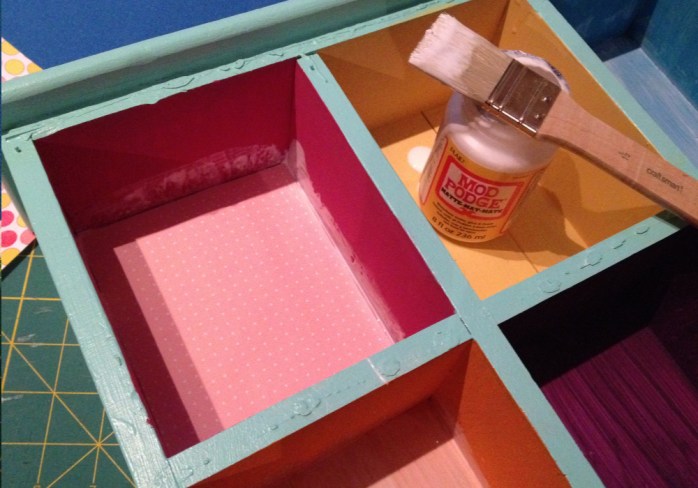
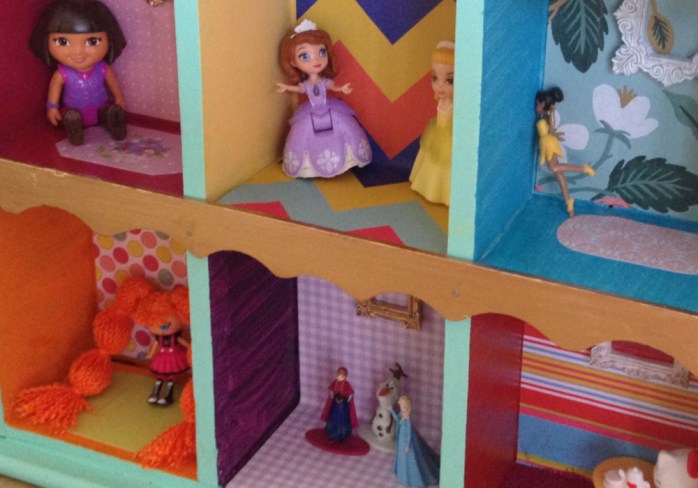
The fun part was choosing pretty scrapbook papers and wrapping papers to decorate each “room.” Each cube measured five inches wide and six inches tall, so I cut pieces of paper to fit — cutting some papers long enough to cover the back wall and the floor, just to mix things up.

Once all of the papers were cut, I brushed some matte Mod Podge onto the back of each cubby and pressed the paper in place. I could have brushed another coat on top, but it didn’t seem to need it, so I left it alone to dry.
That took no time at all, so I cut out a few oval-shaped “rugs” and pasted those on the floor in a few of the cubbies. I also brushed Mod Podge onto one of the “floor” sections, and shook on some hot pink glitter (Recollections’ “Janelle”) just because sparkles make everything more fun.
The finishing touch was digging out my gold leaf paint (LiquidLeaf’s “Classic Gold”) and glitzing up the wooden trim pieces for the shelves. I also painted a couple of miniature frames (50 cents each at the craft store) and hot-glued those to the walls. Once the trim pieces were dry, I used a few tiny finishing nails to tap them back onto the shelves, and I was done.
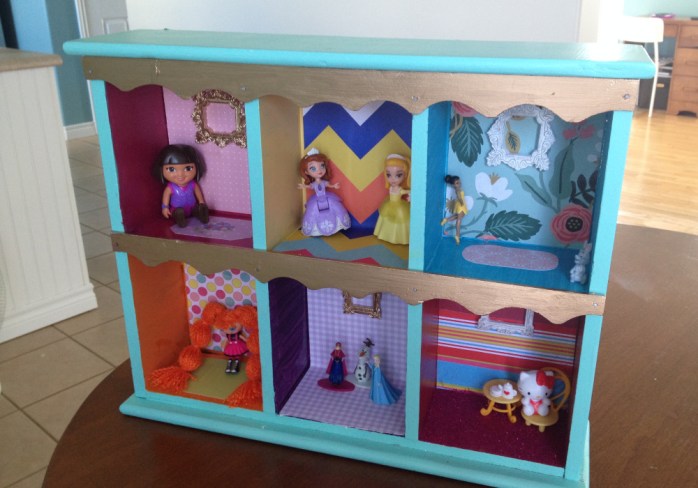
The kids were so excited to see their new play shelves, and they’ve been having fun arranging everybody from Happy Meal toys and Kinder Surprise prizes to board game figurines.

The shelves take up very little space, and they’re light enough to move around from room to room. Because our daughter loves putting her figures “in their rooms” when she’s done playing with them, there aren’t any more tears because she can’t find a one-inch tall Elsa, Dora or Hello Kitty.
I’m happy with it, too, because any day that I don’t accidentally step on that pointy little Sofia the First figurine is a pretty good day.
Don’t forget to pin this idea for later!


As featured on …


