
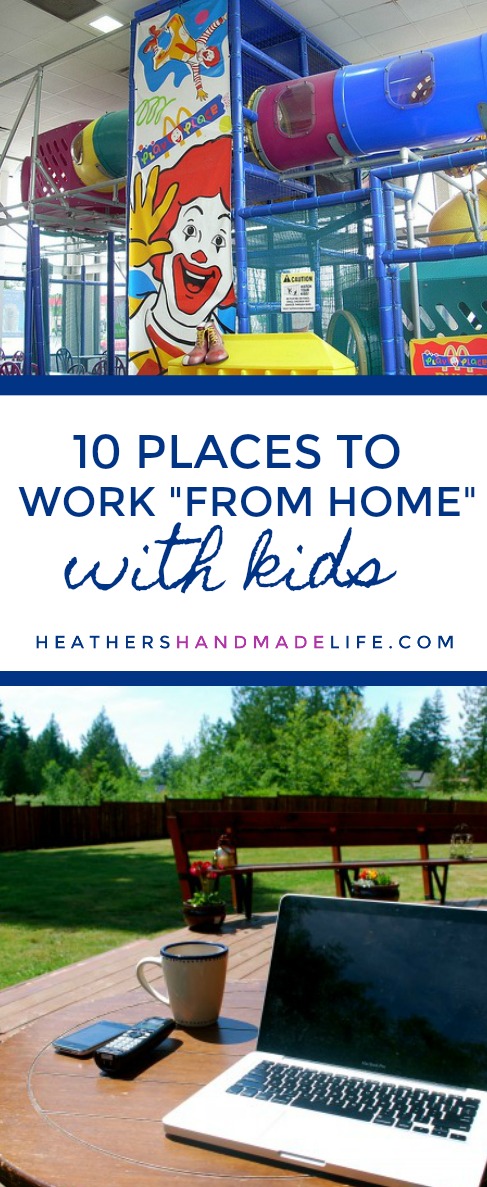
10 places to work ‘from home’ and also entertain your kids

 “I get it! I totally get it! In fact, my kids are on the other side of my office door right now — crayoning notes that say ‘Can we ples play Wii now ples and thack you?’”
I’ve been working from home — with kids — since 2010, so you might say I have seven years’ experience in typing quickly while shouting.
Sometimes it feels like the rest of the world is working in a “real” office free from sticky fingers and demands for more snacks. But the reality is that a lot of other professionals need to work from home occasionally.
Their kid’s too sick for daycare or their babysitter cancelled, they lost the coin toss with their spouse and here they are — struggling to make calls or respond to emails while making grilled cheese and slicing grapes.
It’s usually after a day or two of working from home — with kids — that friends send me the how-do-you-DO-this-every-day text. They claim they can’t get anything done because the kids are so distracting, and it does take practice.
I’ve learned, however, that it’s all about location, location, location.

Since it’s the last week of school, I thought I’d share suggestions for where (and how) to work if you’re blessed (er, burdened) with your children but really need to get stuff done …
- Libraries. This is a new one for us, as we have a gorgeous new library with a very nice children’s area — complete with a playground, craft centre, Lego, and even Wii games. I park myself on a couch, open my Chromebook and start writing.


- Day camp. You can get a lot done while your child’s in day camp, even if it’s just for two or three hours. Maximize your time by working in the car or sitting in a quiet hallway, so you’re not spending precious child-free minutes driving somewhere else.
- Indoor playplaces. We used to have one that I legit considered my off-site office, but it sadly closed last year. This summer I’ll plan to bring the kids to Hop Skip Jump and Happy Kids for a treat, and I’ll use noise-cancelling headphones to concentrate amidst the shrieks and toddler tears.

- Fast food restaurants with playplaces. This is a personal favourite of mine. I take the kids for lunch, we eat together, and then they run off to climb and slide while I start working. Armed with free WiFi and the biggest fountain Diet Coke they serve, I’m super productive and the kids are having a blast.

- Parks. Work at a park? Yup, totally possible — if you can angle your laptop screen properly to reduce the glare. Snag a picnic table in the shade, set up your laptop and use your phone as a WiFi hotspot if you need to go online.
- Splash pad. I wouldn’t work at a pool — if my kids are in the water, I’m right there with them — but there’s no drowning risk at a splash pad. We have two near our house and the kids love them, so I’ll try to find a patch of shade and sit on a towel.
- The backyard. Similar to working at a park, screen glare is the biggest issue. But you can sit on a lawn chair and supervise the kids while they play, and at least everyone’s getting fresh air.
- A friend’s house. Now that my kids are five and seven, they often go to friends’ houses without me in tow — and that means I can work alone in a quiet house! Yipeee! Just make sure to return the favour and have their friends over soon, so their parents can have a bit of quiet time, too.
- Inside the house (without the kids). If the kids are playing in the yard, I don’t always need to be outside with them. Sometimes I’ll set up at the dining room table so I’m right next to the screen door to keep an eye on things.

- Inside the house (with the kids). There are certainly times when you’ll need to work and the kids will be in the house with you. The key is giving them different activities for each work session so they’re not bored. Sometimes mine will get to watch TV or play a video game, but other times I’ll tell them to play with their toys, read, make a craft, play a board game, etc.

By making an effort to work in a place where your kids are happily entertained, you’ll be able to really focus. Being able to concentrate means you’ll finish your work more quickly, and then you can shut your laptop and do something fun together.
xo
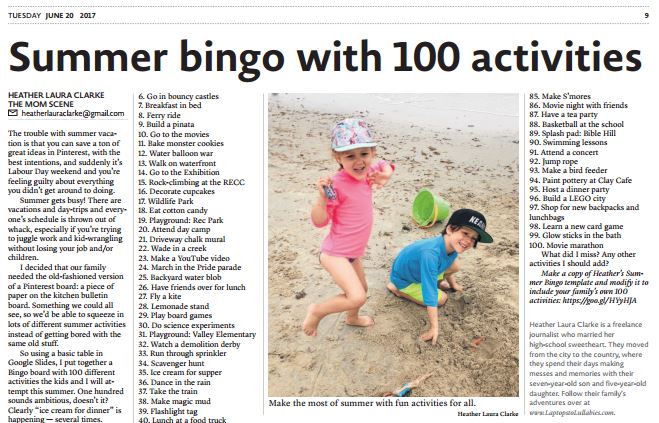
Summer BINGO with 100 activities for kids { Free download }
The trouble with summer vacation is that you can save a ton of great ideas in Pinterest, with the best intentions, and suddenly it’s Labour Day weekend and you’re feeling guilty about everything you didn’t get around to doing.
Summer gets BUSY! There are vacations and day-trips and everyone’s schedule is thrown out of whack, especially if you’re trying to juggle work and kid-wrangling without losing your job and/or children.
I decided that our family needed the old-fashioned version of a Pinterest board: a piece of paper on the kitchen bulletin board. Something we could ALL see, so we’d be able to squeeze in lots of different summer activities instead of getting bored with the same old stuff.
So using a basic table in Google Slides, I put together a Bingo board with 100 different activities the kids and I will attempt this summer. One hundred sounds ambitious, doesn’t it? Clearly “ice cream for dinner” is happening — several times.
We’re going to hit up all of the local playgrounds and pools, take advantage of fun only-in-the-summer activities like parades and outdoor concerts, and cram in lots of backyard fun with sprinklers, wading pools and water balloons.
The list also includes indoor activities, since I’m a major Indoor Girl. We’ll do science experiments and baking, make our own storybook, build a LEGO city, and other things that don’t involve sunscreen, hats and a sweaty mama.
Over the summer, we’ll tackle the Bingo board and see if we can mark out all 100 items. I’ll even get a Bingo dauber for the occasion, which is sure to delight and stain the children on a daily basis. Wait, make that TWO daubers to limit the squabbling. (Each square will undoubtedly have two daubs in it, one per kid.)
… or click below to download your own Bingo cards!
 |
| Customize the editable version in Google Docs |
| Download/print a blank version to fill in yourselves |
 |
| Download/print our family’s version |
 |
| Pin these boards for later! |
Grey is the new orange: How to paint wicker (the easy way)


It found a home with my mother, and then my sister, before finally making its journey to me. But it was not the happily-ever-after one would expect, for its orange wicker was so ghastly that no one could truly fall in love with it . . .
Still with me? I bet you have one of the wicker drawer units, or you know someone who does. They’re everywhere, and they really are well made. This particular unit has been passed around my entire family and it still looked brand new.

We stuck it in our living room for a while and used it to hold small toys, after I’d banished all remaining toys to the basement or the kids’ bedrooms. It was fine, despite not matching the hardwood, but I knew it could be better.
On a very rare evening when I had the house to myself, I got the brilliant idea to close off the bathroom door that connects our master bedroom to the only upstairs bathroom. (I have no idea why a “cheater ensuite” would ever be appealing.)

We didn’t need two doors and we’d gain extra wall space in our room. So I heaved my husband’s tall dresser over to block the door from the bedroom side, and brought this drawered unit into the bathroom — it fit perfectly in the extra doorway.
Could I really paint wicker? I hadn’t done it before. But the orange had to go, so I started with the base of the chest. It didn’t take long to cover it up. I painted the chest a beautiful deep grey (Ash by Fusion Mineral Paint) and lined up the drawers on a dropcloth in the hallway.
When it was time to paint the wicker drawers, I decided it would be insane to attempt perfect coverage. That would have required a lot of cursing and obsessing — using a tiny paintbrush to get in every single nook and cranny. NO WAY.
Instead, I dry-brushed them with a lighter grey (Putty by Fusion Mineral Paint) so they looked weathered. I paid more attention to the drawer fronts, since they’d be the most visible, and just lightly dry brushed the sides. It was enough to cut down on the orange without being too finicky.

When the drawers were dry, I popped them back into the unit and gave the edges a light scuff to distress them. I added a few accessories and eventually plan to hang white drapes to cover the door so no one will ever know it was there.
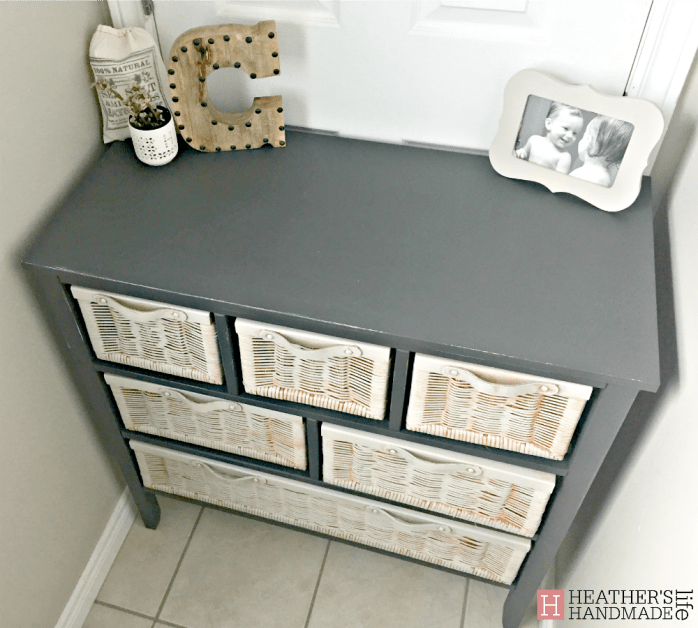
The formerly orange chest is now the perfect spot for storing the extra soap, shampoo, toothpaste and razors that normally got lost under the bathroom sink or tucked away in the linen closet. There’s a drawer for every category, and now it’s much easier to see when we’re running low of something.


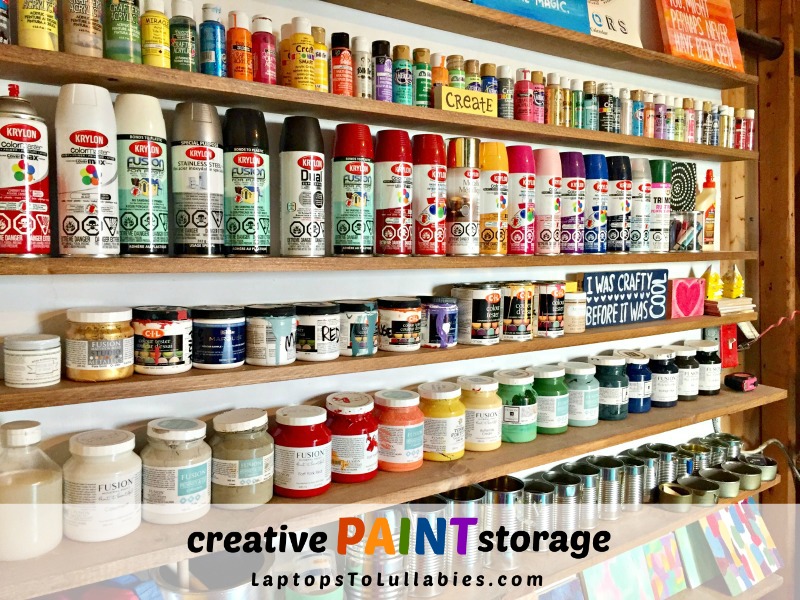
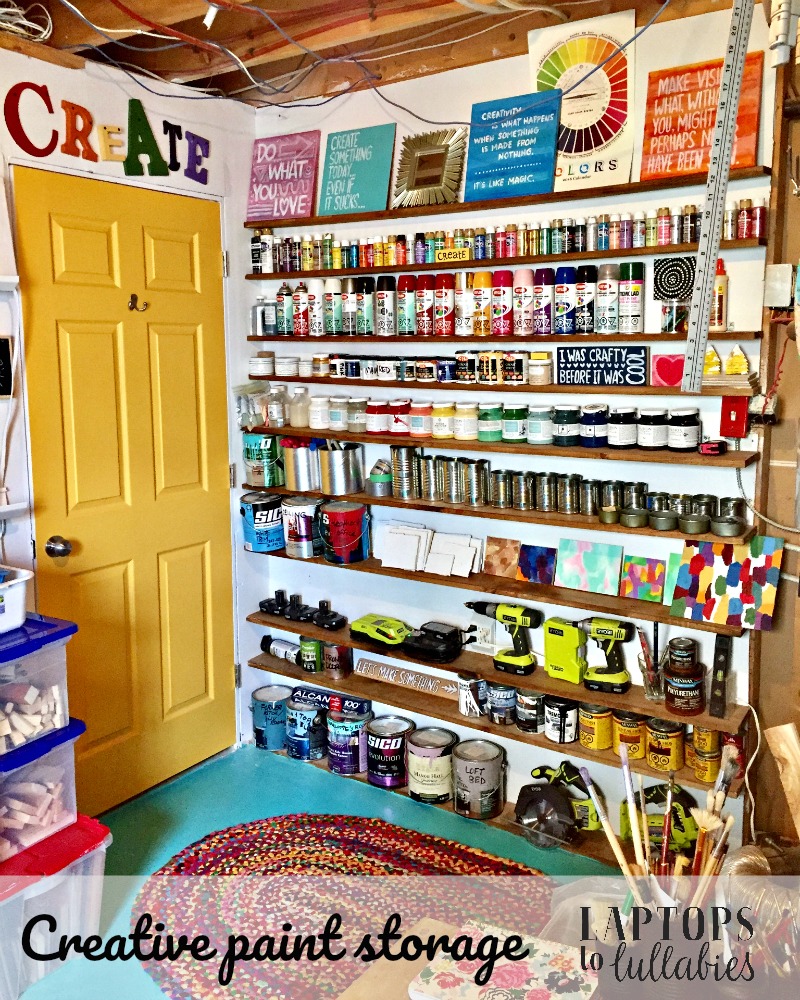
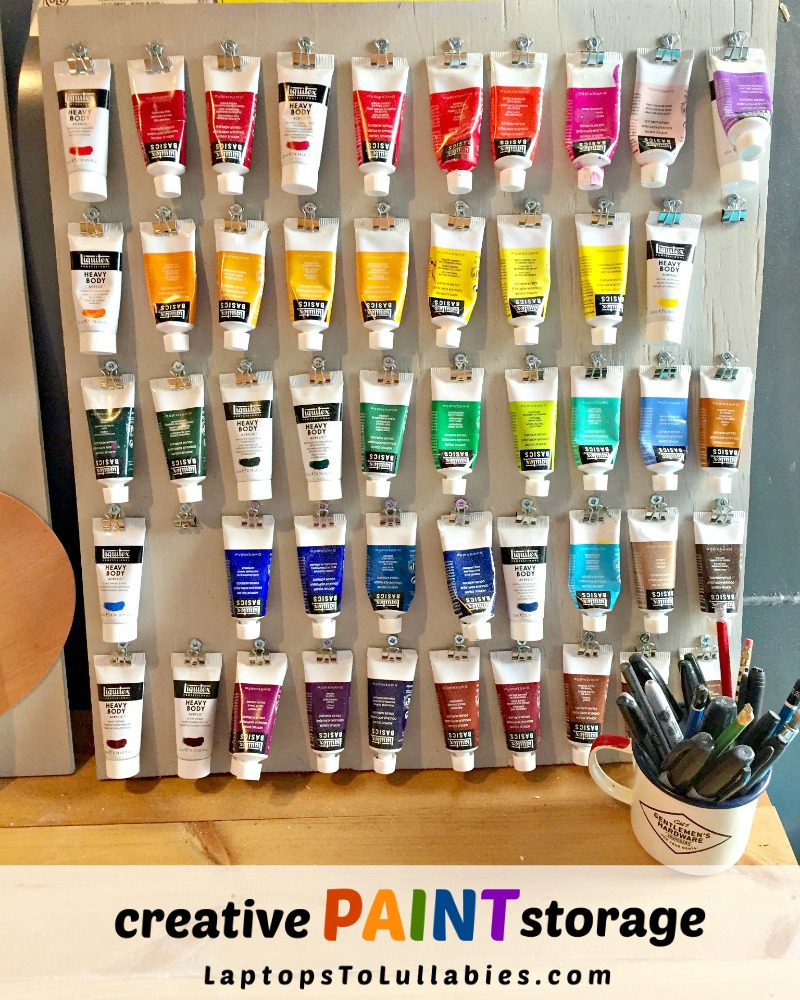
Creative paint storage solutions
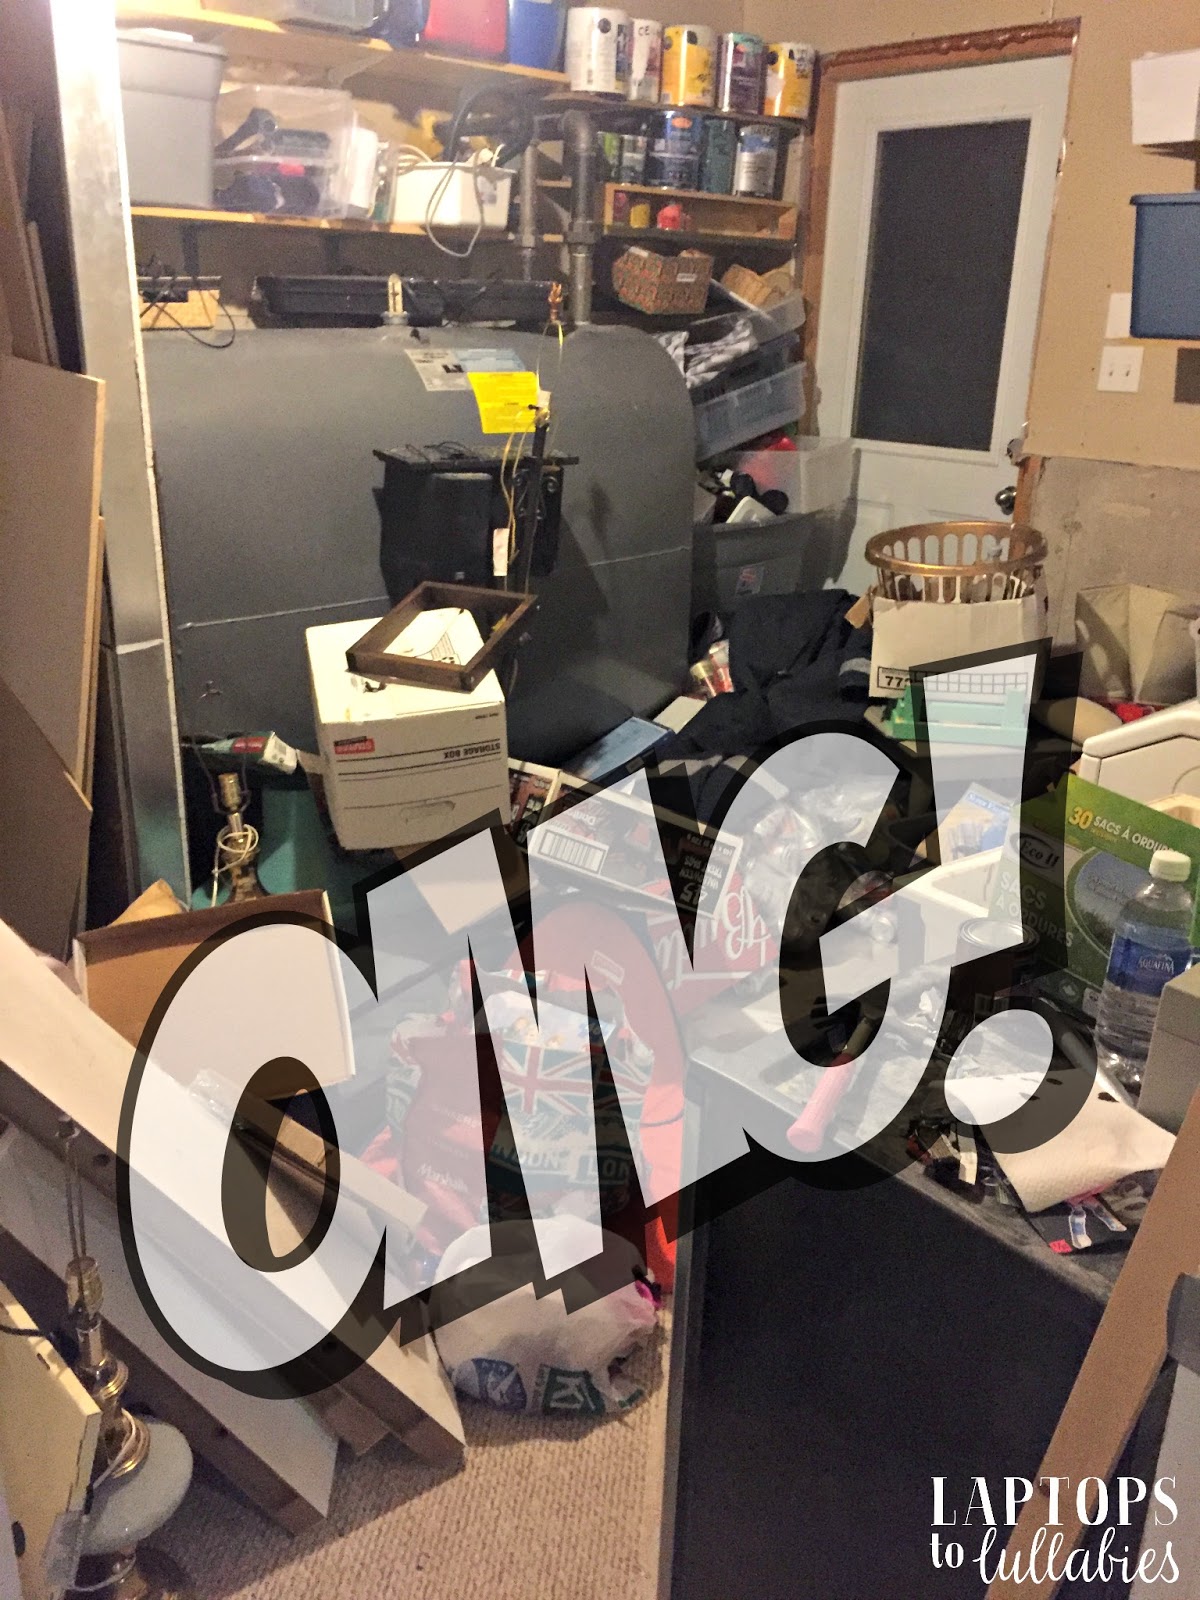
Before the studio, when the room looked like hell, I was storing our large paint cans in the utility room (a.k.a. hellhole), my acrylic paints and oil paints in my office, and my “fancy” paints (Fusion Mineral Paint and Miss Mustard Seed’s Milk Paint) in a closet under the basement stairs.
 |
| Yikes. |

The very top shelf is for displaying canvases, but it can hold more paint if I need the room down the road.
For now, I have …
- a shelf for acrylic bottles — which I only really use in projects with the kids because they’re cheap
- a shelf for spray paint
- a shelf for sample tubs and “proppers” (extra tiles I use to keep things off the ground while I’m painting them, and these genius plastic painting pyramids)
- a shelf for my Fusion Mineral Paint and Miss Mustard Seed’s Milk Paint
- a shelf filled with recycled cans to store my gloves, sponge brushes and screws
- a shelf for in-progress pieces (and large can overflow)
- a shelf for storing and charging my Ryobi batteries
- a shelf for stain and small cans of paint (and the tinfoil I use sometimes while painting)
- a shelf that rests on the floor for most of the large paint cans (and my Ryobi jigsaw and circular saw, so I don’t have to worry about them falling onto the floor)

Looking at these shelves just FILLS me with excitement for new projects!


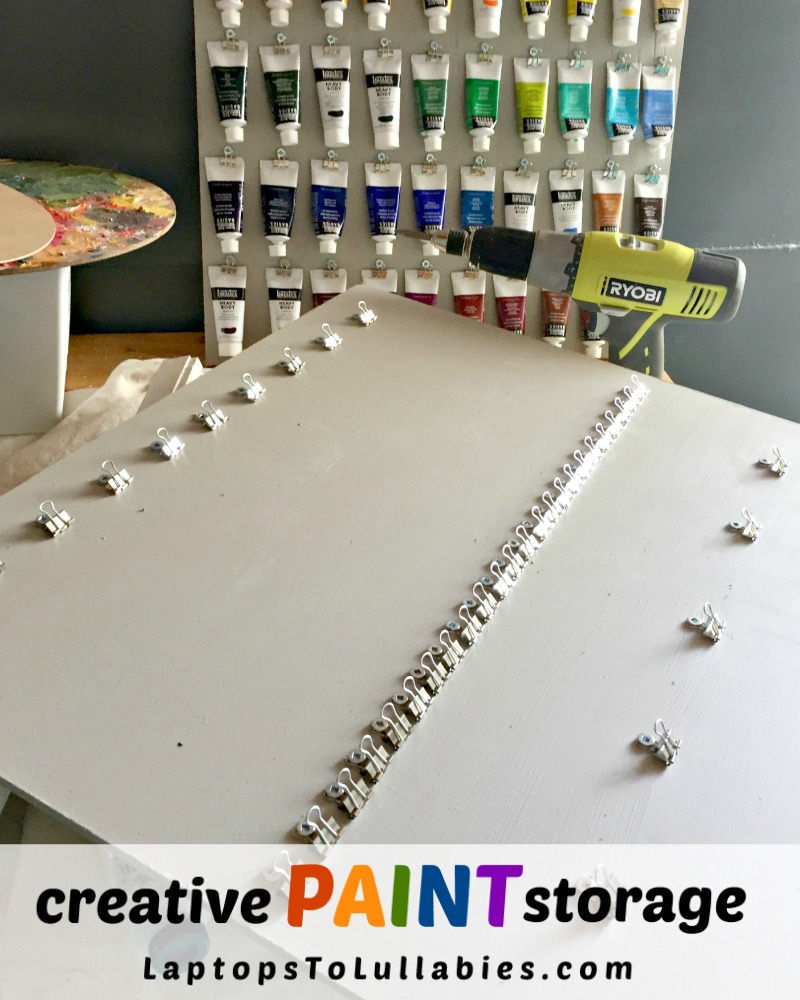


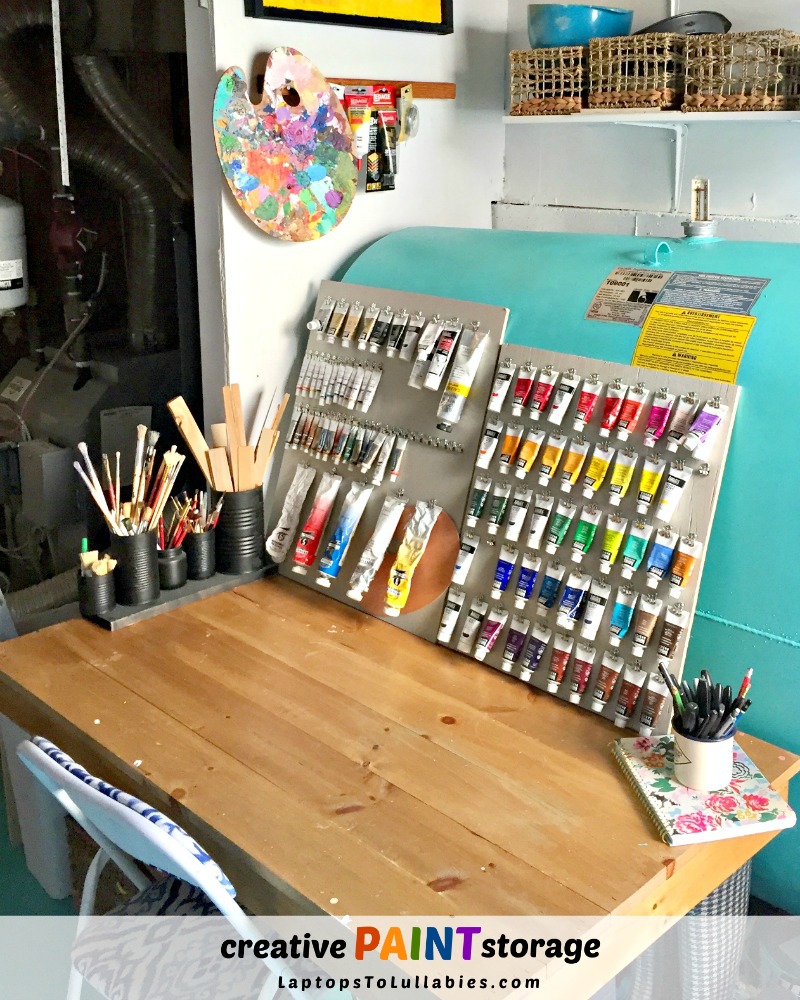
The second board holds the acrylic overflow and any special mediums, plus my oil paints.


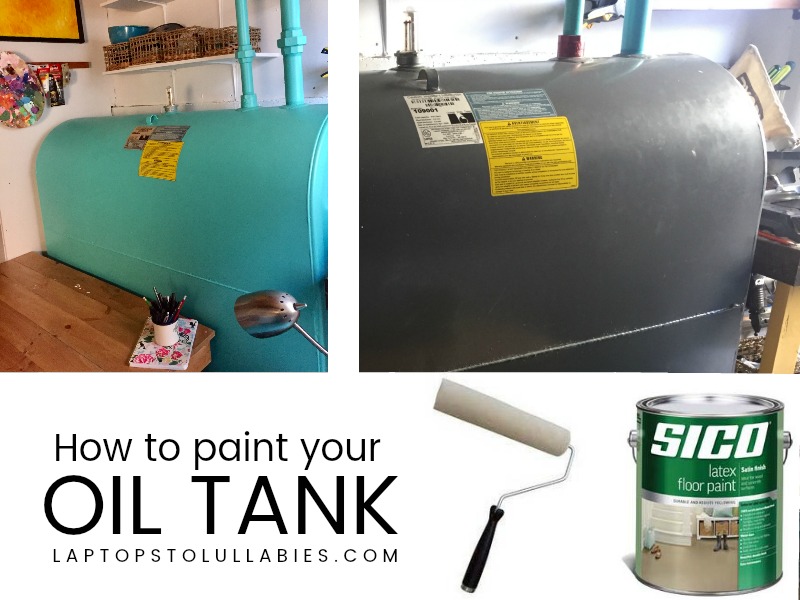
Sure, you can paint your oil tank!
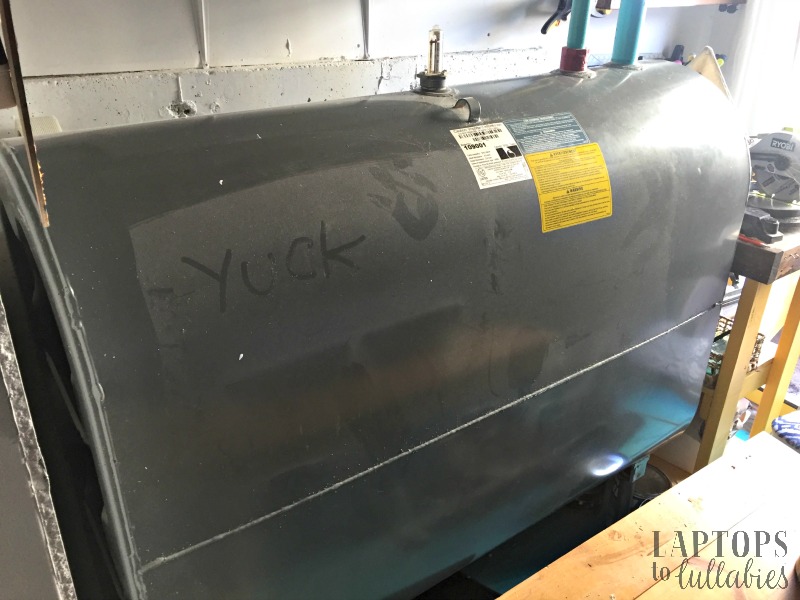
Actually, it was more like this …

And sometimes THIS …
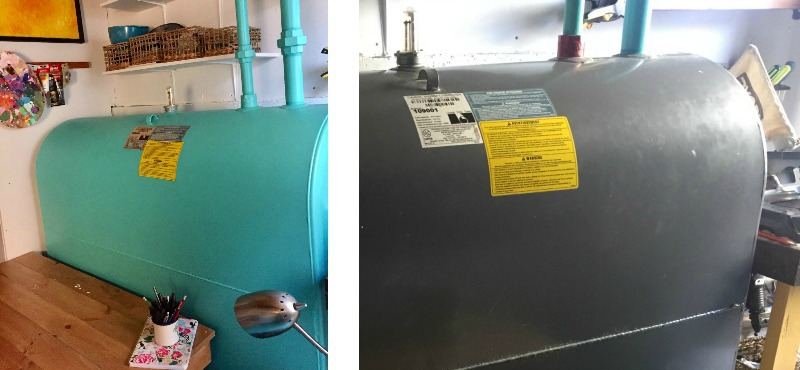
When I shared our laundry room makeover on Sunday, you might recall the oil tank was looking a LOT different …

I knew all along that I WANTED to paint the oil tank, but Darling Husband? He didn’t think it was a good idea.
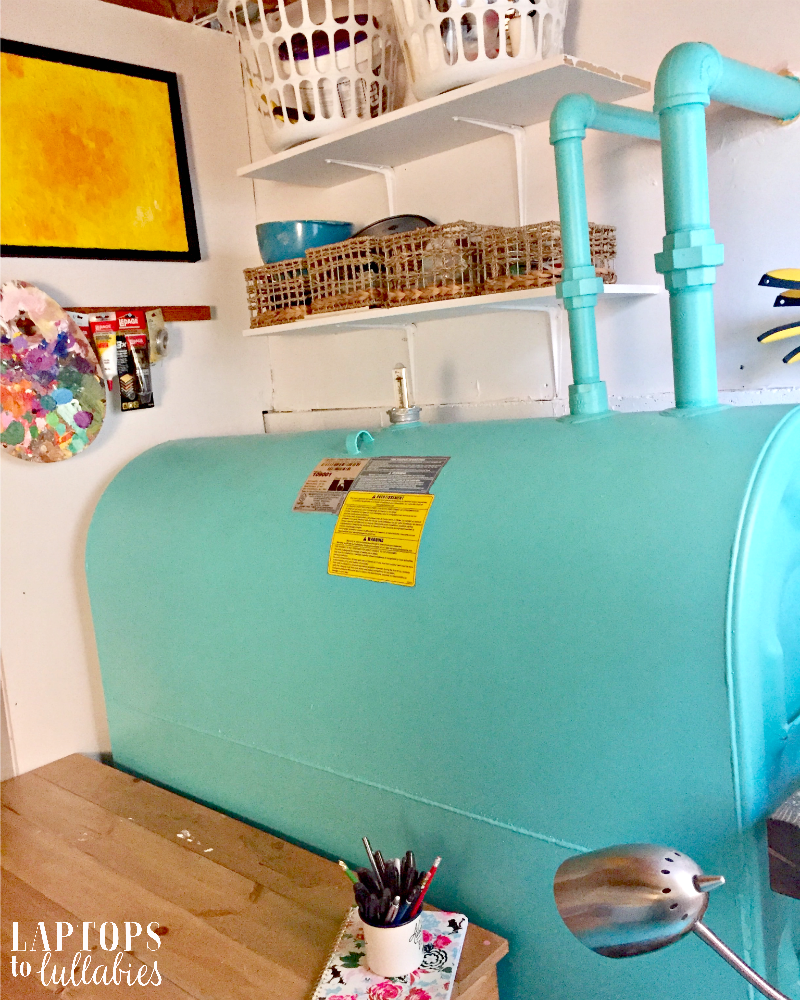
Naturally, I waited until he was working and decided maybe I’d just paint the pipes using some of the leftover floor paint (Naples Bay by SICO) …

… but the pipes looked so good that I JUST. KEPT. GOING.
It was so damn beautiful.
***
Now, a couple of disclaimers!
Yes, we own the oil tank — and yes, I did take a careful look at the sticker before painting it. The sticker said “DO NOT REMOVE OR PAINT THIS LABEL.”
So if we’re talking about not painting a label, that kind of implies that paint might be NEAR the label, right?

It took three coats to cover it nicely, and it looks SO pretty in my new laundry room — a fun splash of turquoise instead of a nasty grey beast.
Ahhhh …
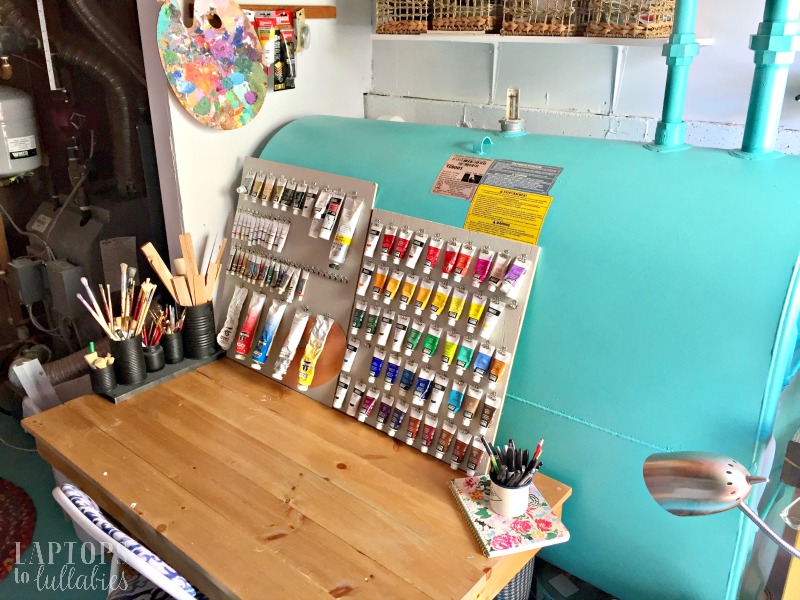
And it’s the perfect spot to prop up my custom paint storage boards. (More on those tomorrow!)
 |
| Pin this idea for later! |
Pssst!
Did you check out the full laundry room makeover yet? It really is epic.
 |
| Click for the full laundry room / DIY studio reveal |
 |
| Seriously, what a difference! |
 |
| My new favourite space |


As featured on …


