
Kids on YouTube is the latest obsession

Are your kids on YouTube and dreaming of stardom?
I often wonder, when my daughter is watching herself on YouTube and giggling hysterically at her own jokes, if we are raising what’s going to be the vainest generation of all time.
Yes, she’s on YouTube … watching herself. The kids were barely three and five when I set up a simple YouTube channel for them. (It’s called Playtime with Dexter & Rosey, if you have YouTube-obsessed children who might want to watch our family’s silliness).

Our first video was seven-and-a-half minutes of the three of us playing with Playmobil toys. The plot was simple: a little girl named Becca goes to the fair with her mom and they start going on rides.
Let’s just say I know what children find funny, and it’s making little plastic people pretend to retch over the side of a ferris wheel. And somehow there were farm animals going to the bathroom on people, too. It’s quite embarrassing, but clearly it worked, judging by the soundtrack of giggles. Read More
Shadow box your treasures so you can actually appreciate them

How creating a simple shadow box can make you feel happier
I admit to being sentimental when it comes to “stuff,” but it gets complicated because I also hate clutter and our house has limited storage space. It’s a vicious cycle, where I lovingly tuck things into plastic storage crates in a closet, and then get frustrated that our closets are full.
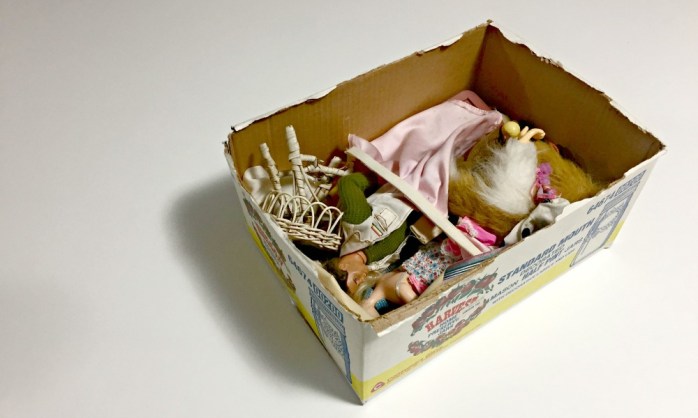
It took me a long time to find the solution: shadow boxes. These deep frames force you to pare down your mementos and only keep the very best ones, and then you get to smile at them every day as they hang on your wall.
The first shadow box I ever made, years ago, was about Jennifer Aniston — yes, Rachel from Friends. Oh, you didn’t think of hanging pictures of her on your wall? Funny.
I’ve been a “Faniston” since I was 12 or 13, and used to collect newspaper and magazine clippings with her pictures and interviews. Pretty soon I had many large boxes stuffed with printed episode scripts, Friends calendars and even old issues of TV Guide.
I finally decided I couldn’t keep it all anymore — and didn’t really want to — but it felt wrong to just toss our years’ worth of collecting. So I went through everything, picked out the best photos, and kept only what fit in a single shadow box (purchased for about $30 at the craft store). Suddenly, I felt OK about getting rid of everything else because my favourite bits were displayed so nicely …

How do you make a beautiful shadow box quickly, without a lot of fuss? Continue reading in my weekly DIY column, My Handmade Home …

Continue reading in my weekly DIY column, My Handmade Home …
HEATHER’S HOLIDAY GIFT GUIDE: Gifts for kids

The following holiday gift guide (gifts for kids) contains affiliate links. If you purchase a product from one of these links, I may receive a small commission from the supplier. As always, all opinions and weirdo children are my own.
***********************************
I’ve written before about how to find out what your kids want for Christmas, and one of the ways is by figuring out what’s “trending” right now in their little worlds. It’s not to say that they’ll only want something because it’s popular, but it can be a good indication that you’re getting a gift they’ll love.
I’ve done the research — i.e. talked to my children and their friends, and spent 92% of my waking hours on the internet — and here’s what I’ve come up with …
1. A bath toy that isn’t for babies.
You guys have seen our MASSIVE Playmobil collection (and awesome DIY storage/play shelves), so we were pumped when our friends at PLAYMOBIL sent us the Drago Ship from Dreamworks’ How to Train Your Dragon. My favourite part is the cage, and the kids looked at me strangely when I suggested we put people in it. “It’s for a DRAGON, Mom.” Oh.

D had the whole thing snapped together in about four minutes, and begged in the middle of the afternoon to get into the tub to play with it! He spent an hour in there acting out scenes with the characters, and it was the cutest thing to listen to. Although his buddy did think he was LOCO when he came to the door at 3 p.m. and I explained D was in the bath. 😉

HEATHER’S HOLIDAY GIFT GUIDE: Gifts for the home

The following holiday gift guide contains affiliate links. If you purchase a product from one of these links, I may receive a small commission from the supplier. As always, all opinions and bathroom anxieties are my own.
***********************************
Today I’m sharing a gift guide for the HOME — full of items that would make a great gift for basically ANY adult. Ready to dive in?
1. A custom address stamper.
You know the person’s address, right? Type it in carefully, choose a fun design, and you can get them a self-inking custom address stamper that will make sending Christmas cards (and birth announcements, invitations, cards, etc.) soooooo much easier. I got mine five years ago from my mom, and it’s one of my all-time favourite (and USEFUL) gifts.

DIY rolling craft table with hidden storage

How to build the craft table of your dreams
Do you know one of my very favourite things to buy at a building supply store? Not wood or paint — although they’re top contenders — but huge sheets of smooth, shiny, white melamine.
They may not look like much, but melamine panels are super affordable (about $33 for a massive rectangle), crisp, easy to clean and perfect for work surfaces. We used them in my home office to build a custom L–shaped desk (which later morphed into a U-shaped desk), and again in our son’s room to build Lego counters.

So when we moved my home office into a larger space in our basement, I knew I wanted more melamine panels (give me all the melamine!) to create an even larger work surface for paper crafts, cutting fabric and hosting crafty get-togethers.

Here’s what we bought to create the rolling craft table of my dreams:
- (1) 4 x 8-foot sheet of white melamine ($33)
- (7) 8-foot-2 inchx4-inch boards ($30)
- (4) 2-inch casters ($30)
- (4) 8-foot white shelf edging ($10)
- (50) 3-inch screws ($7)
- (1) package corner braces ($5)
(And, of course, we used my RYOBI miter saw, RYOBI ONE+ drill, and RYOBI ONE+ orbital jig saw.)
Since I needed a table I could store things underneath, we had the building store cut the 4x 8 sheet of melamine down the middle — giving us two 4x 4 squares: a table top and a shelf for beneath it.
My handy husband started by building two square frames (each slightly smaller than 4’ x 4’) using the 8’ 2” x 4” boards — one to support the top of the table, and one to support the storage shelf underneath.
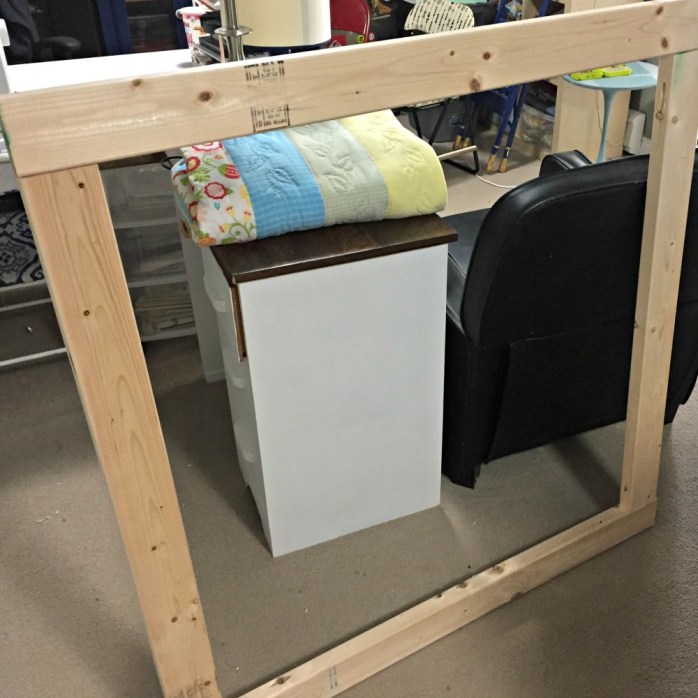
He added swiveling casters to the bottom square so I’d be free to roll the table around the room as needed — an important feature for someone obsessed with rearranging furniture.
Then he decided to get “fancy” and cut holes in the bottom melamine square, so the 2” x 4” legs could slide through to connect to their support. (I didn’t have the heart to tell him no one would see this cool detail because of the curtain I planned to sew.)
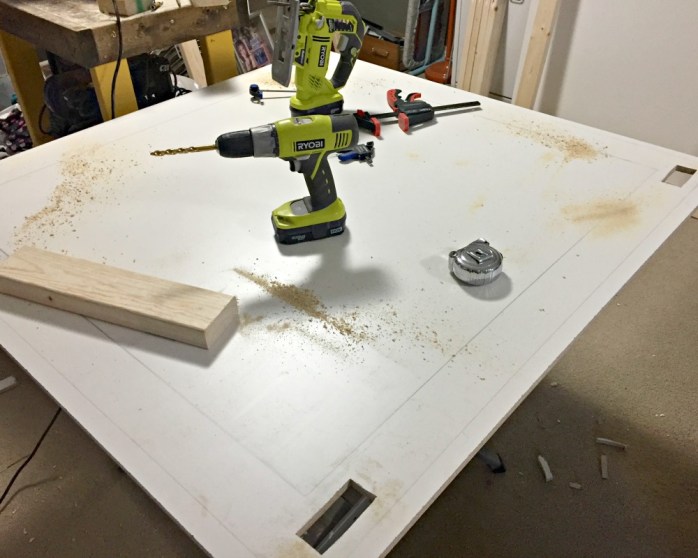
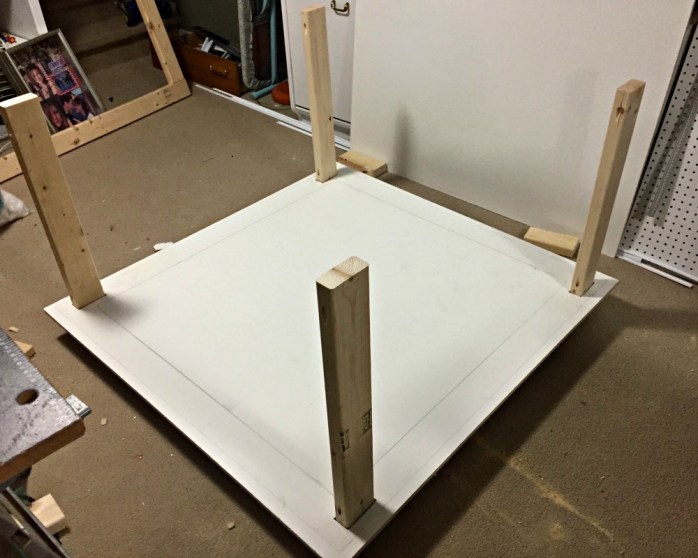
Once the bottom “shelf” and the table legs were in place, he screwed on the top support square and we were ready for the tabletop!

He secured it to the frame with metal corner braces so even the rowdiest craft session wouldn’t be able to budge it.
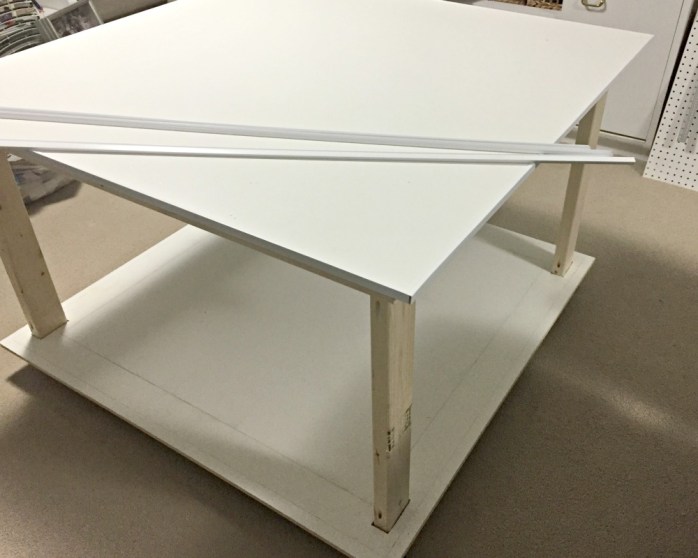
I stepped in at this point to click the white plastic edging in place, all the way around each of the melamine squares. I weirdly love doing this! It’s just white plastic that covers the rough edges and makes melamine look more like a countertop, but it’s immensely satisfying to click into place.
It took no time at all to stain the legs and the apron of the table (Minwax’s “Early American,” to match the small desk I wrote about a few weeks ago).

Then it was time to focus on the most important part: a huge curtain to hide the bins of fabric and craft supplies I needed to store under the table!
I knew I’d need about 8m of fabric to go around all four sides — allowing for a full, fluffy, gathered look. I contemplated buying 8m of this gorgeous modern black and white fabric, but it was close to $20/metre. Spending $160 on a “table skirt” was simply not in the budget.
(If I’m going to spend that on fabric, which I do on the regular, it’s going to be for making clothes, quilts, or living room curtains — not for hiding junk in my home office.)
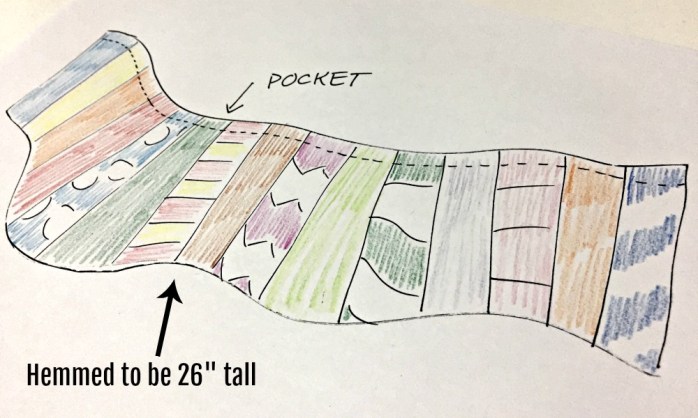
So instead of buying new fabric for the curtain, I raided my generous fabric stash. I picked out ones I was (A) sick of (B) have had forever and not used, and (C) had plenty of, and could spare a bit. I knew the finished curtain should be about 26” tall, so I quickly cut out pieces that were somewhere in the 28”-30” range.
(I don’t seem to have photos of this part, so I apologize for my sketchy renderings!)

I hate ironing, so my visiting stepmom offered to do that for me (hooray!) while I pinned the pieces together to make one huge long curtain. Then I sewed the sides together, hemmed all along the bottom, and sewed a narrow pocket across the top.
Now, there were several ways I could have attached the curtain. I thought about staple-gunning it directly to the wood — creating pleats as I went — but I ultimately decided I didn’t want to harm the tale itself. I wanted the curtain to be easily removable, in case there was a time when I (A) was tidy enough not to need hidden storage, (B) wanted to replace it, or (C) just needed to throw it in the washer. (Creativity is messy, and I am very creative.)
With the help of a safety pin, I threaded a longggg length of skinny elastic through the pocket of the enormous curtain — while pulling tightly to gather the fabric. It was starting to look like a skirt for an elephant, and it was HEAVY.
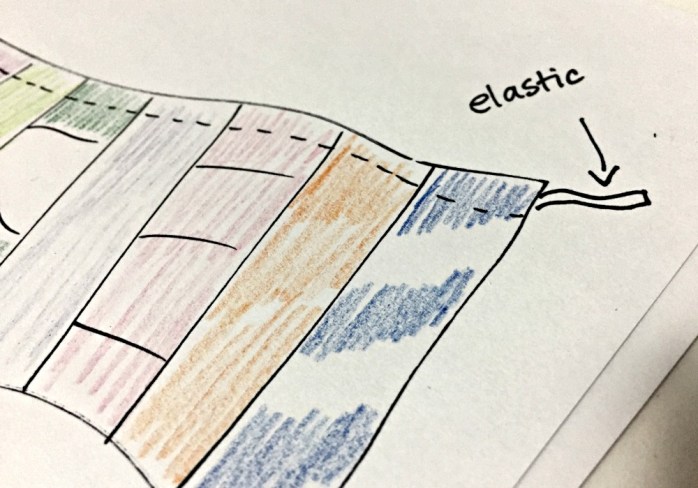
The final step was tying one end of the elastic around a table leg, and wrapping the curtain all the way around the table. I pulled until it was so tightly wrapped that it wouldn’t slip down, and then tied the other end of the elastic onto the original table leg — essentially “shutting” the curtain. Then I reinforced it along the top with a couple of thumbtacks to keep it from drooping.

I’m SO happy with my new work table/cutting table/craft table. It gives me a huge, clean surface for spreading out everything from fabric to paper — I’ve even covered it with a dropcloth and painted furniture on it — and the casters make it easy to roll it around to different areas of my office. But the best part is that I’m able to shove five or six massive totes of supplies underneath, and no one has to look at that hot mess!
Is there anything sweeter than hidden storage … especially when you’re the curator of an extensive fabric collection? 😉


As featured on …


