
DIY rolling craft table with hidden storage

How to build the craft table of your dreams
Do you know one of my very favourite things to buy at a building supply store? Not wood or paint — although they’re top contenders — but huge sheets of smooth, shiny, white melamine.
They may not look like much, but melamine panels are super affordable (about $33 for a massive rectangle), crisp, easy to clean and perfect for work surfaces. We used them in my home office to build a custom L–shaped desk (which later morphed into a U-shaped desk), and again in our son’s room to build Lego counters.

So when we moved my home office into a larger space in our basement, I knew I wanted more melamine panels (give me all the melamine!) to create an even larger work surface for paper crafts, cutting fabric and hosting crafty get-togethers.

Here’s what we bought to create the rolling craft table of my dreams:
- (1) 4 x 8-foot sheet of white melamine ($33)
- (7) 8-foot-2 inchx4-inch boards ($30)
- (4) 2-inch casters ($30)
- (4) 8-foot white shelf edging ($10)
- (50) 3-inch screws ($7)
- (1) package corner braces ($5)
(And, of course, we used my RYOBI miter saw, RYOBI ONE+ drill, and RYOBI ONE+ orbital jig saw.)
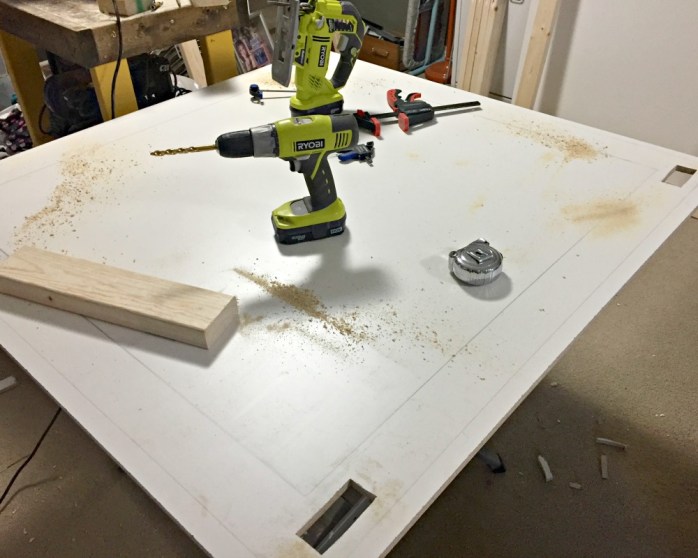
Since I needed a table I could store things underneath, we had the building store cut the 4x 8 sheet of melamine down the middle — giving us two 4x 4 squares: a table top and a shelf for beneath it.
My handy husband started by building two square frames (each slightly smaller than 4’ x 4’) using the 8’ 2” x 4” boards — one to support the top of the table, and one to support the storage shelf underneath.
He added swiveling casters to the bottom square so I’d be free to roll the table around the room as needed — an important feature for someone obsessed with rearranging furniture.
Then he decided to get “fancy” and cut holes in the bottom melamine square, so the 2” x 4” legs could slide through to connect to their support. (I didn’t have the heart to tell him no one would see this cool detail because of the curtain I planned to sew.)
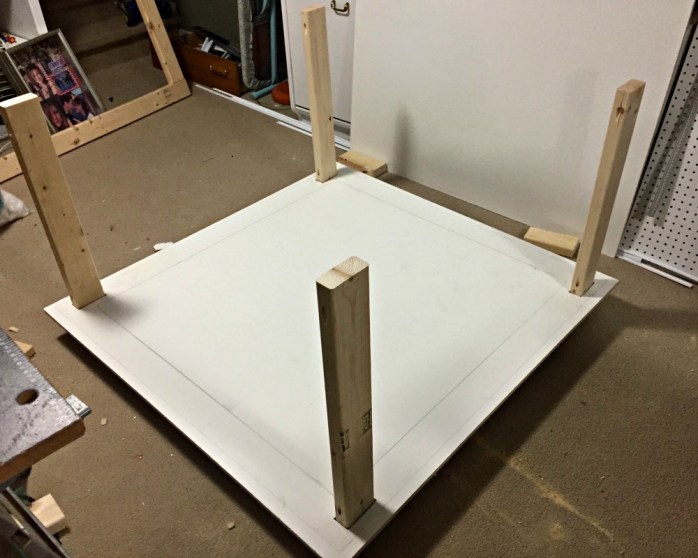
Once the bottom “shelf” and the table legs were in place, he screwed on the top support square and we were ready for the tabletop!

He secured it to the frame with metal corner braces so even the rowdiest craft session wouldn’t be able to budge it.
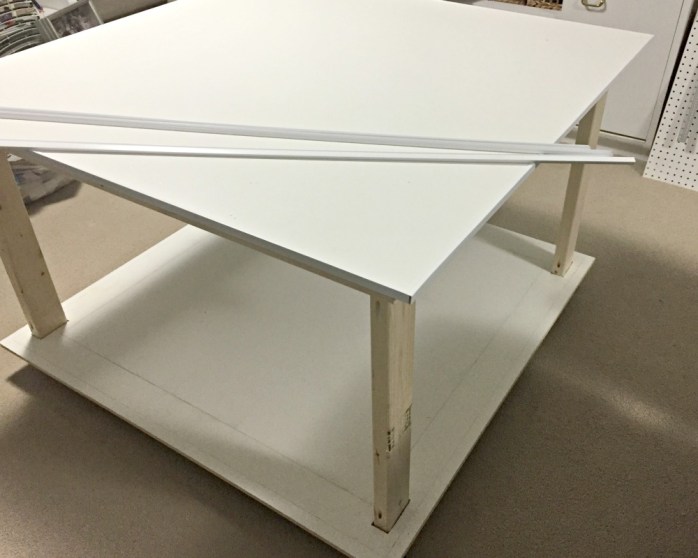
I stepped in at this point to click the white plastic edging in place, all the way around each of the melamine squares. I weirdly love doing this! It’s just white plastic that covers the rough edges and makes melamine look more like a countertop, but it’s immensely satisfying to click into place.
It took no time at all to stain the legs and the apron of the table (Minwax’s “Early American,” to match the small desk I wrote about a few weeks ago).

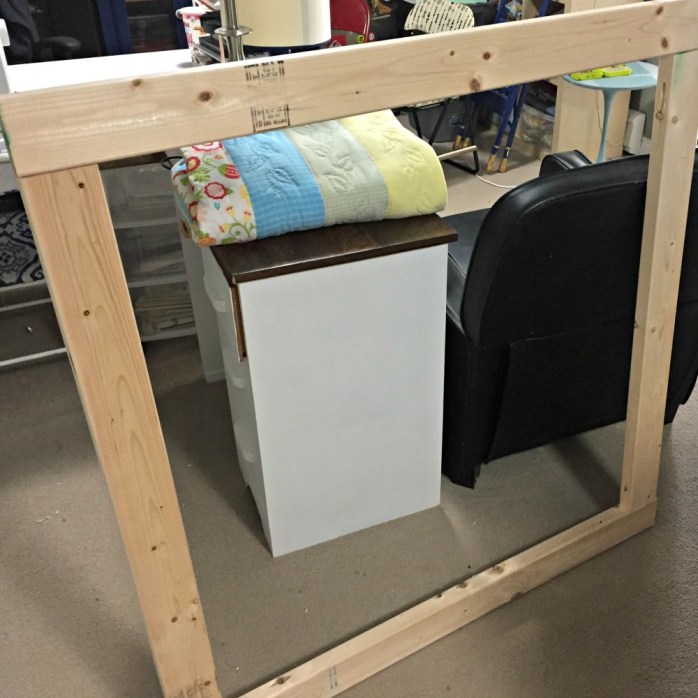
Then it was time to focus on the most important part: a huge curtain to hide the bins of fabric and craft supplies I needed to store under the table!
I knew I’d need about 8m of fabric to go around all four sides — allowing for a full, fluffy, gathered look. I contemplated buying 8m of this gorgeous modern black and white fabric, but it was close to $20/metre. Spending $160 on a “table skirt” was simply not in the budget.
(If I’m going to spend that on fabric, which I do on the regular, it’s going to be for making clothes, quilts, or living room curtains — not for hiding junk in my home office.)
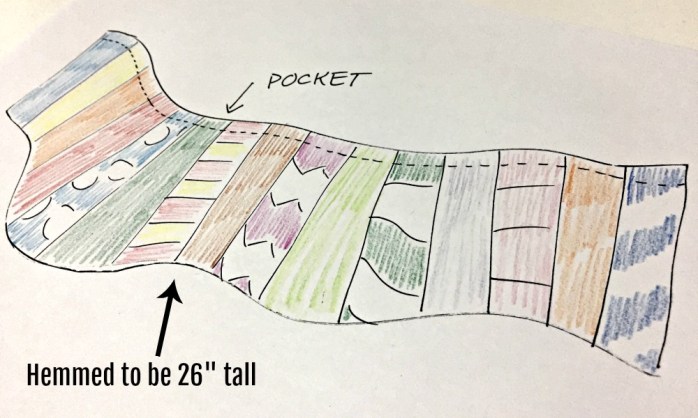
So instead of buying new fabric for the curtain, I raided my generous fabric stash. I picked out ones I was (A) sick of (B) have had forever and not used, and (C) had plenty of, and could spare a bit. I knew the finished curtain should be about 26” tall, so I quickly cut out pieces that were somewhere in the 28”-30” range.
(I don’t seem to have photos of this part, so I apologize for my sketchy renderings!)

I hate ironing, so my visiting stepmom offered to do that for me (hooray!) while I pinned the pieces together to make one huge long curtain. Then I sewed the sides together, hemmed all along the bottom, and sewed a narrow pocket across the top.
Now, there were several ways I could have attached the curtain. I thought about staple-gunning it directly to the wood — creating pleats as I went — but I ultimately decided I didn’t want to harm the tale itself. I wanted the curtain to be easily removable, in case there was a time when I (A) was tidy enough not to need hidden storage, (B) wanted to replace it, or (C) just needed to throw it in the washer. (Creativity is messy, and I am very creative.)
With the help of a safety pin, I threaded a longggg length of skinny elastic through the pocket of the enormous curtain — while pulling tightly to gather the fabric. It was starting to look like a skirt for an elephant, and it was HEAVY.
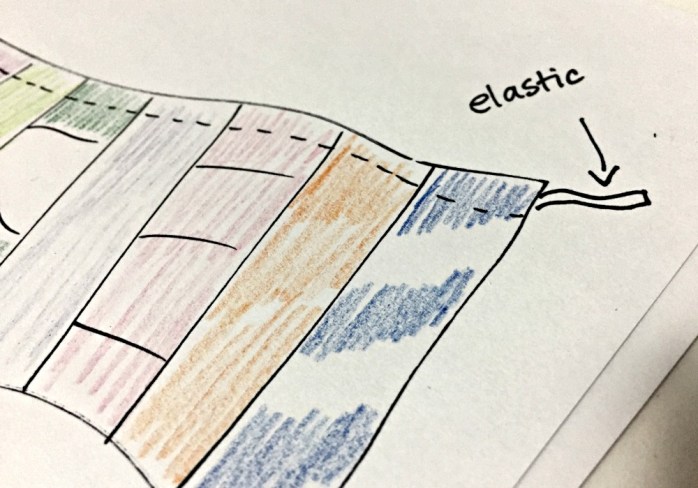
The final step was tying one end of the elastic around a table leg, and wrapping the curtain all the way around the table. I pulled until it was so tightly wrapped that it wouldn’t slip down, and then tied the other end of the elastic onto the original table leg — essentially “shutting” the curtain. Then I reinforced it along the top with a couple of thumbtacks to keep it from drooping.

I’m SO happy with my new work table/cutting table/craft table. It gives me a huge, clean surface for spreading out everything from fabric to paper — I’ve even covered it with a dropcloth and painted furniture on it — and the casters make it easy to roll it around to different areas of my office. But the best part is that I’m able to shove five or six massive totes of supplies underneath, and no one has to look at that hot mess!
Is there anything sweeter than hidden storage … especially when you’re the curator of an extensive fabric collection? 😉


As featured on …


