
10 tips for hanging a gallery wall

I have an obsession with gallery walls. I don’t know what it is about them — the textures, the shapes, the chaos? — but I just adore them.
We already had nine (I think? I might be losing count), but when I decided to redo my home office recently, I knew I wanted to create another.
TIP #1: Gallery walls don’t have to be expensive.
I started by rounding up some frames. You can re-use old frames, buy second-hand frames, or buy cheap frames from a dollar store. In this case I only had two real frames to re-use — my frame stash is getting low! — so I painted them both white.
TIP #2: Keep it cohesive.
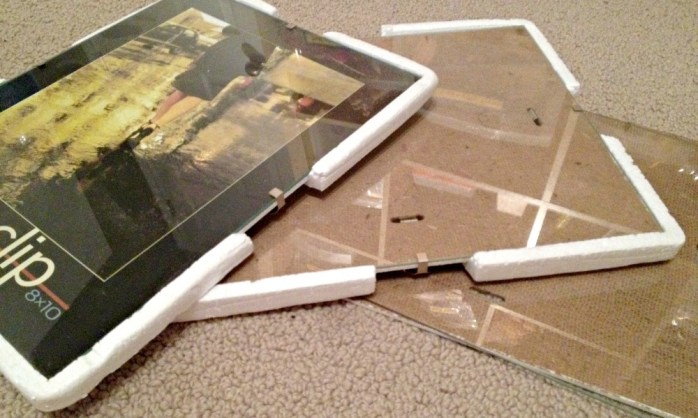
I like to paint all of the frames one colour — or just a few different colours. I also used a few dollar store “document holders” (glass and cardboard with metal clips), which didn’t require painting because they’re frame-less.
TIP #3: Make your own mats.
I knew I wanted really bold mats — since so many of the frames were really document holders — so I bought two black and white chevron duotangs in the school supplies section of a big-box store ($0.97 each) and cut them down to fit the frames. Then I taped a photo on top of each one, and clipped on the glass.

TIP #4: Frame cards!
I used a few family photos, and also two greeting cards I’d received that I found really funny. There are so many awesome cards out there that make wonderful (cheap) artwork.
Some gallery walls are just framed photos, but I like to include letters and shapes, too.
TIP #5: Add wooden letters and shape for texture.
Since this gallery wall was going in my home office/craft room, I went a bit wild and bought wooden letters to spell out my initials, as well as “Write,” “Create,” and “Sew.” I buy my letters when the craft store runs a “20 per cent off your entire order” sale, because letters can average around $4.99 each. It adds up quickly!
I also bought some wooden hearts, a little key, and a cute arrow that says “me” — so I could point it at my initials. Then I coated everything with white paint — leftover trim paint in off-the-shelf glossy white — and let it dry.

TIP #6: Lay everything out on the floor.
I always lay out my gallery walls on the floor so I find an arrangement I like. An easy way to start is by picking one item to be the focal point — in this case it was my “HLC” letters, but often I choose my nicest (largest) frame. Once you have a focal point, choose your largest items and find good spots for them around it. Then you can use the smaller items — frames, wooden shapes, letters — to fill in the spaces.

TIP #7: Take a picture!
Once I’m happy with the arrangement, I take a picture of it for reference when I’m hanging everything. You might think you’ll remember. You won’t.
TIP #8: Start in the centre.
I hang the focal point first — right in the centre of the wall — and then slowly hang one item at a time, making sure I’m keeping the arrangement the same as what’s on the floor.

TIP #9: Space everything evenly.
I cringe when I see a gallery wall with random spacing between each item. It should be as consistent as possible — 1-2 inches between everything is my go-to, and I just eyeball it.
TIP #10: Get sticky (strips).
Sticky velcro picture-hanging strips are great for hanging gallery walls, because you can adjust things slightly if needed — and it’s the only way to hang up tiny wooden letters. Just be careful when you take them off because … yeah, I have ruined some walls in my day.

I’m so happy with my newest gallery wall, especially how the crisp white letters stand out on my newly-painted red walls. It’s inevitable that someday I’ll have a gallery wall that’s nothing but wooden letters.
I’m pretty sure I’m all out of blank walls in my house, so can I come to yours and make a gallery wall now? Please?

Make a giant paper mâché letter

Here’s something you should know about me: my projects don’t always turn out like I’d planned — sometimes they totally bomb — but I’m just stubborn enough to keep working on them until they turn into something decent.
This, my friends, was one of those projects.
It all started when I saw these awesome oversized paper mâché letters on Pinterest. It seemed so simple, and it would be totally free to make! I could have a huge white “C” for my dining room.
Lord knows I spend enough money buying ceramic and wooden letter Cs from the craft store, right? My little sister often jokes, “You know what this wall needs? ANOTHER LETTER C.”
Well, it turns out that I might be better off buying them. Paper mâché is a fickle, fickle foe.
Here’s how it all went down …
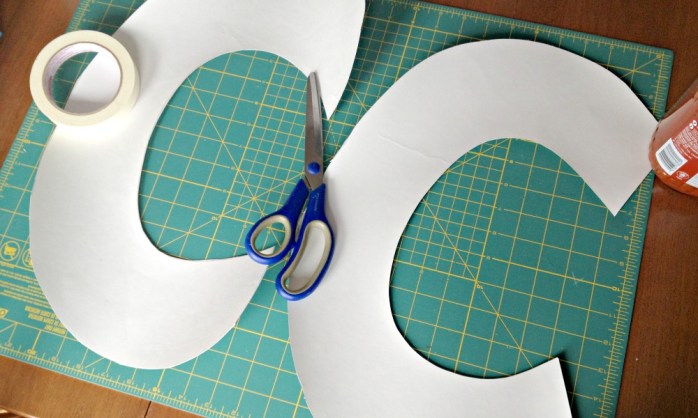
I started by cutting two large Cs out of bristol board. You need to be sure they’re exactly the same size, because they’ll be serving as a top and bottom of your finished letter.
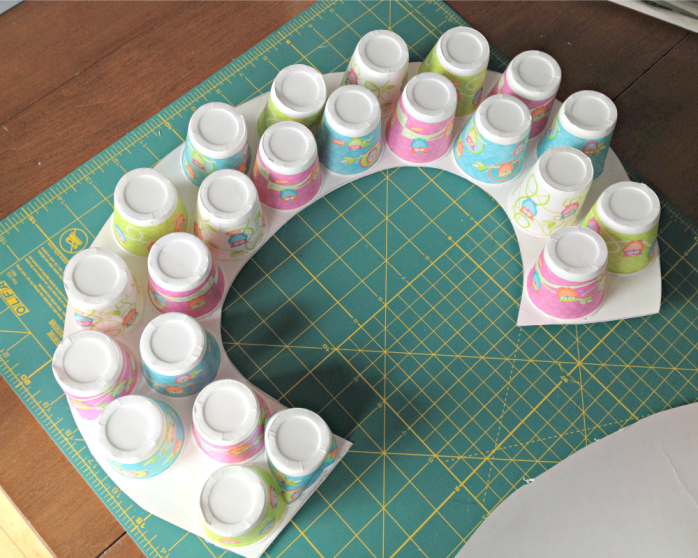
I grabbed a package of mini paper cups, and used my trusty hot glue gun to attach them to one of the letters. The paper cups act as the ‘filling’ to give your letter depth, and keep it nice and strong.
Then I put the second C on top, and wrapped masking tape around the entire thing. The tutorial on Pinterest called for paper tape, but I didn’t have it — and I have a personal (stubborn) rule about not running to the store once I’m into a project. I just make do! (Spoiler alert: this was totally a mistake.)
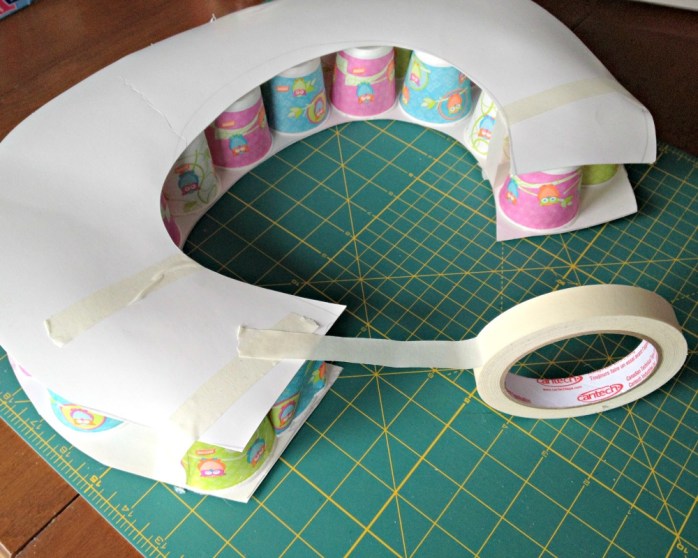
I was skeptical of my little C, once it was wrapped in masking tape. It was bumpy and ugly-looking, but I figured paper mâché would hide that (spoiler alert: nope).

I cut strips of newspaper, filled a measuring cup with water, and started stirring the water and flour together until I had a nice gloppy paste.

If you haven’t done paper mâché since you were a kid, it’s really easy and fun. You just dip your paper strips into the goop, use your fingers to remove the excess, and wrap it around your piece — in this case, the tape-covered C.

After two frustrating layers of paper mâché, my C still looked terrible. It was really bumpy and uneven, and I didn’t even think it could pass as “rustic.”
I painted it with a few coats of white, but that only make it look worse.

I thought maybe it the C wasn’t white, the imperfections might not be so obvious. So I used a tester pot of turquoise, but it still looked awful. It was time to come up with a way to salvage it!
I grabbed a $4 skein of grey yard, and sat down one night in front of the TV to begin wrapping my C. I used dots of hot glue here and there to keep everything in place, but it basically consisted of wrap, wrap, wrap, repeat. I was really careful to keep the yarn even at first — without any overlapping — and then I realized it was going to need several layers anyway. So I started wrapping it any way that looked good!

When my C was fully wrapped, I felt vindicated! It wasn’t the shiny white C I had originally wanted for my dining room, but it was a soft grey C that added texture and warmth to the basement playroom. A project that had started off so lumpy and bumpy was now something I felt happy to hang on the wall.

But I certainly won’t be mixing up a batch of paper mâché any time soon!

Paint a $3 welcome mat
Guys! I never got around to sharing last week’s DIY, so here it is — and it brought a really nice dessert because it felt bad for the lateness.
So, without further ado (or dessert talk, because DID I MENTION I’M DOING ANOTHER FITNESS CHALLENGE?) here’s my column from last weekend …
***
You don’t realize how many floral-edged, kitty-cat, cottage-y, autumn-leafy welcome mats are out there until you’re looking for a plain one.
We had been using a rubbery black mat outside our front door, but I wanted to make something that felt a little more “us.” I managed to find solid beige mats at the Dollarama for $3 each, and picked up two to see how I could customize them.

Outdoorsy activities for fashion-challenged children
Today in lame parenting news: I signed D up for Beaver Scouts!
(And yes, I’m mostly learning to not snicker when I say “beaver” because I am a responsible grown-up type.)

I don’t know what’s worse — the bucket bat, the neckerchief, or the sad little brown vest.
Where’s my Bedazzler?
Getting organized for the new school year
We’ve got two weeks until D’s first day of school, and C will start preschool the following week. HUGE changes for our family, and that means I’ve got to up my organization game.
Here are a few goals on my mind right now:
- Picking up what we need (before the last minute).
I don’t do well at Walmart in the best of situations, but I *really* don’t do well in a crowded Walmart. Or mall. Or any store, really. So I’ve been trying to keep on top of what everyone needs for school before we get too close to D-day. I navigated a surprisingly calm trip to Payless and got them each two pairs of shoes (for $60 total! *heart-eyed emogi*). We still need jeans.
D picked out a new Ninja Turtles backpack and a thermos, so we just need a water bottle for his desk. C got a new backpack for her birthday, so she’s all set. I’m a little sad over the fact that we don’t need to buy school supplies — D’s school requires a $30 cheque, and they provide everything. It’s good, though, because I’d probably have spent $30 on gel pens alone.
Turning the hall closet into a mudroom.This is done, and it’s still working out sooooo well. Like, I can’t even, you guys.

You complete me, hooks. Sometimes we get too many bags hanging on the hooks (ahem, my tote bags) but it’s an easy fix. The kids are great about putting their shoes and hats in their bins (sometimes the odd dirty sock, too), and it’s been a solid solution for our house. Full tutorial here, if you want to make your own.
- Being better about meal-planning and grocery shopping.
We’ve dropped the ball this summer, I’ll admit. Darling Husband does the grocery shopping and I do most of the cooking (albeit badly), and we’ve been guilty of quickie meals (ahem, I made fish sticks and Goldfish crackers for SUPPER the other night, I can’t even …) and even quicker grocery runs to “grab a few things” rather than planning a week’s worth of meals.I wrote out a full week’s worth of meals the other day, made up a list (as much as I love making lists, I dislike writing grocery lists for a reason I can’t understand), and Darling Husband dutifully went out and bought everything we needed. Now we’ll see if I can stick to it.
- Finishing (well, starting) a Family Command Centre.
If I’m going to stick to a meal plan, I need to see it! Written down! Keeping me accountable! So one of my upcoming DIY projects is going to be a Family Command Centre on our kitchen wall. It’s going to have a spot to write out the week’s menus, a calendar, a grocery list, and a place for all of those notices and newsletters that are bound to come home from school.
- Sewing back-to-school wardrobes.
My sewing skills are really picking up, and I’ve branched out from just making dresses and leggings for C to making shirts for D! He loves it, and I love that he’s going to have his own sense of style (well, my style?) in the classroom. I’m also learning that sewing collared shirts take waaaay more time than sewing a simple dress.
(Sewing friends, I’ve been making the Anytime at All Tee and the Maxwell Shirt, both from Shwin Designs)

xo


As featured on …


