
Disappearing farmhouse benches

Every fall and spring, there’s a special week when you can score free furniture. Sure, it’s from the curb, but sometimes you can get great pieces from people who don’t want to bother trying to sell it.
I’ve mentioned before how we went years without a coffee table. We distressed a hand-me-down coffee table for our basement family room earlier this year, but the living room’s only “table” was a child-sized table and chairs.
So when I spotted a large coffee table that looked like “vintage” IKEA, I screeched to a stop and stuffed it into the minivan. It waited all summer for me to figure out how I wanted to refinish it, but in the process I had an even better idea: it would pull double-duty as a coffee table and kiddie table.
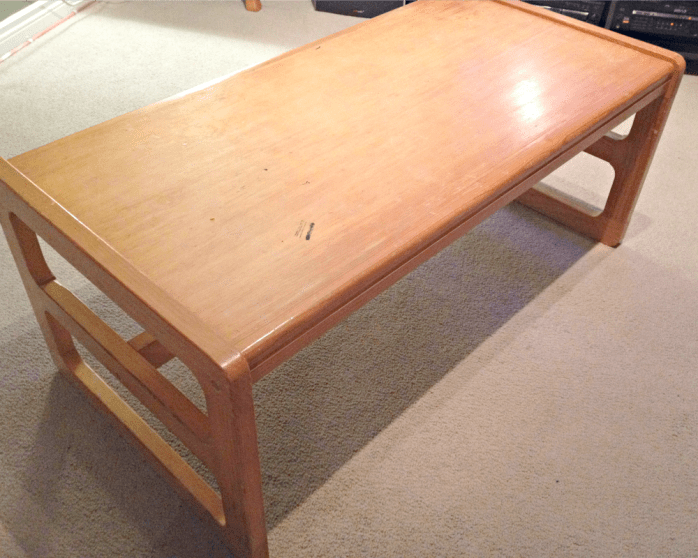
If we built two farmhouse-style benches, I thought, the kids could sit at the coffee table to eat breakfast or do a puzzle. When the benches weren’t being used, we could slide them underneath the table out of sight. They could even be sturdy enough for adults to sit on, too! My heart fluttered at the idea of concealed seating in our modest floor plan.
We started by measuring the coffee table from every angle and deciding how large the benches should be. I’ll try not to get too math-y on you, but we decided to make the benches a couple of inches narrower than the opening of the table — so it would be easy to push them in — and seven inches lower than the top of the table — leaving room for our kids’ growing legs.
Then it was off to the building supply store, where we bought an eight-foot 1×10 to use for two bench seats, two 1×6 boards for legs, and two 1×4 boards for supports.

We cut two bench seats from the 1×10, and had a little left over. The opening of the table was 46 inches, so we made each bench seat 42 inches for easy clearance. Since we wanted the bench legs to be really strong, we cut the 1×6 boards into 16 pieces — each nine inches tall. In no time at all, my handy husband, Michael, had turned 16 tiny boards into eight solid L-shaped pieces, one for each corner of the benches. He predrilled holes in the seats so the wood wouldn’t split, and then screwed on the legs.

To make things even stronger, he cut sections of 1×4 to run between the legs. Then we were left with two adorable wooden benches that even the rowdiest kids (i.e. ours) couldn’t break.

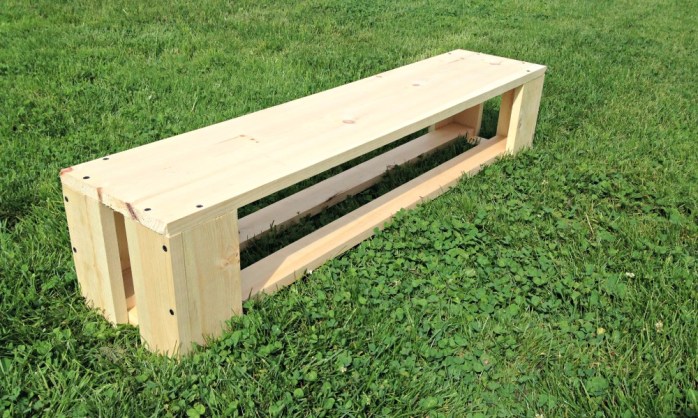
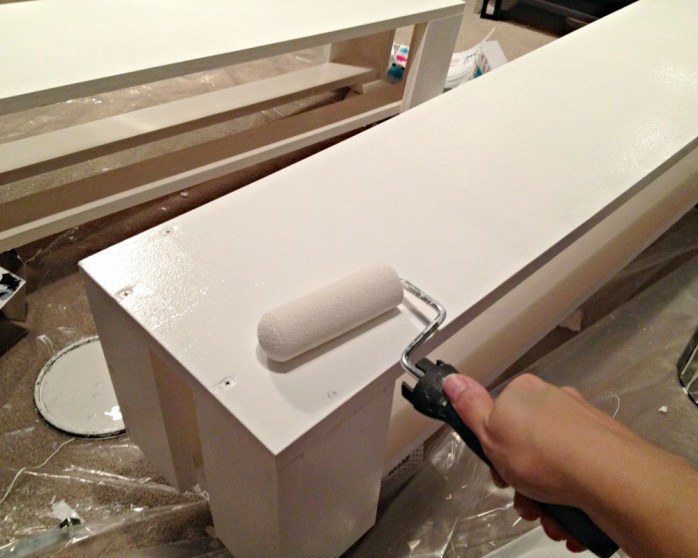
Michael helped me lug the benches into the basement, and I spread out drop cloths for a marathon painting session. I really, really wanted to use chalk paint but I knew it wouldn’t be able to take a beating from the kids. So I used leftover white melamine paint that’s designed for furniture and cabinets, since it creates a durable surface that can be wiped and scrubbed.
Painting the two benches was a fairly quick process — three coats with an angled brush and a small roller — compared to the curbside coffee table with its shiny surface. Despite pre-sanding it, the table felt enormous and it was a pain to work around. It didn’t help that I was painting during the Humidity Wave of 2015, and my sweaty knees kept sticking to the plastic drop cloths.
After a few days of drying in front of a fan, the benches and the coffee table were fully dry. We carried everything upstairs and got to feel the satisfaction of sliding the benches under the table and pulling them back out again. Now you see them, now you don’t!

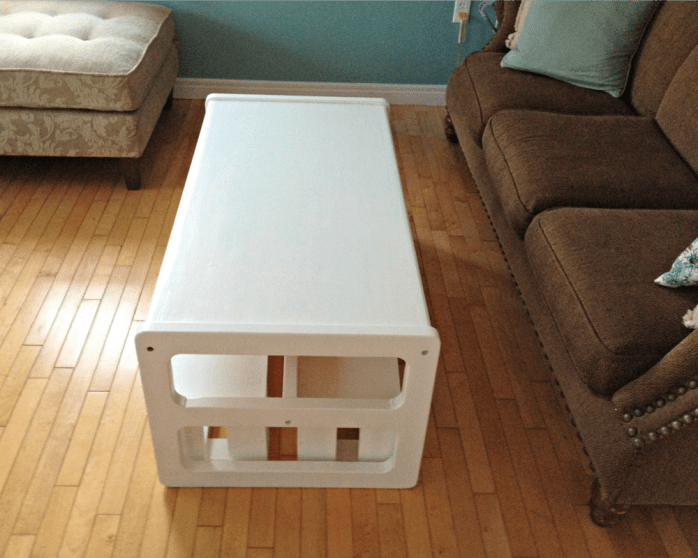
The kids love their new set-up, and it’s been really convenient for playdates because you can squeeze four kids onto each bench. They’re solid enough that we can plunk down on them, too — the benches, not the kids — and I no longer feel worried that we don’t have enough seating on our main level.

I promptly sold our child-sized table and chairs on a secondhand site for a cool $30, so the project really only cost us $15. We technically have the same amount of furniture in the living room as before, except what we have now is much more functional. Bless you, Curbside Giveaway Weekend.

Now I’m wondering what other furniture can do double-duty. A trundle bed under the couch? A storage drawer under the chaise lounge? Hmm, I wonder if it’s structurally sound to install a pull-down library in the ceiling?

School: Exhausting Parents Since The Dawn of Time

You guys, this whole two-kids-in-school thing is kicking my ass. Really.
D started last week, on Thursday, and C started preschool (two mornings a week for a couple of hours) on Tuesday. Which means I’ve officially had two kids in “school” for less than a week, and already I’m so over it.
But the thing is that I *can’t* be over it, because they will be in school for the next million and million-and-two years, respectively. And truant officers still exist, maybe?
C’s dress matched her brother’s shirt on his first day of school, and D’s shirt matched his sister’s dress on her first day of school.
Because I am very fair. Also I love matching. #fabrichoarder


I’m so tired. I’m so, so, so, so tired.
We leave the house at 7:20 a.m. so D can catch the bus. It’s freaking dark out there, at 7:20 a.m. Dark and cold and gloomy and altogether icky. The only upside is that (A) it’s adorable watching him get on the bus, all excited, and (B) I’m making some cool mom-friends at the bus stop.
Between all of this dropping-at-the-bus and picking-up-at-the-bus and driving-to-preschool and picking-up-from-preschool and OH DID I MENTION VOLUNTEERING AT BOTH SCHOOLS, it’s been a hard week to get my work done. You know, my paying work. That gets stuffed into the cracks of whatever time is not wrapped around the kids and the house and all of the food everyone insists on eating, regularly.
Signing off now, to attempt some work before the next round of pick-ups. If you need me, I will be the messy-haired mom drooling on her keyboard in between deadlines.
xoxo
Confessions of a Pinterest Mom
My children are the ones showing up in outfits I lovingly sewed for them. They eat pancakes shaped like dragons and sandwiches cut into smiley faces. They play outside in playhouses we built and painted, and take baths with glow-sticks and homemade body paint.
I’m what they call a “Pinterest Mom” — a crafting, sewing, baking, decorating, organizing fiend that is mostly misunderstood. Some parents take our actions as underhanded digs at their own parenting. Some parents think we are deliberately trying to show them up.
But being a “Pinterest Mom” isn’t about trying to compete with other parents or out-do them.

Continue reading in my weekly parenting column, The Mom Scene …
The night the kids cooked dinner


C and D were so proud that they’d cooked dinner “all by ourselves,” and kept saying “Can you bee-weave we made this?!” all through the meal. It was pretty cute.
I love the idea of getting them more involved in meal prep, since it’s more of a useful life skill than baking cookies and muffins. If I’d had a book/DVD like this when I was a kid, maybe I would have been able to master more than scrambled eggs and Hamburger Helper?
DIY family command centre
Life changes, and sometimes that means your decor needs to change with it. We used to have a family “art gallery”on the main wall in our kitchen and we’d hang up the kids’ paintings and drawings — occasionally a worksheet from preschool. But we weren’t good about taking down old pieces and pretty soon that wall turned into a paper-heavy jumble that flapped madly in the slightest breeze.
Our son started primary this week and our daughter begins preschool in a few days, so we needed a solution that worked better for our increasingly busy schedule. A place where we could stick important notices from school, figure out who was doing what on any given day and jot reminders about new and strange elementary-school things like ‘gym clothes’ and ‘hot lunch.’
Sadly, the wipe-off burlap calendar I made just a few months ago for the wall near the fridge wasn’t cutting it. Cramming a full month of information onto a single frame — even if it was quite a large frame — was impossible and I wrote smaller and smaller as I tried to squeeze in the basics.
So I took the wipe-off calendar apart and grabbed a duplicate frame I’d stashed in the basement, as well as an old bulletin board we hadn’t used in years …
 |









As featured on …