
10 tips for hanging a gallery wall

I have an obsession with gallery walls. I don’t know what it is about them — the textures, the shapes, the chaos? — but I just adore them.
We already had nine (I think? I might be losing count), but when I decided to redo my home office recently, I knew I wanted to create another.
TIP #1: Gallery walls don’t have to be expensive.
I started by rounding up some frames. You can re-use old frames, buy second-hand frames, or buy cheap frames from a dollar store. In this case I only had two real frames to re-use — my frame stash is getting low! — so I painted them both white.
TIP #2: Keep it cohesive.
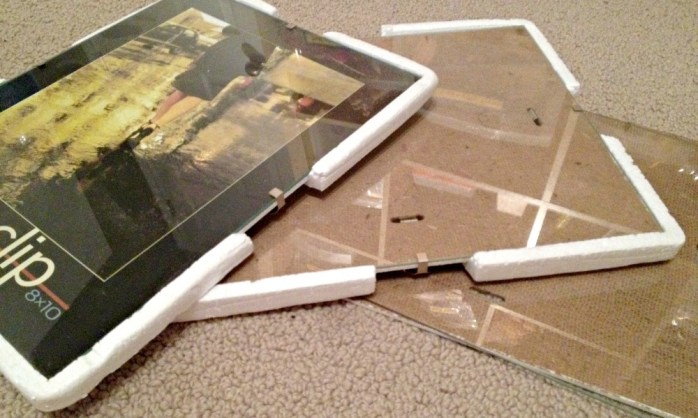
I like to paint all of the frames one colour — or just a few different colours. I also used a few dollar store “document holders” (glass and cardboard with metal clips), which didn’t require painting because they’re frame-less.
TIP #3: Make your own mats.
I knew I wanted really bold mats — since so many of the frames were really document holders — so I bought two black and white chevron duotangs in the school supplies section of a big-box store ($0.97 each) and cut them down to fit the frames. Then I taped a photo on top of each one, and clipped on the glass.

TIP #4: Frame cards!
I used a few family photos, and also two greeting cards I’d received that I found really funny. There are so many awesome cards out there that make wonderful (cheap) artwork.
Some gallery walls are just framed photos, but I like to include letters and shapes, too.
TIP #5: Add wooden letters and shape for texture.
Since this gallery wall was going in my home office/craft room, I went a bit wild and bought wooden letters to spell out my initials, as well as “Write,” “Create,” and “Sew.” I buy my letters when the craft store runs a “20 per cent off your entire order” sale, because letters can average around $4.99 each. It adds up quickly!
I also bought some wooden hearts, a little key, and a cute arrow that says “me” — so I could point it at my initials. Then I coated everything with white paint — leftover trim paint in off-the-shelf glossy white — and let it dry.

TIP #6: Lay everything out on the floor.
I always lay out my gallery walls on the floor so I find an arrangement I like. An easy way to start is by picking one item to be the focal point — in this case it was my “HLC” letters, but often I choose my nicest (largest) frame. Once you have a focal point, choose your largest items and find good spots for them around it. Then you can use the smaller items — frames, wooden shapes, letters — to fill in the spaces.

TIP #7: Take a picture!
Once I’m happy with the arrangement, I take a picture of it for reference when I’m hanging everything. You might think you’ll remember. You won’t.
TIP #8: Start in the centre.
I hang the focal point first — right in the centre of the wall — and then slowly hang one item at a time, making sure I’m keeping the arrangement the same as what’s on the floor.

TIP #9: Space everything evenly.
I cringe when I see a gallery wall with random spacing between each item. It should be as consistent as possible — 1-2 inches between everything is my go-to, and I just eyeball it.
TIP #10: Get sticky (strips).
Sticky velcro picture-hanging strips are great for hanging gallery walls, because you can adjust things slightly if needed — and it’s the only way to hang up tiny wooden letters. Just be careful when you take them off because … yeah, I have ruined some walls in my day.

I’m so happy with my newest gallery wall, especially how the crisp white letters stand out on my newly-painted red walls. It’s inevitable that someday I’ll have a gallery wall that’s nothing but wooden letters.
I’m pretty sure I’m all out of blank walls in my house, so can I come to yours and make a gallery wall now? Please?

One Comment on “10 tips for hanging a gallery wall”
So what do you think?


As featured on …


Pingback: Building a huge L-shaped desk – Heather's Handmade Life