
Beat the school lunch blues with Lunch Pucks

Our five-year-old loves peanut butter sandwiches, but he can’t bring those to school, of course. We did buy something called Wowbutter, but he’s not keen on it yet. So what do you pack for the child who refuses to bring a sandwich to school?
This whole “packed lunch” thing is new for us, and our son decided that what he actually wants for lunch is dinner. Like, an actual supper-type meal, somehow served at lunchtime in his elementary school cafeteria. The place where he refuses to buy the $4 school lunch.
The thermos has been getting plenty of use over the last two weeks, as I find ways to make him “dinner” at 6:30 a.m. so he can take it to school with him. Did I mention that he refuses to eat canned soup or Chef Boyardee delights, which are pretty much the only things I ever got in my thermos as a child?
My lifesaver has been a little thing I “invented” called Lunch Pucks. I could have come up with something more creative, I suppose, but they are literally frozen chunks of food that look like hockey pucks. Super appetizing, right? I know.
If you know and love a student who turns up their nose at a sandwich, here’s how to make your very own Lunch Pucks:
Step 1: Make dinner (presumably something you would do anyway?) and hoard the leftovers.

Step 2: Coat a muffin tin with nonstick spray
(I like a silicone muffin tray with six large cups) Spoon your leftovers into the muffin cups, heaping the food if necessary so you get a serving that will suit your child. You can also use tiny glass bowls, if you can’t spare your muffin tin.

Step 3: Set the tray in your freezer.
(I put my silicone tray on a cookie sheet so it doesn’t warp out of shape) Leave it for about 12 hours until the pucks freeze solid.

Step 4: Pop the pucks into a large freezer bag.
Don’t forget to jot down the name of the meal (all pucks start to look alike). Because they’re already frozen, they won’t stick together. Put the bag in the freezer.

Step 5: When you wake up at the crack of dawn to rush your child to the bus, put a frozen puck in a microwave-safe dish.

Punch the reheat button a few times. When the food’s nice and hot, transfer it to their thermos.

So far, our most popular pucks have been chopped-up spaghetti or penne with meat sauce, and I add a sprinkle of parmesan before closing up the thermos. We’ve also done pucks of “Nannie’s special meatballs” with rice, and those turned out well, too.
I have plans to experiment with lunch pucks made from cheesy chicken casserole, enchiladas, chicken with rice and veggies, and even turkey dinner. I think the trick to a good puck is making sure the meal is kind of saucy, because the liquid prevents it from dying out.
We burned through our first batch of pucks quickly, but I’ve been able to replenish the stash by freezing more pucks every few days. Now that we have a few varieties ready to go in the freezer, our son likes getting to choose his lunch each morning. His chosen puck spins around in the microwave as we eat breakfast and get ready for the bus, and it’s actually easier than making him a sandwich.
I wonder if he’ll notice if I sneak one for my own lunch? They look pretty good once they’re not in puck form …

Build your own slide-out pantry

You never hear anyone say “Oh, I have so much cabinet space, and I really don’t know what to do with these empty drawers.” That’s because canned goods multiply when we’re not looking, and packages of spaghetti are procreating faster than we can go through them.
Yes, storage space was at a premium in our kitchen. That’s the trouble with these new-fangled open-concept homes. Fewer walls = fewer places to stick cabinets and drawers.
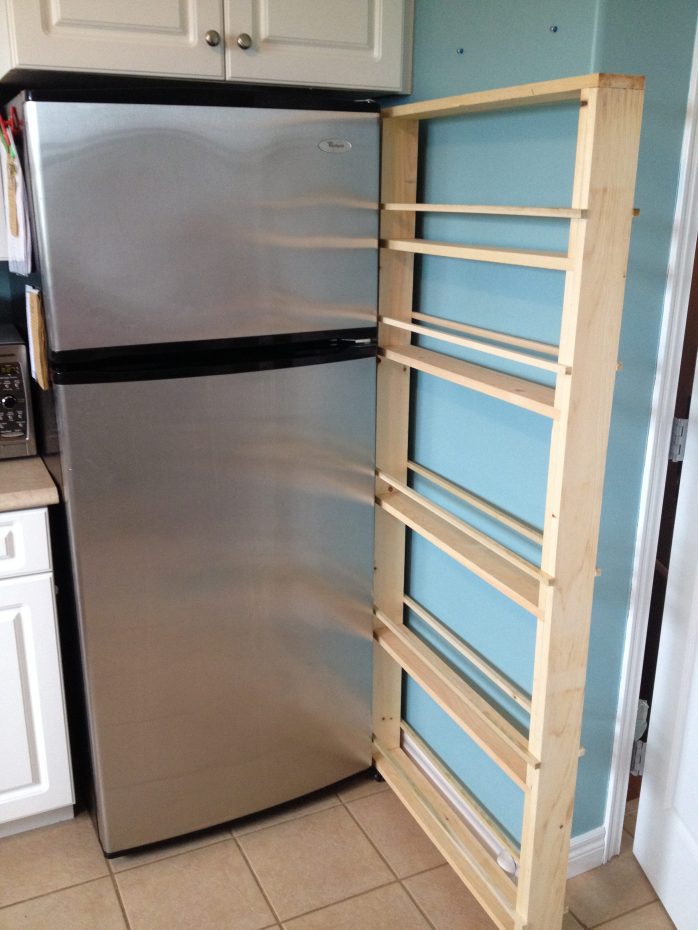
So when I saw a pull-out pantry on Pinterest, I knew we had to make one. Our fridge isn’t very wide because it doesn’t have double doors or an ice-maker (*tear*) so there was a good-sized gap between the fridge and the wall.
Measuring bores me, because I’m always eager to get started, but we got out the measuring tape and carefully wrote down all of the dimensions. By sliding the fridge up against the counter on one side, we were able to make a 6 1/2 inch nook for a slide-out pantry. We decided it should be exactly the height of the fridge, taking into consideration that it would be standing on rolling casters, and that it should be just as deep as the fridge so it held as much as possible.
During a quick trip to the home improvement store, where the kids delight in oversized carts and free suckers at the cash register, we bought the wood. We chose lightweight 1×4 boards for framing and 1/2-inch square dowels to use as “railings” to keep the food from falling overboard.

Michael quickly cut and assembled the outer shell, which was just a very tall rectangle. Then he cut 1×4 boards to fit on the inside as supports for five shelves. This way, we wouldn’t have nail holes or screws running down the front panel — leaving it smooth like the rest of the cabinet and drawer fronts in the kitchen.
Once the shelves were in place, he cut the square dowels to size and used his brad nailer to add them in front and behind each shelf. We chose to use square dowels instead of round ones so that they’d blend in a bit better, but they’re harder to find.
He added two casters to each of the ends, so the pantry could roll smoothly out from its hiding spot, and then we lugged it down to the basement for stain and paint. I had to lean it up against a tall ladder while I worked on it because it was so tall and skinny that it kept tipping over.
I opted for stain on the inside (Minwax’s “Dark Walnut”) because I’d just suffered through many, many coats of white paint on last week’s coffee table/bench project. I painted the front panel white, though, so it would match the rest of the kitchen.
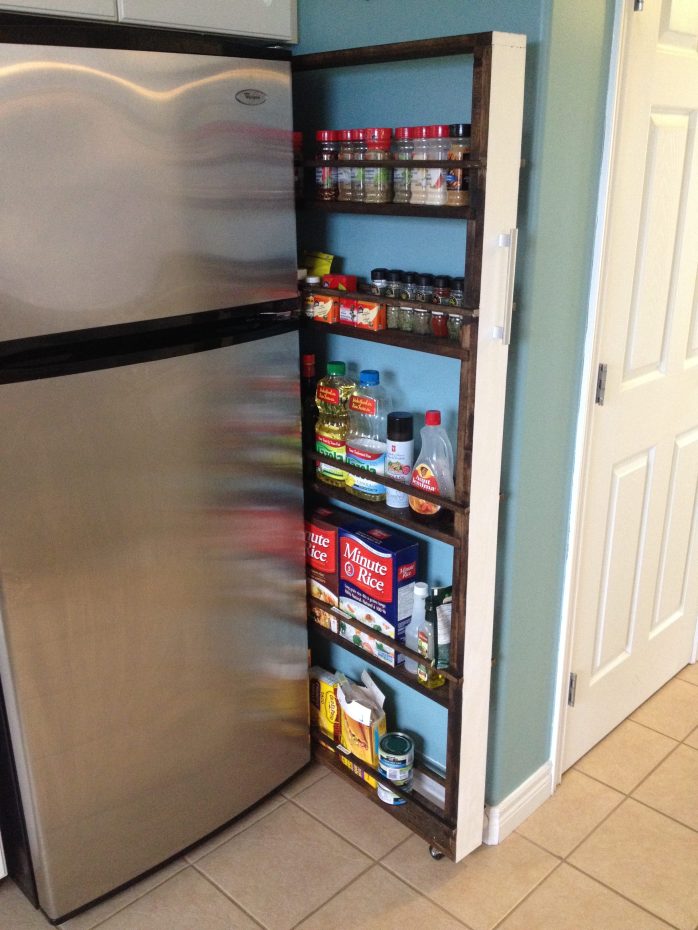
The final step was adding a brushed nickel handle, which we chose to roughly match the cabinet and drawer hardware. And then it was time for the most exciting part of all: sliding it in its spot next to the fridge, and loading it up with groceries. I saved the task until after the kids were in bed, put on some music, and really got into it (yes, I’m super lame).
//pagead2.googlesyndication.com/pagead/js/adsbygoogle.js
(adsbygoogle = window.adsbygoogle || []).push({});
We’ve had the slide-out pantry in place for about a week now, and it’s been unbelievably convenient. I was able to get all of our spices and oils out of a cabinet near the stove, so I designed a new “coffee and tea” cabinet for the items we use every morning. The pantry now stores a bunch of rice packages and taco shell boxes that we’d normally had in our “food cabinet” (yes, there’s only one!) so it’s freed up a lot of room in there for other categories, like pasta, bread and crackers.

The only negatives would be that I wish we’d make shorter shelves near the top, so we could have fit a couple of more — there’s a bit of wasted space above the rows of spices. The casters clunk a little when they’re sliding over the grout lines, but I don’t think that could be helped.
We like that this slide-out pantry isn’t attached to the walls or cabinets in any way, so it’s easy to remove if we — or future owners — want to upgrade to a fancier fridge. I’m still dreaming of an ice maker, so it could happen. But for now, we’re very content with our magical little pantry.

YOU MIGHT ALSO LIKE …


 |
| DIY dog crate cover |

 |
| How to paint a hutch (and why you should do it) |
Finding a new normal

But I certainly wasn’t prepared for the exhaustion that accompanies the first couple of weeks of school.
In a previous life (i.e. a few weeks ago) I would put the kids to bed and thoroughly enjoy my evenings. I used to stay up until 11 p.m. most nights, sometimes a little later, because we never had to be up very early. For the two years our son was in preschool, we didn’t have to leave the house until 8:30 a.m. We could “sleep in” until 7:45 a.m. even on our earliest days. I didn’t realize how lovely that was until it was gone.
Now, however, we’re a two-school family — preschool twice a week, elementary school five times a week. Monday through Friday, we need to hustle our five-year-old to the bus stop at the crack of dawn. The bus does not arrive at a reasonable time in the morning, like 8:20 or even 8:10 a.m. No, the bus arrives at the red-eyed blinky yawn-y hour of precisely 7:25 a.m.
If you’re fuzzy on the numbers, three of us need to be washed, brushed, dressed, fed, and down the road a full 20 minutes early than our previous “early” wake-up time. Open mouth, insert all the Diet Coke in the world.
The 7:25 a.m. bus means we scoot ourselves to the bus stop by 7:20 a.m. I’m compulsively early for everything, so don’t try to convince me I can stroll down right at 7:24 a.m. I’m the girl who arrives at a movie two hours before showtime so I can be the first one in the theatre and choose my ideal seat — 3/4 of the way back, dead centre.
Waking up when it’s still dark isn’t a problem for our newly-minted Primary student, because he’s always been an early riser. It’s not so easy for the rest of us, though. My husband is usually sleeping off the back shift, so I need to bring our sleepy three-year-old along for the walk to the bus stop. She is not a morning person. Actually, she’s not much of a late-afternoon person, either, but that’s besides the point.
I have been trying all of the tricks so we can sleep in as late as possible. I pack his lunch and lay out his clothes the night before. I put the backpack by the door. Sometimes I even lay out my own clothes. But it still seems like there’s too many boxes to check as I race up and down the stairs half-asleep.
It’s a brand-new pressure knowing the bus will be there whether you’re ready or not. Sure, it wouldn’t be difficult to drive him, but I think it’s become a twisted game for me. We cannot miss the bus. We are leaving in one minute. Go, go, go!
Tuesdays are the hardest, I’m learning, because it’s a two-school day and it’s the morning I’m volunteering at the elementary school’s breakfast program. We need to leave the house at 7:20 a.m., and the whirlwind of activity slows down at 9 a.m. when I finish the preschool drop-off. Then I get to go to work, which feels like a freaking vacation after so much rushing around.
It’s been an adjustment for all of us. There have been bedtime meltdowns, meals where the kids could barely lift their head off the table, and afternoons where everybody was cranky and overtired. It’s like how you feel exhausted during the first week at a new job — everything’s new and you’re absorbing so much, you feel completely drained. We’ve bumped up their bedtime to accommodate for the extra-early starts, and we’re slowly seeing an improvement.
So as much as I hate to give up any precious free “me-time” in the evenings, I have started forcing myself to go to bed earlier. It’s the only way I’m going to get through these insanely early, hectic mornings during the school year.
Because the only other solution is to drink my body weight in caffeinated hot tea every morning, and that’s probably not the best idea.

The easiest, most delicious banana muffin recipe on the internet
I made “my” famous banana and dark chocolate mini-chip muffins on the weekend, and it occurred to me that I may not have ever shared the recipe here? Which is pretty nuts, when you think about it, because I make these muffins about once a week (a.k.a. whenever we buy bananas and don’t eat them all before they go brownish).
//platform.instagram.com/en_US/embeds.jsI use this recipe from CatCanCook, and I can attest that they really are foolproof because (A) I absolutely cannot make banana bread, but I can make these, and (B) they always, always, always turn out perfectly.
It should be noted that I dislike bananas and also don’t eat these muffins, but I can appreciate that they’re really gorgeous-looking muffins. The kids love them. Darling Husband loves them. And I love the fact that they make an incredibly easy breakfast.
“Kids, go downstairs and grab a muffin. I’ll be down … soon.”
xo
Disappearing farmhouse benches

Every fall and spring, there’s a special week when you can score free furniture. Sure, it’s from the curb, but sometimes you can get great pieces from people who don’t want to bother trying to sell it.
I’ve mentioned before how we went years without a coffee table. We distressed a hand-me-down coffee table for our basement family room earlier this year, but the living room’s only “table” was a child-sized table and chairs.
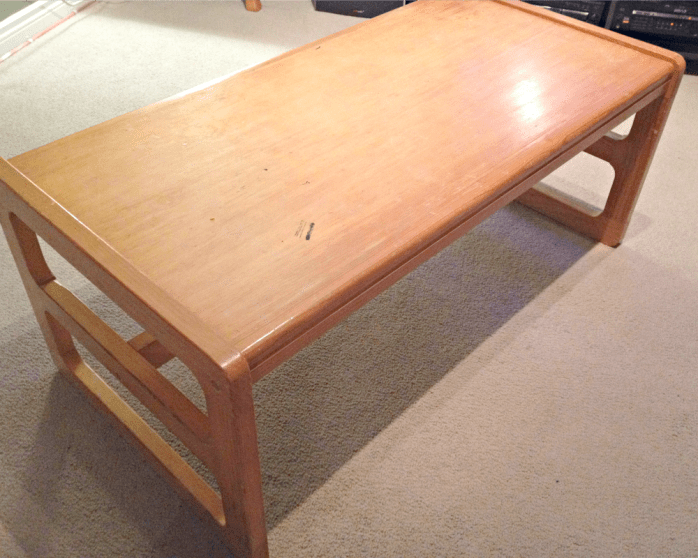
So when I spotted a large coffee table that looked like “vintage” IKEA, I screeched to a stop and stuffed it into the minivan. It waited all summer for me to figure out how I wanted to refinish it, but in the process I had an even better idea: it would pull double-duty as a coffee table and kiddie table.
If we built two farmhouse-style benches, I thought, the kids could sit at the coffee table to eat breakfast or do a puzzle. When the benches weren’t being used, we could slide them underneath the table out of sight. They could even be sturdy enough for adults to sit on, too! My heart fluttered at the idea of concealed seating in our modest floor plan.
We started by measuring the coffee table from every angle and deciding how large the benches should be. I’ll try not to get too math-y on you, but we decided to make the benches a couple of inches narrower than the opening of the table — so it would be easy to push them in — and seven inches lower than the top of the table — leaving room for our kids’ growing legs.
Then it was off to the building supply store, where we bought an eight-foot 1×10 to use for two bench seats, two 1×6 boards for legs, and two 1×4 boards for supports.

We cut two bench seats from the 1×10, and had a little left over. The opening of the table was 46 inches, so we made each bench seat 42 inches for easy clearance. Since we wanted the bench legs to be really strong, we cut the 1×6 boards into 16 pieces — each nine inches tall. In no time at all, my handy husband, Michael, had turned 16 tiny boards into eight solid L-shaped pieces, one for each corner of the benches. He predrilled holes in the seats so the wood wouldn’t split, and then screwed on the legs.

To make things even stronger, he cut sections of 1×4 to run between the legs. Then we were left with two adorable wooden benches that even the rowdiest kids (i.e. ours) couldn’t break.

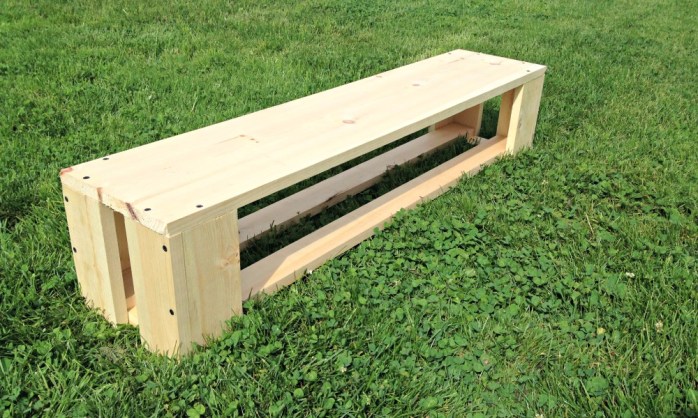
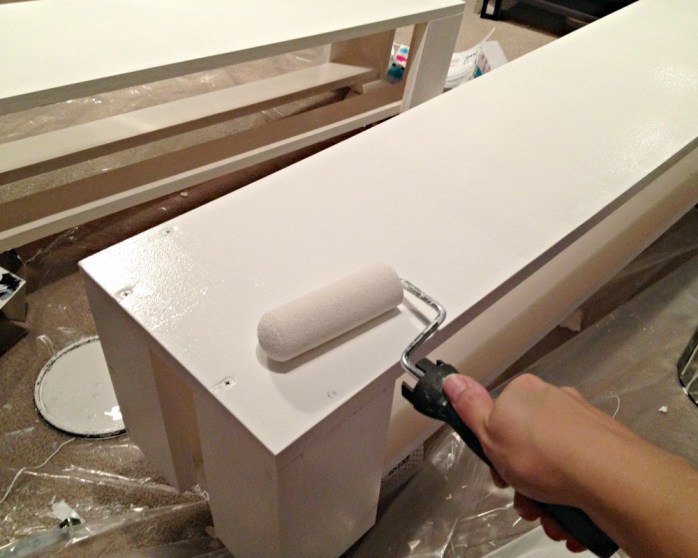
Michael helped me lug the benches into the basement, and I spread out drop cloths for a marathon painting session. I really, really wanted to use chalk paint but I knew it wouldn’t be able to take a beating from the kids. So I used leftover white melamine paint that’s designed for furniture and cabinets, since it creates a durable surface that can be wiped and scrubbed.
Painting the two benches was a fairly quick process — three coats with an angled brush and a small roller — compared to the curbside coffee table with its shiny surface. Despite pre-sanding it, the table felt enormous and it was a pain to work around. It didn’t help that I was painting during the Humidity Wave of 2015, and my sweaty knees kept sticking to the plastic drop cloths.
After a few days of drying in front of a fan, the benches and the coffee table were fully dry. We carried everything upstairs and got to feel the satisfaction of sliding the benches under the table and pulling them back out again. Now you see them, now you don’t!

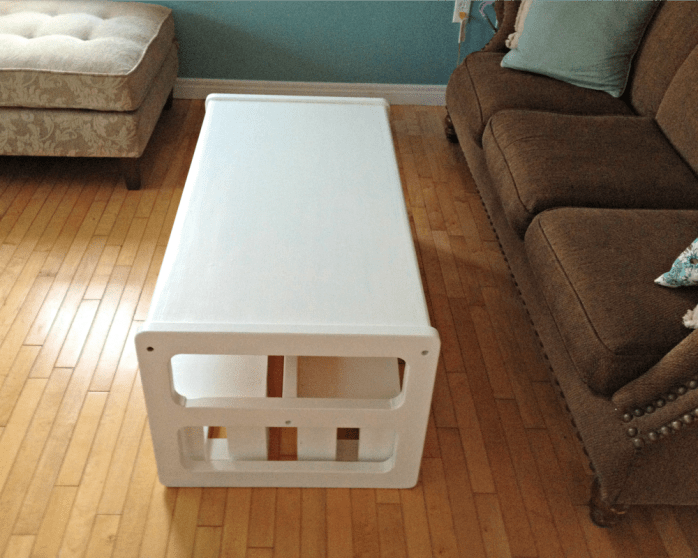
The kids love their new set-up, and it’s been really convenient for playdates because you can squeeze four kids onto each bench. They’re solid enough that we can plunk down on them, too — the benches, not the kids — and I no longer feel worried that we don’t have enough seating on our main level.

I promptly sold our child-sized table and chairs on a secondhand site for a cool $30, so the project really only cost us $15. We technically have the same amount of furniture in the living room as before, except what we have now is much more functional. Bless you, Curbside Giveaway Weekend.

Now I’m wondering what other furniture can do double-duty. A trundle bed under the couch? A storage drawer under the chaise lounge? Hmm, I wonder if it’s structurally sound to install a pull-down library in the ceiling?


As featured on …


