
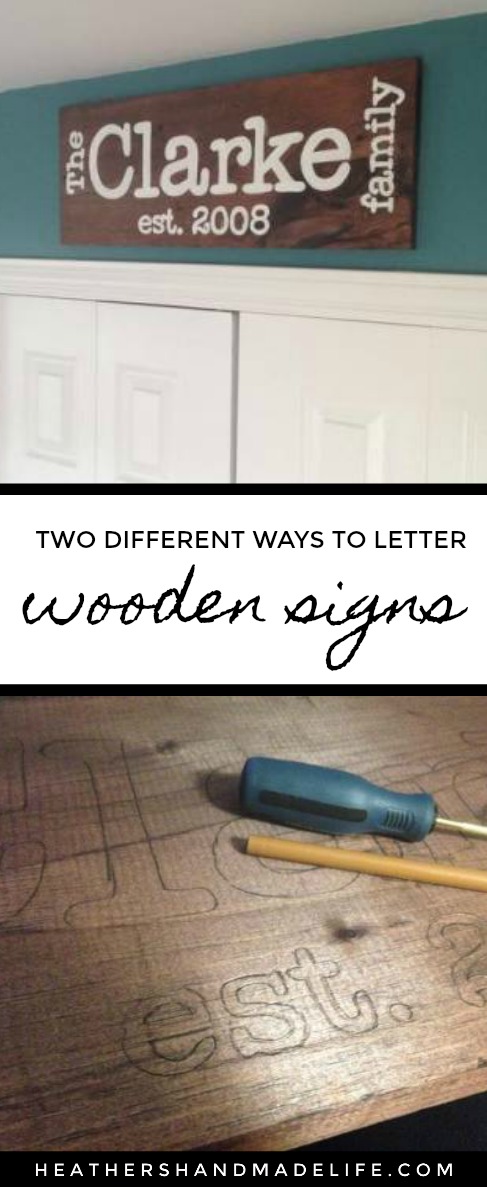
Two ways to letter a wooden sign

Want to hear a secret from a highly-effective crafter? Pursue projects you can make in front of the TV, after you’ve put the kids to bed. I’ve gotten to the point where it actually feels strange to sit on the couch without a pile of supplies spread across the coffee table.
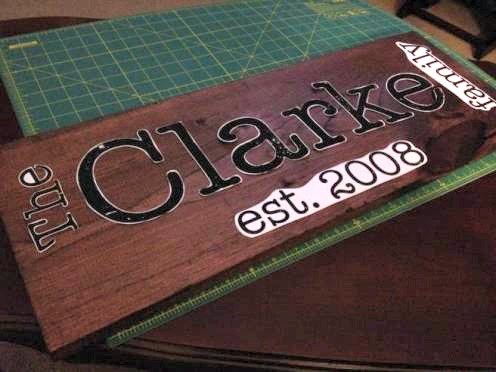
I love the look of the signs on Pinterest that display a family name and the year you were married — the year your family was “established” — so I decided to make one for our front hall.
I usually just hand-letter signs, but they always look … well … hand-lettered. Some turn out better than others. So sometimes I bite the bullet, take the extra time, and print letters to cut out and trace. I knew I wanted this sign to look more polished than thrown-together, so I headed to the computer.
I started by going to my favourite font website (DaFont.com) and found one I liked. Then I wrote out my phrases — “The Clarke family” and “est. 2008.” Is it just me, or does 2008 not feel like very long ago? We have been together since 2000, so I suppose we just should have gotten married earlier, maybe?
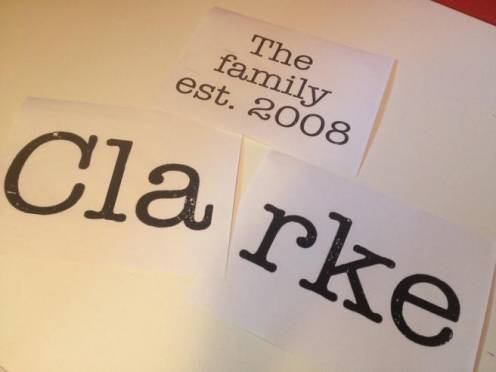
The trick to getting things to print at the proper sizes is to use your screen-grab tool (Snipping Tool for Windows users) and digitally snip the words to make them separate image files. For example, I separated the word “Clarke” into “Cla” and “rke,” and printed them each as a full page to make them nice and large.
Once everything was printed out, I started by cutting out “The” and “Clarke.”
Then I decided I was really, really tired of cutting out letters. Who has time for that?
So for the rest of the words, I just cut around the entire word. Then I asked my husband if he had a really pointy screwdriver (that’s a technical term) and he produced a very cool ice-pick type of thing.
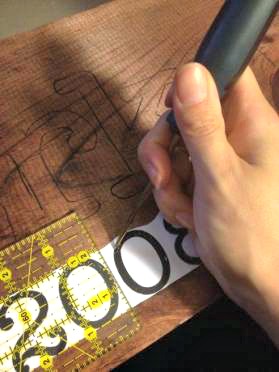
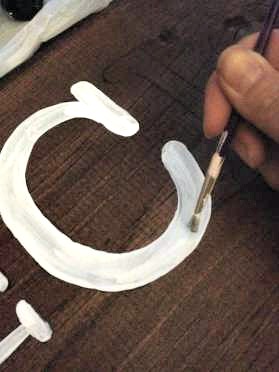
I used the ice-pick screwdriver to trace each letter, right through the paper — scraping the lines directly into the wood.

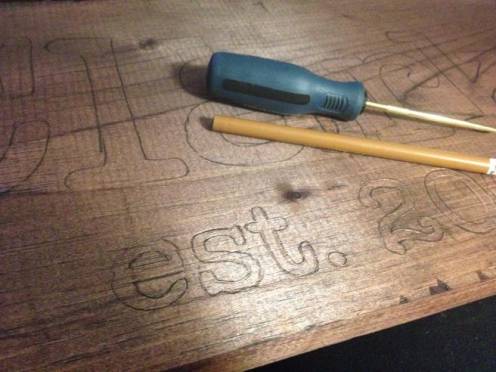
The “scraped” letters left indents in the wood, but they weren’t noticeable once they were painted. Once the shapes of the letters were scraped into the wood, I used a pencil to make the outlines more visible.
Then it was time for paint! I used leftover white latex paint and a tiny art brush to outline all of the letters and fill them in. It took three coats for good coverage, and a few of the larger letters needed some extra swipes of paint.
The whole project only took about two hours — not including drying time — and I’m happy with how it turned out. I’d actually made one of these signs years ago, but it bothered me that the freehanded letters were crooked and uneven, so it never stuck around. There’s something to be said for spending a bit more time on a project, I suppose!

Happy lettering!


As featured on …


