
DIY Lego play table with storage

There’s no pain quite like stepping on a Lego, is there?
Although they’re sharp underfoot, I think I’m probably more bothered by the appearance of a bunch of tiny toys littering the floors. My kids have inherited my love of miniatures, so we have an abundance of minuscule rubber Polly Pocket high heels and teeny tiny Calico Critters ice cream cones. Do you know how small a teaspoon needs to be in order to fit in the hand of a Playmobil figure? It’s practically invisible to the naked eye … until it’s cluttering up my living room.
The trouble with Lego is that my son is so proud of his creations that he wants to keep them intact (possibly forever). This usually means they end up staying on our kitchen table, and — I don’t know, I’m fond of using that space for serving meals. You can see the conflict.
We turned our old train table into a Playmobil table, and it worked wonderfully for taming the mess. So I was craving more “play tables” for our littlest toys.
Here’s what we did …
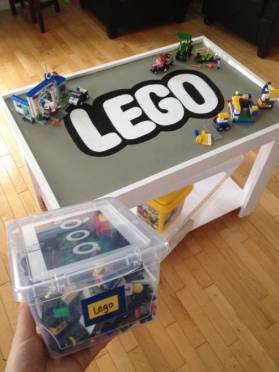
The first step was buying a new storage bin for our Lego. The current Lego bin was half the size of a shoebox, but we knew our son would be getting a lot more Lego for his upcoming fourth birthday. We grabbed a large clear plastic tote, and roughed out the design for a table that would fit around it.
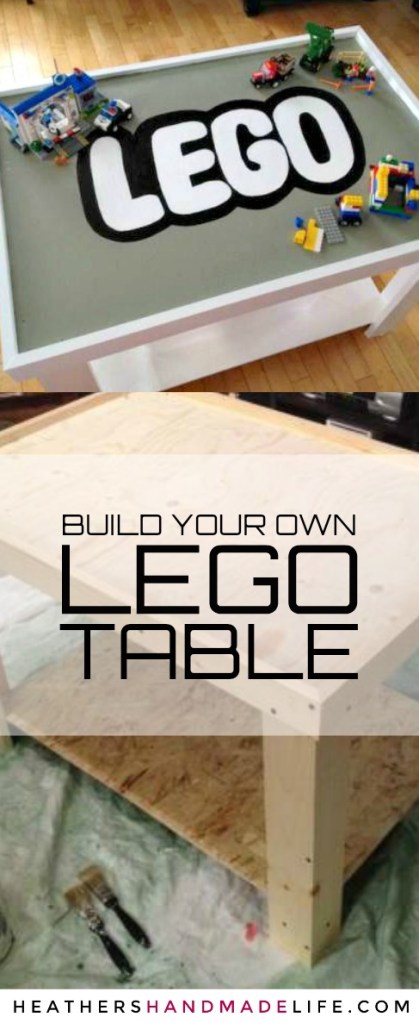
My handy husband bought $50 worth of wood (a half-sheet of plywood, a half-sheet of particle board, two six-foot-long/three-inch-wide knotty pine boards, and two six-foot-long/two-inch-wide knotty pine boards) and put together a simple table with L-shaped legs and a raised border — to keep the little pieces from falling off the tabletop.
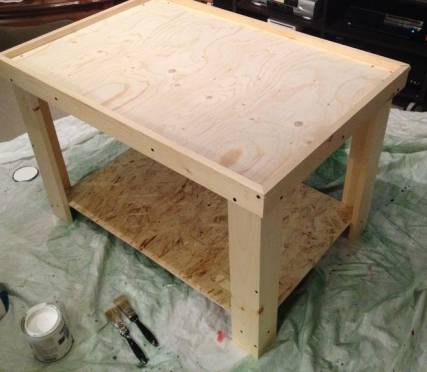
He used the half-sheet of particle board to add a shelf that would hold the storage bin, and built a centre block to give it stability — since our kids will totally end up climbing under there to hide.

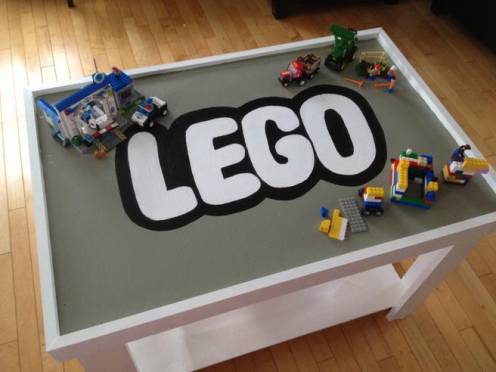
I grabbed some leftover paint (glossy white) and covered the sides and legs with two thick coats. Then I painted the table surface a deep grey (using more leftover paint).
Once the paint was dry, I looked at a picture of the Lego logo and drew the letters on sheets of cardstock.
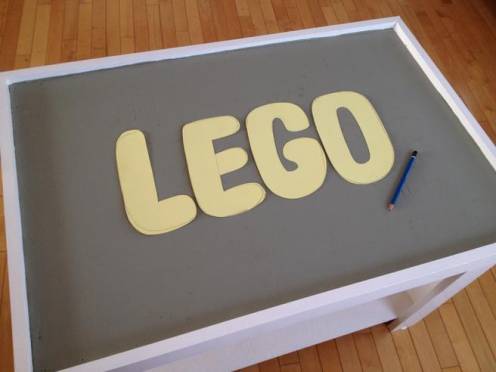
I cut out the letters, traced them onto the table with a pencil, and painted them white.
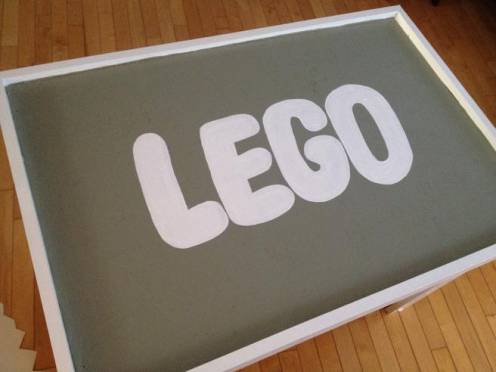
When the white paint was dry, I used a bit of black paint and a teeny brush to add the black outline. The real Lego logo has another outline of yellow (and then a red background), but I decided to keep it simple — mostly because I wasn’t sure how the yellow would show up against the dark grey paint!
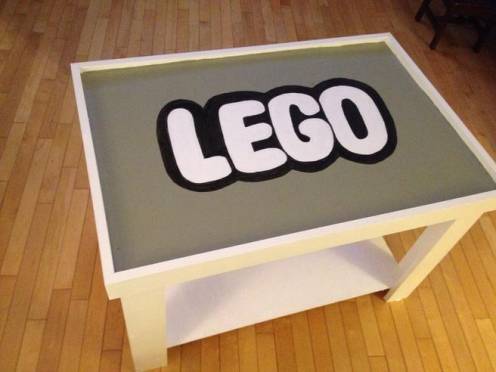
After the logo was dry, I grabbed my trusty Mod Podge and slathered on a thick coat with a sponge brush. Mod Podge looks thick and white going on, but it dries into a clear protective coat. Then all it needed was a big birthday bow!

The Lego table is so large that our son has plenty of room to set up different scenes, and build to his heart’s content. He leaves his creations on display — where they’re safe — and stores any extra pieces in the bin below.
The table ended up being quite a bit larger than the bin, so we can always upgrade to a series of smaller bins, or even plastic drawers, as his collection grows.
But the best part? My kitchen table is no longer a Lego museum!
***
YOU MIGHT ALSO LIKE …

One Comment on “DIY Lego play table with storage”
So what do you think?


As featured on …


Pingback: DIY Lego countertops – Heather's Handmade Life