
Sweet treats and spoiling

I’m years away from having grandchildren of my own — at least 15 years, minimum, and even that would give me a heart attack.
But somehow, the other day, I was chatting with my four-year-old daughter about her someday-children. Specifically, how I must act when I’m in charge of these someday-children.
As I write this, our kids are having a sleepover with my mother. It’s the kiddie-equivalent of going to a rave, I think.
They spend their time hopped up on miniature chocolate bars, Pop-Tarts, Lunchables and bagels with cinnamon sugar. The apple juice is always flowing. There are treats and little surprises around every corner. It’s Willy Wonka’s factory, basically.
That’s why it was so hilarious when my daughter started talking about how I was encouraged — no, expected — to care for the children she might have in 20-odd years.
(Their names change each time she talks about them, but they always rhyme. Millie and Tillie, Dahlia and Ball-ia, Lonnie and Talauni.)
“When I’m a grown-up and I go to a wedding,” she began conversationally, “you can ‘babysitter’ my kids.”
(Apparently weddings are the most common reason a parent would need to go out of town for the night? I think I’ve only been to one or two in her lifetime, but oh well.)
“Oh, thank you!” I said graciously. “I’ll always want to take care of my little grandbabies.”
She nodded triumphantly.
“And I’m going to give them so many treats,” I continued. “I’m going to give them lots of chocolate bars and juice and pop and Rockets! And they’re going to come home all sugared-up and be really hyper for you.”
I thought she’d laugh and play along, but — to my surprise — she was angry …
Continue reading in my weekly parenting column, The Mom Scene, to see exactly why C was angry!
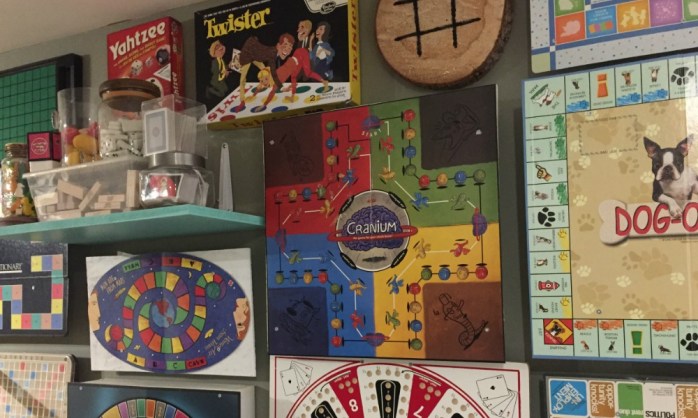
(Even more) board game wall art

One of my most popular DIYs to date has been the board game wall in our basement family room. It’s kind of wild how many people have pinned it and viewed it, you guys.
 |
| Hooray for popular pins! |
It’s undergone some changes since I first shared it with you back in 2014, and I’ve gotten reader questions about how some of the games are hanging up there, so let’s dive in!
The arrangement itself is pretty much the same — just larger — and it’s been such a fun addition to a window-less room that has many purposes: playing, watching TV and hosting guests on our hand-made daybed.
We received a couple of new games for Christmas which prompted me to switch things up a little. There were still quite a few games not on the wall and I decided to get them off the shelves into a place of honour. Of course, this is easier said than done for some of the oddly-shaped games.
Here’s a rundown on how I updated our cheerful gallery wall of board games that we can actually take down and play:
Standard board games:
The typical board-with-pieces games like Monopoly (er, Dogopoly), Careers and Cranium are the easiest to hang. I just build a simple wooden rectangle or square for the back and then screw through the board into the wood to secure it.
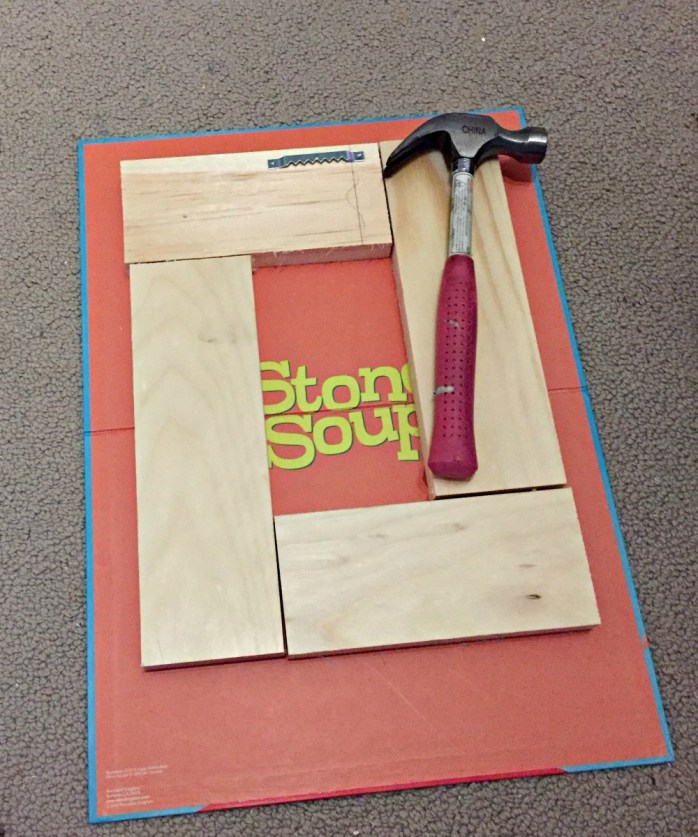
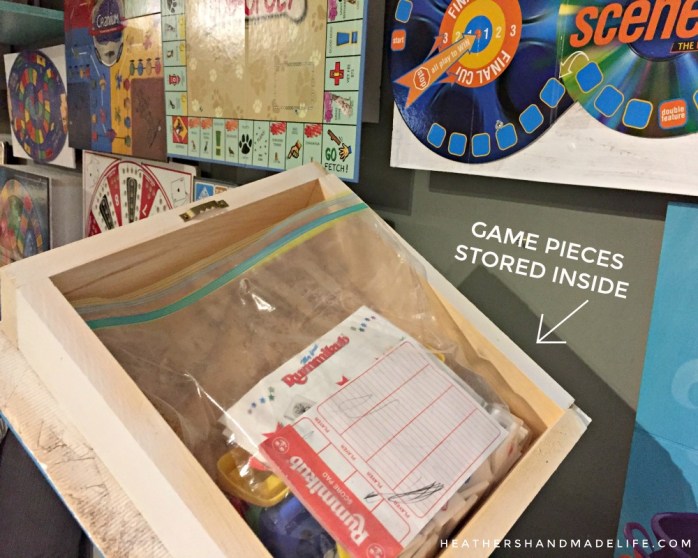
This way the game board stays flat against the wall (without folding up) and there’s room to hide a baggie of playing pieces in the empty space.
Certain games, like Scrabble and Othello, already have hard plastic boards so they don’t need wooden bases.
//pagead2.googlesyndication.com/pagead/js/adsbygoogle.js
(adsbygoogle = window.adsbygoogle || []).push({});
3D board games:
For Christmas my sister bought me my old favourite game, Mall Madness. It talks and you get to swipe credit cards as you buy things, so the kids think it’s fantastic too.
The trouble was that the box was enormous and there were a ton of loose cardboard and plastic pieces that needed to be set up every time we played.
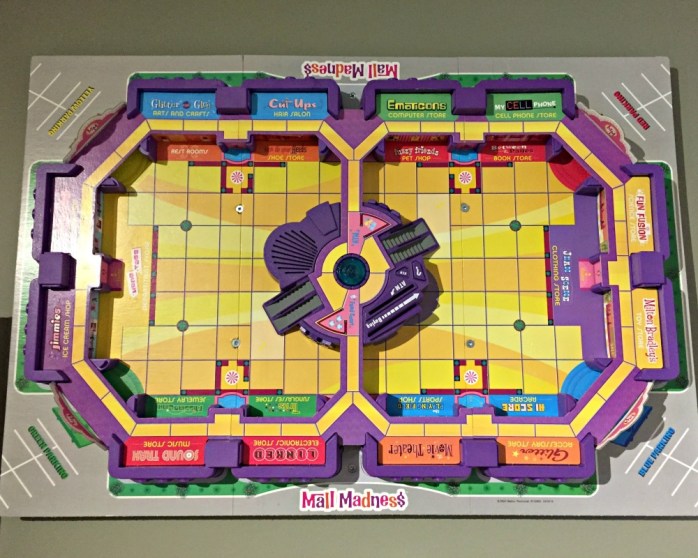
So I set up the ‘mall’ and then hot glued both levels of ‘stores’ to the board. The talking console can still slip out when it needs new batteries, but the glued cardboard surrounding it keeps it in place the rest of the time.
Board-less games:
Our pieces-only games, like Dominos, Animal Upon Animal and Jenga were still sitting on shelves in their original boxes.
So I added a small wooden shelf to the board game collage and stored their pieces in clear jars and bins instead.
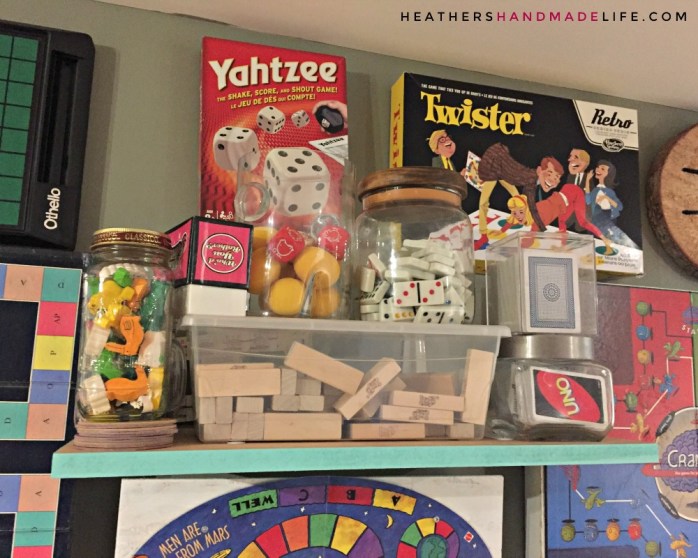
At some point I’d like to upgrade to a set of large matching jars, but right now they’re in everything from rinsed-out pasta sauce jars to old cookie jars.
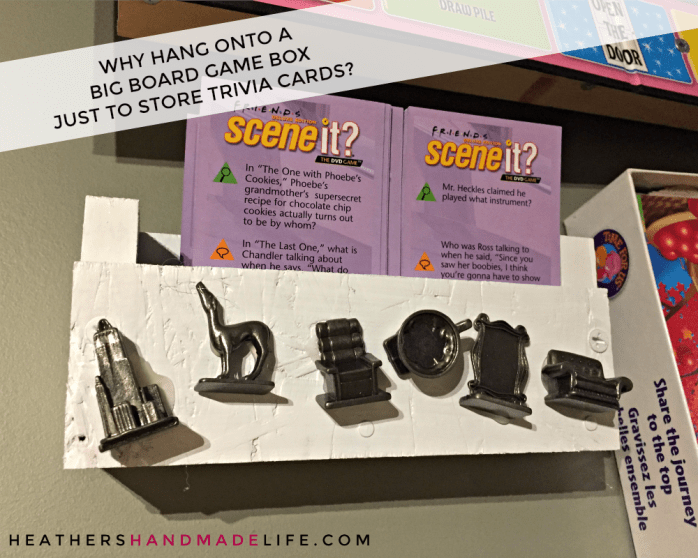
Trivia games:
I wasn’t willing to part with my Friends trivia game, but I decided I didn’t need to hang onto the huge board and the ‘Move back three spaces’ cards. So I put the trivia cards in a small wooden display — just large enough for the two stacks — and hot-glued the metal playing pieces on the front. They were too cute to toss!
Awkward/ugly games:
Twister had to remain in its original box because I couldn’t figure out how to store the huge vinyl mat in a way that didn’t look like a white tarp hanging from the wall. (Plus, I bought the vintage version and I really like the box.)
Yahtzee is also in its box for now, but I’ll probably find a way to display it differently at some point. The boxes are easy to hang — I just punch a hole in the back with a screwdriver and hang it off a screw.
Freestanding games:
Our Connect Four game was a plastic stand that needed to be assembled whenever it came out of the box. So I used a scrap of 2×4 and added L-brackets (I didn’t have any hooks) and two Mason jars to hold the pieces.
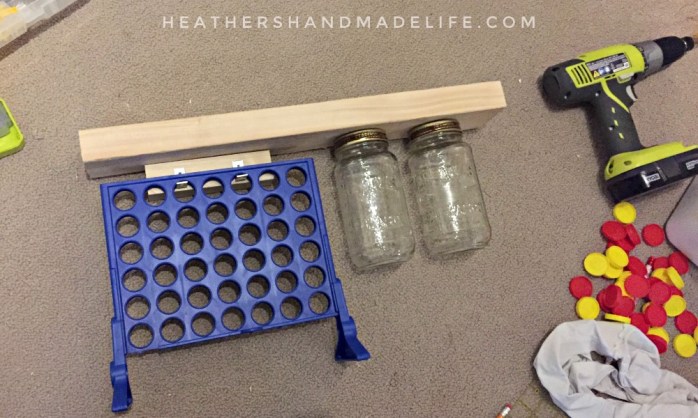
A bit of white and gold paint prettied it up and now it’s a perfect way to display and store the game. When we’re ready to play, we just lift the stand off the L-bracket hooks and the jars of game pieces twist off.
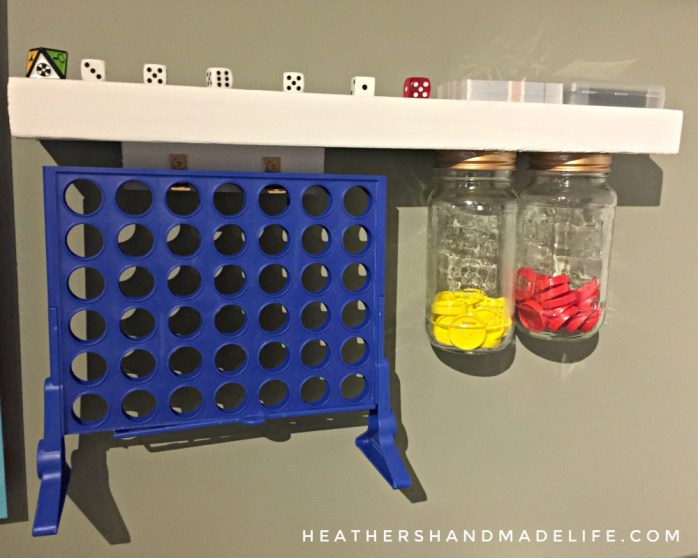
And when we’re finished playing, it’s easy for the kids to put back in its spot!

Just by tweaking the wall and adding a few more games I was able to trash two more garbage bags full of boxes and instructions. That’s a lot of junk out of the house — and more free space on the playroom shelves!


The girl at the art show

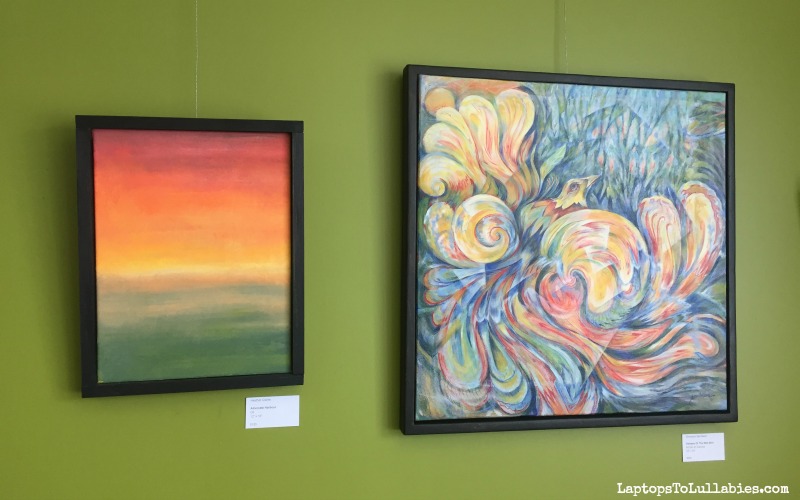
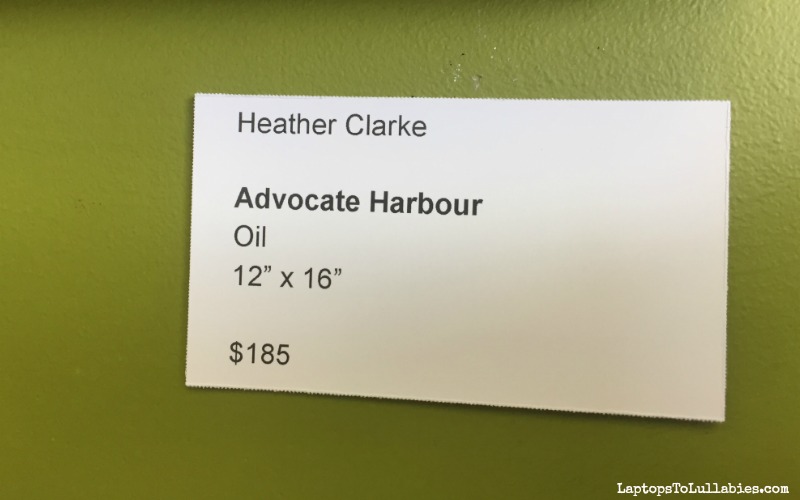
So now my painting is part of a real art show — up for sale with REAL DOLLARS — and it’s awesome.
 |
| It’s real. |
My grandmother was an incredible oil-painter. She taught me when I was little, but I hadn’t done any oils without her help until last year.
Seeing my painting next to the fabulous other entries is really intimidating. THEY ARE ALL SO GOOD! I’m not at “good” yet, but maybe I will be someday.
But it’s there, hanging on the wall of a super-cool spot downtown. I drank hot chocolate sitting below it, and stole bites of D’s cinnamon bun.
I tried not to take too many pictures of it and look like a weirdo. But, hey, I was proud.

And so is this guy.
Remember my art desk from this office tour back in 2013? It’s been sitting in a closet, collapsed, for a couple of years now.
But this weekend I’m going to set it up again.
 |
| Hey, old friend. |
I have some painting to do.
Why I hooked my kids on Little House on the Prairie

There’s been a lot of sickness in our house lately, and that means the TV has been on more than usual. One of our house rules is that the sickest person gets to choose the show, and sometimes that’s me.

The kids know better than to complain about my choices and, admittedly, I think they’d watch anything just for the sake of watching something. It’s through this system that I’ve gotten to expose them to some obscure favourites, and sometimes they end up really liking something new.
They were both skeptical when I first turned on an episode of Little House on the Prairie. The colours were dull and the picture was kind of grainy, compared to the crispness of the new HD shows they watch. But all it took was the river-fording scene — with the wagon being thrashed around on the choppy waters — to pique their interest.
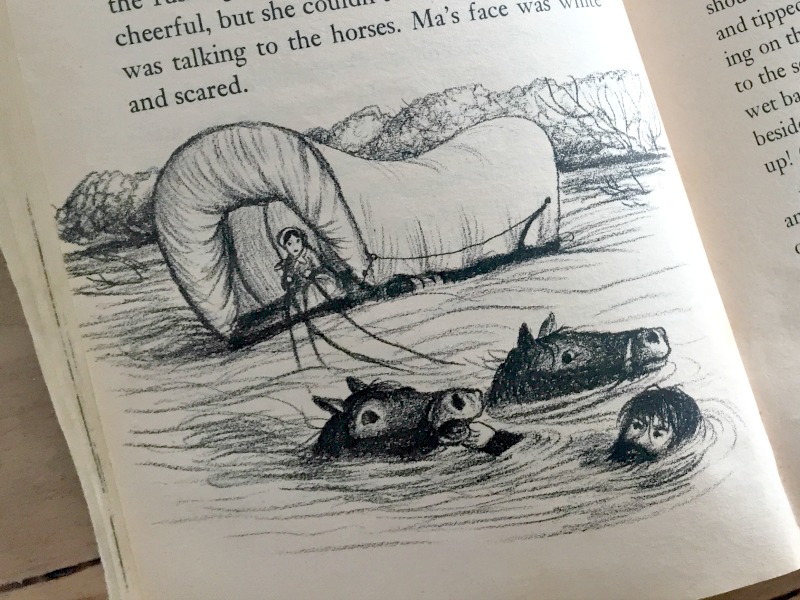 |
| Pioneer dramz. |
From there, I kept pointing out the differences in the way the Ingalls family lived. There was no running water! They cooked their food in that fireplace! There were no bathrooms!
(The kids once got confused and called an outhouse an “in-house,” but I refuse to correct them because it’s too cute. So if they ask, the Ingalls family uses an in-house.)
We slowly worked our way through the first season here and there when I was sick (or just tired). It had been years since I’d watched the show, and even then I’d only see a smattering of episodes. (It’s the books I know by heart.)
It made me smile to see how much the kids loved the famous “town party/country party” scenes I remembered from On the Banks of Plum Creek, when mean Nellie Olsen wouldn’t let Laura play with her doll and Laura got even by tricking Nellie into the muddy creek full of leeches.
Our daughter immediately decided the sweet eldest sister, Mary, was her favourite character, and our son laughed jubilantly every time Laura decked somebody (which was … often).
Some of the episodes were a little dark, but there were opportunities to talk about important lessons. The Ingalls family struggled financially and every member of the family worked hard. Christmases were modest and the children were happy to get a single, handmade gift. The winters were difficult and everyone felt lucky to find warm shelter during a bad storm. Nellie Olsen and her equally mean mother provide lots of chances to talk about kindness, too.
I loved when when our daughter had a friend over recently and insisted that instead of their usual “play home” game, they were going to pretend to be in Little House on the Prairie.
She was Mary (of course) and her friend decided to be Baby Carrie, once she heard her options. Our puppy, Annabelle, played Jack the loyal bulldog. I was Ma, and kept saying things like “Please put on the fire, Mary,” and “Be careful Carrie doesn’t wander near the creek.” It was fun, and now I have plans to make a toy slate and maybe a little cookstove.
Because our daughter is named after not one, but two Little House characters — Charlotte for Laura’s treasured ragdoll, and Rose for Laura’s daughter — it makes me ridiculously happy that she’s loving the Ingalls family as much as I do. It’s something special we can watch together, we’re going to start reading the chapter books aloud at night, and now it’s even our go-to pretend game.
Next family vacation spot? The Laura Ingalls Wilder Historic Home & Museum in Mansfield, Missouri! Well, unless the kids discover a museum about the TV character they love the most: SpongeBob Fricking SquarePants.
xo
Whimsical DIY shelves from end tables

We’ve been working on a sky-high loft bed as part of our four-year-old daughter’s bedroom makeover, and that meant there were two pieces of furniture she definitely didn’t need anymore: her two nightstands.

I mean, unless we wanted to hang them from the ceiling? Hmmm . . .
I knew I absolutely wanted to reuse them somehow. They’re solid wood with beautiful curvy details, and the process of making them — cutting a single end table in half to get two nightstands — was so fun.
But since she wasn’t going to be able to use them as nightstands when her bed was hovering near the ceiling, I had to think of a new use for them. I stared at them for a long time and eventually tried stacking them. What if I . . . yes! That was it!
There’s a great bookstore and coffee shop here in Truro called NovelTea, and they have a fabulous wall of shelves built from halved coffee tables and end tables — all arranged in stacks and painted the same colour. It was the perfect way to reuse these nightstands.
 |
| NovelTea’s cool shelves |
So I took another hand-me-down end table I’d had for a while — painted in Fusion Mineral Paint’s Algonquin but only used for a while in our living room. We sliced it in half down the middle, using our circular saw, just like we’d once done to make those nightstands.

Then I spread out a dropcloth and started painting all four of the table-halves — tops, bottoms and underneath, since most nooks and crannies would be visible.
I used one of Fusion Mineral Paint’s new shades, Coral, which was a Christmas gift from the lovely owners of Phillips & Chestnut Victorian Salvage & Decor. It’s a stunning colour and it’s always fun to paint with something so vibrant.

After a couple of rounds of painting, flipping the tables, painting again and doing final touch-ups, they were ready to install …

I possibly should have waited until my husband was awake to help me, but I was too eager to get started (as usual) and decided to figure it out myself.
I did a test-stack of the table-halves and learned that my original plan — alternating the chunkier table with the thinner table — wouldn’t work, since they had very different depths. So I resigned myself to stacking the two chunkier tables first, and then having the two slimmer tables on top.
There was a tremendous crash as they immediately tumbled down, so apparently I wasn’t going to be able to leave them stacked — even for a second — without securing them to the wall. But how was I going to do that, exactly? Again, I sat and thought.
I decided the table-halves didn’t need to be attached to each other as long as they were attached to the wall. So I ran down to my mitre saw and cut four strips of 2×2 (the length of the tables). I positioned the first table against the wall, pressed the piece of 2×2 against the wall, and screwed down into the table and then again into the wall. It wasn’t budging now!
I continued to do this with the other three tables — stacking, adding the piece of wood, screwing into the table and into the wall — until my little tower was finished. I didn’t even bother screwing the legs into the table-tops because everything felt so sturdy already.
I painted the wood strips coral so they blended into the shelves, and then I was ready to style them! It was fun to arrange my daughter’s books and figurines along with a few picture frames I’d painted.

I love that this set of shelves has a small footprint, and there’s something about it — the fun colour, the curves — that reminds me of the French Provincial-style armoire in Beauty and the Beast. It’s whimsical and perfect for a little girl’s room.

While the new loft bed is going to be the showstopper in this room, this DIY bookcase will give it a run for its money!


As featured on …


