
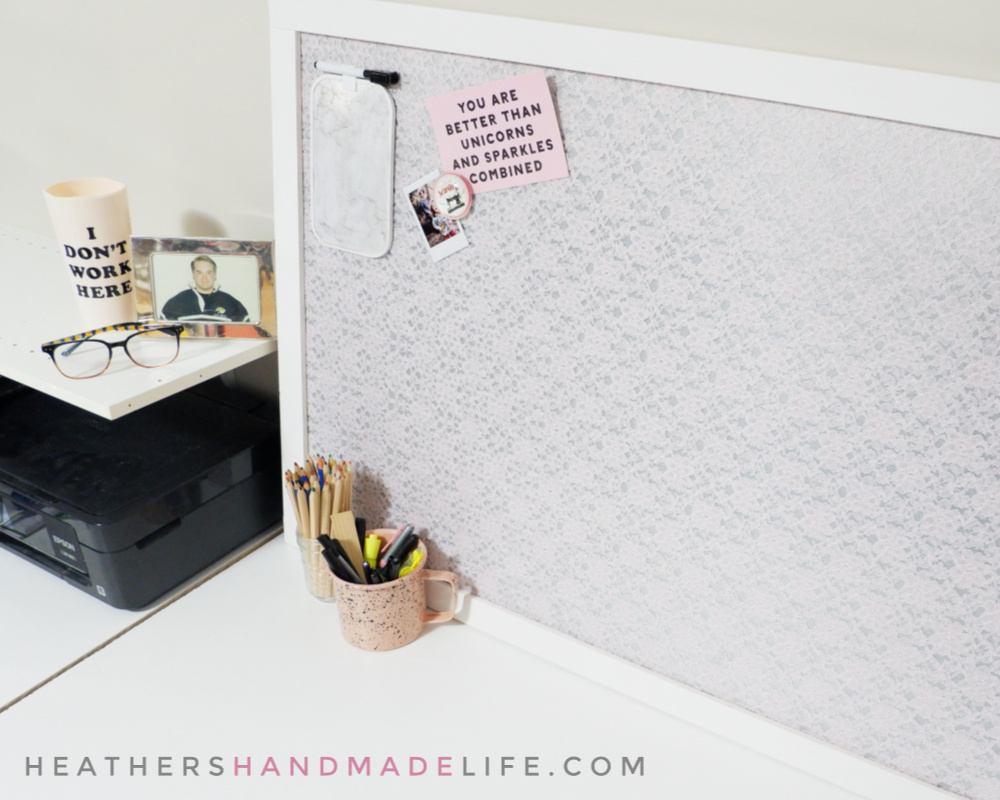
Pink lace DIY magnetic board

I needed a place in my home office to organize scribbled notes and lists, but none of the store-bought options appealed to me.
I didn’t want a bulletin board — tried it, now use it elsewhere for the kids’ school stuff. I didn’t want a white dry-erase board — they tend to look messy and ugly because the marker never fully wipes away. I also refused to buy one of the magnetic memo boards from the office supply store — they were stark, bland and overpriced.
Naturally, I decided to make my own. I asked my handy husband to pick up a thin piece of sheet metal during one of his runs to the home improvement store. The sheet metal was pricer than I’d imagined (about $45 for a 36×24 inch piece) but it was certainly large — only a couple of dollars for the 1×2 boards to frame it.

Now, I’d probably have just sandwiched the metal between two wooden frames, but my handy husband had the brilliant idea to use our table saw to cut a groove down one side of each piece so the grooves could hold the sheet metal in place …


Continue reading in my weekly DIY column, My Handmade Home …
… or pin this post and come back to it later!

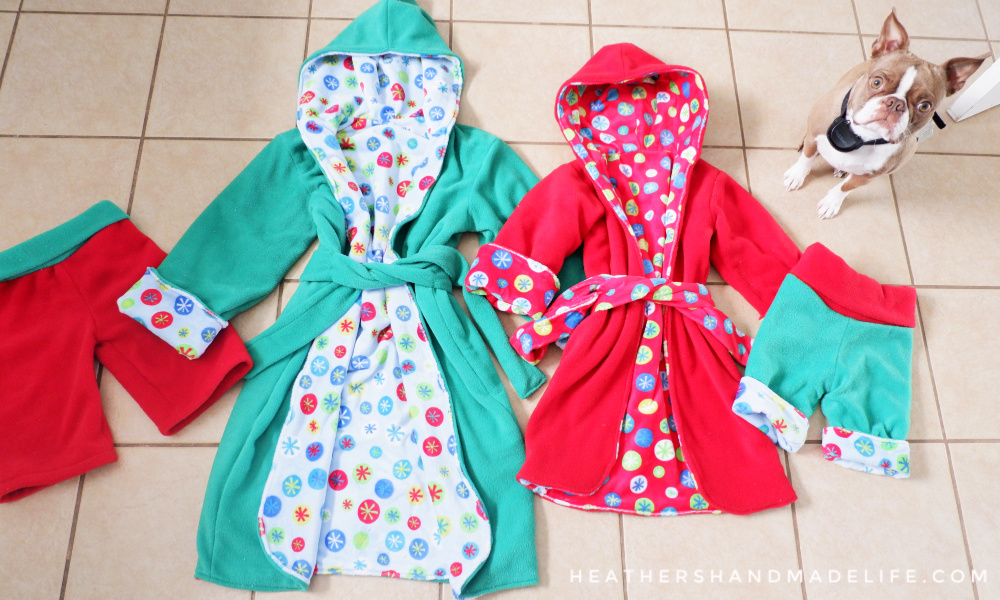
Super-soft reversible child’s robe

I sewed my first robes back in early December when I was making the kids’ annual Christmas jammies. This year they’d requested “robes and shorts — no shirts!” so … OK, yeah, if you want to look like boxers, I guess that’s cool?
I modified this amazing free robe pattern from FleeceFun.com. (It’s for 3T to 8, but super easy to scale up or down.)
Instead of making a single robe and trimming the edges with bias tape (something I struggle with, even after all these years of sewing!) I made TWO robes — one in fleece, and one in super-soft cuddle fleece — and stitched them together to make one reversible robe.
The kids LOVED their Christmas robes and wore them daily, but I realized pretty soon that I should have made a larger one for C. No problem — I just bought new fabric and made her a larger one at the end of February.
Except this time I made BOTH sides out of the extra-soft (and more expensive) cuddle fleece, thanks to a sale at the fabric store.
Be sure to head over to FleeceFun.com to score the free robe pattern, and here’s a step-by-step look at how I used the pattern to make a fully reversible hooded robe …
1. Cut out all your pieces.
Use one fabric for the “inside” and one fabric for the “outside.” If the pattern says to cut one, cut TWO because you’re making two robes.
I prefer to cut ALL of my pieces out at once, sew one robe, and then sew the second robe — but you could sew both robes simutaneously if you found that easier.

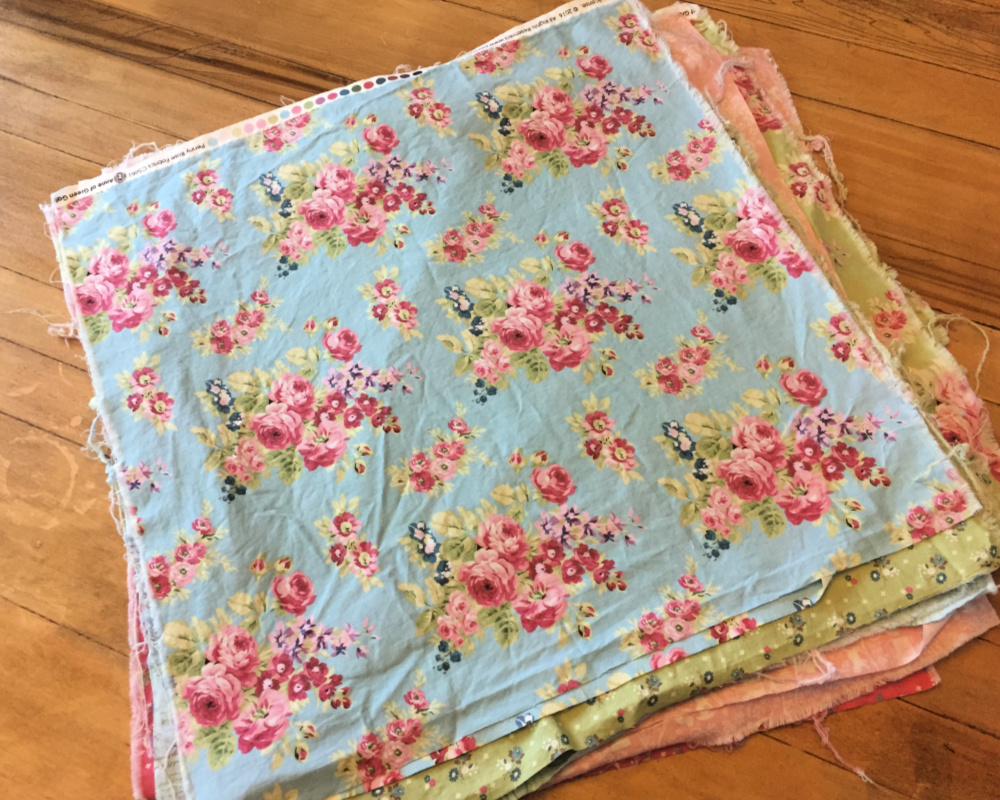
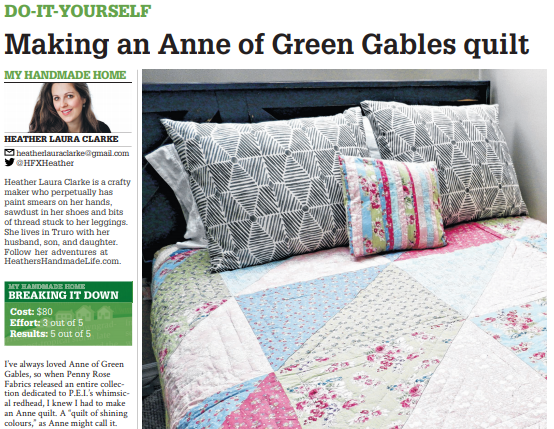
Anne of Green Gables quilt

I’ve always loved Anne of Green Gables, so when Penny Rose Fabrics released an entire collection dedicated to P.E.I.’s whimsical redhead, I knew I had to make an Anne quilt. A “quilt of shining colours,” as Anne might call it.
I pawed through the bolts and narrowed it down to my eight favourites: two greens, three blues and three pinks. Most were printed with flowers (my favourite), but one had teacups (another favourite) and another was printed with delicately scripted quotes from the books.

Now, I’m often asked how to figure out how much fabric to buy when you’re making a quilt. Luckily, I’ve developed a system that’s been working well.
People who sew use a term called a “fat quarter,” which refers to a quarter-metre of fabric if you cut it into squares instead of strips. Fabric stores even sell pre-cut “fat quarters” because they’re handy for making small projects. If you were to buy a quarter-metre off a bolt, it would be a long skinny strip instead of one fat square. Make sense?
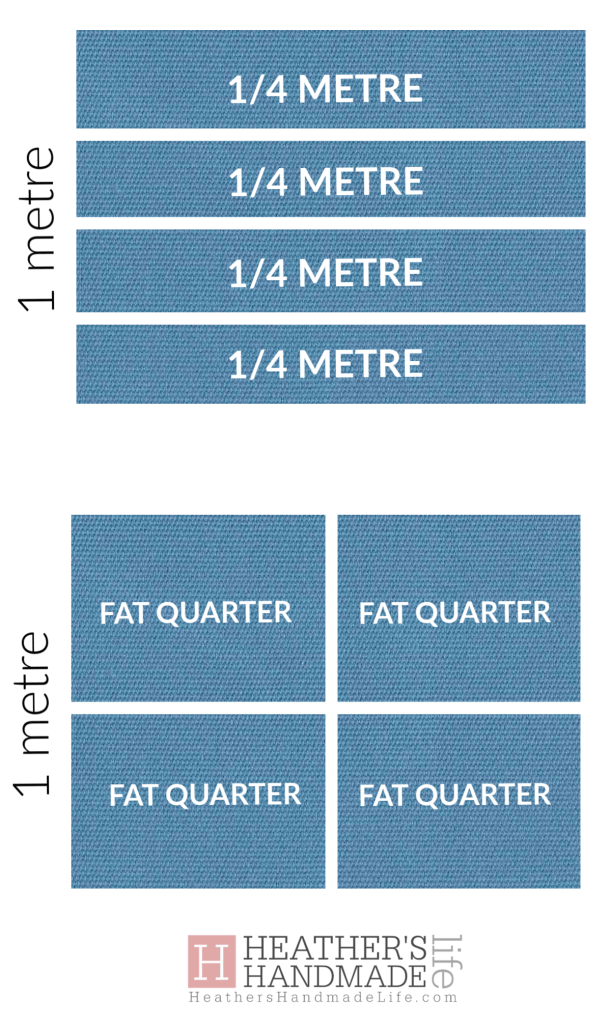
Since I was making the quilt for our guest room, which has a double bed, I knew I could get by with half a metre of each fabric — four metres of fabric, total. Since I’d cut each piece of fabric in half, it was like I was buying 16 fat quarters.
So if you want an easy formula for making a quilt that fits a double bed, either buy 16 fat quarters or eight half-metres of different fabrics. (If you only want to use four fabrics, just buy one metre of each.)
Once I’d washed and dried the fabric — always important if you’re making something that will be washed and dried in the future — I roughly cut each piece of fabric down the middle, giving me 16 fat quarters.
I could have stopped here and sewn them into a 4×4 grid of squares to make a patchwork-style quilt, but I wanted to go a step further and turn these squares into what are called “half-square triangles” or “HSTs.” (They’re easier and more fun than taxes, I promise.)
I ironed the squares well, then drew a diagonal line through the middle of each (using an iron-away fabric pen) and cut them into 32 triangles. Then it was just a matter of matching up different triangles — pink against green, blue against pink, etc. — by putting the good sides together.
Once I had a stack of doubled-up triangles, I sewed the pairs together along one side — giving me 16 squares again, except this time each square was two different colours. They were still rough squares, so the next step was using my clear square quilting ruler to trim the edges and make them all even.
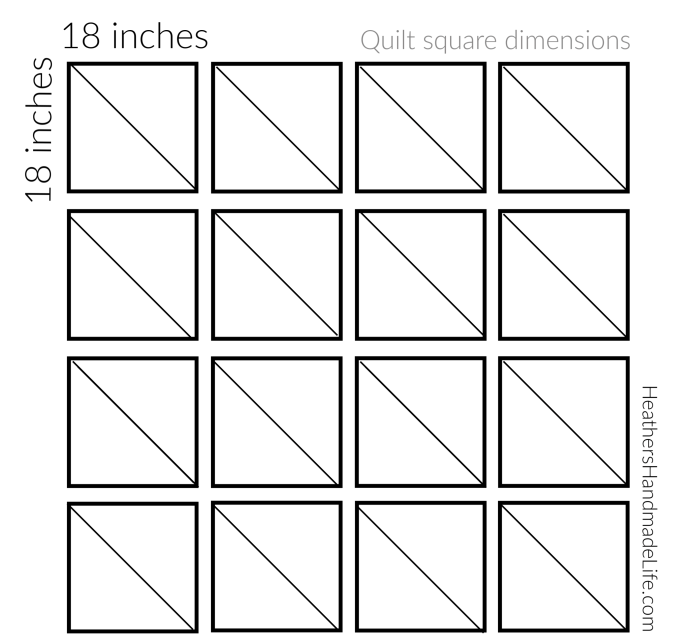
The finished squares were trimmed to be 18″ wide/tall.
When I sewed the 16 squares together using a 1/4″ seam allowance, the squares measured 17 1/2″ across.
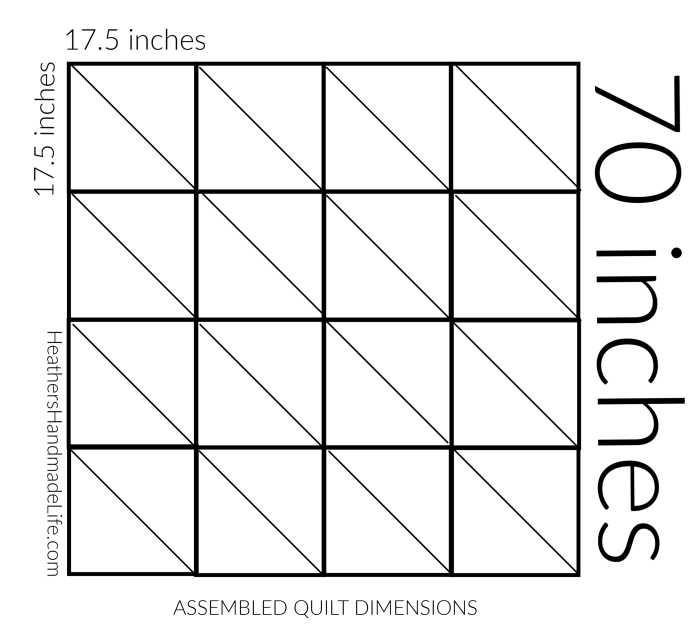
I sewed the 16 squares together in a 4×4 grid, so now I had a quilt top. I sandwiched it together with a layer of batting and plain white prewashed cotton for backing, and added a zillion pins to keep the layers neatly together.
I love quilting by hand, so I spent a few weeks of evenings stitching through the layers with a needle and white quilting thread. I’d used a metre-stick and an iron-away pen to draw triangles inside each triangle of the quilt, which made it fast to quilt because it was just a bunch of straight lines.

When the quilting was finished, I bought a little more of the deep pink Anne fabric, cut it into skinny strips and sewed the strips together to make the binding. Basically you line up the binding and the edge of the quilt (right sides together) and machine-stitch all the way around …

… then you wrap the binding around to the back and hand-stitch it in place there.

The Anne of Green Gables quilt is perfect in our guest room. The colours are light and cheerful, and it goes perfectly with the pastel-painted furniture and light greige walls. I even had enough scraps left over to make a tiny accent pillow! I think Anne would have approved.
xo Heather

Bodysuits are back (and easy to sew)
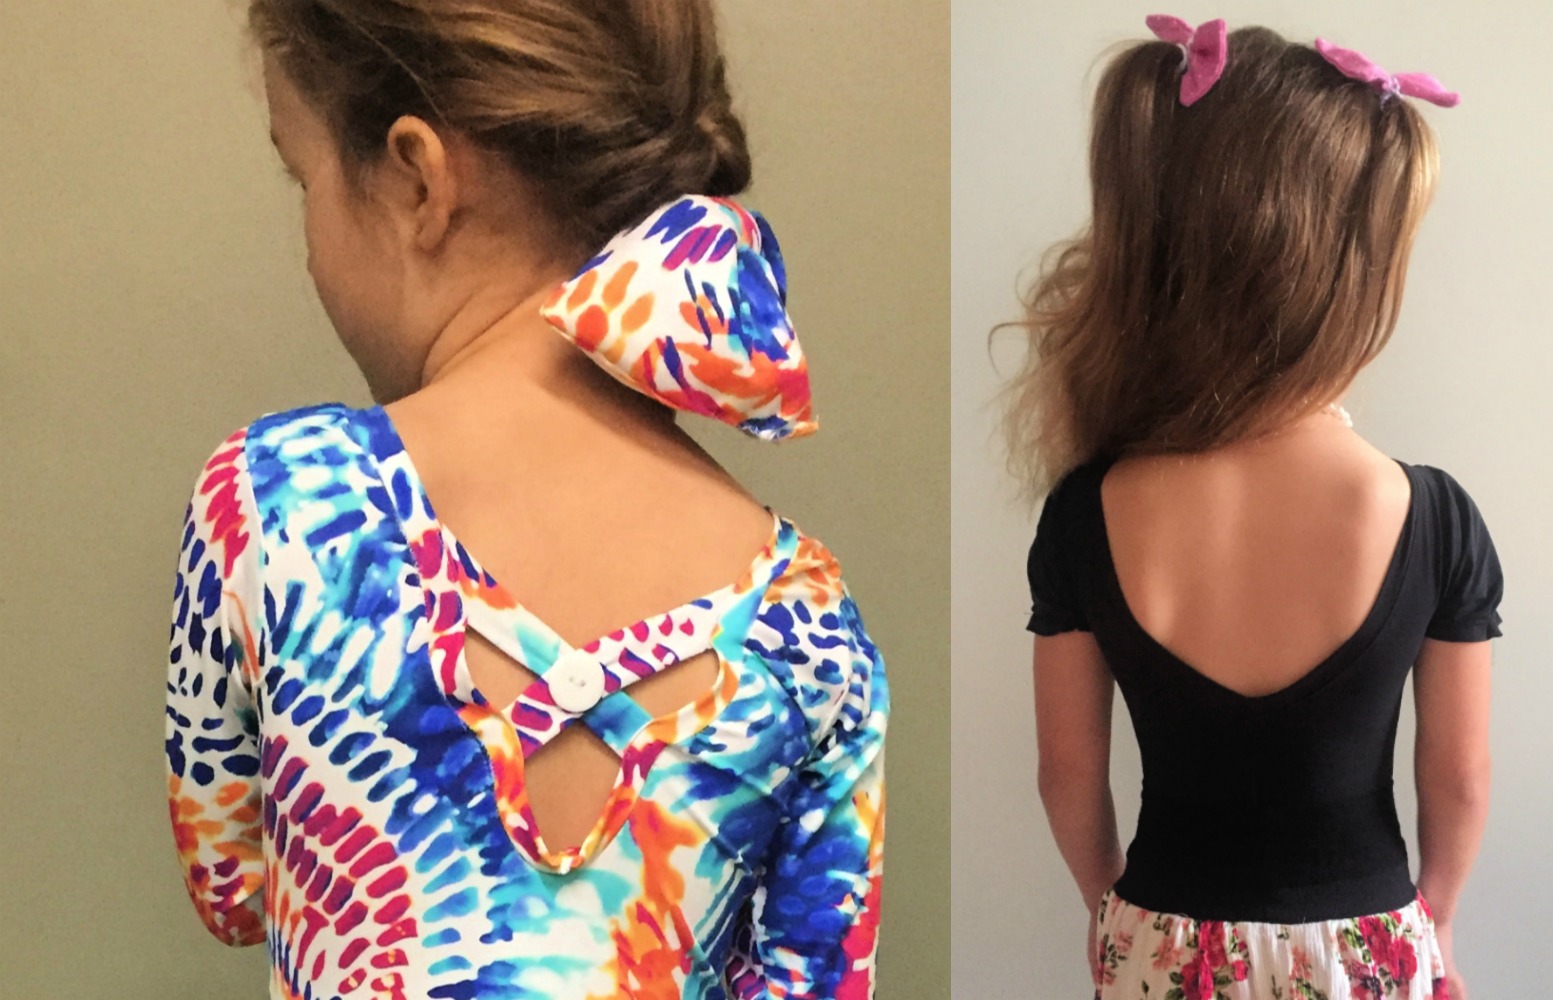
Fellow 30-somethings, remember the bodysuits of the ’90s with snap crotches?! And if you stretched or arched your back or breathed wrong, you’d pop one of the snaps open? And if they all came unsnapped, your bodysuit would start to hitch upwards until you had weird circle cut-outs peeking above your jeans? Ah, memories.
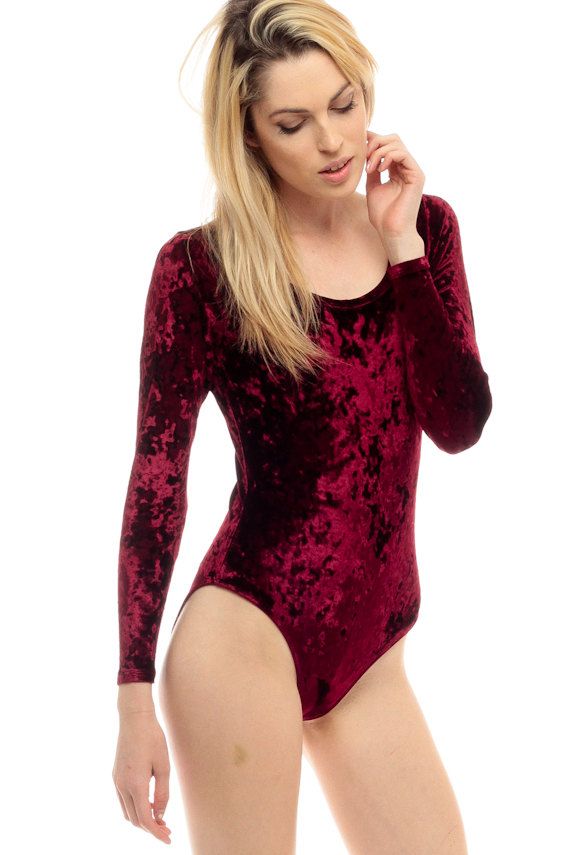
I had one in dark green crushed velvet that I LOVED, and another that was made from ribbed cream-coloured fabric (not as pretty). And now in 2019? My daughter’s wearing bodysuits!*
(*I, of course, am not. The rule is that if you wore a trend the first time around, you’re too old to wear it when it reappears. Following that logic, I will no longer be allowed to wear jelly shoes, overalls or carpenter-style jeans.)
Read MoreLetting kids stay home alone

It started out of desperation, when my son was unexpectedly home sick from school. My husband had to take our dog to a vet appointment, while I was already out at a client meeting that was running late. Through a few frantic texts, we decided we only had one solution that made sense.
We left our eight-year-old son home alone.

Even though I was only a few streets away and was going to be home within 20 minutes or so, it felt strange knowing he was completely by himself. Were we horrible parents for making that decision? Should my husband have dragged him along to the vet?
Were we horrible parents for making that decision? Should my husband have dragged him along to the vet?
I thought I’d be more nervous, wondering anxiously if the kitchen might be bursting into flames spontaneously or a daring robber might be attempting a mid-morning heist. But I was oddly calm.
I finished my meeting, drove home and unlocked the front door to find our son lying on the couch watching TV, exactly as he’d been when my husband left.
Since that uneventful Home Alone experience, we’ve left him on his own quite a few times — mostly when one of us has to zoom down the hill to the farmers market to pick up a pre-ordered meal.
But … there are rules. A lot of them!
Continue reading in my weekly parenting column, The Mom Scene …


As featured on …


