
3D pen home decor projects

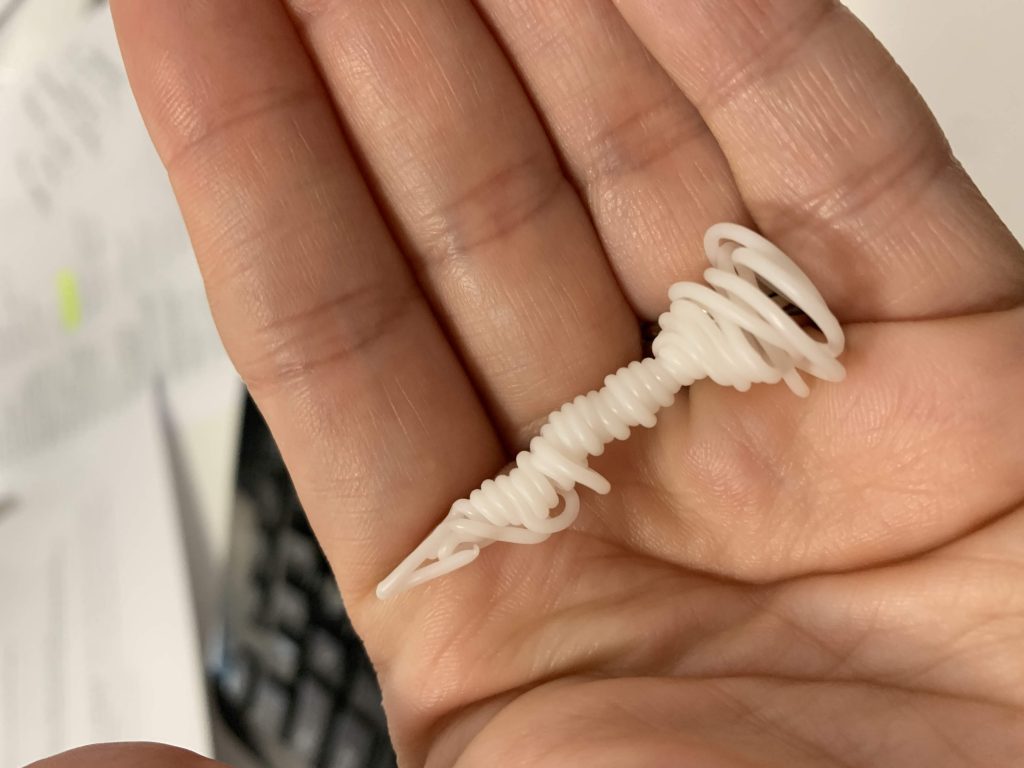
For my birthday a couple of weeks ago, my sister came up with the idea of getting me a 3D pen.* (I think she Googled “birthday gift ideas for crafty people who have everything.”) I was surprised and excited when I opened it, since I always love trying something new.
A 3D pen prints in three dimensions, so it’s almost like a 3D printer that you hold in your hand. Instead of ink, you load it with long coils of plastic called filaments. The pen melts the plastic and you’re able to write with it in any direction.
My pen came with filaments labeled PLA, which stands for polylactic acid. This kind of filament is made from renewable resources like corn, tapioca or sugarcane, so it’s sweet-smelling when it melts and it’s considered the more environmentally friendly 3D printing material.
(My 3D pen can also handle oil-based ABS (acrylonitrile butadiene styrene) filaments, but those supposedly produce strong fumes and aren’t as safe for home use. But that’s enough science talk!)
When I first experimented with the pen, I didn’t know how to stop the flow of plastic. It flew out of the pen in a steady stream and hardened into an ugly coil. I finally managed to switch it off, and I was holding a twisted piece of hard plastic that looked like a Barbie-sized candlestick.
On the advice of my handy husband, I watched a YouTube video and learned how the buttons worked.
Sure enough, I could stop and start the flow of plastic as needed. It also ran on three speeds, so I could work slowly around a difficult part and speed up when colouring in a larger area.
Then I actually started making some really cool stuff …


Continue reading in my weekly DIY column, My Handmade Home …
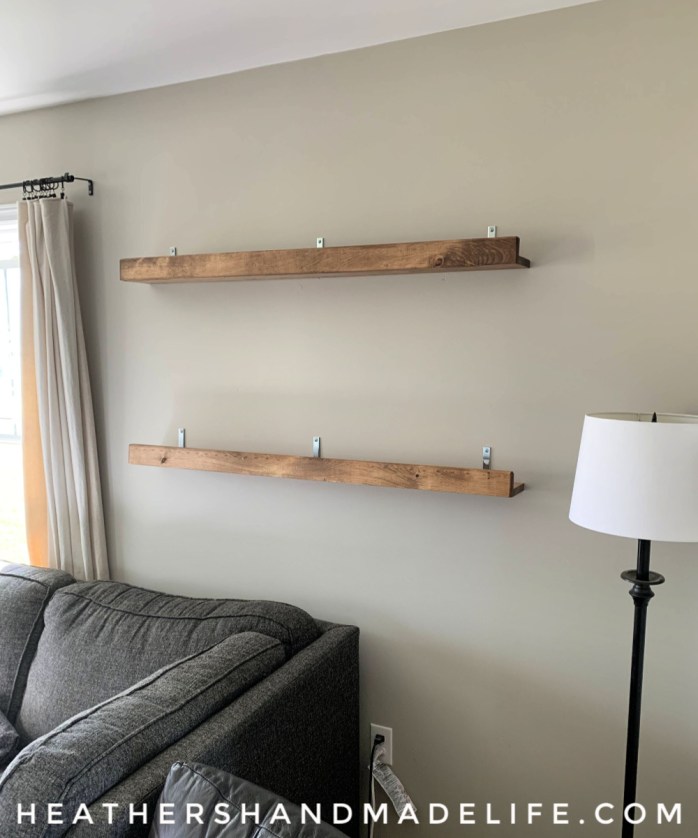
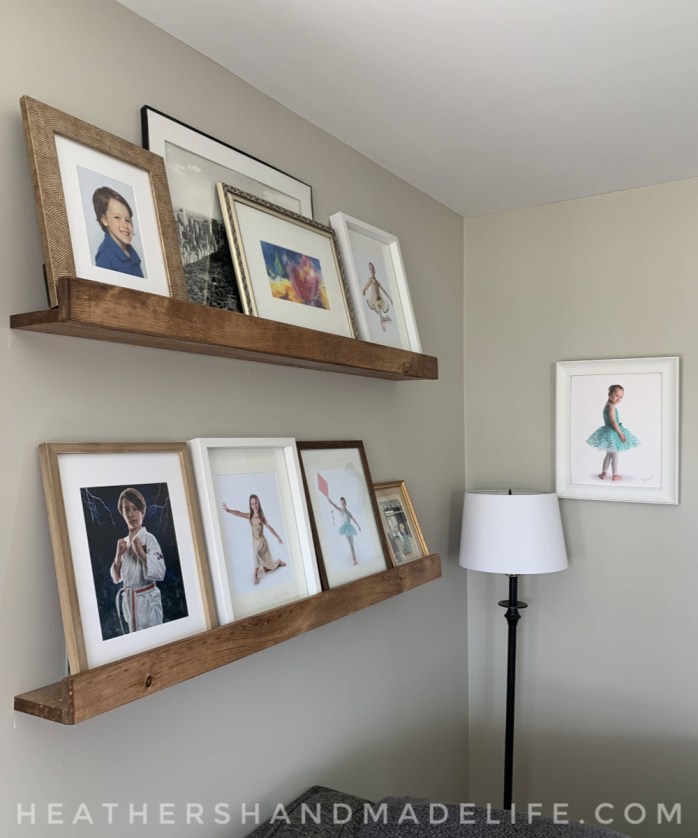
Updated living room photo ledges

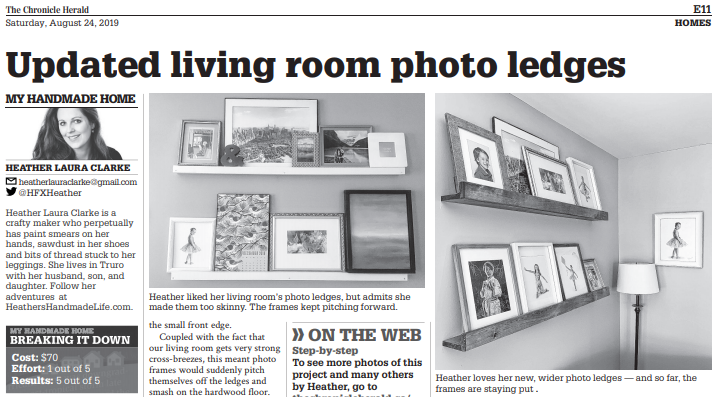
Sometimes you can’t see a project’s flaws until it’s too late, and there’s nothing left to do except … start over again.
That was the case with our living room photo ledges. I’d decided, three years ago, to take down our floating shelves and replace them with wooden photo ledges. I loved the idea of swapping out frames whenever I felt like it — without making dozens of holes in the walls.

When I built our first set of photo ledges, I used skinny 1×2 and tiny L-brackets so the cost was just $15 for two ledges. They looked pretty good, but I didn’t think about the fact that skinny ledges wouldn’t give the frames much room to lean back against the wall. They were almost standing straight up, teetering precariously behind the small front edge.
Coupled with the fact that our living room gets very strong cross-breezes, this meant photo frames would suddenly pitch themselves off the ledges and smash on the hardwood floor. I’d lean the frames back up — minus the shattered glass — and we’d forget about the problem until the next sharp breeze sent another one tumbling down onto the couch.

So when my Handy Husband asked me what I wanted for my birthday a few weeks ago, I knew exactly what he could give me: new 8×10 frames and for him to build me thicker photo ledges that would let the frames to really LEAN …
Read the full tutorial in my weekly DIY column, My Handmade Home …
School lunch container tips & tricks

Our kids head back to school in 15 days. (But who’s counting?)
I can tell they’re ready for it because yesterday they actually argued over who got to wash the new Tupperware lunch containers. Once I stopped laughing at the fact that they were FIGHTING TO WASH THE DISHES, I told them one person could scrub while the other rinsed, and then they’d trade.

They did, and they were very pleased with their work.

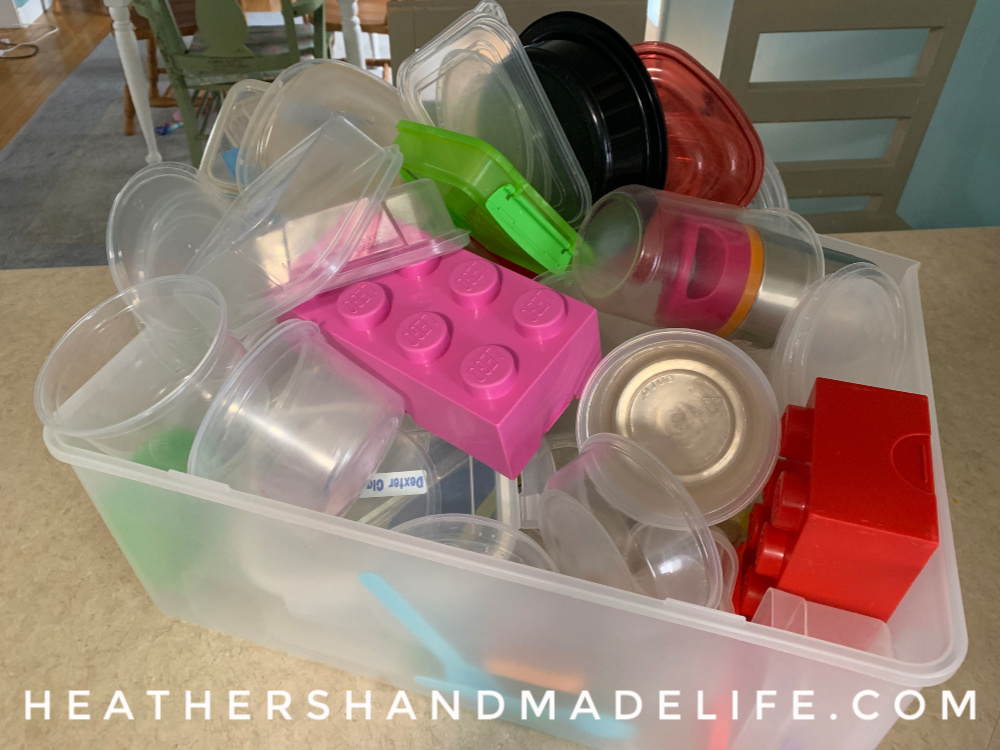
I dried them off and started to label them, and then I realized I’d need to clean out our “school lunch container bin” before I added our pretty new pieces.
YUCK. We’d gotten lazy over the summer and kept randomly tossing in ANY lunch container, so it was a disaster.
DIY tire tower for the backyard

We add something new to our backyard playground every summer, and it’s fun to see how our additions evolve as our kids get older.
The wooden seesaw we built for them when they were preschoolers still gets a lot of use …

… but now they’re more interested in scaling the roof of the treehouse (yikes!) or daring each other to leap from the top of the monkey bars.

I knew this summer’s new addition had to reflect the fact that they’re now seven and nine years old — and very adventurous — so the answer was obvious: something high and challenging. A DIY tire tower!

We had four old winter tires taking up space below the deck, so we were off and running. We still needed to buy the rest of the supplies — three 4x4x10 posts, two 2x8x10 boards, three ground spikes, four heavy-duty metal brackets, 12 three-inch lag bolts with washers and about 20 three-inch wood screws — which ran us about $170.
Not bad for a brand-new (and huge) piece of playground equipment, though.
Continue reading in my weekly DIY column, My Handmade Home …
… or pin this idea and come back to read the instructions later!

The high price of nostalgia

Have you ever spent a ridiculous amount of money trying to recapture something special from your childhood? No? Well, prepare to roll your eyes at me. I think I deserve it.
It all started when our daughter received a set of vintage-style Fashion Plates as a gift. You know the kind — textured plastic rectangles that you arrange to form an outfit and then scribble over with a sideways crayon to transfer the designs onto paper.

I’d had these as a child, but I wasn’t really a fan. Her Fashion Plates, however, reminded me of something similar I’d had as a child: a Crayola Fashion Designer Kit. It had a purple plastic stencil of three different models and sheets of clothing designs and backgrounds that you could trace onto your stenciled models.

I used that stencil for YEARS — well into my teens! I ignored the paper outfit designs after a while, but I continued to trace those three models and draw my own outfits onto their frames. I did this at least up until I was 13 or 14 because I remember doodling outfits for Rachel, Monica and Phoebe from Friends.
“That was the BEST stencil, you guys!” I told my kids enthusiastically as we sat around the table with their Fashion Plates. “I bet I can find one online. You’ll love it!”
I hopped onto Amazon and started searching “vintage ’90s Crayola fashion model stencil,” ready to throw down my credit card in a heartbeat. I could already picture myself tracing those familiar models and drawing new outfits on them.
Continue reading in my weekly parenting column, The Mom Scene …


As featured on …


