
A new kind of Freshman 15 … "Mommy 15"?
I have been struggling MIGHTILY lately, with issues surrounding exercise, healthy eating, and body image. Is it just that time of year, or what? What gives?

It seems that in every thought, there is the opposite thought — making it impossible for me to fully decide where I stand.
As long-time readers know, I joined Weight Watchers when my baby girl C was six weeks old and wound up losing 65 lbs. from my delivery day (although, yes, some of that was baby). I was breastfeeding hardcore, so that helped a lot (oh, how I miss it!) with burning calories.
When I finished breastfeeding C (when she was 16 months old), about 10 lbs. immediately reattached itself to me (boo!). And then I got a Mirena (more on that soon) which I feel contributed to gaining another five-ish lbs. (it can do that).
So right now, I’m 15 lbs. heavier than I was at my lightest (the 65-lb. loss), and it’s really frustrating. Why can’t I just breastfeed FOREVER AND EVER, because it’s definitely the most awesome way to burn calories that was ever invented.
Here’s my internal whine these days …
- Exercise: I enjoy my adult gymnastics class because I love chatting with the other girls (Girls? Ladies? Are we ladies? I don’t feel old enough to be a lady) and I love bouncing on trampolines. But I also kind of hate it sometimes because I don’t like getting sweaty and out of breath, and feeling so sloggy and out of shape. It’s like I FEEL those extra 15 lbs. I am just not an exerciser. I am not sporty. I am not someone who likes physical activity, as horrible as that sounds! But yet I know how important it is. I want my kids to love being active. I want my kids — and me! — to be healthy. But will I ever actually like it? Will I ever get used to feeling sweaty and sore-throaty from exertion?
- Clothes: I still fit into all of my jeans, but yet I also feel like I’m busting out of them — isn’t that just the grossest, muffin-toppiest feeling? I admit that if it wasn’t for wearing nothing but Reitmans Comfort Fit (not paid to say that — I just love them), I surely wouldn’t still fit into them some days. It is depressing. But other days they fit fine — probably the days they are stretched out, but shhhhh! I put on the right top (i.e. loose-fitting at the waist, tighter-fitting up top) and I think “OK, this is fine. I look all right. I’m tall.” I see other people who are much shorter than me, and weight a lot more, and I feel better about myself. Is it normal to be so back-and-forth about how you feel about your (pear) shape? I feel schizophrenic half the time when I’m getting dressed!
- Food: I struggle with food, lately. I feel like a sudden crop of eating-out opportunities popped up all at once, and I’m not the type of person who will order salad
everin a restaurant. No, no, no. I want to order things that I can’t make (or can’t make well) at home! Chicken fingers and potato skins 4-eva, you know? I go back and forth between feeling like I deserve a treat (DESERVE, I tell you!) and feeling like I’m making horrible choices. I tried (and failed) to give up potato chips for Lent, and I have a lot of FEELINGS over that. More of the back-and-forth “deserving a treat” and “making bad choices” nonsense.
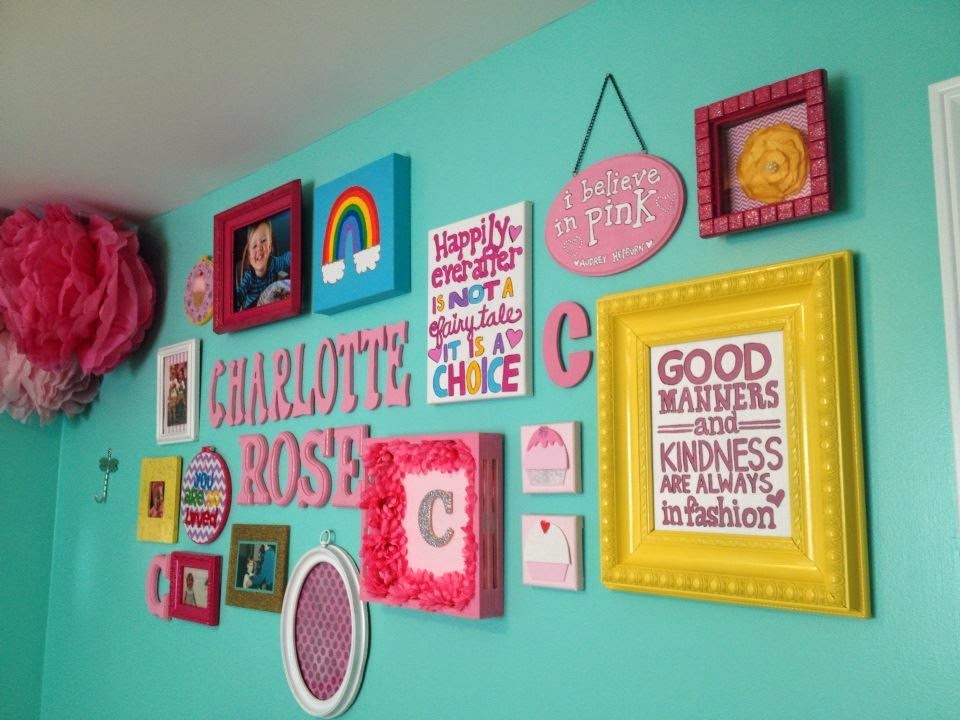
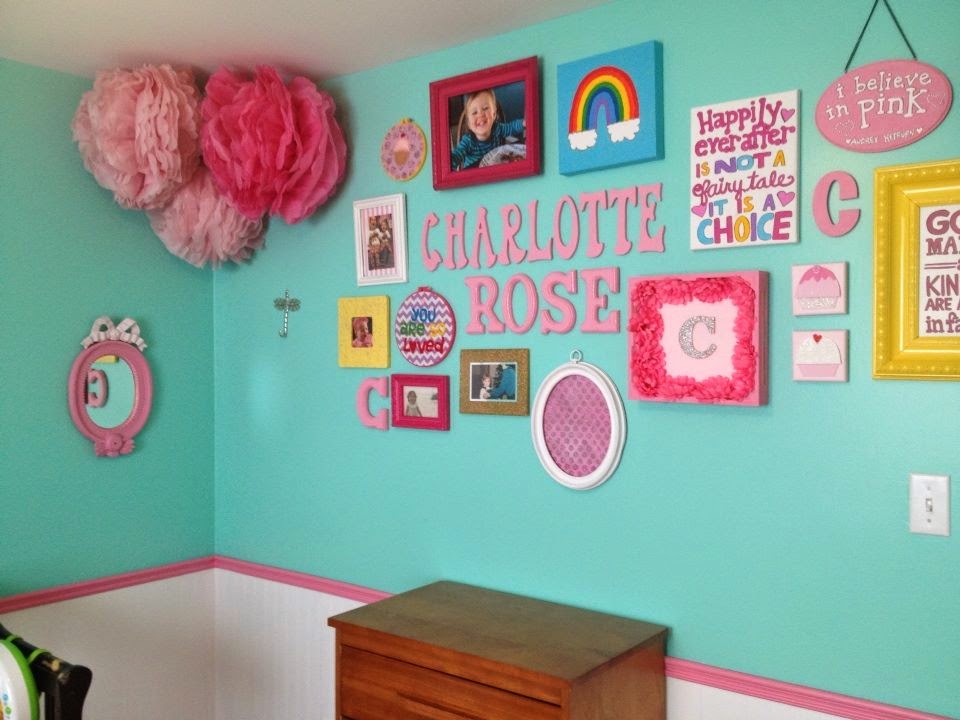
Transforming the cupcake nursery to a toddler room (by creating a very girly gallery wall)


|
| Fun fact: only ONE of these frames was actually purchased (the gold one) and it was from the Dollarama. Everything else was a gift, a hand-me-down, or a recycled one from a previous home/room. |
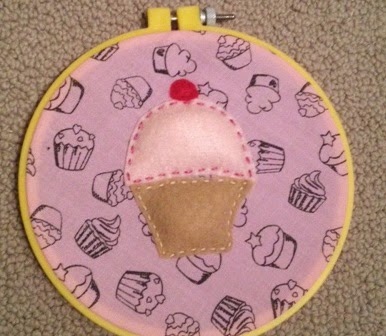 |
| This little cupcake is hard to spot in the big picture, but I love how it turned out. It took me about five minutes from start to finish, using a cheap plastic embroidery hoop (from Walmart), a scrap of cupcake material, a few scraps of felt, and a bit of stuffing. |
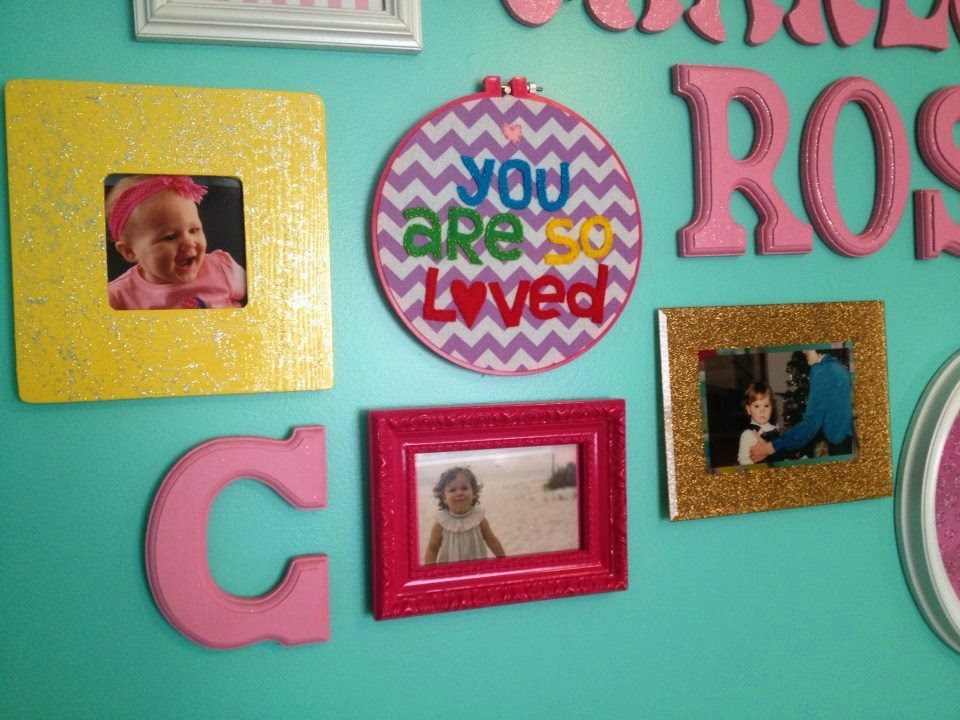 |
| I put a picture of C in the yellow frame (taken on her first birthday), and the other two photos are of me as a baby. The chevron wall-hanging was really easy to make, and I just hung it right in the embroidery hoop to add some circle-y shapes into the mix. |
 |
| This is actually a wooden Melissa & Doug box (it used to hold wooden fruit) that I painted pink, and hot-glued fake flowers into. I coated one of those $0.49 wooden Cs from Michaels in glitter, and glued it in the middle. |
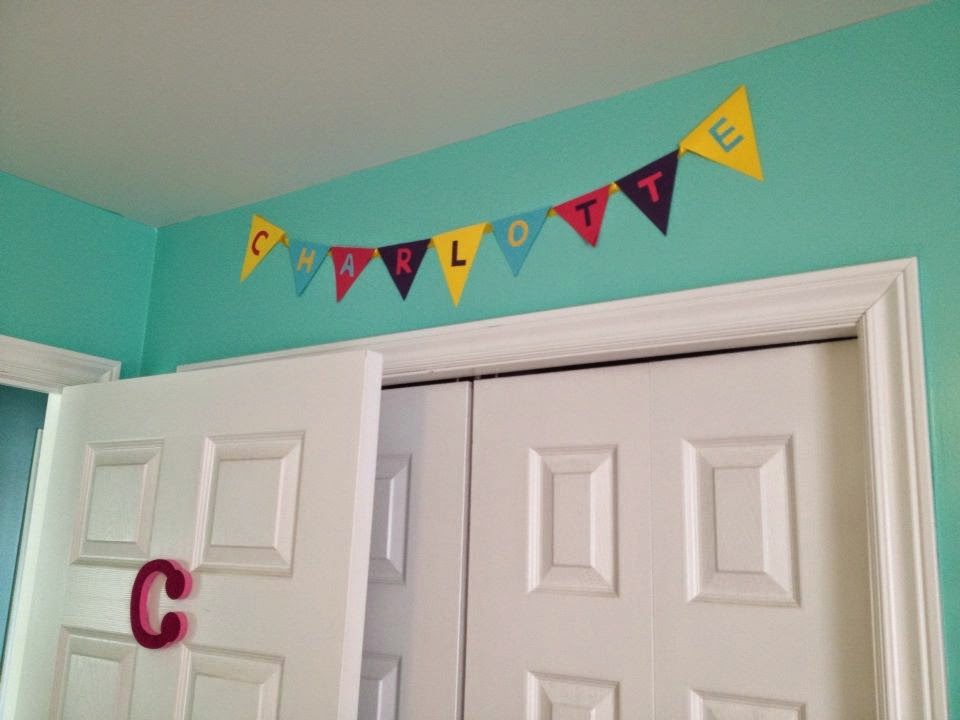 |
| I made this cardstock pennant banner sort of absent-mindedly thinking I’d use it for C’s upcoming second birthday, but then realized the colours didn’t match the theme. I stuck it above her closet with scotch tape, and it worked perfectly. |
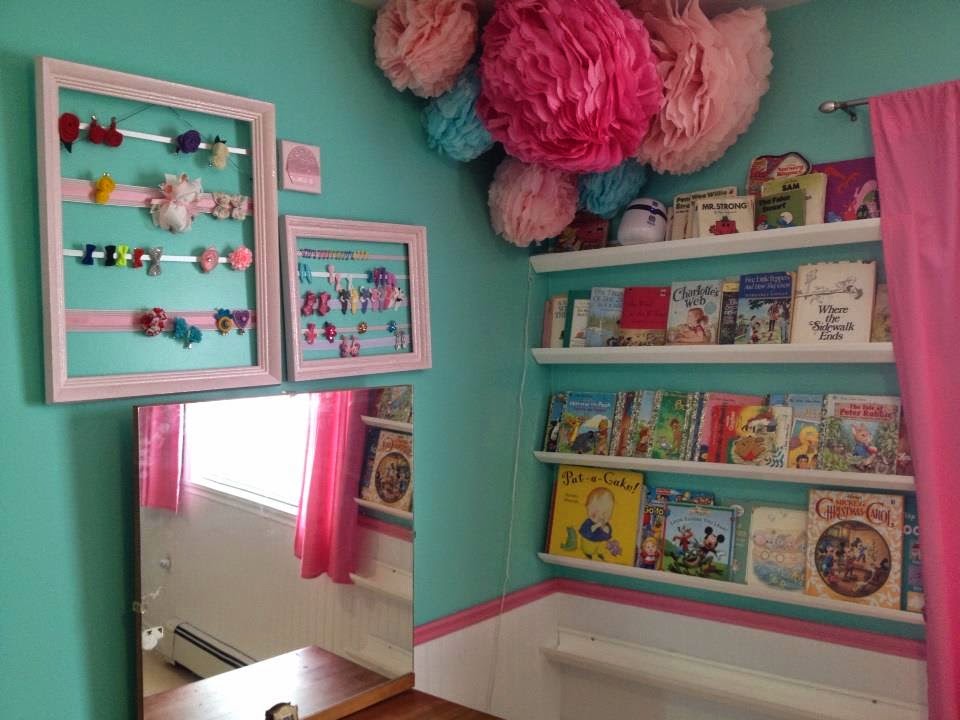 |
| We’d filled up C’s original hairclip frame (the smaller one) a while back, so I grabbed another reject frame from the basement, painted it the same shade of pink, did a coat of glitter (GLITTERRRR) and glued on a few similar strips of ribbon. Now we have lots of space!
Oh, and for anyone interested in the $12 rain gutter bookshelves, here’s a post about them. |
|
| Let’s give a shoutout to the Dollarama (sup!) which is where I bought the pink titled shadowbox (top right) to paint and glue on titles (and pop a $1 hair flower in as 3D art). I also bought the oval wooden sign (“I believe in pink”) to paint, the gold glittery frame, the wooden square frame (painted yellow). I love the Dollarama, and SO much of my wall decor comes from there. |
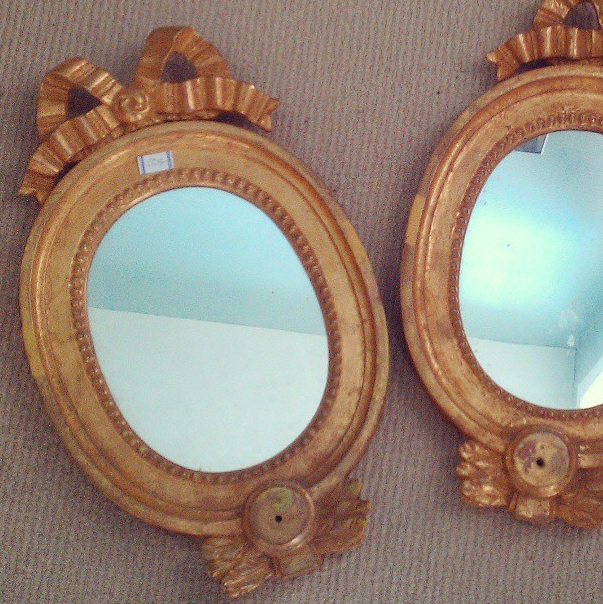 |
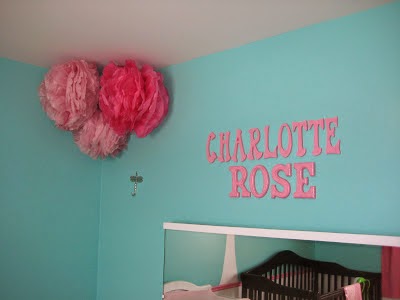
| See these beauties? I bought them for $0.50 (FIFTY FREAKING CENTS) each at a yard sale last summer. I literally pounced on them. I painted them pink using paint I already had, and now they’r perfect on C’s walls (one on either side of her toddler bed) |
 |
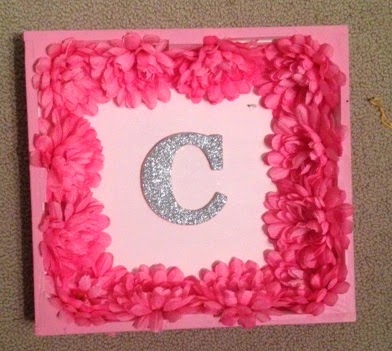
| I made this namesake art by covering an old (used) canvas with a piece of floral fabric, gluing on letters, and then outlining each letter in glitter glue from Michaels. Then I made a few felt roses to glue on. |
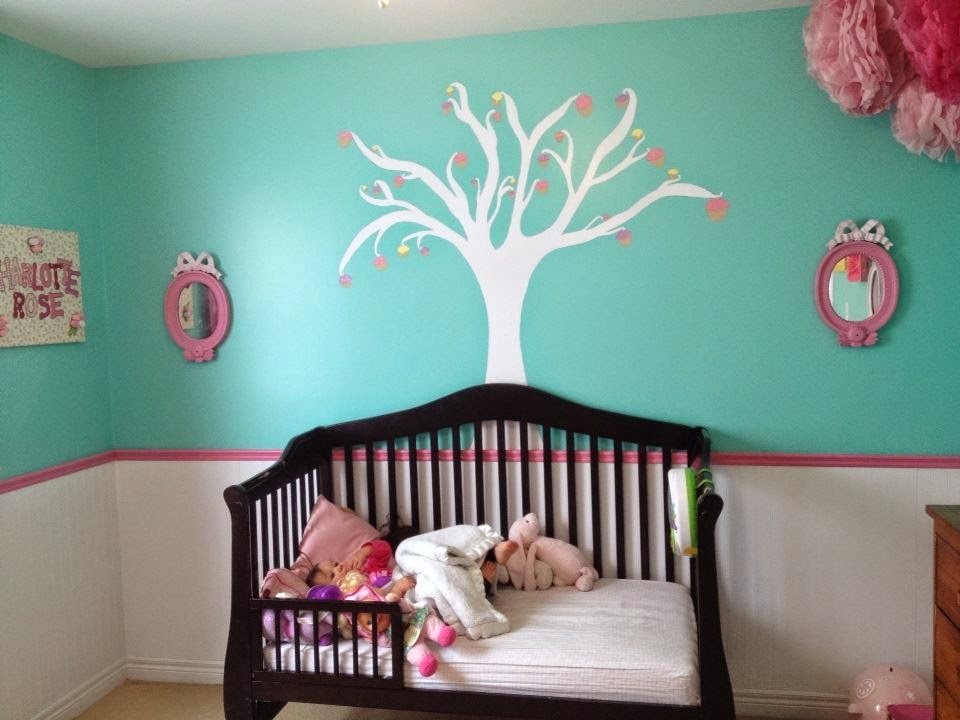 |
| Hello, fifty-cent beauties! (Hello, C!) |
Thanks for touring C’s “refreshed” toddler room. What do you think? Is the gallery wall too crazy, or are you — like me — all about the gold, glitter, yellow, and hot pink?
xoxo
 |
| CLICK TO READ the full column on this gallery wall, featured in The Chronicle Herald’s HOMES section |
Related posts:
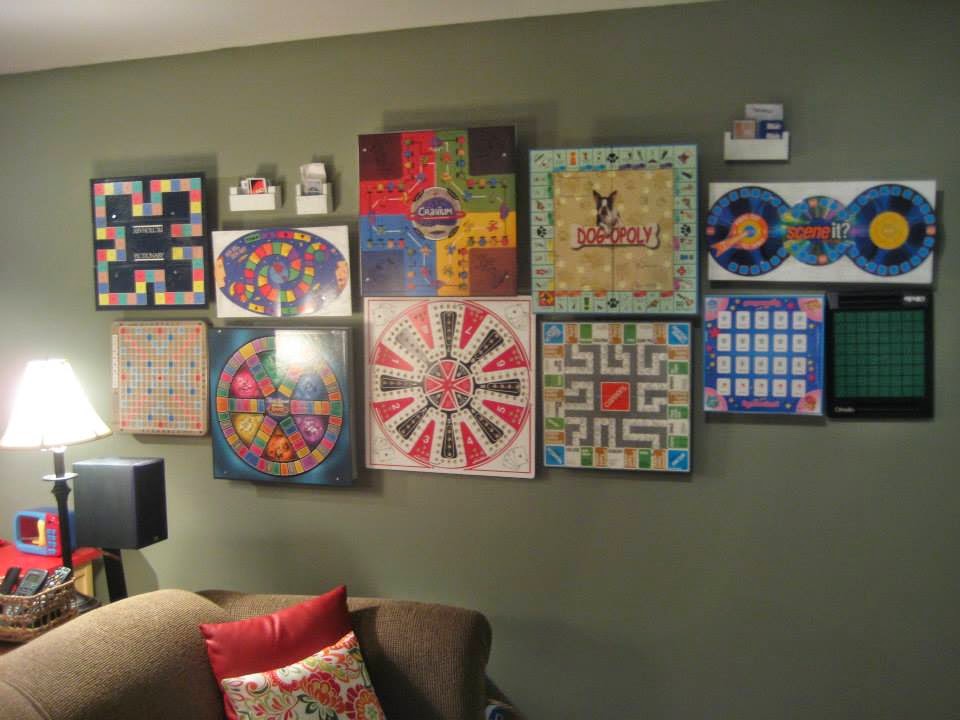
Our board game wall

You guys know that I do a lot of projects, but this has been one of my favourites to date.
Mostly because it served three purposes: it helped to empty out our storage closet, it made cheerful wall art, and it inspired us to play more board games together as a family.
You see, we had a collection of dusty board game boxes taking up space in our basement closet. They were always buried beneath a huge plastic tote (or three), so we never played them. They also took up room that we really needed … for more totes. (I have a fabric addiction, and I will not apologize.)
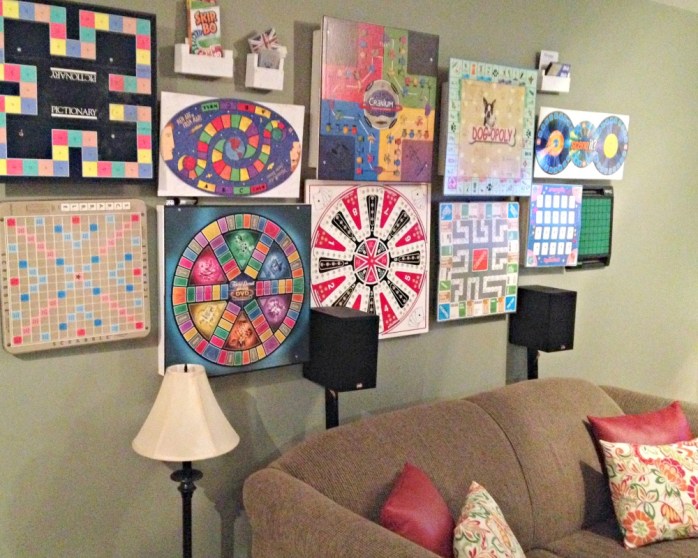
When I saw a pin on Pinterest where someone hung all of their board games as wall art, I was totally inspired. It made perfect sense! Game boards are colourful, they have interesting patterns, and they spend most of their lives hidden in boxes. Let’s put them to good use!
Here’s how we turned a heap of boxes into fresh, functional, nearly-free wall art …
The first step was spreading out all of the games, and figuring out which ones would make the cut. We donated a few we don’t play (I’m looking at you, Risk), and we decided not to hang the babyish games the kids will outgrow in a couple of years (Candy Land, ugh).
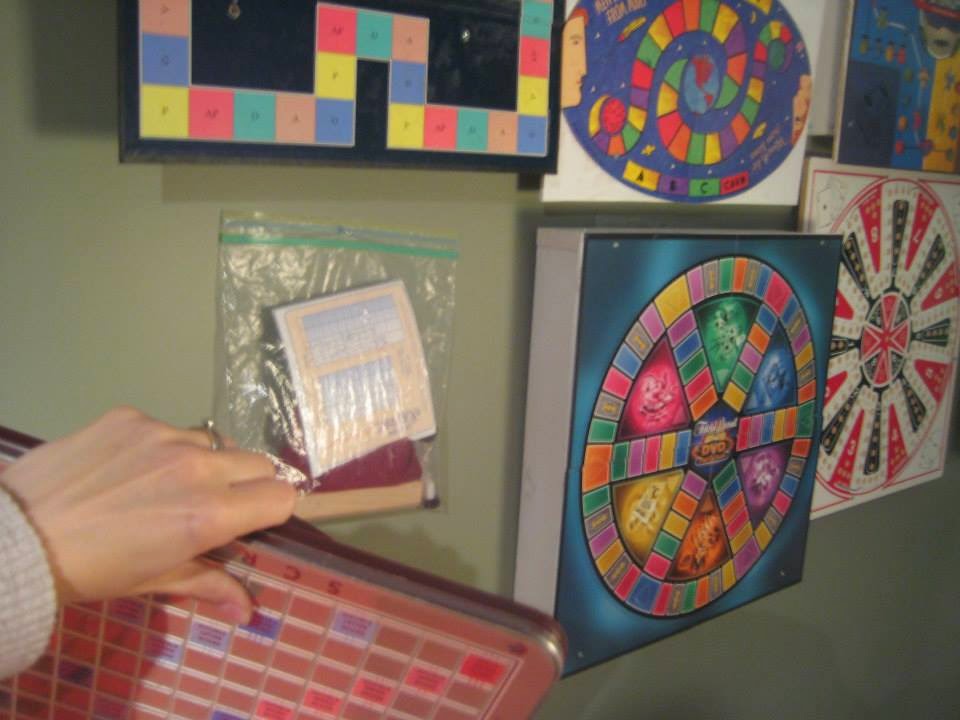
I put each game’s dice, timers, playing pieces, instructions, and cards into a labelled baggie, and then tossed the game box itself into a recycling bag.
I was also able to trash all the plastic padding and packaging that was inside many of the boxes. I had three huge bags of junk by the end!
When that was done, I turned my attention to the boards themselves. I spread them out on the carpet and played around with the order until I found a nice arrangement — just like I do when I’m making a gallery wall. Then I snapped a picture of the layout with my phone, and turned the boards over to my handy husband.
Because many of the boards were foldable — like good ol’ Pictionary — he cut thin squares of plywood that would give them stability. If the game board was rounded — like Scene It — I painted the plywood, since part of it would be visible.
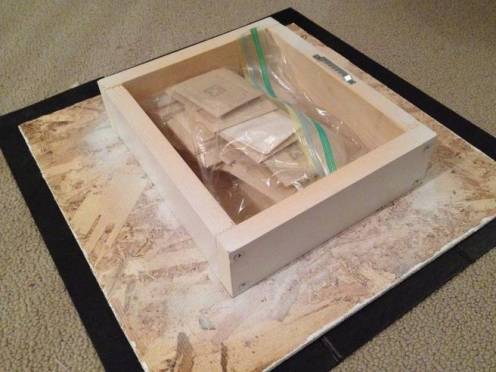
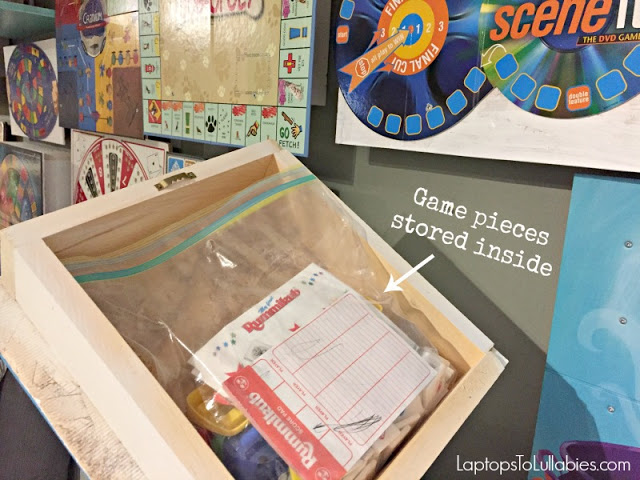
Once each game board had a “backing” piece of plywood, it was time to make secret compartments that would store the playing pieces, cards, and dice. My husband sawed 2x4s into small strips, and then screwed them together to make little boxes — each about two to three inches deep.
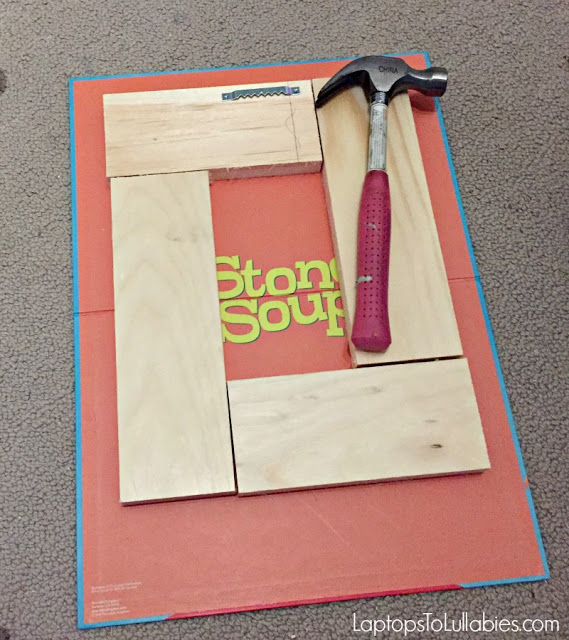
When a box was ready, he flipped the game board over, and drove screws directly through the game board into the edges of the hidden storage box. The screws aren’t really noticeable within the game boards, and the boxes are snugly attached to the backs.
Then he added sawtooth picture-hangers on the back of each box, so they could hang on the wall just like a piece of art. Some of the games were supported by their own plastic frames, like Scrabble and Othello, so they didn’t need picture-hangers. They balance just fine on a screw in the wall.
Finally, it was time to hang our game gallery! Using the layout photo on my phone as a guide, I arranged the games on the floor in exactly the same order. Then I picked up a board, stuffed the baggie of corresponding playing pieces and cards into the storage box, and hung it on the wall.
Some the heavier baggies kept falling out of the storage box before I could hang the game, so I hung those baggies directly on the wall screw, and then the storage box simply hid them from sight.
For smaller games without their own board, like UNO, Skip-Bo, and decks of playing cards, we built little storage boxes with pieces of scrap wood. Once you add a sawtooth picture-hanger on the back, you can hang them just like the other games.
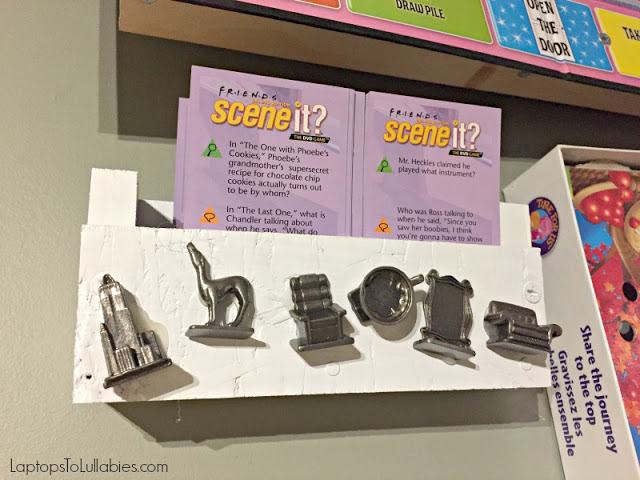
We also use these mini-boxes to store hourglass timers, extra dice, and handwritten cheat-sheets. What?! I can’t be the only person who needs a written set of instructions, detailing each level, every time I play Patience. (It’s no surprise, really, that I am terrible at a game called Patience.)
Our board game wall is complete for now, but we can always add new games on either side — or even above the arrangement.
 |
| MORE IDEAS HERE |
Because the game are so easily accessible, we’re much more likely to pull one down off the wall spontaneously and play a few rounds.
Once I’ve whooped my husband in a game of Careers or Skip-Bo — I mean, when the game is over — the game goes straight back up on the wall until next time. Easy clean-up!
 |
Our organized toyroom + a board game wall
 |
| DIY board game wall |
You guys know that I do a lot of projects, but this has been one of my favourites to date. Mostly because it served three purposes: it helped to empty out our storage closet, it made cheerful wall art, and it inspired us to play more board games together as a family.
You see, we had a collection of dusty board game boxes taking up space in our basement closet. They were always buried beneath a huge plastic tote (or three), so we never played them. They also took up room that we really needed … for more totes. (I have a fabric addiction, and I will not apologize.)
When I saw a pin on Pinterest where someone hung all of their board games as wall art, I was totally inspired. It made perfect sense! Game boards are colourful, they have interesting patterns, and they spend most of their lives hidden in boxes. Let’s put them to good use!
Here’s how we turned a heap of boxes into fresh, functional, nearly-free wall art …
The first step was spreading out all of the games, and figuring out which ones would make the cut. We donated a few we don’t play (I’m looking at you, Risk), and we decided not to hang the babyish games the kids will outgrow in a couple of years (Candy Land, ugh).
I put each game’s dice, timers, playing pieces, instructions, and cards into a labelled baggie, and then tossed the game box itself into a recycling bag.
I was also able to trash all the plastic padding and packaging that was inside many of the boxes. I had three huge bags of junk by the end!
When that was done, I turned my attention to the boards themselves. I spread them out on the carpet and played around with the order until I found a nice arrangement — just like I do when I’m making a gallery wall. Then I snapped a picture of the layout with my phone, and turned the boards over to my handy husband.
Because many of the boards were foldable — like good ol’ Pictionary — he cut thin squares of plywood that would give them stability. If the game board was rounded — like Scene It — I painted the plywood, since part of it would be visible.
Once each game board had a “backing” piece of plywood, it was time to make secret compartments that would store the playing pieces, cards, and dice. My husband sawed 2x4s into small strips, and then screwed them together to make little boxes — each about two to three inches deep.
When a box was ready, he flipped the game board over, and drove screws directly through the game board into the edges of the hidden storage box. The screws aren’t really noticeable within the game boards, and the boxes are snugly attached to the backs.
Then he added sawtooth picture-hangers on the back of each box, so they could hang on the wall just like a piece of art. Some of the games were supported by their own plastic frames, like Scrabble and Othello, so they didn’t need picture-hangers. They balance just fine on a screw in the wall.
Finally, it was time to hang our game gallery! Using the layout photo on my phone as a guide, I arranged the games on the floor in exactly the same order. Then I picked up a board, stuffed the baggie of corresponding playing pieces and cards into the storage box, and hung it on the wall.

Some the heavier baggies kept falling out of the storage box before I could hang the game, so I hung those baggies directly on the wall screw, and then the storage box simply hid them from sight.
For smaller games without their own board, like UNO, Skip-Bo, and decks of playing cards, we built little storage boxes with pieces of scrap wood. Once you add a sawtooth picture-hanger on the back, you can hang them just like the other games.
We also use these mini-boxes to store hourglass timers, extra dice, and handwritten cheat-sheets. What?! I can’t be the only person who needs a written set of instructions, detailing each level, every time I play Patience. (It’s no surprise, really, that I am terrible at a game called Patience.)
Our board game wall is complete for now, but we can always add new games on either side — or even above the arrangement.
|
| MORE IDEAS HERE |
Because the game are so easily accessible, we’re much more likely to pull one down off the wall spontaneously and play a few rounds. Once I’ve whooped my husband in a game of Careers or Skip-Bo — I mean, when the game is over — the game goes straight back up on the wall until next time. Easy clean-up!
|
| DIY board game wall |
 |
| My favourite part of the room is the board game wall. We LOVE playing board games, but most importantly this gets them out of the storage closet — we have extremely limited storage in our house — and onto the walls. Art and storage get married, and this is their baby. Behold! |
 |
||||
| Games, games, games
|

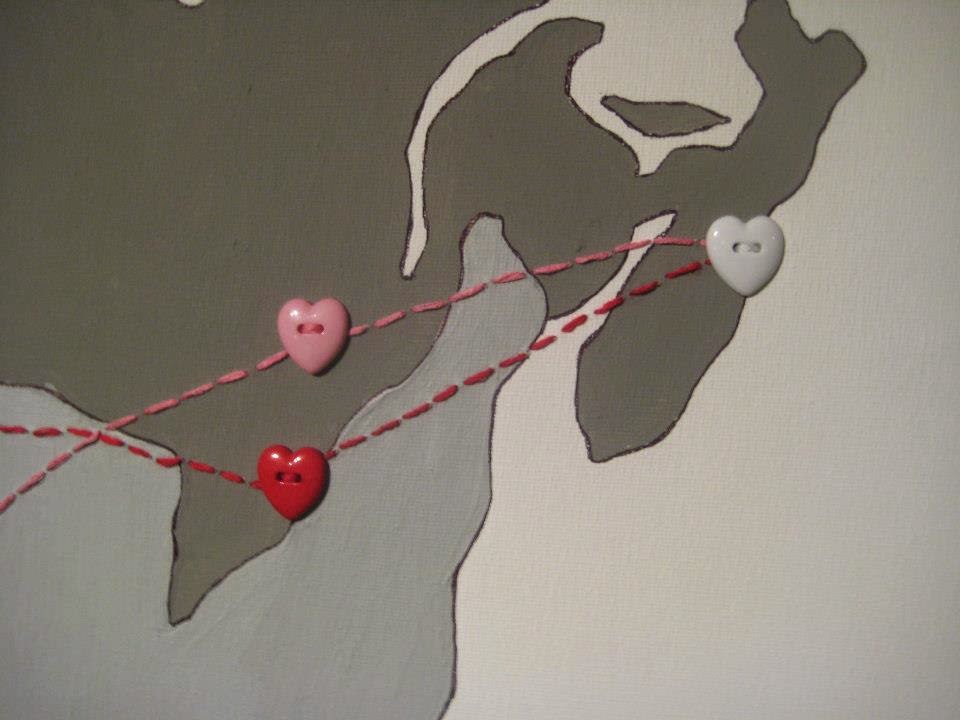 |
| I sewed on little buttons at the destinations, too, and I love how it turned out. |
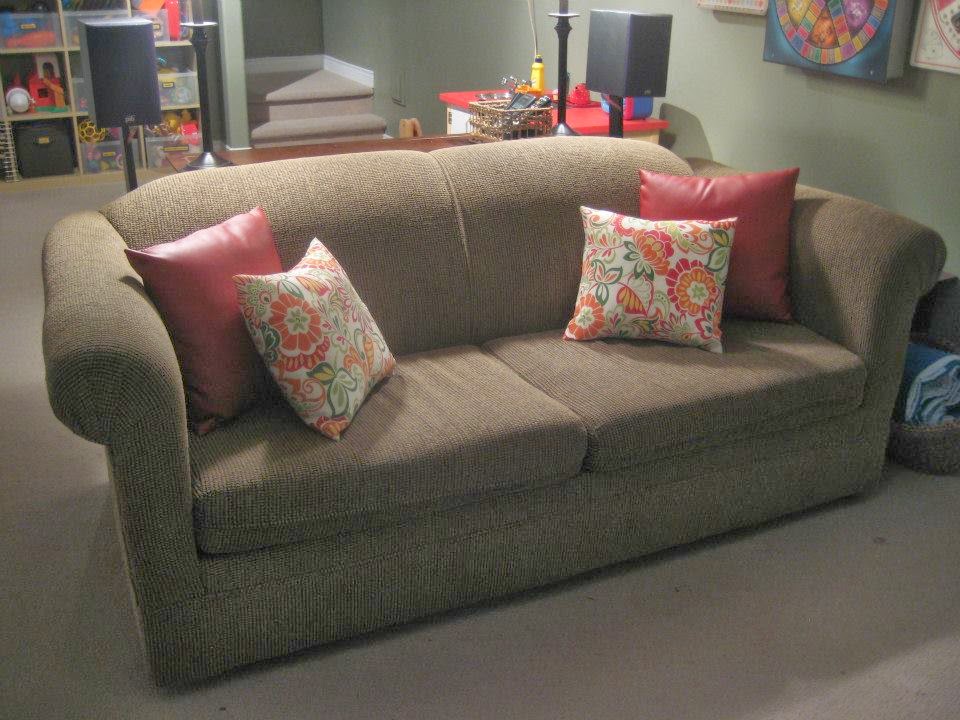 |
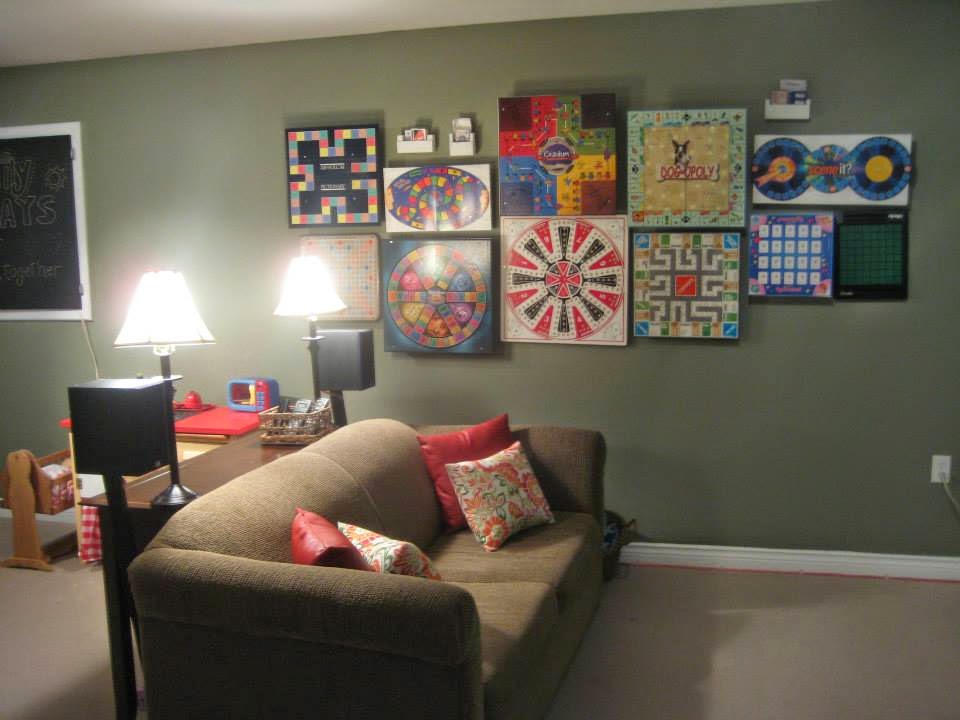
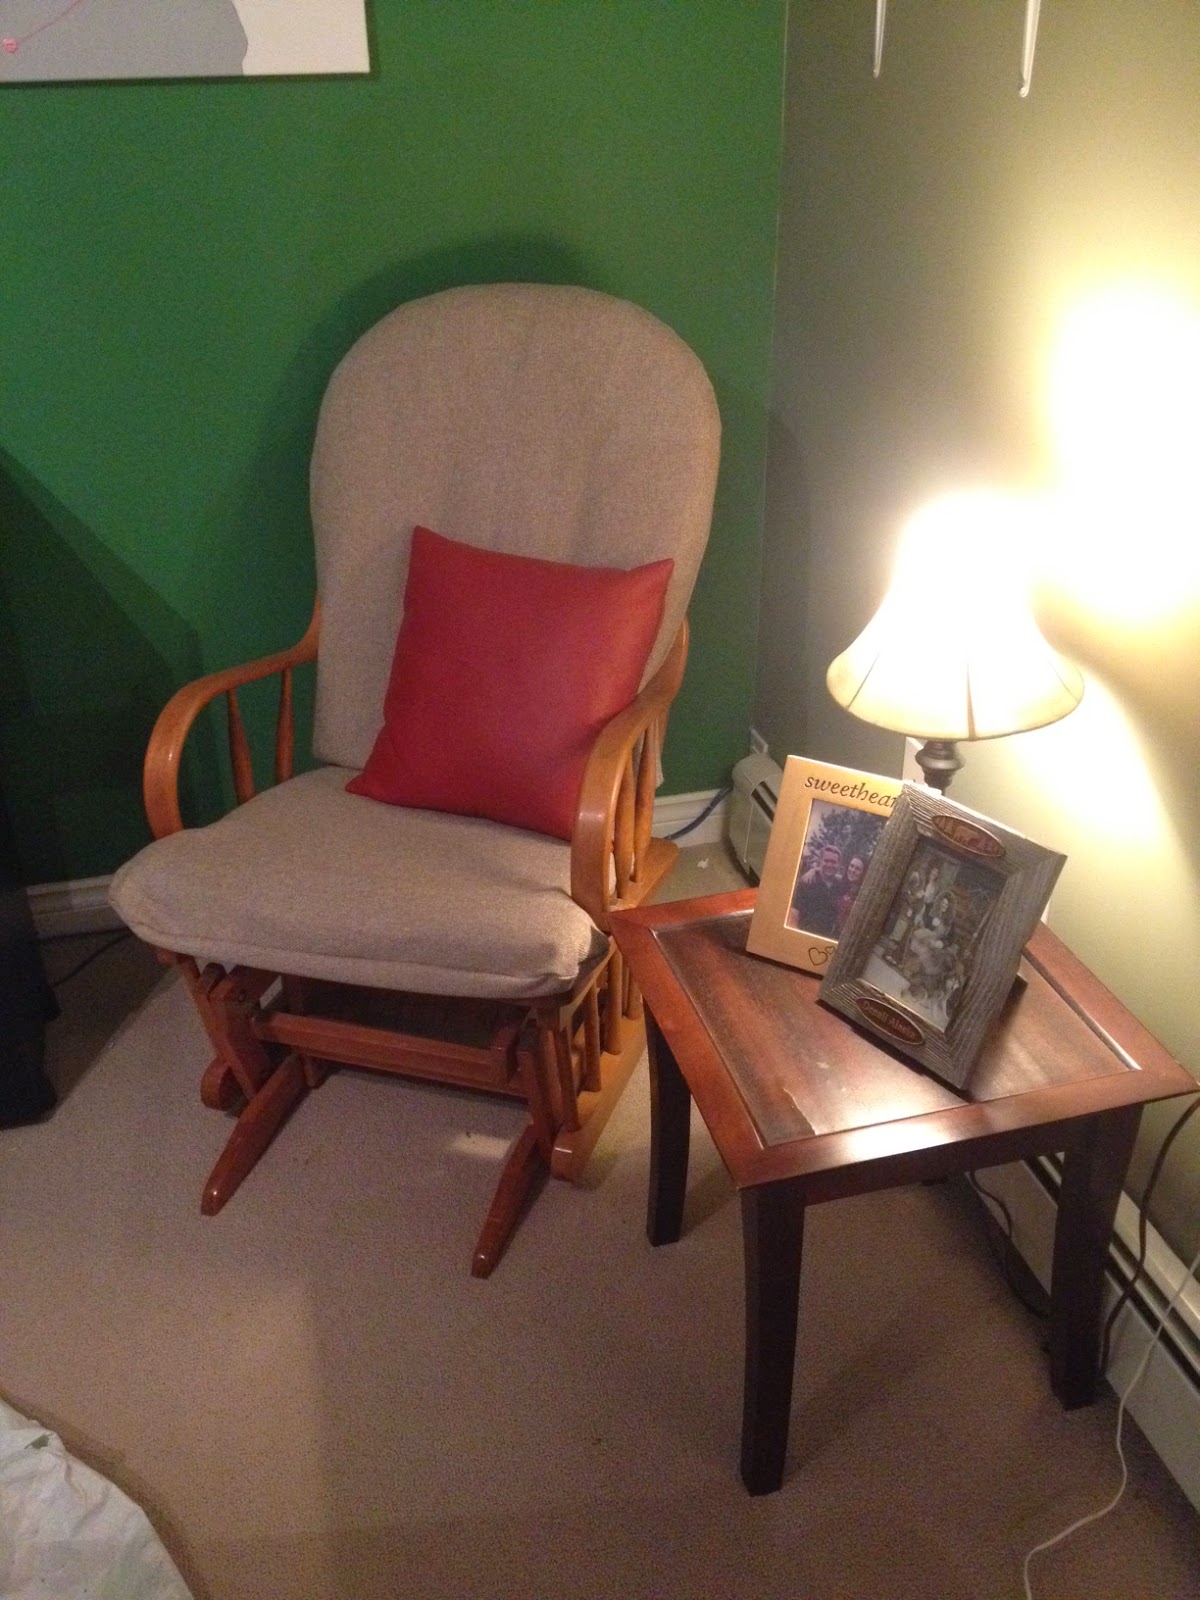
| Hand-me-down pull-out-couch (that’s a lot of hyphens) with two really old red leather pillows, and two pillows I made. |
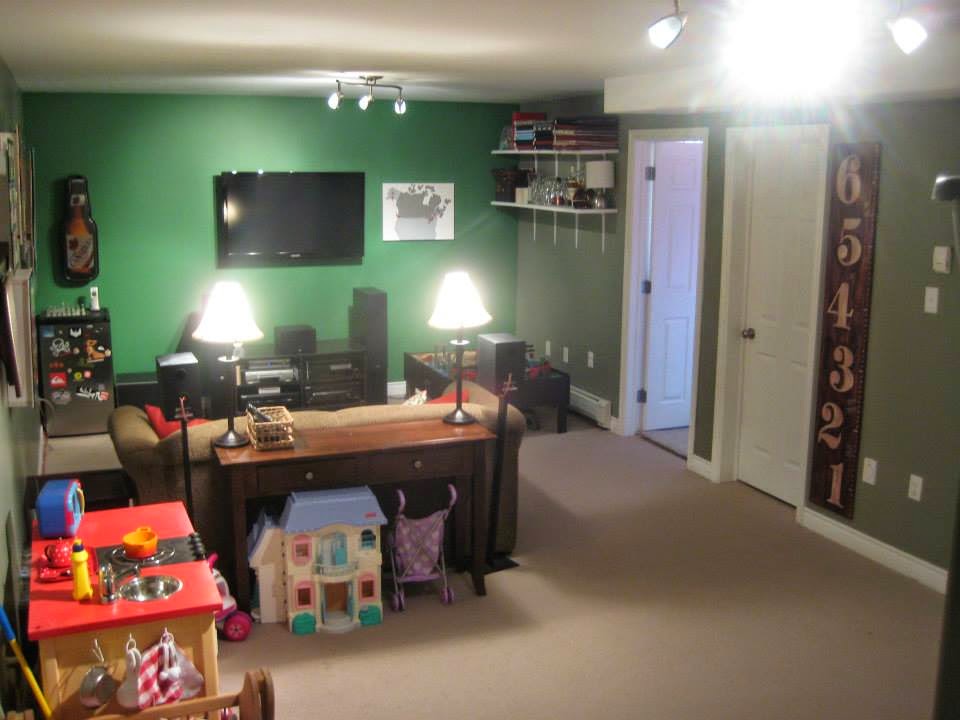 |
| A view into the “adult” side of the room |
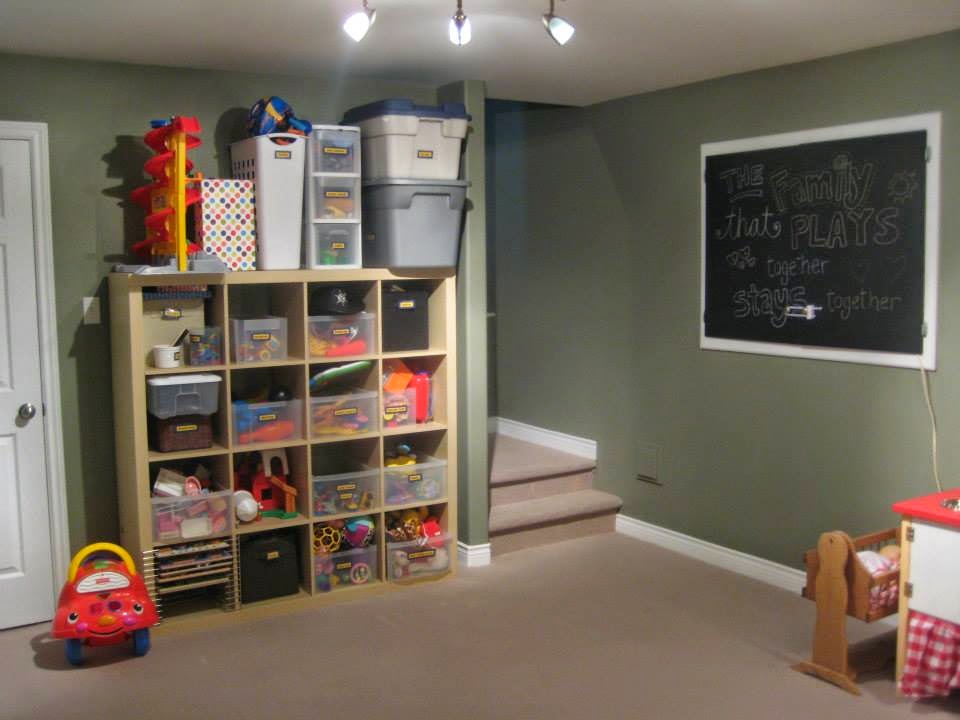 |
| A view into the “kids” side of the room (although these pictures are a few months’ old — I’ve already Kijijied that little red car, and the cradle has been moved upstairs) |
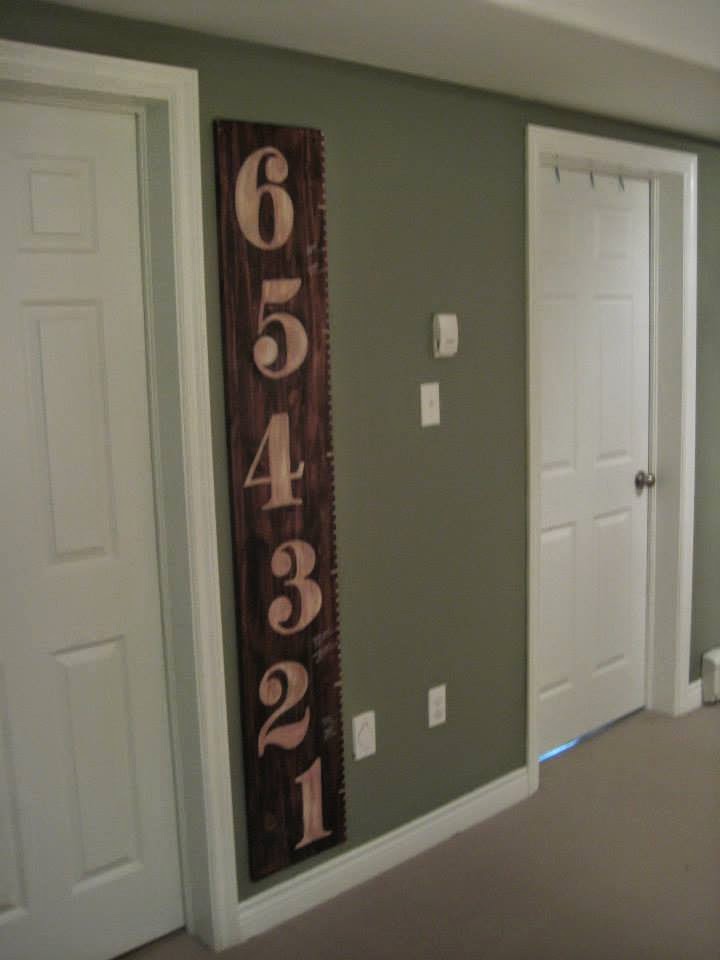 |
| Remember reading about my ruler growth chart? It’s got a place of honour down here! |
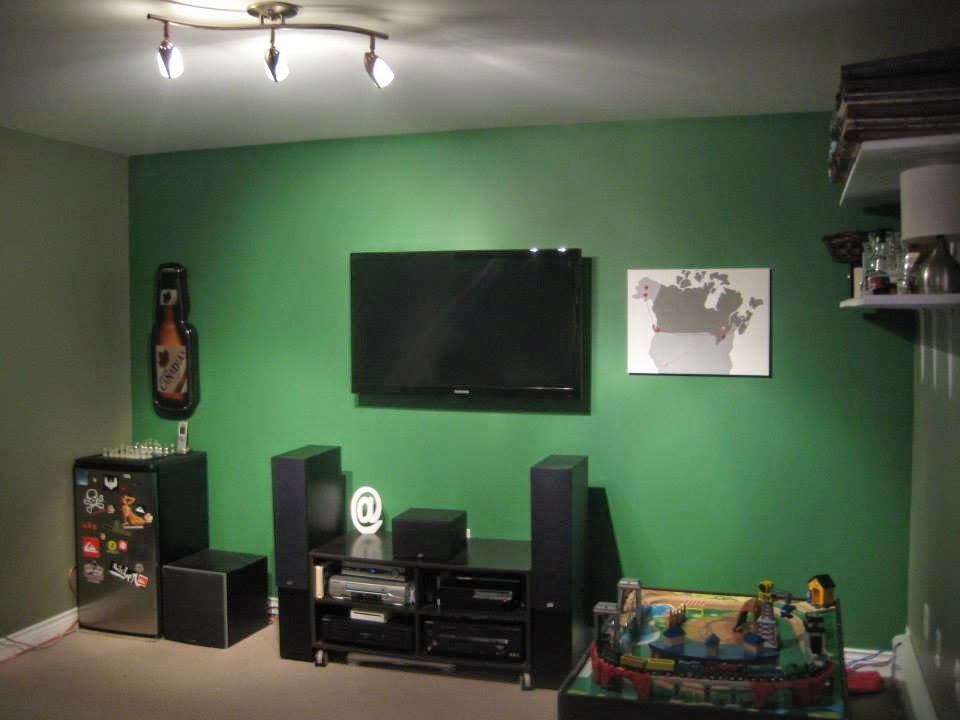 |
| I painted the feature wall emerald green, because it was named Colour of the Year. I’m into trends, apparently? (Just not when it comes to clothing, shoes, movies, books, TV shows, or diets) |

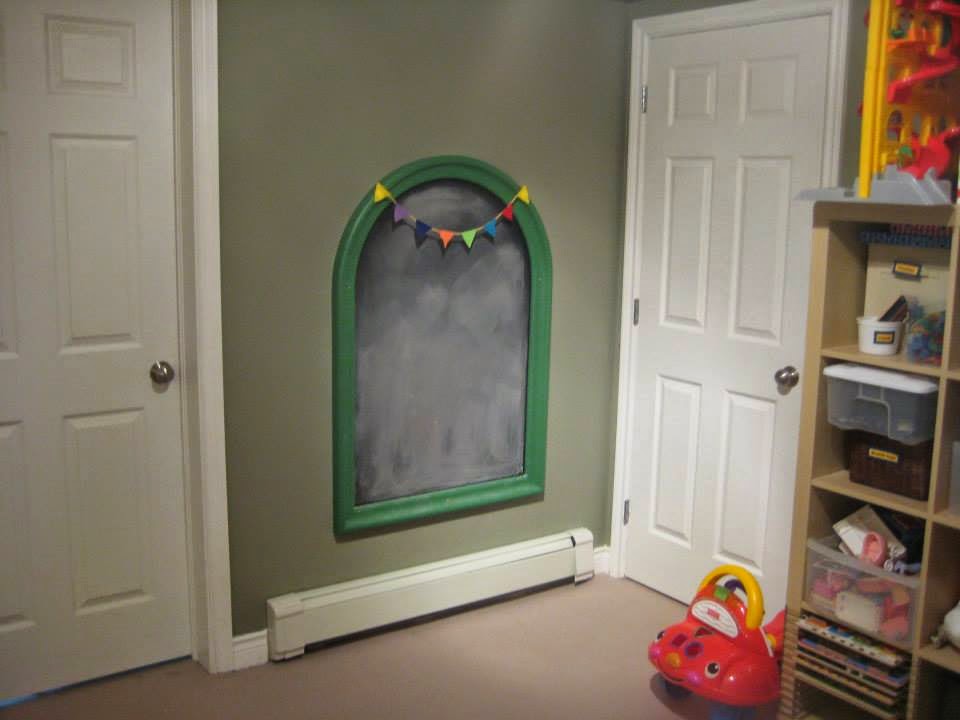 |
| This giant frame used to be in our kitchen, growing up. I snagged it from my mom’s basement, painted it the focal wall colour, and Darling Husband screwed it into the wall (since my beloved 3M strips definitely wouldn’t have held it). We (uh, HE) also painted wall inside the frame with chalkboard paint, and I made a quickie pennant banner out of felt and yarn. |
 |
| This awesome DIY mirror lives at the bottom of the basement stairs. |
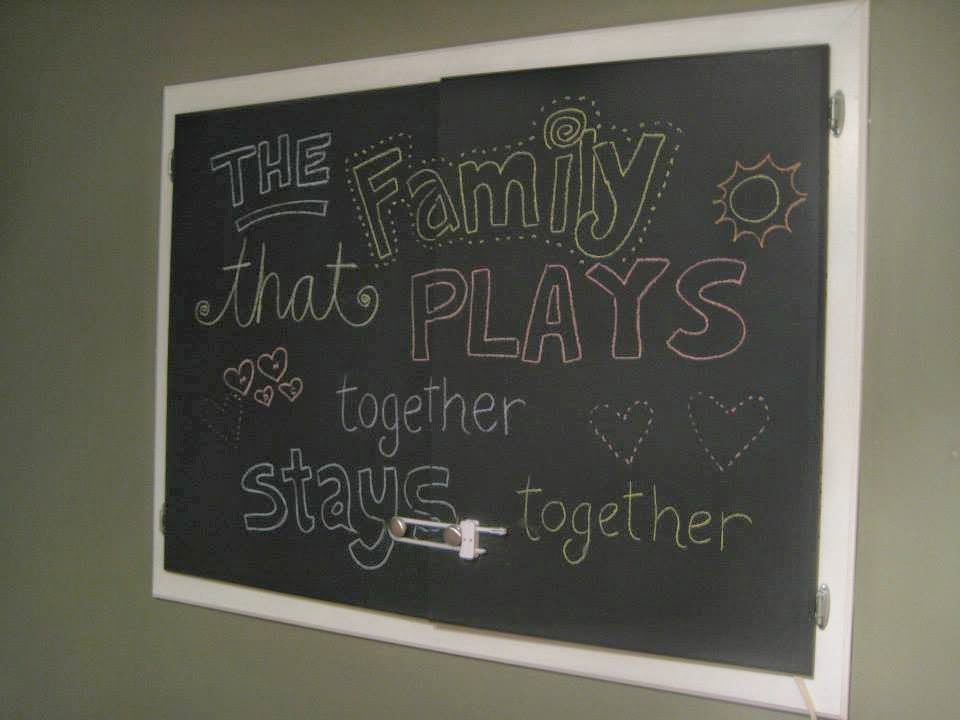 |
| This cabinet (dunno, electrical? something?) used to be all white, but now it’s chalkboard paint. Chalkboard paint makes everything better. |
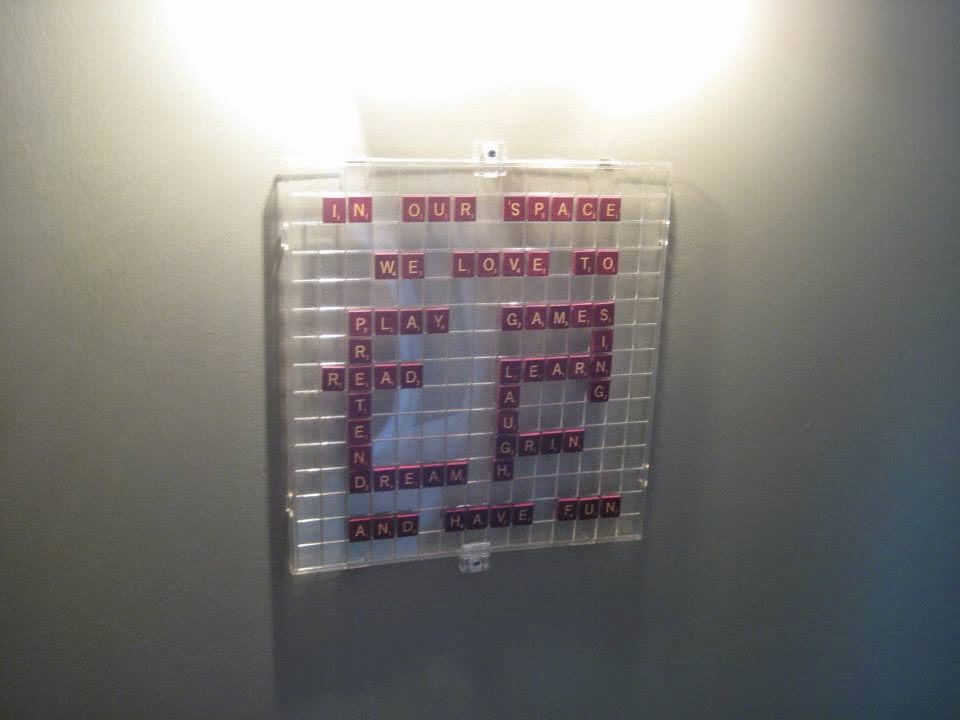 |
| I had an extra Scrabble game somehow, so I played around with the letters until I got this combination — it used almost all of the letters, which was the goal! It says “In our house we love to play games, pretend, read, learn, sing, laugh, dream, grin, and have fun.” I just took apart the board to access the clear piece, hot-glued the letters into the slots, and hung it with two plastic clampy things. It hangs just inside the door to the basement, at the top of the stairs. |
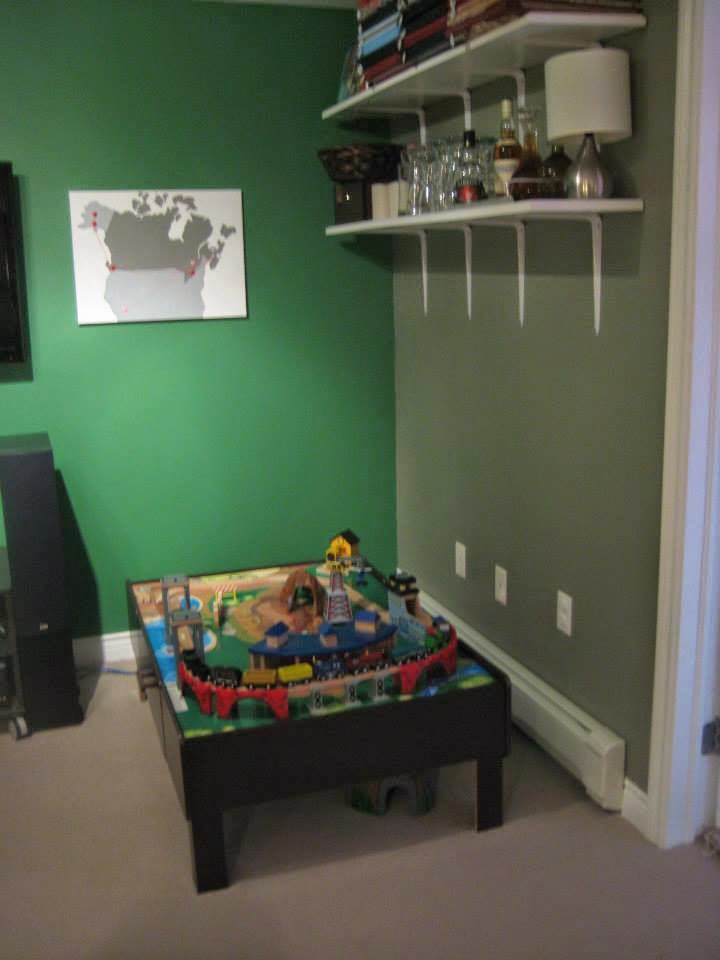 |
| The train table/Playmobil table was here for a while, but then I got tired of looking at it during my “Me time” after the kids were asleep, so I moved it back to the kiddie area, and … |
 |
| … this is what the corner looks like right now (like two seconds ago, right now). It makes the adult half truly an “adult” half, and it’s more relaxing not to stare at a toy table every night. |
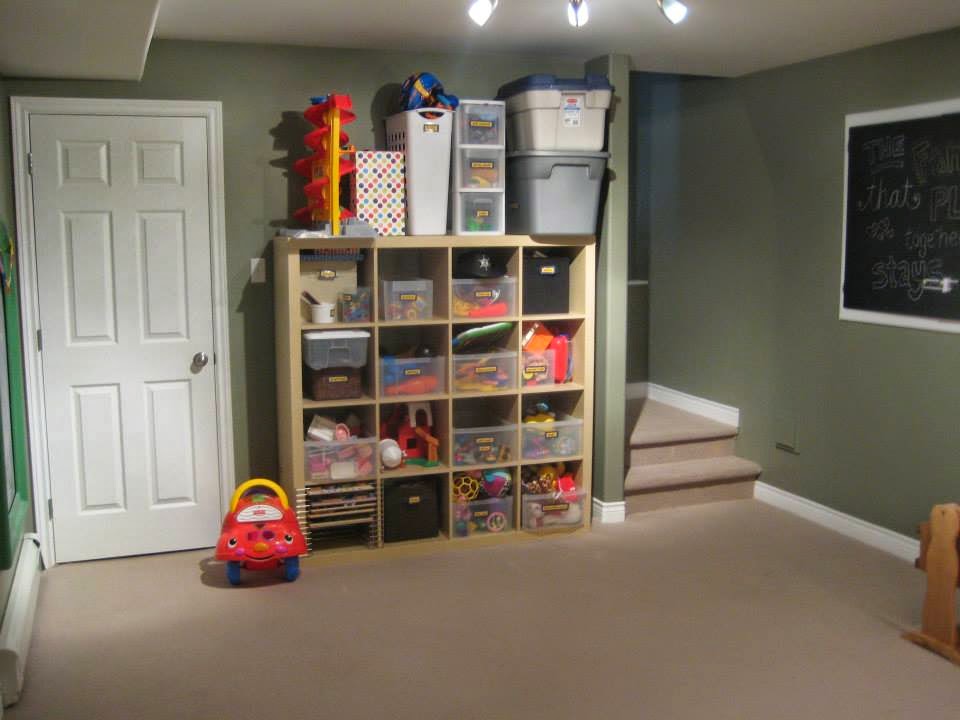 |
| Is there anything more calming than a perfectly-organized toy wall? No. I didn’t think so. |
***
Thanks for stopping by to tour our playroom!
xo
 |
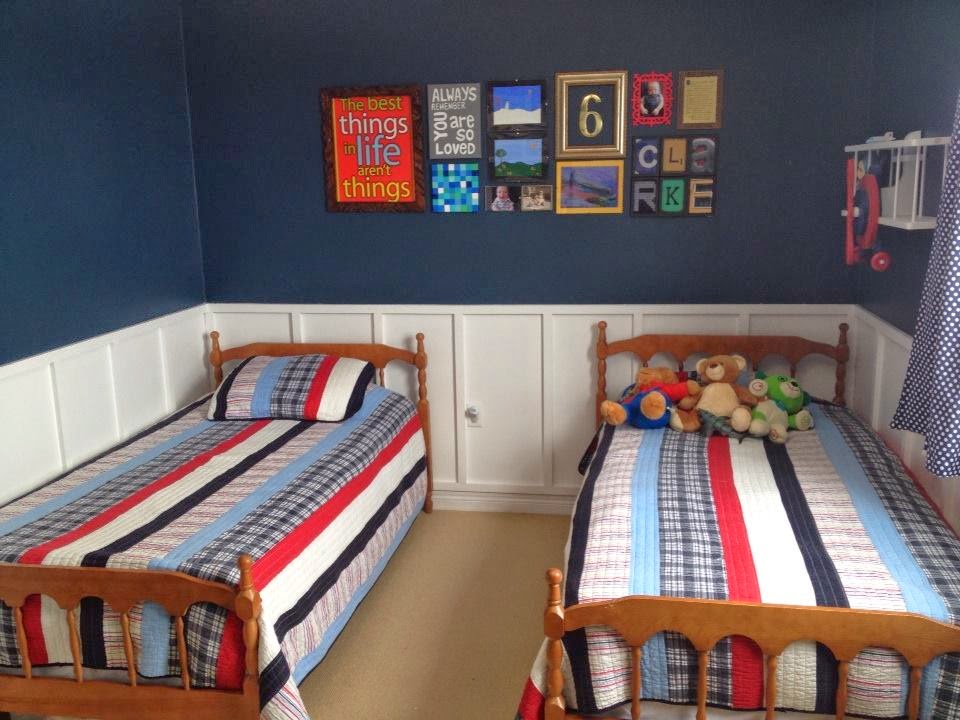
Creating a gallery wall for a boys’ bedroom

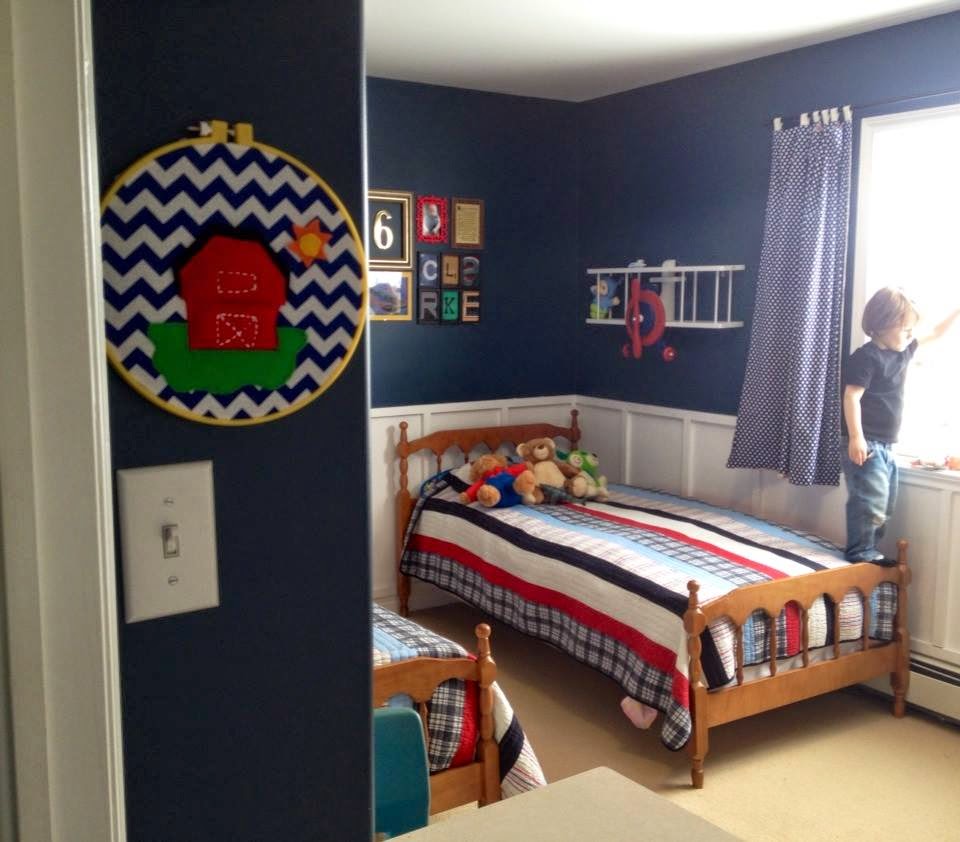 |
| D is obsessed with farms (OBSESSED) and I’m obsessed with chevron, so … |
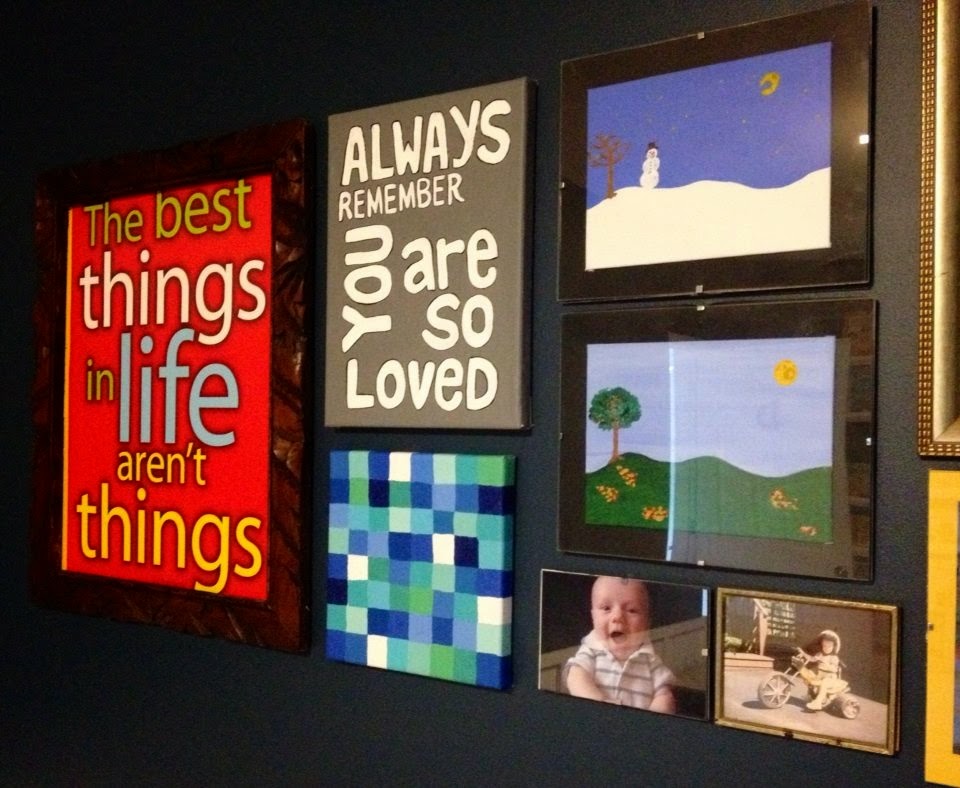 |
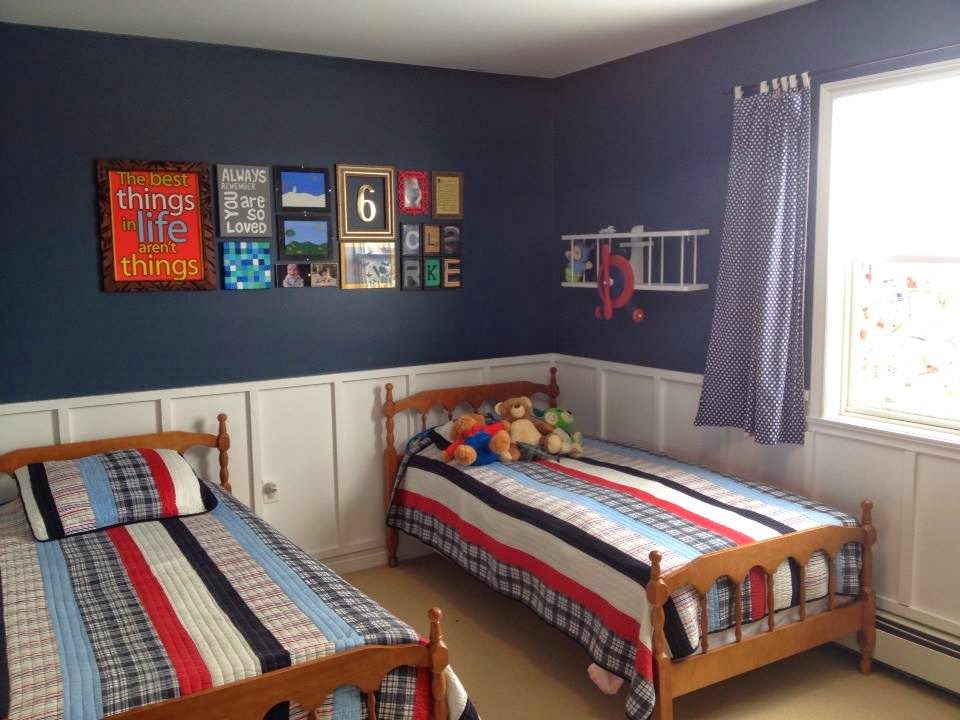
| Red poster is from a school supply shop, grey “Always remember you are so loved” was painted by me, blue square painting by me, two landscapes by me (I got new paints for Christmas, thanks Mommmm). Cute baby D photo is on the left, and a cute Baby Darling Husband photo is on the right. |
 |
| Little Sis always makes fun of me for putting Cs in all of my gallery walls, but THERE IS NO “C” here. Just a six, because our sweet boy was born on 6/6/10 (it’s a brass house number from Kent). The red frame is a $1 cut-out I bought at Michaels and painted red, the yellow mat around D’s artwork is a piece of yellow cardstock, the “What is a little boy?” plaque is from when Darling Husband was a baby, and the “C-L-A-R-K-E” photos are free printables that I stuck in two three-slot Walmart photo frames and jammed together. |
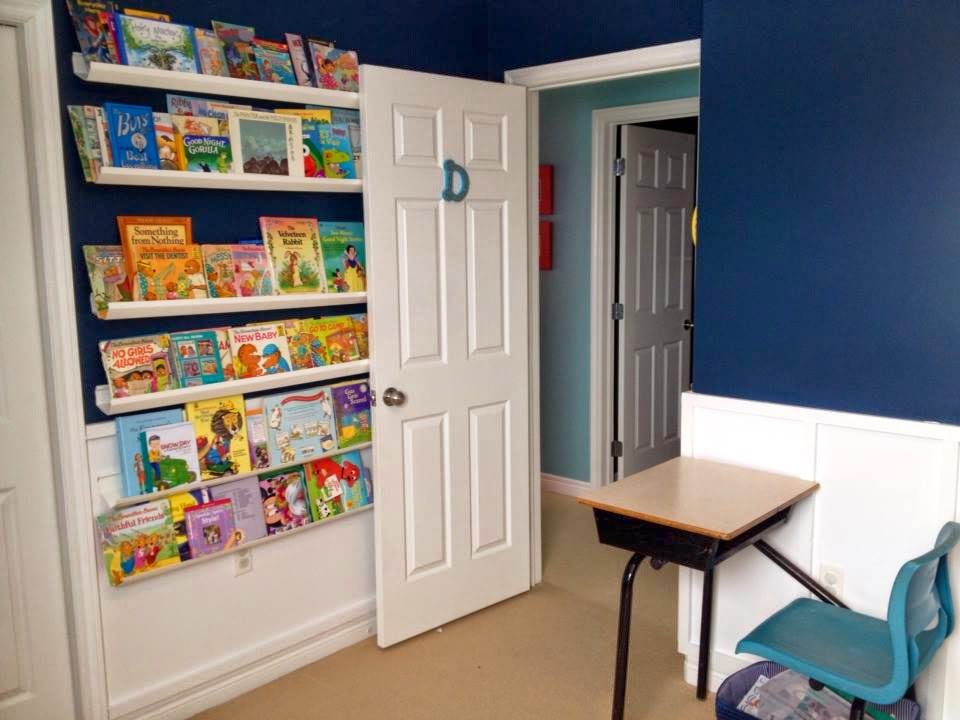 |
| Like D’s new desk? I think it’s so fun! Our town was actually giving a bunch of them away, and tweeted that they were in front of the old teachers’ college for anyone who wanted them. I sent Darling Husband down IMMEDIATELY and he grabbed one for each kid, along with some extra chairs. D is in LOVE with his “real school desk,” and it meant I got to move his old one to the entranceway. Woo! |
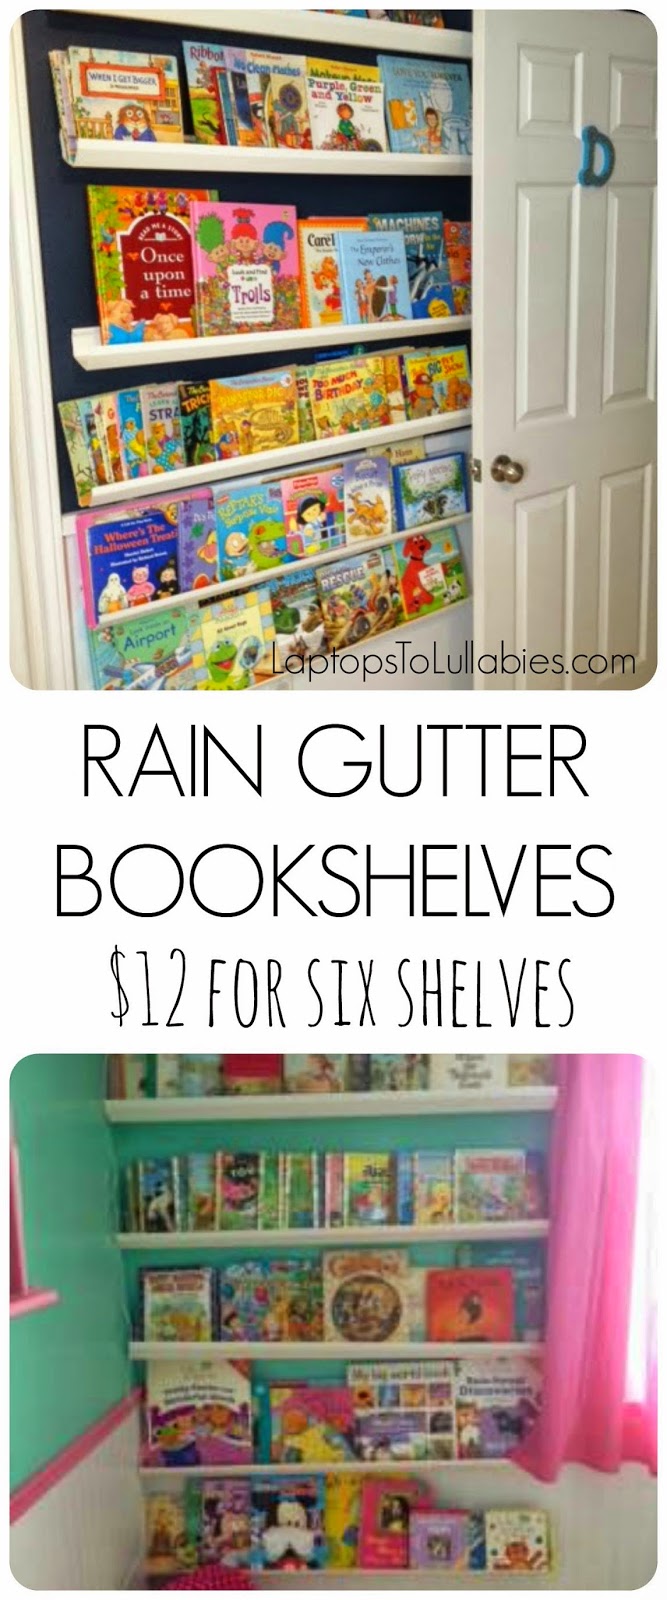 |
| More info about our rain gutter bookshelves here! |
Thanks for tolerating yet another post about The Boy Who Got The Worst Room In The House. I don’t have to feel bad any more about choosing a bad paint colour originally (too-pale grey = ick), and it feels good!
D’s room now has so many elements that I LOVE (board-and-batten, a nice bold paint colour, a gallery wall) along with kid-approved items (a funky old school desk, stickers all over the window) and lots of colour (the red and yellow accents in the gallery wall make me smile).
Most importantly, my obsession with gallery walls has been appeased … for now …
xoxo
 |
| Pin this! |


As featured on …


