
Kids Ergo — the end to fidgeting at the table?!

*** The great folks at ErgoErgo offered me two KidsErgo seats for our son and daughter to test out. All opinions and wild-eyed kids are my own. ***
It was supper table anarchy.
Our nine-year-old son was partial to crouching on his chair like he was squatting around a campfire cooking something he’d caught with his bare hands, instead of eating a perfectly normal meal with his family at the table.

Then he’d shake things up by tipping his chair back from the table so it was balancing on its two back legs, tilting his head closer and closer to the hardwood floor. That one really irritated my husband, who’d put on a particularly gruff “Dad voice” and bark that the chair had four legs for a reason.
Across the table, meanwhile, our seven-year-old daughter preferred to kneel on her chair. She’d hunch forward so far over the table that her long curls were constantly getting dragged through pools of noodles and getting dunked into her glass of milk.
Read MoreDIY weighted blanket quilt

Let me start by saying that this isn’t a tutorial on how to make your own weighted blanket, and there’s a good reason for that.
Weighted blankets require poly pellets to give them their heaviness, and buying those pellets alone can be just as expensive as buying a ready-made weighted blanket.

While I love to DIY as much as I can, I draw the line at spending more money on something that likely will be a nightmare to create — and maybe not even turn out that well.
Anyway, while I loved my weighted blanket from Amazon, I hated the itchy faux velvet cover that came with it. I would have been happy to use it without a cover, but I would have been in trouble when it got dirty.

You can’t exactly throw a 25 lb. blanket full of plastic pellets into your washing machine … at least, not if you want to still own a working washing machine.
Since I love to quilt and our house is full of my handmade quilts, it made sense to make a quilt that could fit over my weighted blanket.
Luckily, I already had a quilt that was 90 per cent finished and almost exactly the right size. It would just be a matter of turning this quilt into a “duvet cover” to hold my very heavy weighted blanket.
Let’s back up for a minute, though, because I want to share how I made the quilt itself.
Normally I just do standard patchwork quilts (all squares) or maybe large half-square triangles (two huge triangles that form a new, larger square). But I wanted to challenge myself to do a really intricate quilt block with lots of tiny pieces coming together to form a cool pattern.
I’d scrolled through Pinterest until I found a block I loved (the Sisters and Quilters’ blog’s Blueberry Pie quilt block) and forced myself to do something that doesn’t come easily to me: math.

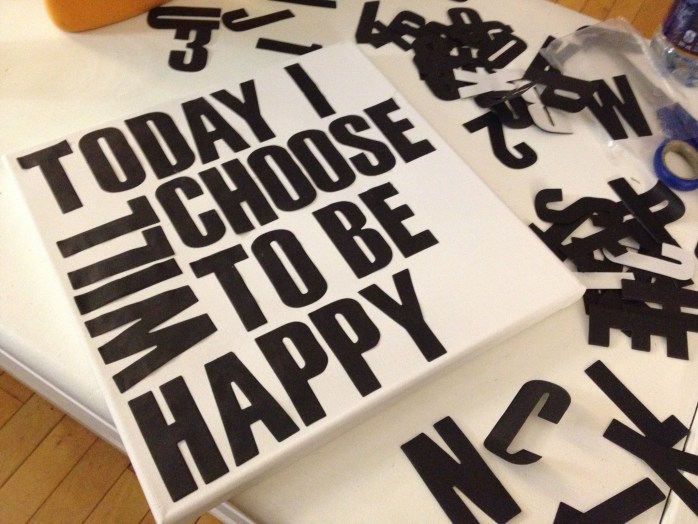
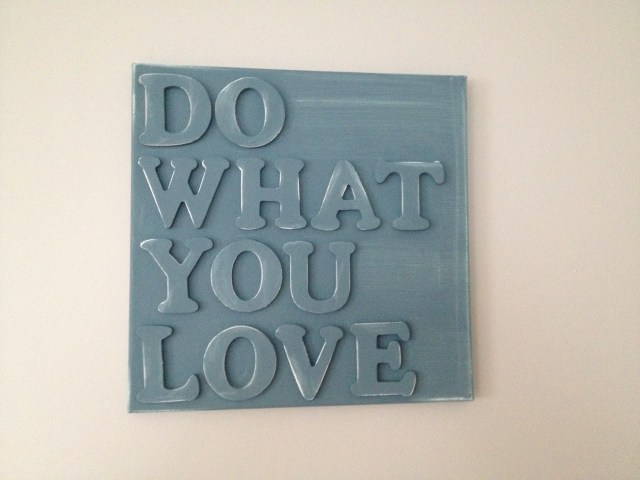
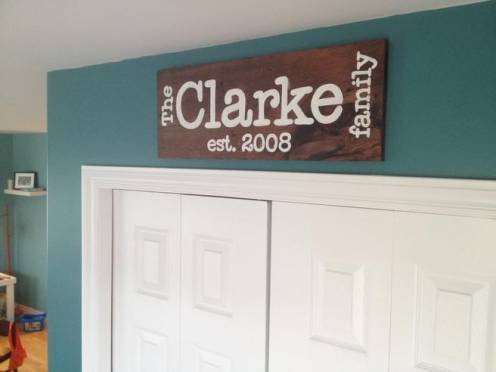
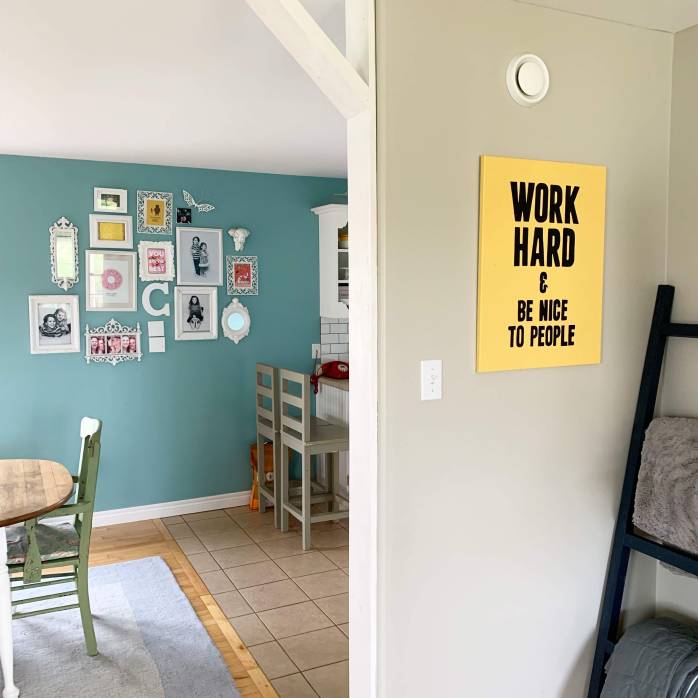
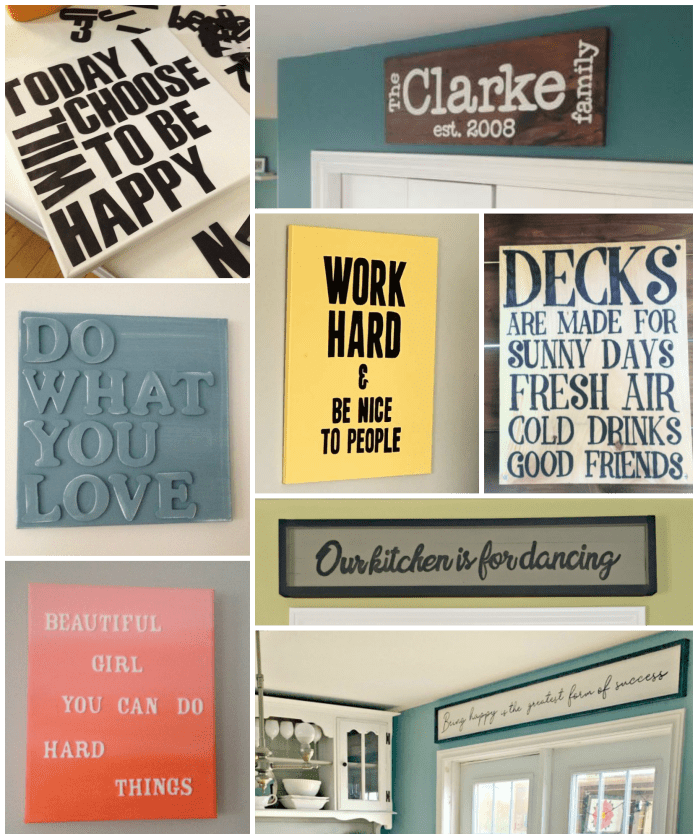
DIY Signs + Lettered Canvases

I’ve made a LOT of DIY signs and DIY lettered canvases over years, and it’s no surprise. I’m a writer and I love collecting quotes that inspire me and motivate me.
These tutorials are scattered all over the blog, so I’ve finally rounded up some of my top ways to make a DIY sign or canvas, from using stickers (paper and foam) and hot-gluing wooden letters to various ways to print and transfer words you print out.
Any questions, let me know in the comments and I’ll be happy to help …
DIY lettered sign with paper stickers
DIY lettered canvas with foam stickers

DIY sign with wooden letters
Two ways to letter a wooden sign
The above tutorial on lettering a wooden sign also works for canvases like these ones below! (Just stick to tracing the printed letters and skip the screwdriver step.)
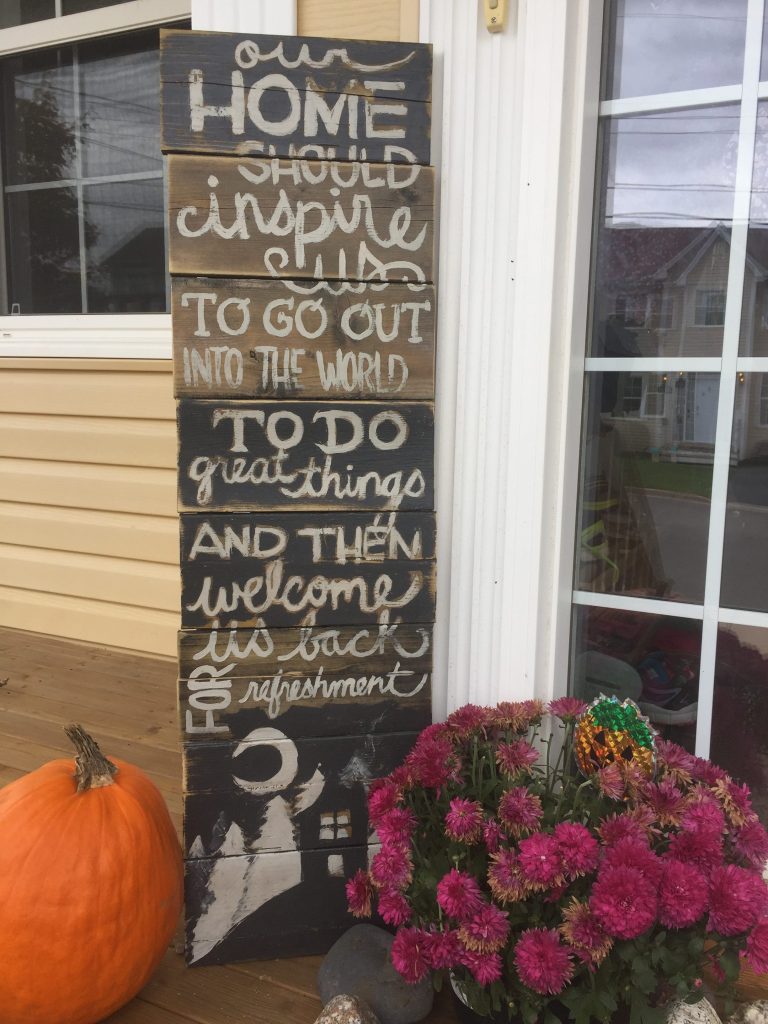
DIY porch pallet-style sign
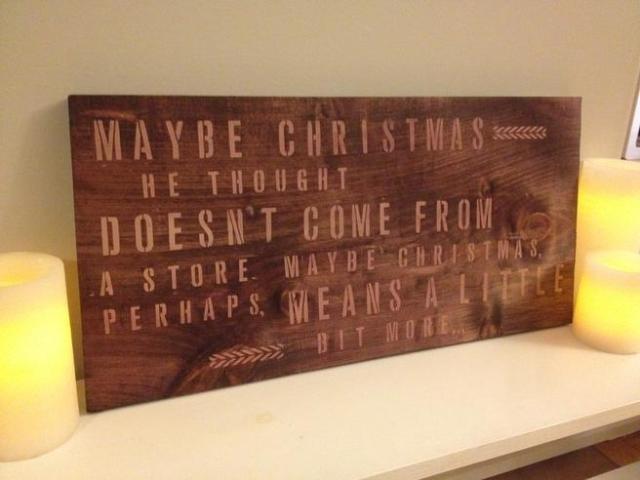
Easy stenciled DIY Christmas sign
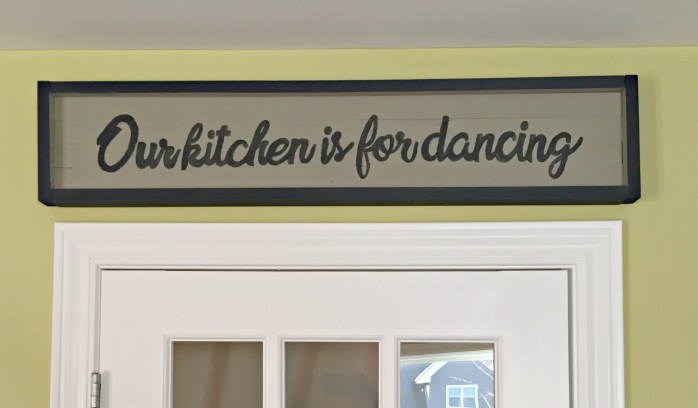
DIY Cape Breton kitchen sign
DIY farmhouse sign

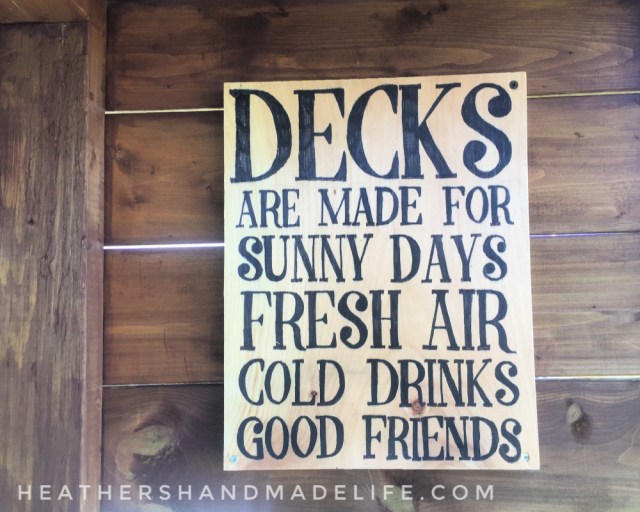
DIY outdoor sign for the back deck
I’ll keep adding more sign tutorials to this post as I make them, so be sure to pin this post for later and pop back to it when you need to make a DIY sign. 😉
The online shopping trick that just saved me $108.49

‘Tis the season for online shopping (well, for me at least). Working from home has made me #alittlebitagoraphobic! 😉
I wanted to do a quick post to share an online shopping tip that REALLY helped me recently.
As in … it saved me more than a hundred bucks, buying EXACTLY the same items on a different website.
You see, our daughter is desperate for a pretend grocery store for Christmas. (It’s pricey so my dad and stepmom graciously agreed to go in with us, just like we’re doing with our son’s Nintendo Switch.)
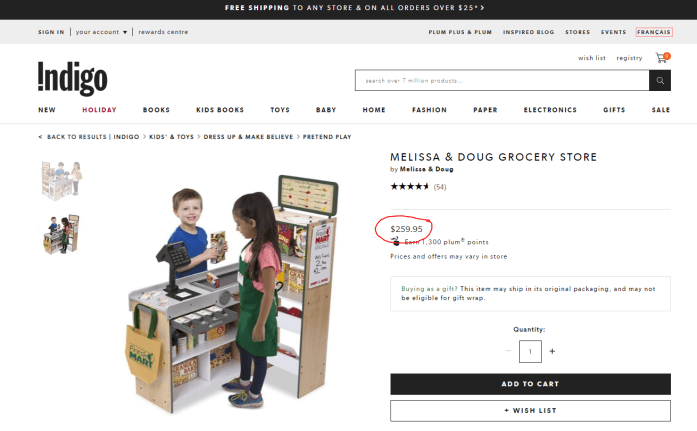
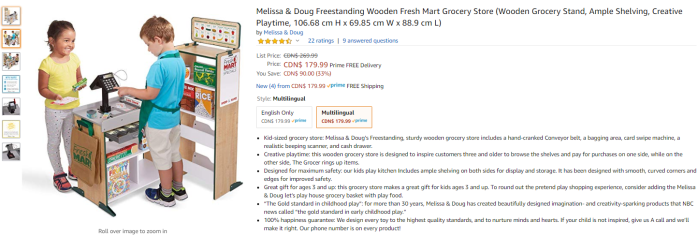
If I had just hopped on the site where I first found the item (and its accessories) and bought everything there, I would have paid $374.67 for everything after tax.
- $259.95 (toy grocery store)
- $39.95 (grocery store accessories)
- $12.95 (grocery store cans)
- $12.95 (grocery store boxes)
- Before tax: $325.80
- After tax: $374.67
Instead? I used a handy little trick that saved me soooo much money.
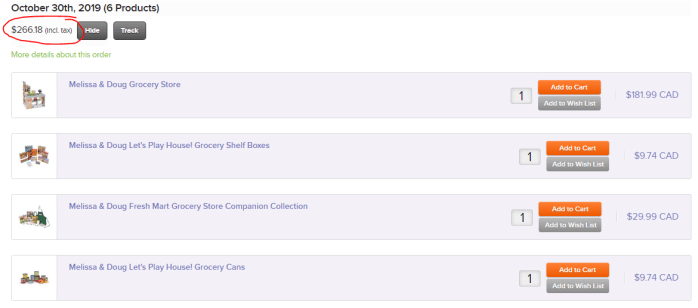
I paid $266.18 after tax.
$108.49 less, you guys!

Here’s the trick …
1. When you know which item you want to buy, GOOGLE IT.
Type in the specific name of the product if possible. In my case, I typed “Melissa & Doug grocery store.”
2. Click “Shopping.”
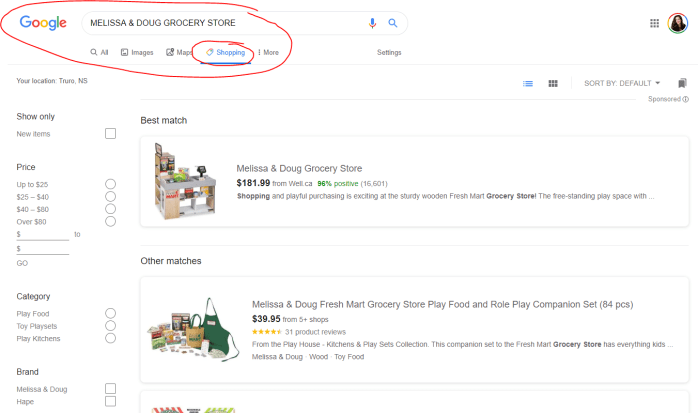
3. Instantly see which site offers the best price!
I was shocked when I saw that Well.ca — a site I had NEVER used before, never even heard of, honestly — was selling the identical toy for $181.99. Almost $78 cheaper than Indigo, which is where I often shop for toys.
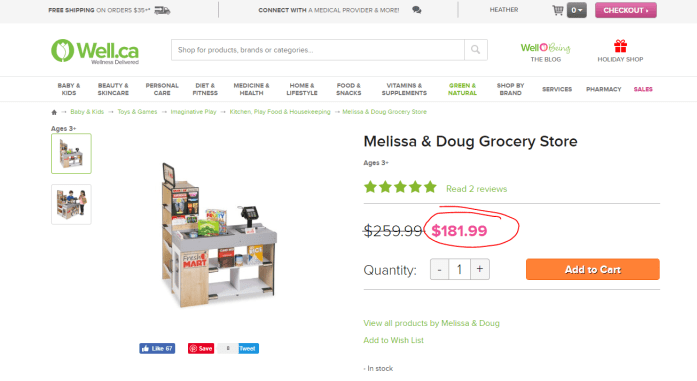
I added it to my cart immediately, feeling SO much better about the purchase all of a sudden.
And because Well.ca had ALL of their Melissa & Doug products on sale, I was able to scoop up three additional sets (grocery store accessories, pretend grocery cans, and pretend grocery boxes) all for almost exactly the same price I would have paid JUST FOR THE ONE big item on Indigo.
Much LESS, actually, because this total includes tax (and shipping was free).
For comparison …
It’s no longer on sale on Well.ca, BUT it’s actually $3 cheaper right NOW on Amazon.ca. (And no, I’m not even mad about it. I’m relieved to have mine sitting upstairs in our closet, and I still saved a ton of money on it.)
So the next time you need something online, take the extra minute to do a quick Google search of the item and click “Shopping” to see different price options.
You can even click a drop-down to sort them from low to high.
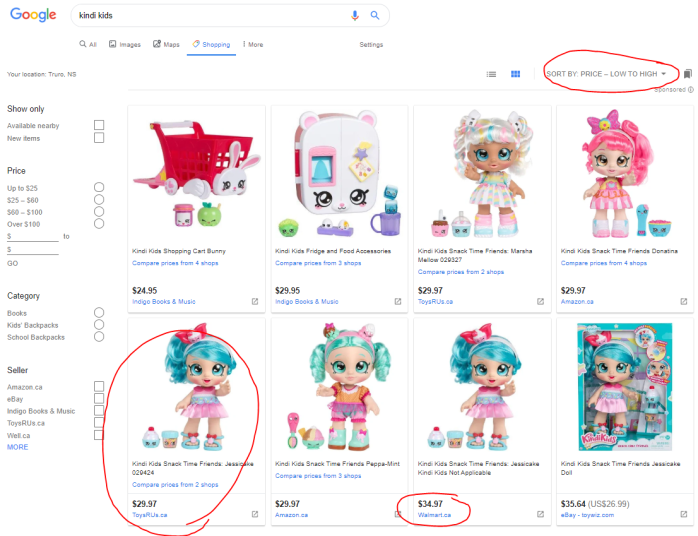
I just tested this by searching “Kindi Kid” (another gift our daughter wants) and sure enough, it shows that the identical doll is $5 cheaper on ToysRUs.ca than it is on Walmart.ca.
Happy online shopping! I hope this helps!
xo
Easy ways to change a room’s colour palette

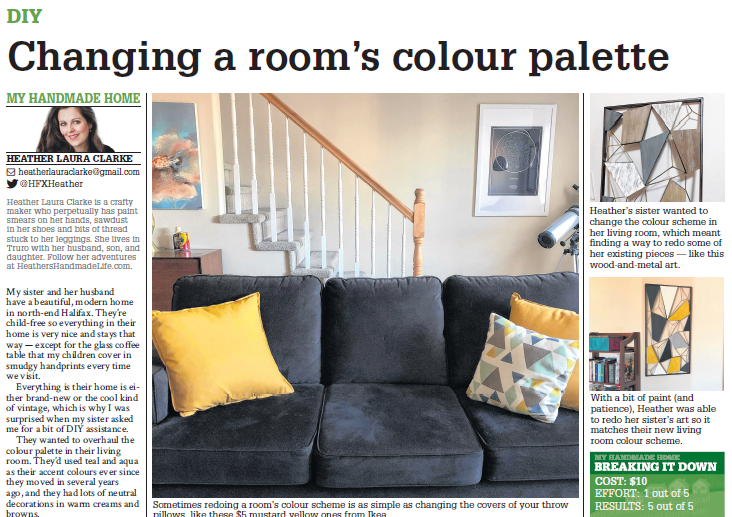
My sister and her husband have a beautiful, modern home in north-end Halifax. They’re child-free so everything in their home is very nice and stays that way — except for the glass coffee table that my children cover in smudgy handprints every time we visit.
Everything is their home is either brand-new or the cool kind of vintage, which is why I was surprised when my sister asked me for a bit of DIY assistance.
They wanted to overhaul the colour palette in their living room. They’d used teal and aqua as their accent colours ever since they moved in several years ago, and they had lots of neutral decorations in warm creams and browns.
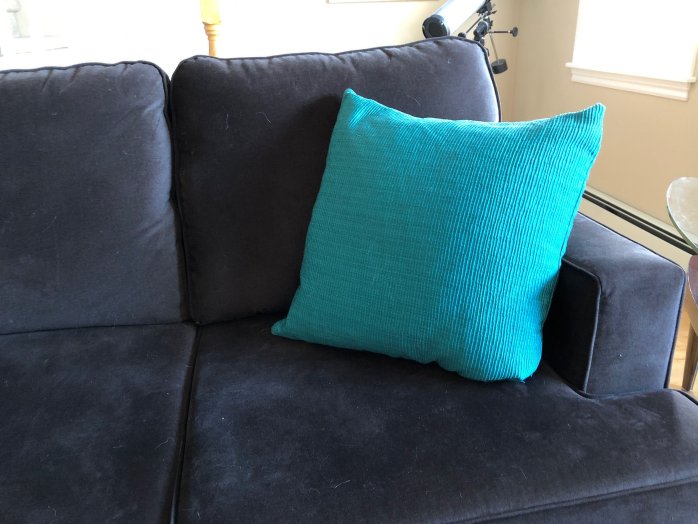
(My sister has always been convinced their beautiful velvet sofas are “chocolate brown,” but I have insisted they are charcoal grey. It’s so funny how differently we all see colours!)
Now they wanted to repaint the walls (from a creamy beige to a cool crisp white), focus on deep greys instead of browns and bring in mustard yellow as the primary accent colour …
Continue reading in my weekly DIY column, My Handmade Home …


As featured on …


