
DIY crib bedding

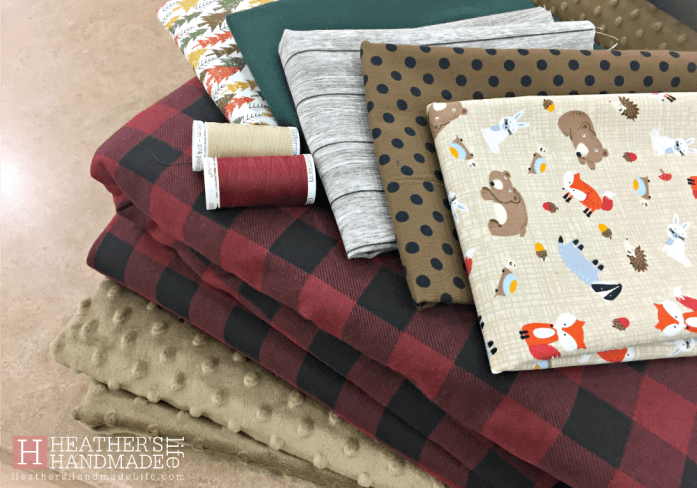
My friend is expecting her third baby, and we’re all so excited for her. She wanted a rustic, woodsy feel for the nursery to go with the rest of her farmhouse, and didn’t want to reuse the old brown and green bedding from her previous two nurseries.
We ended up spending just $75 on everything we needed to recover her old crib bumpers* as well as make a brand-new crib sheet and a four-sided crib skirt.
I also made her a sweet, woodland-themed quilt for her baby shower.

If you’re an expectant parent, feel free to hand these tutorials over to a friend/family member who sews and beg them to help you make custom nursery bedding. You’ll be able to get exactly what you want for a fraction of the price of baby bedding sold in stores, and think of the possibilities …

Let’s get started!

How to recover crib bumpers:
If you can’t find bumpers to match your nursery decor, it’s easy to recover old ones with fabric you love.
What you’ll need:
- 4m of prewashed fabric (cotton, flannel, etc.)
Sewing instructions:
-
- Lay each bumper over your fabric, and cut around it leaving a border of about 2” (6cm) excess fabric.
-
- Do this again, because you’ll need two pieces of fabric for every bumper (a front and a back).
-
- Take a piece of fabric and lay it wrong side up. Fold the edges over by 1” (3cm) around all four sides, so you can see the good side of the fabric.

Press or pin to keep it from unfolding. Repeat for all fabric pieces.

- Take a piece of fabric and lay it wrong side up. Fold the edges over by 1” (3cm) around all four sides, so you can see the good side of the fabric.
-
- Make a “bumper sandwich” by stacking a piece of fabric (right side down), the bumper, and another piece of fabric (right side up). Repeat for all bumpers.

- Make a “bumper sandwich” by stacking a piece of fabric (right side down), the bumper, and another piece of fabric (right side up). Repeat for all bumpers.
-
-
- Pin the top piece of fabric to the bottom piece of fabric, sandwiching the bumper inside until you can’t see it. Make sure to pull the bumper’s ties through the sandwich so they’re hanging out, otherwise they’ll be trapped inside for good. Repeat for all bumpers.

- Stitch all the way around each bumper, removing the pins as you go, until the bumper is fully encased in the new fabric with the ties hanging out. You’re done!
- Pin the top piece of fabric to the bottom piece of fabric, sandwiching the bumper inside until you can’t see it. Make sure to pull the bumper’s ties through the sandwich so they’re hanging out, otherwise they’ll be trapped inside for good. Repeat for all bumpers.

-
Now who’s ready to sew a fitted crib sheet to match those bumpers?

How to sew a fitted crib sheet:
This crib sheet should fit all standard crib mattresses, and has French seams to protect it from many trips through the washer and dryer.
What you’ll need:
- 2m of prewashed fabric (cotton, flannel, etc.)
- 62” of 1/4” elastic
Sewing instructions:
-
- Trim your fabric down so you have a 69” x 44” rectangle (175 x 111 cm)
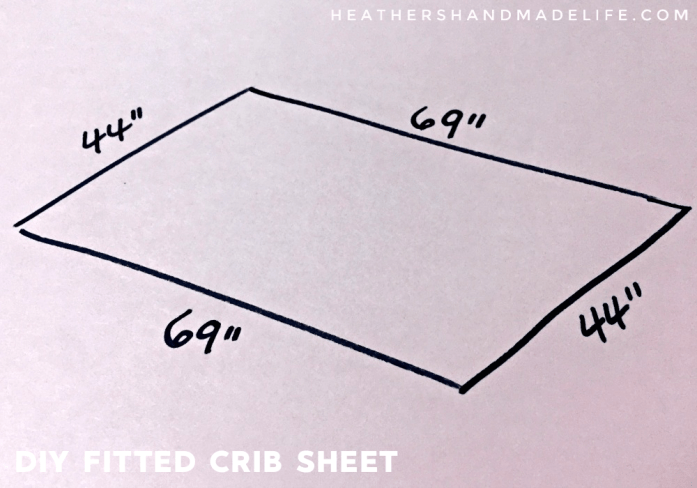
- Trim your fabric down so you have a 69” x 44” rectangle (175 x 111 cm)
-
- Cut an 8” square (20cm) out of each corner

- Cut an 8” square (20cm) out of each corner
-
- Fold each cut corner over onto itself (wrong sides together, right sides out, raw edges aligned) and stitch a seam along the cut edge.
-
- Flip the sheet so the right sides are touching and the wrong sides are out — hiding your seam inside. Stitch another seam outside of that first seam. Now your raw edges are encased inside this neat double seam, and your crib sheet won’t fray or fall apart in the wash.
-
- Now that you have a nearly-finished sheet, you need to create a casing for the elastic. Fold the raw edge of the sheet (all the way around the bottom) under by 1/2” (1.5cm) and then again by 1/2” (1.5cm) and press it with a hot iron.
- Stitch as close to the second fold as possible almost all of the way around the crib sheet. Leave a small gap when you’re almost back to where you started.
- Slip a safety pin through one end of your elastic, and pull it through the casing you just made. Securely knot or stitch the ends of the elastic together (overlapping by a few inches) and stitch up the gap in the casing. You’re done!

Ready to finish it off with a DIY crib skirt?

How to sew a crib skirt:
This crib skirt has four pleated sides and is designed for when the crib is at its highest setting (for newborns). As you lower the crib mattress, tuck the excess skirt fabric underneath the crib.
What you’ll need:
- An old sheet or fabric for underneath the mattress (measuring 52 1/2” x 28” or 134cm x 71cm)
- 3m of prewashed fabric for the panels of the crib skirt
- 18-20” high x 72” wide for the long sides of the crib (cut two)
- 18-20” high x 50” wide for the short sides of the crib (cut two)
Sewing instructions:
- You should be starting with five pieces of fabric — the big “mattress piece” rectangle that won’t really be visible, two long skinnier rectangles for the long sides of the crib, and two shorter rectangles for the short sides of the crib. (If part of your crib will be up against a wall, feel free to skip the panel on that side.)


- Fold the edges of ALL FIVE pieces underneath by 1/2” (1.5cm) and then again by 1/2” (1.5cm) and stitch along the second fold to hem them. This is so your crib skirt doesn’t fray and fall apart in the wash someday.
- Spread the biggest rectangle (the mattress piece) out on the floor, right side up.
- Take one of your long panels and lay it over the big mattress piece lengthwise (right sides together) so their ends are matched up. The long panel is TOO long for the mattress piece, so you will need to fold/pleat it a few times — any way you want — until they are the same length.

- Pin the long panel to the mattress piece, right sides together, and stitch them together. Repeat for the other long panel.
- Take one of your short panels and lay it over the big mattress piece along the short end (right sides together) so their ends are matched up. The short panel is also too long for the mattress piece, so you will need to fold/pleat it a few times — any way you want — until they are the same length.

-
- Pin the short panel to the mattress piece, right sides together, and stitch them together. Repeat for the other short panel.
- Flip all four panels down so the right sides are showing, and slip the whole thing onto the flat board below the crib mattress. You’re done!
***
(*RE: BumperGate. I’ve gotten a lot of emails about crib bumpers, since this article ran in the newspaper this past weekend. I don’t “endorse” crib bumpers and didn’t use them with my own babies, BUT my friend has used them with her two previous babies and wants to use them again. That’s her choice, and any parent’s choice. I just made them look pretty for her.)
One Comment on “DIY crib bedding”
So what do you think?


As featured on …


Pingback: No-sew pennant banner