
Super easy quilt top for beginners
Whenever I share pictures of a quilt I’ve sewn, I hear a lot of “OMG I could never do that!” or questions about HOW I EVER LEARNED how to make quilts. They are a project that seems to baffle most people who have never tried to make one.
They might *look* complicated — and some quilts certainly are, but, um, not the ones I make — but quilts are actually REALLY easy to make. I swear. They’re just taking little bits (or big bits) of fabric and stitching them together, for the most part.
If you’ve ever thought about learning to quilt but were intimidated by the idea of making complex little blocks and assembling them, here’s a super easy way to buy fabric, take it home, wash and dry it, cut out blocks, assemble them, and put together AN ENTIRE QUILT TOP in … a single evening. Yup! It’s true.
(Oh, and did I mention there’s hardly ANY waste? You’ll use every smidgen of fabric, except maybe a raw edge or two.)
Step 1: Get thee to your nearest fabric store!
Find pretty fabrics that speak to your soul (ahhhh) and choose EIGHT (8) different ones. This is incredibly fun. I could pick quilt fabrics all day long and never get bored.
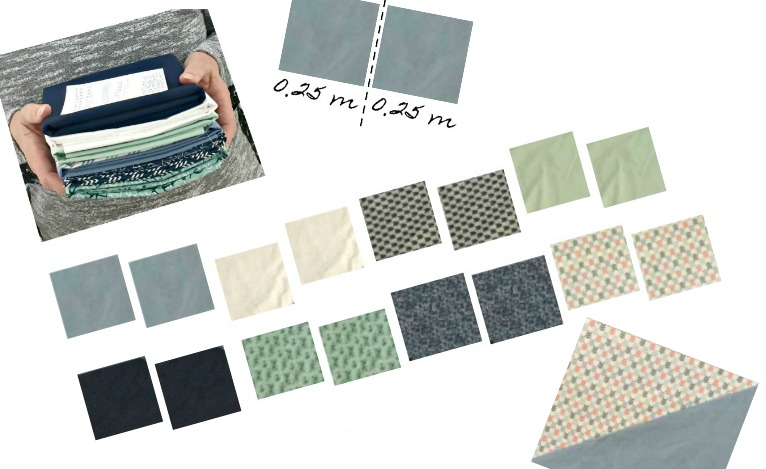
For this quilt, I went with my stepmother because I had been harassing her to start quilting for ages. She liked the idea of making a nautical-themed quilt for her guest room, so we found a collection with beautiful blues and greens — anchors, chevron, etc. To get a total of eight, we also added some plain/solid coordinating colours.
Once we had our top eight picks, we asked the sales associate to please cut 0.5 meters of each fabric — giving us eight tidy little bundles, for a total of 4m. This is going to make a nice-sized square quilt for snuggling up on the couch or spreading over a double bed.

Taekwondo teaches kids respect, instills pride

I didn’t know much about taekwondo, but I kept hearing the same rave review from other parents: “It’s so good for teaching them respect.”
Sold! I mean, who doesn’t want respectful kids?
We signed up our son last year, when he started Grade 1, and we all liked it so much that our daughter joined him this fall. We aren’t a sporty family, so taekwondo has been the perfect combination of physical activity and teamwork.

From the power of coloured duct tape to synchronized bowing in the middle of a basketball game, there are a few things you may not have known about taekwondo …
1. It really is all about respect.
Whenever an instructor enters the gymnasium (dojang), every student needs to stop whatever they’re doing and bow in unison. Now, this might not sound that impressive if you think about them already being fairly quiet and working on their moves. But the instructors are entering the dojang before class starts, during the “free time” when the kids are running around playing basketball and scooting on PlasmaCars. It’s pretty neat to see dozens of kids look up suddenly, bow and then get back to their game of tag.

Continue reading in my weekly parenting column, The Mom Scene …
Trimming furniture to make it fit perfectly

Sometimes the perfect piece for a room is already lurking somewhere in your house, but you look right past it.
That’s what I discovered recently when I was helping a client convert an office into a guest bedroom. She wanted a small desk where she could plug in her laptop when she wasn’t using it, so we’d talked about building a slim floating desk near the door. (Similar to this floating makeup desk I’d built for our daughter’s room.)
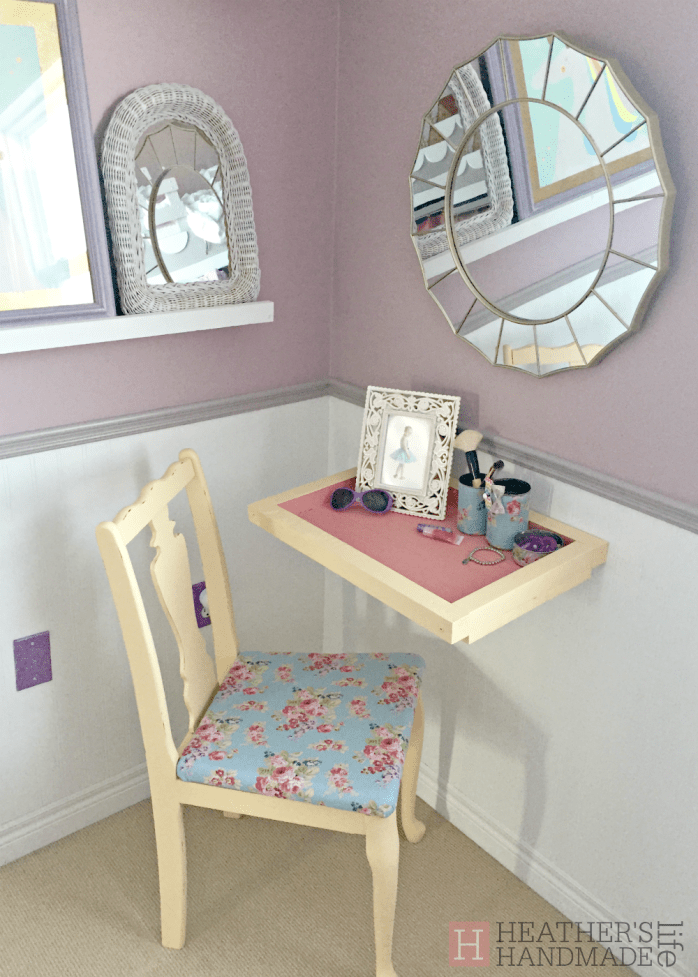
Then, 10 minutes later, when we were traipsing through her basement, I said, “Wait, what about that desk?” It was home to a few kitty food bowls and the top was in rough shape.
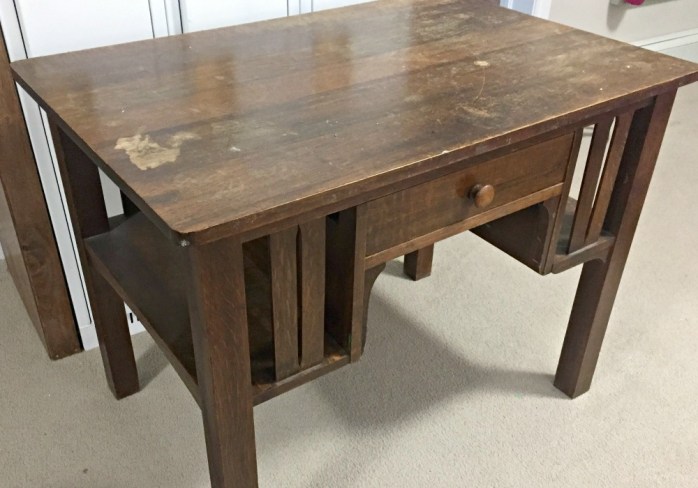
She explained it was an old partner’s desk — designed to be shared by two lawyers. While she liked it a lot, she’d checked numerous antique shops and had never been able to find a chair narrow enough to slide underneath it.
“We can totally trim a chair to fit!” I insisted. I was already committed to making the old desk work.
In fact, she already had a great wooden chair to use — the front of the seat was just slightly too wide, but I knew it could be lopped off.
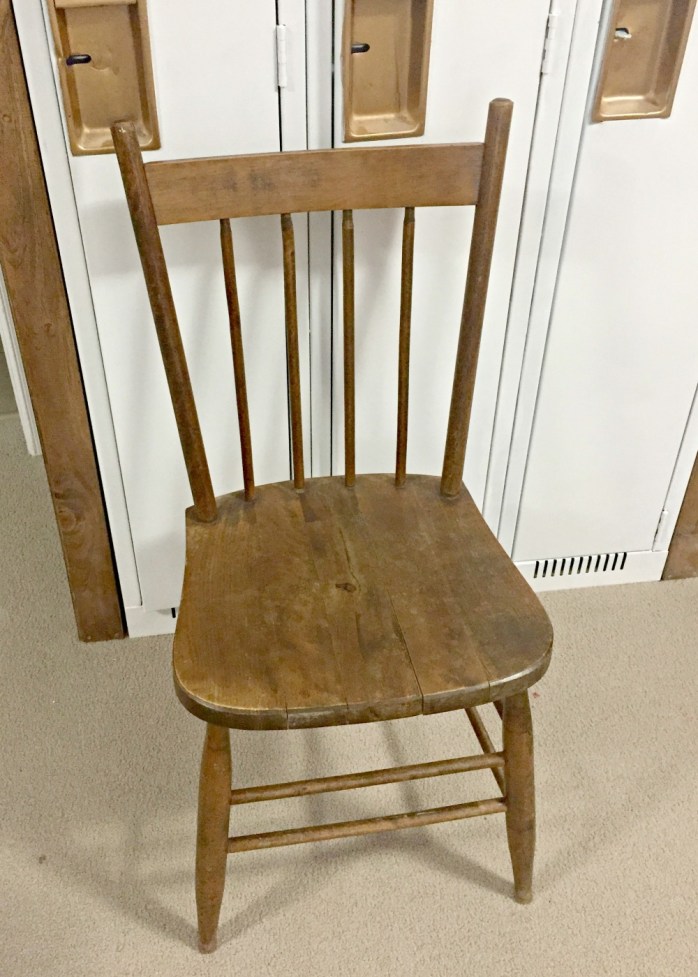
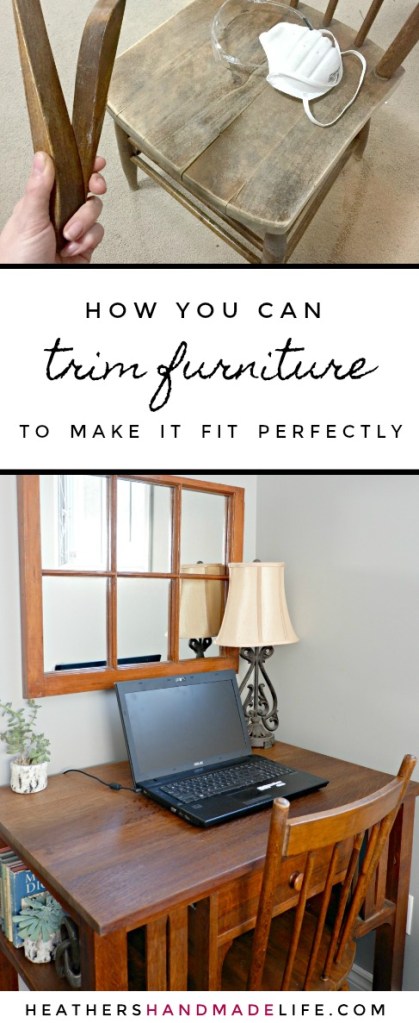
I loaded everything in my truck and took it home. I used my quilting ruler to square off the edges of the chair seat — basically just removing the curve where it became wider at the front. I used my jigsaw and took off less than an inch from the widest section, but it was enough to make the chair fit smoothly under the desk.
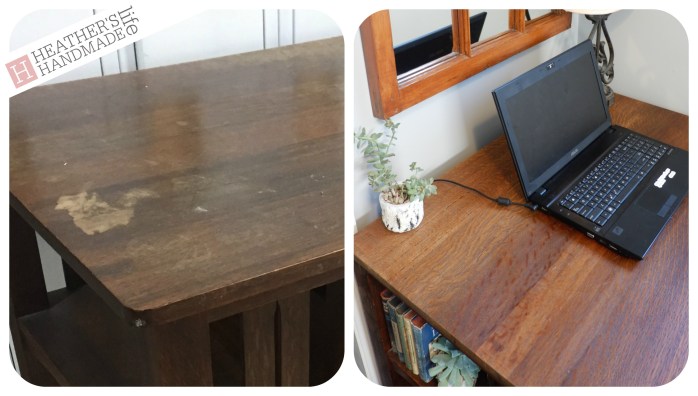
Now, I also had plans (and permission) to trim the desk. Since it would be going in a fairly small room, we wanted to eliminate any extra bulk. I was able to saw off about an inch and a half from each side and along the back, but I left the front intact. I also unscrewed a small interior board that would prevent the chair from pushing in all of the way.
Since the top of the desk was in rough shape, I gave it a good sand to remove the dings, scratches and discolourations. I brushed on a coat of wood conditioner, and then stained it to match the rest of the desk — Minxwax’s “Dark Walnut” was just about perfect. I did the same to the chair, which took care of its newly-trimmed edges and helped it blend with the desk.
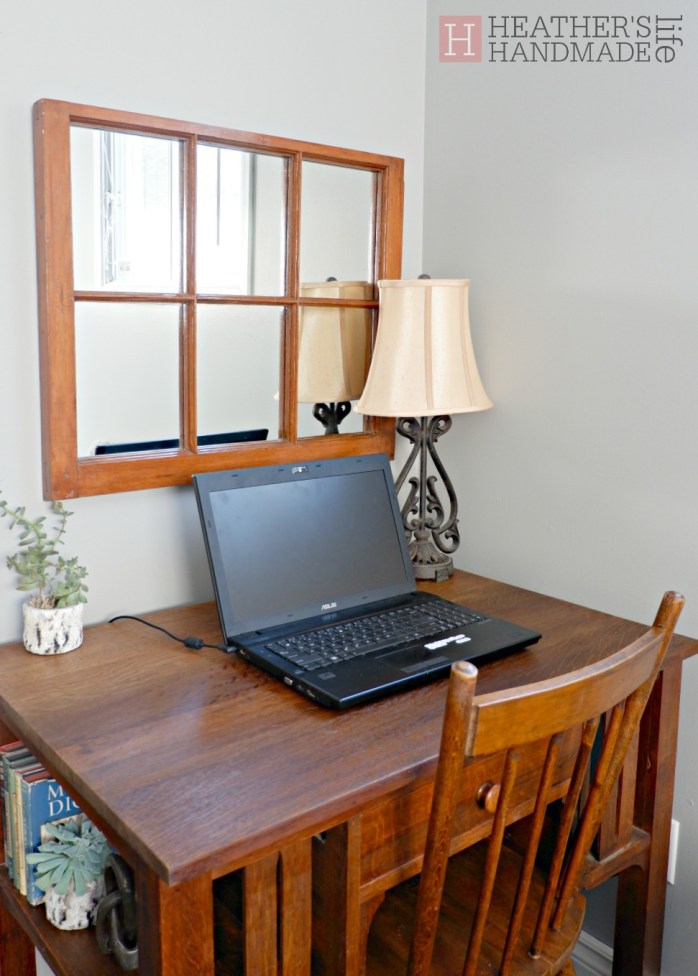
It was exciting to bring the refinished desk and chair back to my client’s house and set it up. The poor desk that could never find a chair to fit is finally living out its destiny — not a cat food holder — and it’s perfect for the corner of this vintage-inspired bedroom.
All it took was a little furniture haircut!
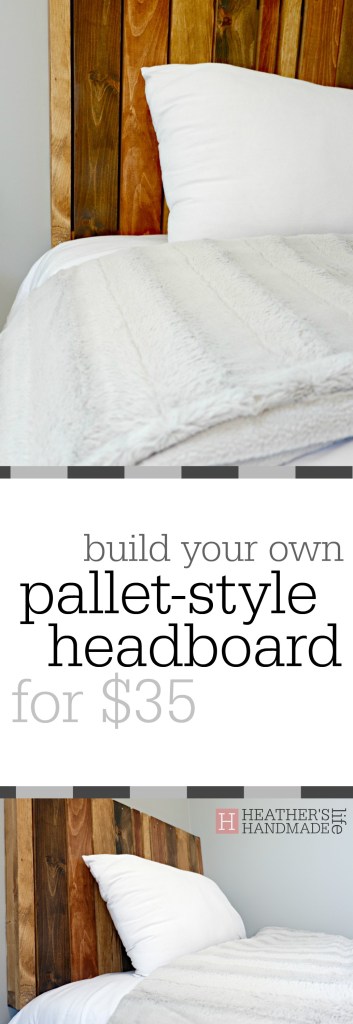
DIY pallet headboards

I recently made a housecall — yes, I do those — to visit a client who wanted help turning a former home office into a cosy guest room.
She had two twin bed frames and I knew immediately I wanted to try building pallet-style headboards — envisioning a mix of deep wood tones to go with the fluffy white comforters we planned to use.
I measured the beds and decided the headboards should be 38 inches wide and 24 inches tall, so they’d fit nicely over the beds without hitting the window trim (or being completely hidden by pillows).
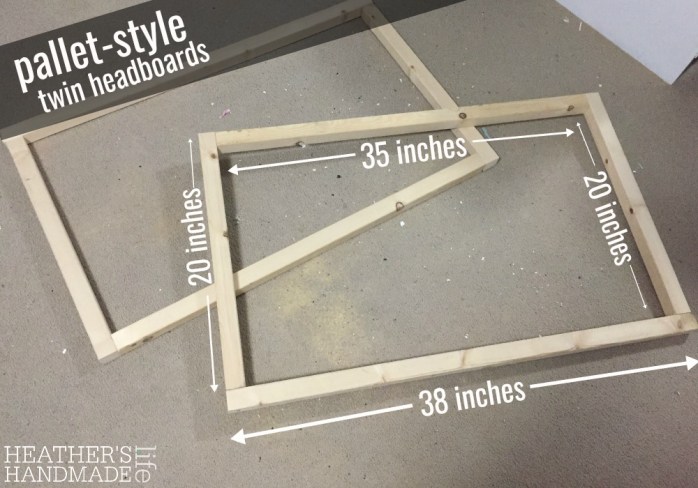
I got started by cutting pieces for a frame and screwing them together. Each headboard got a long 38-inch piece of 2×2 for the top of the frame, two 20-inch pieces of 2×2 for the sides, and a 35-inch piece for the bottom.
Once I had two sturdy rectangles built out of 2x2s, it was time for the fun part: adding the planks!
My chop-saw got a workout as I cut 12 24” pieces of 1×4 (six for each headboard) and 8 24” pieces of 1×2 (four for each headboard).
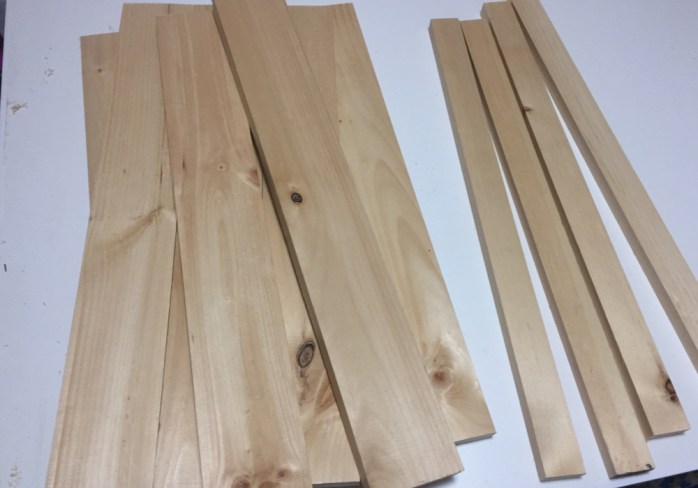
This meant each headboard would have a combination of 1×2 and 1×4 vertical planks — 12 boards total per headboard — with a nice gap between each.
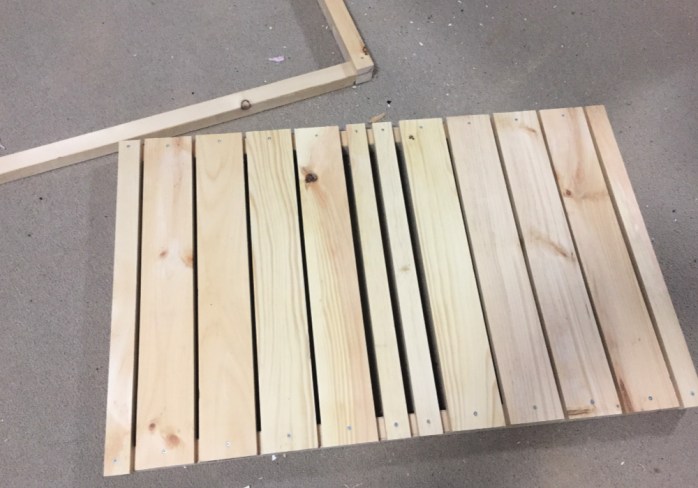
Then I played around with the order, laying the planks on the frame to see which pattern looked best. In the end, I decided on “a thin, four wides, two thins, four wides, and a thin.”
The part that took the longest was pre-drilling holes in the end of each plank to prevent the wood from splitting. Then I started on each end — screwing the first 1x2s in place — and worked my way toward the middle of each headboard, using two flat construction pencils as spacers to keep the boards even.

When I got to the middle of each headboard, I just eyeballed the placement of the two centre 1x2s — screwing them evenly between the 1x4s on either side. There’s a slightly larger gap around them, but — as Pa Ingalls would say — it’ll never be noticed on a trotting horse!
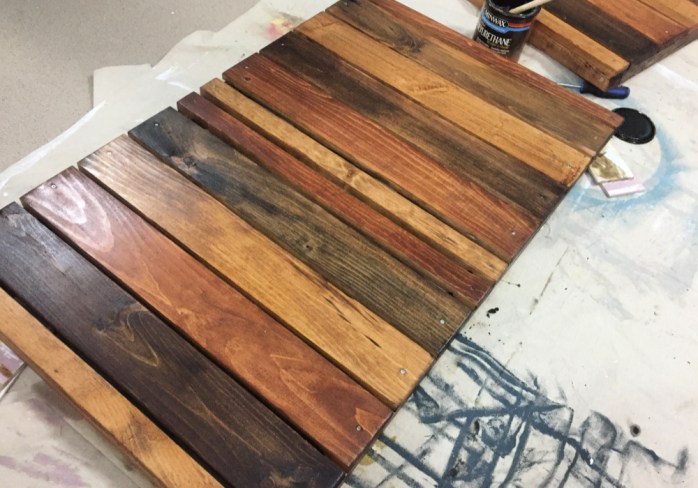
After using my electric sander to get them silky-smooth, I spread out my trusty drop cloths and propped up each headboard on my little plastic painter’s pyramids (and some leftover subway tile). Then I brought in a bunch of different pots of stain and started playing around.

I kept the pattern the same on each headboard, and alternated between dark, medium, and light wood tones — doubling up and using two different shades on some of the boards. That was fun, but then I realized I’d have to use a tiny brush to stain between each plank.
Should I have stained the planks before assembling the headboards? Sure, probably. But that just doesn’t seem to be the way I operate, so I didn’t let it bother me. I was binging old DVRed episodes of Four Weddings as I worked, so it wasn’t that bad.
After the stain was dry, I used a foam brush to apply a couple of coats of poly — sanding lightly in between. I love, love, love the silky feel of wood that’s beautifully stained and sealed. It just gleams with a healthy sheen that makes it look like it’s perfectly content.

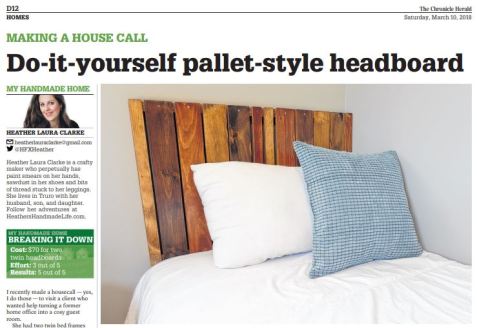
A couple of screws later — into studs, since these suckers are HEAVY — the new twin headboards were hanging above their beds. I love how the wood looks against the pale grey walls and fluffy white bedding. The headboards also go perfectly with some other elements in the room, which I’ll show you another day …
March Break? March Broken.

Happy March Break! This is a truly magical time of year when absolutely nothing lives up to anyone’s expectations for nine whole days.
You think you know how you’d like to spend it, and somewhere around Wednesday — possibly as early as Tuesday — you wonder if it’s possible to switch to a different school district that’s already had its March Break.
For example …
“March Break is the perfect time for a family vacation!”
No one has to miss any school. You could spend six days and seven nights on a beautiful resort where no one has to wash dishes or cook meals. You could take frame-worthy family photos where everyone’s laughing on the beach, or whirling around in the spinning teacup ride. It’s perfect!
Oh, wait. Except for the fact that it’s exponentially more expensive to travel anywhere on March Break, since that’s when hotels and airlines all jack the prices. You will bleed money from your pores every time someone dares to whine they are hungry. You will come home far more exhausted than you were when you left.
Hmm, scratch that …
Continue reading in my weekly parenting column, The Mom Scene …









As featured on …