
Experiments in beginner pottery

It’s been a while since I shared what I’ve been making in my weekly pottery class — something special I do for myself now that our youngest is in Primary, yayyyy!
I shared the first batch of finished pieces back in October, about a month after starting the class, and then shared more finished pieces in November. So everything below is what’s come out of the kiln from November until the end of March. (I’ll share the newest pieces soon, once I’ve caught up here on the ol’ blog.)
Let’s dive in!


Teaching kids to fall asleep

Helping a baby fall asleep usually involves a pretty steady routine: a warm bath, a cosy sleeper, a soothing story, some milk and a few lullabies.
Helping a toddler fall asleep means helping them brush their teeth, wrangling them into their PJs, answering numerous questions, managing requests for drinks of water and making them try to pee just one last time.
Putting school-aged kids to bed is far easier in most ways. They can brush and floss their own teeth. They can put on their own PJs and put their dirty clothes in the laundry. They’ll pee if they need to pee — but usually they’ll wait until they’re in bed and then decide to take a jaunt down the hall. (Let’s not even get into the whole sleepwalking thing today.)
Even bedtime stories are different in our house, now that we have two kids who can read! Our five-year-old daughter reads us a book first, while I dig my fingernails into my palms to keep myself from blurting out the words. Then our seven-year-old son reads us a longer, more difficult book, or we take turns reading a page at a time.
After that, it’s time for prayers, which the kids can also say aloud on their own now. (Our daughter is extremely proud she’s finally remembering to say “thy” instead of “I” during the Our Father.) Then there’s a flurry of hugs and kisses, and everyone gets tucked in. Done!
Lately, though, there’s been something new.
“Mom, I don’t know what to dream about,” our seven-year-old called down the stairs one night. My husband and I exchanged “Huh?” looks, and he paused our show so I could answer …
Continue reading in my weekly parenting column, The Mom Scene …
The backwards fabric hack

If you find a paint swatch you like, look for a more greyed-out version and it’s probably going to be even nicer. Strangely enough, you can almost do the same thing with fabric, all by turning it over and using the other side!
I discovered this recently while organizing my fabric stash, something that takes considerably more time and effort than organizing my clothes, my cupboards or anything else in my house.
I found a bin of flannel fabric that was a crazy mishmash of different colours and prints. There was bright-red snowflake-printed flannel from sewing Christmas jammies for my kids, lime-green giraffe flannel from making a baby quilt, and even some purple paisley flannel from nightgowns that once belonged to my husband’s grandmother (proof that I really do hoard fabric from all sources).
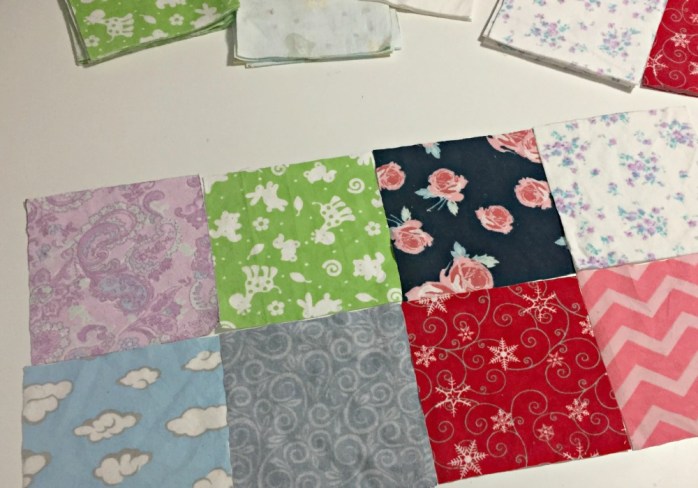
I considered tossing or donating all of it, since I rarely make anything out of flannel, but the hoarder in me hesitated. It was perfectly good fabric, just a hideous mess of colours and prints. Wasn’t there anything I could do with it?
Distractedly pawing through the bin while watching something on TV, I flipped a red piece over and noticed it almost looked pink on the other side. Hmm. I flipped the ugly bright green piece, and the back was a softer green. I started laying the different flannels together, upside-down, and they actually looked good together …
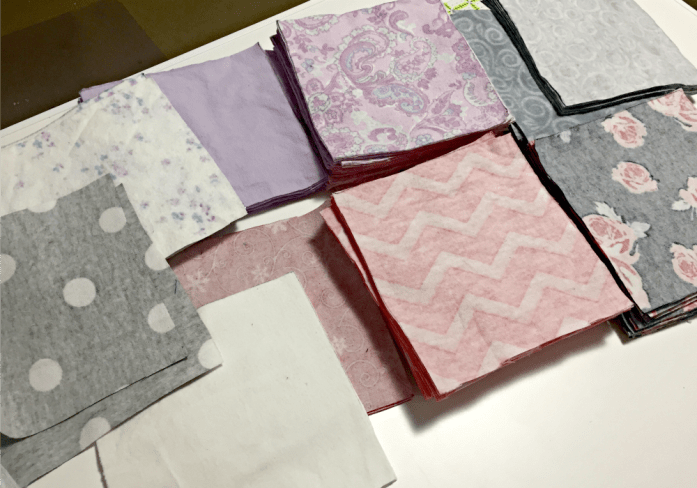
I started cutting out squares, with the help of my 6.5” square ruler, and didn’t pay much attention to how many I ended up with. I stopped to count them when I had around 100, and decided to keep going until I had 143 — giving me 13 rows with 11 squares in each row. (This is how I make almost all of my quilts. It’s very loosey-goosey.)
Once I had a pile of “backwards” flannel squares, I laid them out on the carpet randomly in rows. I tried to keep the darkest ones somewhat separated, since they were the most noticeable, but there certainly wasn’t a pattern. I sewed the squares together, row by row, and then sewed all of the rows together to finish the quilt top.
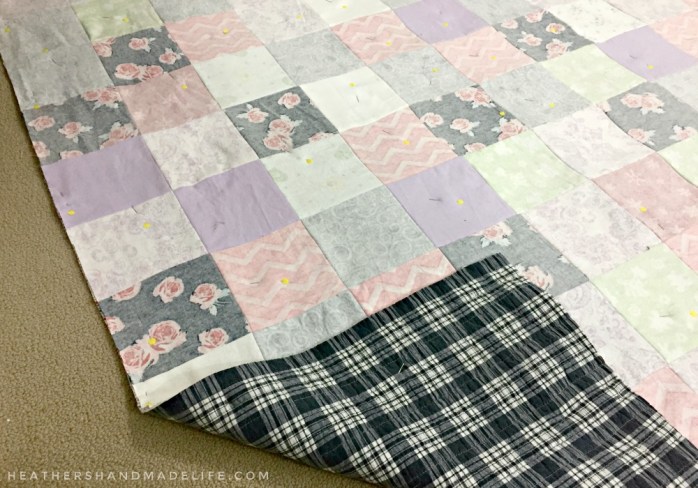
It was around this point that I realized I didn’t have batting (the fluff for the inside) or backing (the back of the quilt that rests against your body). I didn’t have enough flannel to make a back, but I did have a well-loved blue-and-white plaid blanket that was heavy enough to serve as both layers. Done!
After pinning the blanket to the quilt top and trimming away the excess, I used 1/2 meter of white flannel as binding to connect both layers. Then I spent a few evenings hand-quilting the squares while watching TV — no quilting frame required, just a needle, some thread, and my lap. You don’t get picture-perfect quilts this way, but you get to work while you’re snuggled up, so I prefer it. 😉
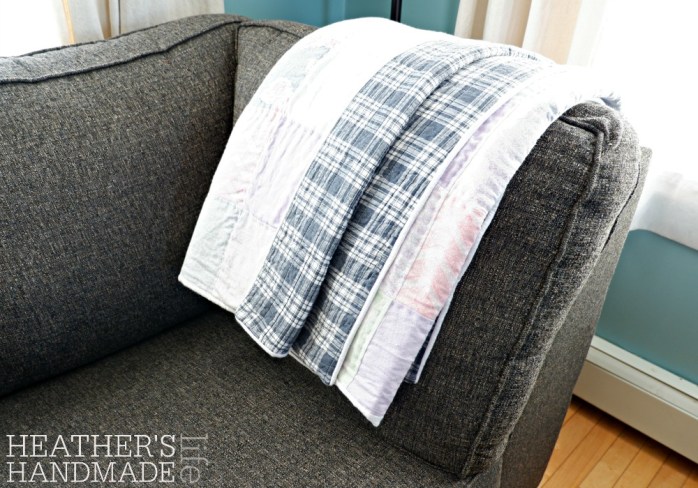
The finished flannel quilt is deliciously heavy — like those weighted blankets you can buy to help with anxiety and sensory overload. I love cuddling up under it, and sometimes I wrap it around me tightly so I’m like a human burrito.
It’s pretty neat that my new favourite quilt is the love child of an old blue blanket and a bucket of ugly, mismatched flannel scraps — including bright red, lime green and some truly strange patterns.
I suppose the lesson is that if you don’t like the look of a piece of fabric, try turning it over — it might be just right.

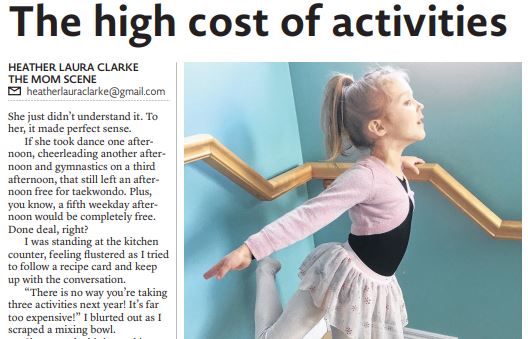
The high cost of kids’ activities

She just didn’t understand it. To her, it made perfect sense.
If she took dance one afternoon, cheerleading another afternoon and gymnastics on a third afternoon, that still left an afternoon free for taekwondo. Plus, you know, a fifth weekday afternoon would be completely free. Done deal, right?
I was standing at the kitchen counter, feeling flustered as I tried to follow a recipe card and keep up with the conversation.
“There is no way you’re taking three activities next year! It’s far too expensive!” I blurted out as I scraped a mixing bowl.
She started whining, asking “how many dollars,” as I thought about what I’d just said.
How do you explain to a five-year-old that you can’t even fathom shelling out the September-to-May tuition to so many kids’ activities simultaneously? What do you say when they point out that other families can swing it? How can you talk to them about what you can’t afford in a way that doesn’t make them worry?
Continue reading in my weekly parenting column, The Mom Scene …
Turn mismatched lamps into matching lamps

When it comes to decorating around a bed, I know three things to be true …
- If you have different nightstands, they should at least be the same height.
- If you have different bedside lamps, they should be the same height and have the same shades.
- If you have one end table and two mismatched lamps, you can (somehow) still follow the first two rules.
I was helping a client re-decorate a guest bedroom with a double bed and I’d told her to check local thrift stores for a large end table I could saw down the middle to make two matching nightstands — one of my favourite tricks. I’d also told her to look for two matching lamps — didn’t matter what they looked like, because I was going to paint those suckers and stick new shades on them.
But when I was poking around her home for a different project, I realized she didn’t need to buy anything. Sitting in her basement was an old green end table. Would it work? Absolutely!

In another room, there were two mismatched lamps waiting to be donated. There was nothing remotely similar about them — one was five inches taller than the other, one was brass and the other had silver accents (and ugly painted sunflowers), and the silhouettes weren’t even somewhat of a match.

I studied the lamps carefully, lifting the shorter lamp up so the finials lined up. True, they looked nothing alike, but if I could find a way to build up the base of the shorter lamp . . . hmmm.
Continue reading in my weekly DIY column, My Handmade Home …


Continue reading in my weekly DIY column, My Handmade Home …


As featured on …


