
The not-a-party birthday party

We’ve celebrated 13 — nearly 14 — kiddie birthdays so far between our two children, and we have learned a LOT. We’ve figured out which parties are the most expensive, which parties require the most effort (before, during and after) and which parties we swore we’d never repeat.
There’s the house party, which can feel incredibly claustrophobic and requires cleaning your house twice — yuck. There’s the rent-a-venue party, which is typically the biggest party and can make your bank account weep. And then there’s a third kind of party, which has become our favourite — the “outing.”

We started this tradition last year, and I don’t see us changing it anytime soon.
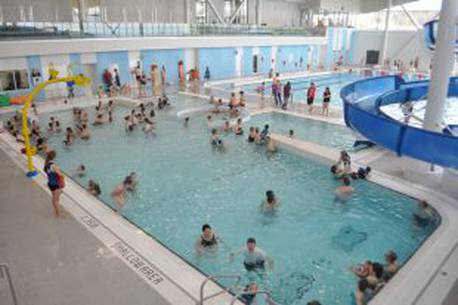
Last year we took our daughter and a few good friends to Clay Cafe to paint pottery, and it was awesome. We took our son and a few friends to the local rec centre for rock-climbing and a swim, and we just repeated that this year for our daughter’s birthday.
Since it’s not a “party,” we’re not shelling out the hundreds of dollars to book the party room and rent the leisure pool. We’re just paying for a family day pass (or two family passes, depending on the number of friends).
We met up in the lobby and the kids went rock-climbing first. All I had to do was stand by and take pictures to text to their parents. (My husband helped by hooking and unhooking the kids to the auto-belay system, which he seemed to enjoy.)

Once their arms started to get tired, we made a group decision to move to the pool. I felt like a teacher, making everyone line up and walk slowly to the change rooms. Quick — another head-count! Did we leave someone behind?!
I helped them get into their bathing suits and slowly, slowly, we trooped out to the pool. I tried to keep them all corralled by playing Duck Duck Goose, but it didn’t last more than a few minutes. Some of them wanted to jump into the deep end, others wanted to dive for toys, and others bounced around on noodles pretending they were riding horses.
My husband went on unofficial lifeguard duty in the deep end, while I stayed with my friend in the shallow end. As our little guests splashed around, I counted them constantly. I’d catch my husband’s eye, hold up a few fingers to show how many kids I had in my “possession,” and he’d nod and hold up a few fingers to show how many he had.
When the numbers added up to the total number of guests, we were golden. When they didn’t add up? Well, we’d both start hunting for the missing ones.
Oops, she was on the ramp — got her!
Oh, he was standing on the edge — got him!
Wait, where’s … oh, she was ducking under. Got her!
Aside from obsessively counting the kids every 30 seconds or so, it was a pretty calm swim.
Fifteen minutes before the party was scheduled to end, we rounded everybody up and got them changed. It’s much harder getting into clothes — especially tight ones — when you’re all damp from swimming. I literally broke a nail tugging up someone’s leggings, but before long we nudged them into their shoes and herded them out into the lobby.
Since we weren’t an official party, we didn’t have access to the party room. No problem — I’d made “portable” snacks using $2 clear plastic tackle boxes from the Dollar Store. The boxes were loaded with Goldfish crackers, Oreo cookies, granola bars, Fun Dips, suckers and gummy worms.

Some of the parents had arrived, and others were on their way, so we handed out the boxes to the hungry little swimmers. The kids loved opening up their boxes and deciding what to eat first. When they had an empty wrapper, they just stuffed it back in their box — easy clean-up! — and moved onto the next snack.
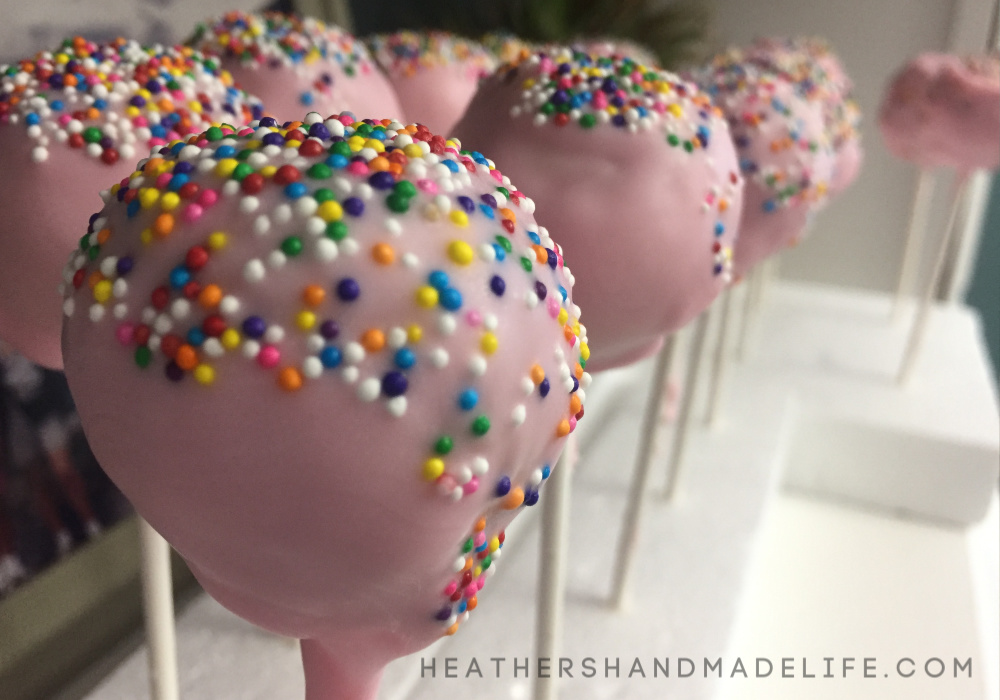
What about birthday cake, you ask? I skipped the cake and made cake pops — candy-coated balls of cake on lollipop sticks — that the kids happily ate in the lobby and walking out to their parents’ cars. (I’d sent them home with a second cake pop plus ones for any siblings waiting at home, because I’m a parent and I understand jealousy.)
If we’d gone the traditional route, I think we would have spent about $350 renting the pool and the party room — once you factor in that you need to purchase food from the in-house cafe.
By having a birthday “outing” instead of a big party, it cost us a cool $56 at the venue, and probably $50 for the plastic boxes, snacks, and cake pop supplies.
Our daughter had a blast, her friends all loved it, and it was one of the most affordable celebrations we’ve ever had.
Now that’s what I call a successful not-a-party party.
***
Don’t forget to pin this idea for later!

DIY $20 wooden doormat

Sometimes I’ll get an idea for a project and tackle it the very same day, and other times it’ll take me years to actually get around to completing it.
I came across the idea for a wooden doormat at least a year or two ago, and now that I’ve finished one, I can’t wait to make more of them. It’s one of those rare DIY gems where the project is inexpensive, fast, fun to make, and the results are awesome.
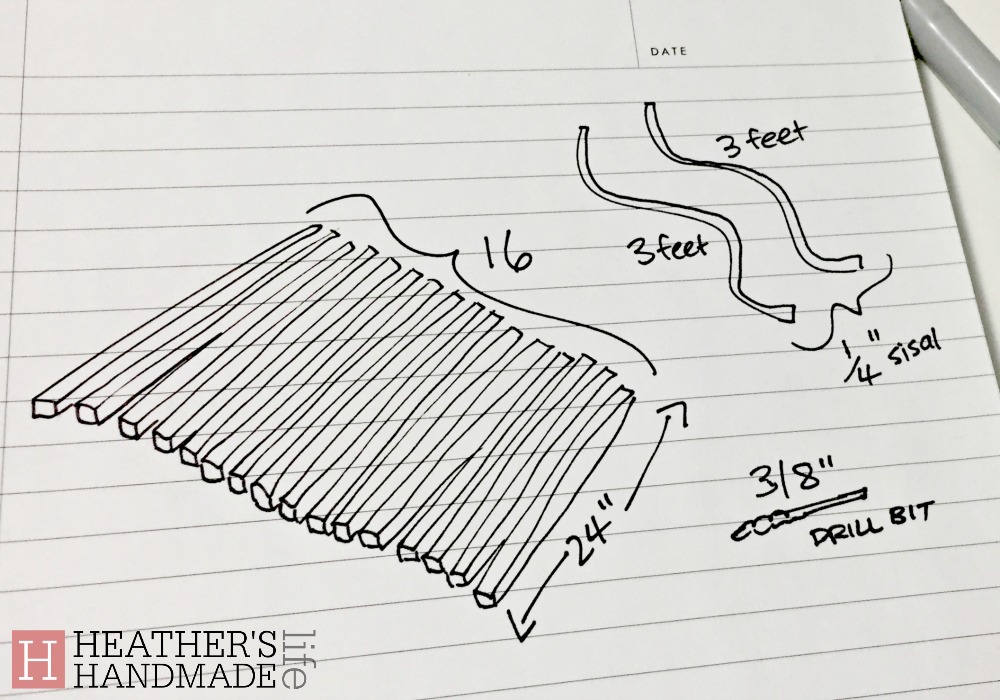
Determined to finally make one of these wooden doormats, I pulled up a Pinterest tutorial and skimmed the simple materials list: 16 pieces of 2×2-inch lumber measuring 24 inches each, six feet of quarter-inch sisal rope* and a 3/8-inch drill bit. It was so simple, in fact, that I never went back to read the instructions — I am weirdly rebellious about instructions — and things still turned out perfectly.
During a home improvement store run I asked my handy husband to pick me up four eight-foot-long 2×2-inch boards (less than $15 total) and a 50-foot package of 1/4″ sisal rope* (way more than I’d need for one mat).
You know I’m normally not much of a measurer, but I was careful to measure and mark 24” sections before cutting them with my mitre saw. I didn’t want the mat to look like a choppy piano with crooked keys, after all.
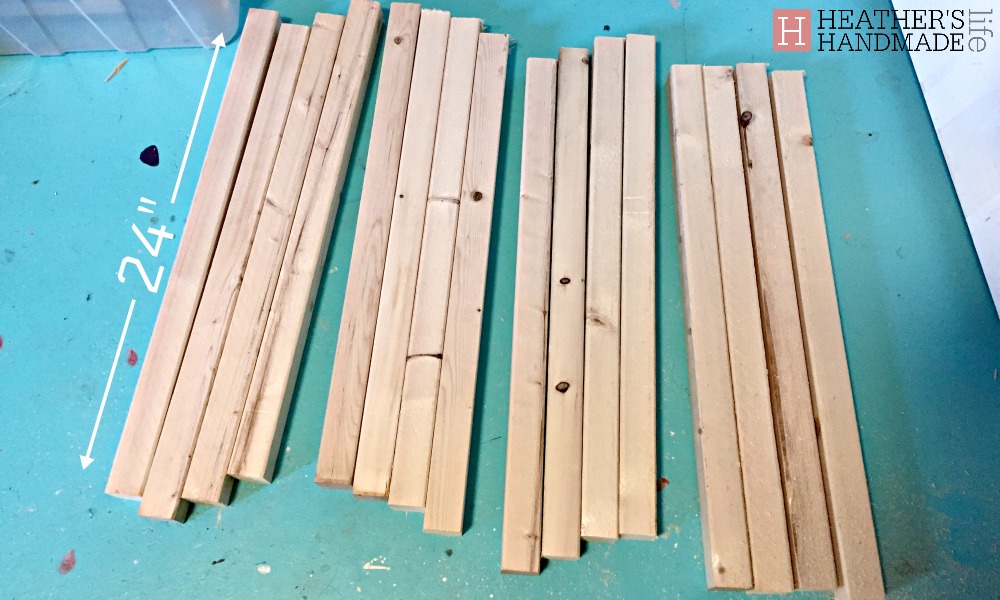
Once I had my stack of 16 little planks, I gave them a good sanding so they’d be nice and smooth underfoot. Lots of little bare feet run in and out of our house from May through September, weather-permitting.
Armed with the requested 3/8” drill bit — borrowed from my handy husband, since my own bits were all too small — I prepared to drill the holes I’d need to connect each plank together.
Since I hadn’t bothered to read the tutorial, I didn’t know how far down each plank to drill the holes. I knew they’d need to be in exactly the same spot or else the mat would be wonky, so I used a cardboard scrap to make a drilling template. Then I marked a tiny Sharpie dot equal distances from the end of each plank.
Drilling into the stack of 2x2s wasn’t difficult, but it went slowly so I didn’t split any of them or drill crooked paths through the wood. After about 15 minutes, all 16 boards had top and bottom holes. The drilling wasn’t particularly clean, so I fussed around sanding the holes for a while. Don’t worry about that, because it ended up not being noticeable!

While I’d been drilling, I was thinking about how I was going to paint the planks. Did I want a crisp white mat, or maybe a fun yellow one? A combination of different stains? Rainbow colours? So many possibilities!

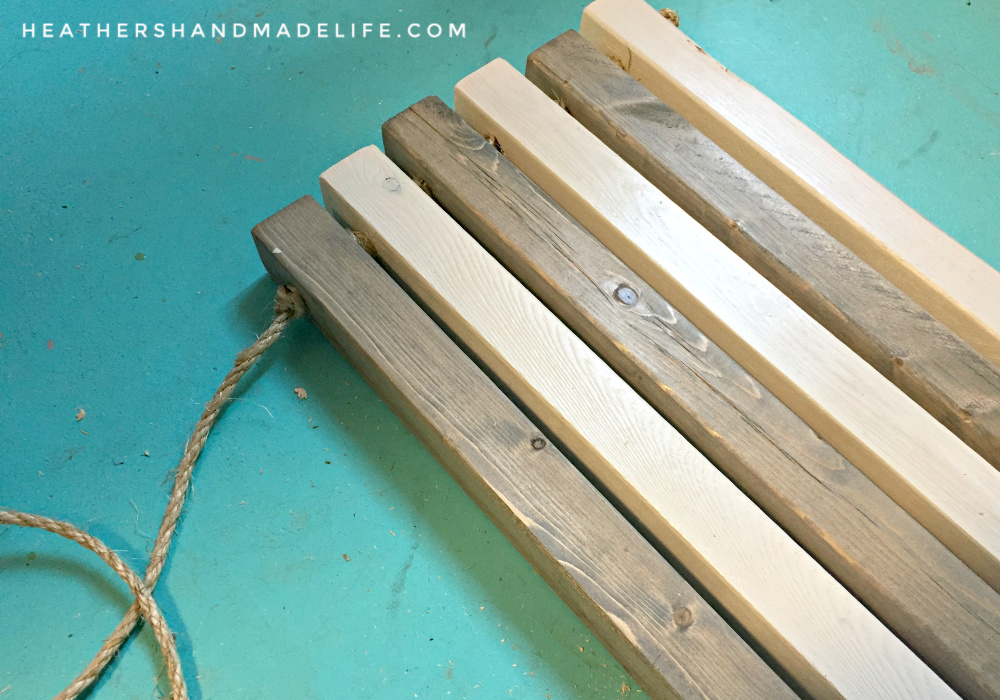
I decided on a pattern of white and pale grey, so I brushed half of the planks white — not bothering to do a “proper” coat since I wanted it to look casual — and sponged the other half with grey stain. I painted/stained all four sides of each plank, but in theory you could have a reversible mat with different colours on the top and bottom. (The “inside” sides of the planks aren’t that visible.)
Once the paint and stain were dry, I brushed on a few coats of polyurethane to protect the colour from the elements. I could hardly wait for the next step — stringing the planks on the sisal — so I likely rushed this part a bit.
I remembered from the original tutorial that I only needed six feet of sisal, so naturally, that meant three feet for the top and three feet for the bottom.
I cut off two lengths of about four feet — just in case — tied a double knot on one end of each piece, and strung the first plank in place.

Then I knotted each rope again, pushing the knot tightly up against the first plank, and slid on the second plank. It was working!
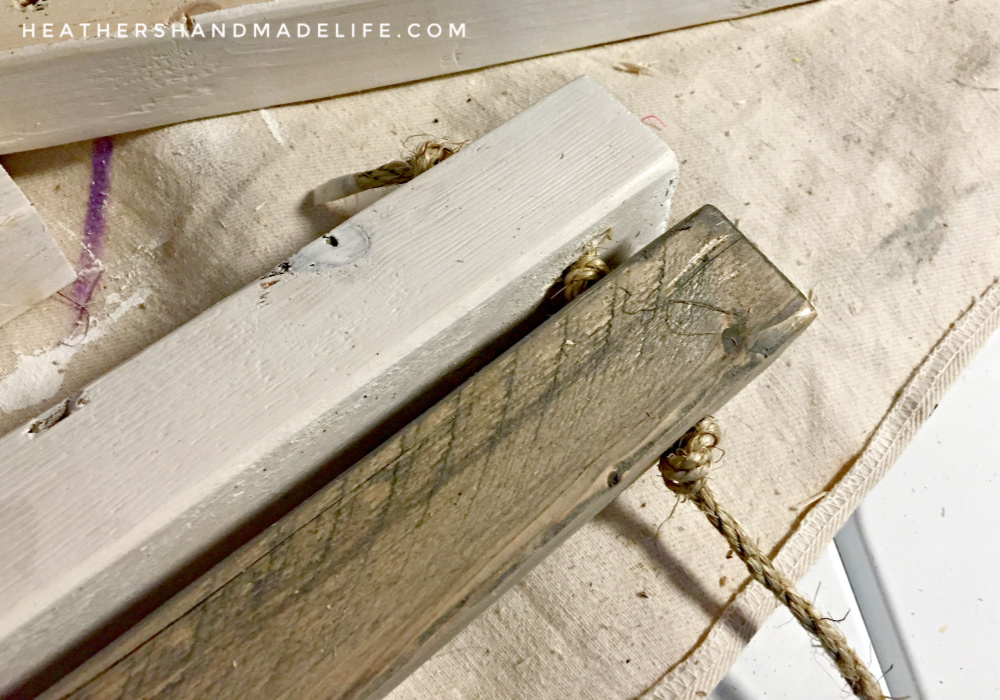
It was super fast — and oddly satisfying — stringing the planks onto the rope, and tying knots between each one. Oh, and if you’re having trouble jamming the rope through the holes, wrap a piece of scotch tape around the tip to help thread it through.
When I’d slid the last plank into place, I double-knotted the ends of the rope and cut off the excess. It was done!
Our new wooden doormat is really cool to step on, and surprisingly smooth and comfortable under bare feet. Hilariously, our dog refuses to step on it — maybe her paws feel like they’ll slip between the planks? — and jumps around it, but everyone else likes it.
I’ve already cut more planks to make another one of these for our back door, and I’m trying a combination of 2x2s and 2x4s this time — using wood I had on hand, since I have plenty of leftover sisal rope.
Twenty bucks for a totally durable, unique doormat? I can see myself making a lot of these!

Easy mini pizza hack

You guys know I HATE cooking and only ever post “recipes” (I use that word very loosely) on the blog if they are (A) incredibly easy to make, (B) super-fast, (C) prevent us from wasting something, and/or (D) get me out of the kitchen in record time so I can go sew something or paint something.
But we had a big family “party” over the weekend to celebrate C turning six. Having 20-ish people in your house for dinner either involves cooking or cleaning out your bank account for a ton of pizzas to be delivered. So we always choose cooking.
Darling Husband had bought a new BBQ for the occasion since ours recently got the boot to the curb during Clean-up Week. So, of course, we decided to make hamburgers and sausages.
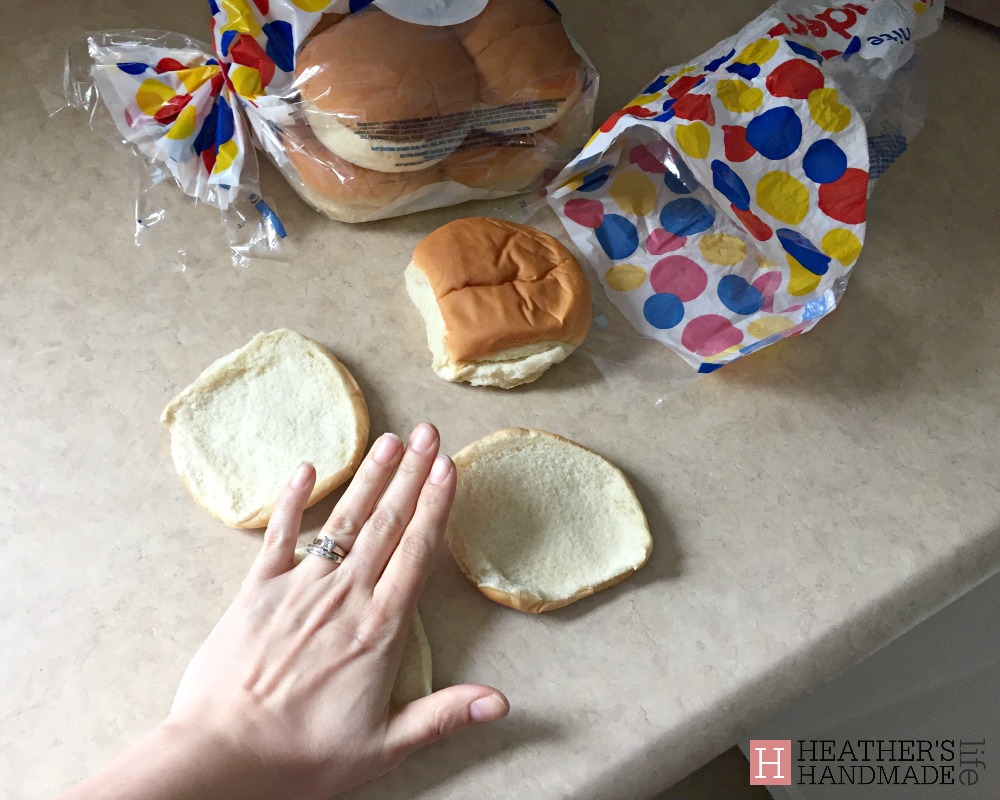
AND OF COURSE, he bought ninety-trillion packages of hamburger buns. I made 20 hamburger patties. You do the math. *sigh*
So what does one do with the eighty-nine-trillion remaining hamburger buns?
Freeze them, you might say? Nope — remember, we got rid of our deep freeze when I turned the laundry room into The Most Epic DIY Studio Ever.
And so I squashed them with my (still-kind-of-annoyed) palms and made mini pizzas with them …
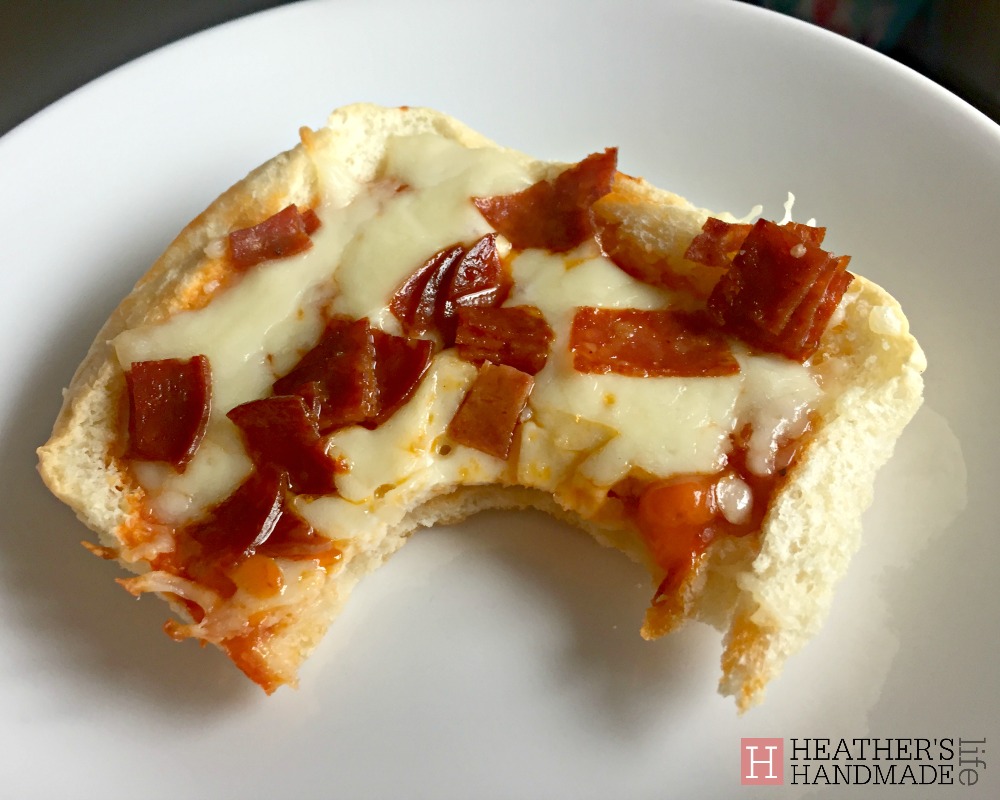
I loaded the squashed bun halves with pizza sauce, grated mozzerella, and chopped pepperoni, and baked ’em at 425F (the same temperature we used for regular pizza) for about 15 minutes.
THEY. WERE. DELICIOUS.
This is really all I have to say. I hope this helps you, especially this summer during BBQ-every-damn-day season, if you also have a husband who ALWAYS OVERBUYS FRIGGING HAMBURGER BUNS.
(I love you, babe. I do. But sometimes I wonder if you are single-handedly keeping the folks at Wonder Bread in business?)
50 backyard activities for spring

It’s not that my kids weren’t playing outside over the winter — they were. Honest.
It’s just that it was an especially icy, wet, windy winter, rather than a picturesque fairytale winter wonderland. The kids would go play outside and come back, wet and freezing, sooner than I would have liked. How do you force a child to stay outside for fresh air when there’s no snow — just a lot of frozen dead grass and frigid wind?
Admittedly, yes, they played too many video games over the winter. Now it’s time to correct that with lots of vitamin D and mud.
But now, after what feels like six months of false starts, spring weather is actually here! It feels amazing to be able to nudge the kids outside and watch them run around the yard happily. They’ve missed it, too.
We’re still in the rubber-boots-and-jackets phase, but soon enough they’ll be out there in sandals and shorts and T-shirts.

I love this time of year, when every sunny day feels like a gift — lifting the spirits of parents everywhere who are tired of everyone being stuck inside …
Continue reading my weekly parenting column, The Mom Scene, for my list of 50 (yes, FIFTY) backyard activities we’re excited to do this spring …

Kids’ bookcase makeover

While I usually don’t have a problem painting wooden furniture, I did hesitate at the start of this bookcase makeover when Lila’s mom told me it had been hand-built by her grandfather.

He’d done a beautiful job staining and sealing the wood, and even added a decorative square trim around the top. Was she sure about painting it? Yup. OK then — I’d paint it. Read More


As featured on …


