
Cake pops are surprisingly easy

I always admired parents who made cake pops. They seemed so fancy and I’d imagined they’d spent hours in the kitchen, perfecting each little ball of cakey goodness before dipping it and decorating it.
While I’m definitely better at baking than cooking (which isn’t saying much), I don’t like making cupcakes because I find it a pain to frost them individually. I prefer to just slap some frosting on a cake — much faster — and maybe toss on some sprinkles. I assumed cake pops were way out of my league.
But when we threw a “mobile” birthday party for our daughter back in April, I realized cake pops would be really convenient. We wouldn’t need to pack napkins or muck around with globs of frosting and we’d also avoid the crumbs that come from half-eaten cupcakes.
I was shocked to discover that cake pops were MUCH easier than I’d imagined. They were actually kind of fun to make! They were tidy to eat, really delicious and a huge hit with our party guests (and their parents).
So, if you’ve been tempted to try making cake pops but figured they were too difficult, here’s exactly how to master them on your first try …

- Start with a cake — any cake. It could even be a store-bought cake. I’d thought about doing the cheater method, which involves using unglazed Timbits you preorder from Tim Hortons. But in the end, I decided it was much cheaper to just use a 99-cent chocolate cake mix from the grocery store. I baked it in a rectangular pan and let it cool.
- Crumble it up with your hands. This part is fun. Normally you’re all concerned about your cake baking evenly, but this time you just tear into it with your bare hands like an animal.
- Mix in a few tablespoons of frosting — any frosting. I warmed a bit of butter and made a tiny batch of chocolate buttercream, but you could use a few spoonfuls of canned frosting. You just need something to make the cake stickier.
- Roll it into balls. I could have used my cookie dough scooper, but it didn’t take long to roll the cakey mush into little balls. It was like making meatballs, except I could sneak a bite here and there without an E. Coli risk.
- Dip the sticks. I’d bought a package of lollipop sticks at the craft store for a couple of bucks, along with a package of candy melts (which had always been a total mystery to me). I poured about 1/4 cup of the melts into a dish and microwaved them until the melted, stirring every so often. Then I dipped one end of each lollipop stick and shoved it into a cake ball. I stuck the whole batch of balls-with-sticks in the freezer for 15 minutes to firm up.
- Dip the pops. I poured the rest of the melts into a glass dish and heated them up in the microwave. When they were nice and melted, I started dipping each cake pop into the melty mixture — using a spoon to help coat them. The melts are very forgiving, so you can really slop on the goop and it hardens into a smooth coating. If you want to shake on a few sprinkles (or dunk the whole pop in a bowl of sprinkles), do it now while the coating is still wet.
- Stand them up to harden. We had just bought a new BBQ the day before, so we still had tons of styrofoam lying around. I stuck each lollipop stick into the styrofoam so the cake pops could harden, and any excess coating could drip off. (The next time I made them, we didn’t have styrofoam so I stood them up in my cooling rack.)

Once the cake pops were hardened, we were able to cover them individually in plastic wrap tied with ribbon. Even the unwrapped ones travelled beautifully, all stacked up in a plastic container. They were gobbled up without any mess, since each one is only a few bites’ worth of cake, and everyone loved them.
Cake pops, you’re the new cupcake — and I’m glad.
DIY pergola picnic table

When you’re a certified indoor person and avoid the sun like a vampire, it’s a challenge to have children who love (and need) to play outside.
Even with my collection of oversized hats, sunglasses and tubes of fancy sunscreen, I’m all about sitting in the shade. I don’t like to feel hot, I’m prone to heatstroke, and working as a drugstore cosmetician in high school and university left me extremely paranoid about sunburns.

I wanted a spot where I could sit outside our house semi-comfortably to supervise the kids in their little pool. A large umbrella seemed like the obvious solution. But we live on top of a very windy hill, and umbrellas are a joke. (Well, and a weapon, since they’re likely to catapult through the air whenever the wind picks up.)

My next thought was a retractable awning attached to the house to cover our (very small) back deck. But those started at $500 and the majority were several thousand dollars (yikes), plus there was a good chance the wind would destroy it anyway.
“I just need some kind of little roof,” I whined to my handy husband on a particularly sunny day. “Just something to cover me. We could almost just …” I paused, looking at the picnic table sitting in the backyard.
“We could just put a roof on the table! …”

He agreed that would probably be the best solution, and we didn’t have anything to lose — the picnic table was already several years old, and building onto it wouldn’t harm it.
He wasn’t as pleased with the second part of my plan, though: to move the picnic table onto our back deck.
“It’ll take up almost the whole deck!” he complained. “Why can’t it stay on the grass?”
“No! I’ll use it much more if it’s right here on the deck,” I countered. “I’ll also have a better view of the kiddie pool. It’ll be like a lifeguard stand!”
Grudgingly, he agreed and helped me lug the heavy picnic table onto the deck. It didn’t leave much room for anything except the BBQ, but I knew it was still the best spot for it.
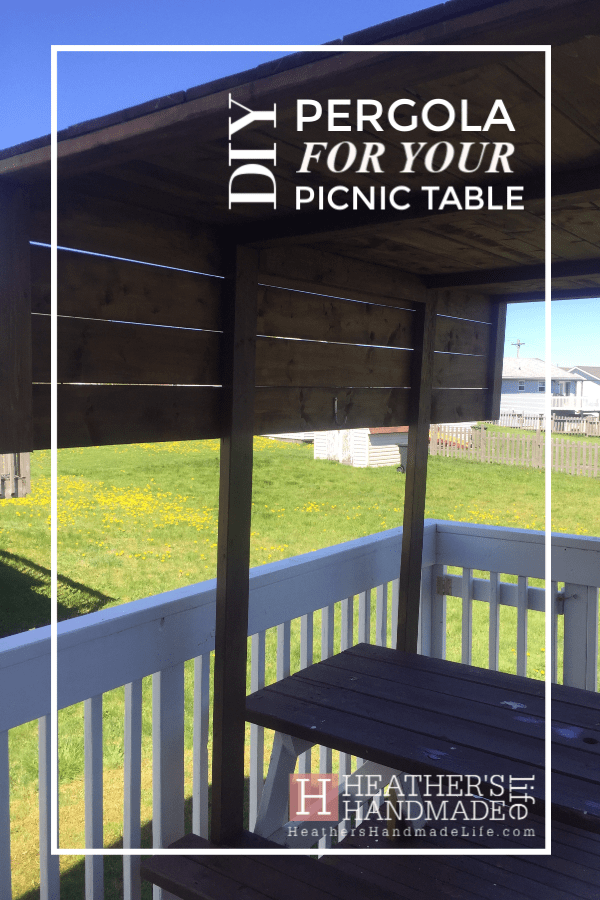
After a quick trip to the store for pressure-treated lumber, he started by attaching four tall “legs” (2x4s) to the picnic table and then connecting them across the top. It looked like a strange outdoor canopy bed.

Then he framed out a wider roof, so the benches would be fully shaded, and started covering it with planks made from 6” fence boards.

We considered where the sun tends to strike during the afternoon, and decided to take the planks partially down the “wall” on the west side and provide more shade. Of course, if it were completely up to me, I’d run the walls up and down both sides so I was basically sitting in wooden box with air holes. 😉
Once it was built, we did a quick coat of stain to match our deck (Sico’s “Autumn Brown” in exterior semi-transparent). I also re-stained the faded picnic table to match, and then we were done!

Our “pergola” picnic table is way sturdier than a store-bought patio set with an umbrella — the wind is DEFINITELY not blowing this heavy wooden structure over — and it’s a compact way to seat a lot of people in the shade.
I’m pleased to report it became an instant hang-out spot for the neighbourhood moms. We gather there on sunny afternoons to sip Diet Coke and chat while our kids run around like maniacs in the connected backyards.

I’m considering adding more fence boards — or maybe outdoor curtains — to give me a teeny bit more shade, but overall I’m very happy with my new “vampire perch.”
xo
Don’t forget to pin this idea for later!
Work-at-home meal hack

When I’m working, I’m completely zoned out and don’t register that I’m hungry until suddenly I’m STARVING and ready to eat anything in sight. I feel like I’m too busy to stop and make something — even if it’s just opening a can of tuna and making a sandwich — so I used to run upstairs to the kitchen and grab a handful of crackers, a bowl of cereal, a granola bar, or another non-meal that takes mere seconds to prepare.
Then I started doing this …
Canvas grocery bag hack

Yesterday’s post was all about how we packed our carry-on luggage, and today’s is about the kids’ “airplane activity bags” they also carried onboard (since each person is allowed two carry-ons). Instead of hefting around backpacks (which they would invariably load with way too much stuff), I wanted them to have something smaller to tote around.
I had a few of these free canvas grocery bags from Atlantic Superstore, as part of their new online shopping program. (Pssst — if you’re local, I did a full review video on Facebook.) Lots of companies give out similar bags, so chances are you have one or two floating around somewhere.

Tips for packing carry-on luggage

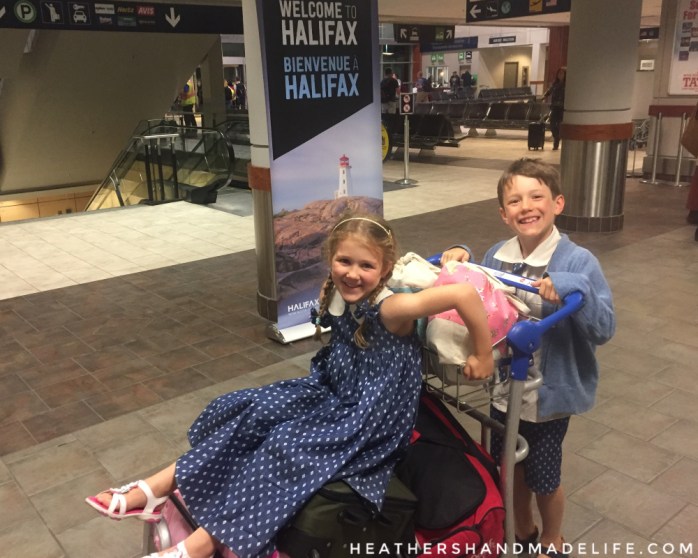
My dad’s been a pilot since before I was born, so I grew up traveling as an “airline kid.” When I got married, I smoothly transitioned into being an “airline spouse,” since my husband is a baggage assembly lead. This means I’m very comfortable on airplanes — while simultaneously suffering from Standby Stomach — but I don’t exactly travel the traditional way.
For one, we never check luggage. Checked luggage is a huge pain when you’re traveling standby since it means you can’t jump from flight to flight as opportunities present themselves — you’re stuck with the plane holding your suitcase.
We started flying with our kids when they were three and five, and while it certainly would have been easier to check huge suitcases full of everything we might need or want, we’ve managed to keep things streamlined and only take what we can carry directly onto the plane.

Ready to dive into how we organize our neatly-packed ultra-efficient suitcases? Fasten your seatbelts and prepare for takeoff …
- Know the rules. Typically an airline allows you to take two pieces of carry-on luggage — a suitcase and a smaller bag, like a purse. We each have a small wheeled suitcase that fits under the seat with no problem. My husband and I each carry a small backpack, and the kids have small canvas bags. When we travel with our dog as a carry-on, we slip one of their canvas bags into the other so we still have two bags per person.
- Limit the clothing. We only pack 3-4 tops and 2-3 bottoms per person and do laundry while we’re away. I make sure everything coordinates so we can mix and match.
- Tuck and roll. Rolling clothes keeps them from wrinkling, and rolled bundles take up less space. If there are tops and bottoms I want our kids to wear together, I roll the entire outfit up and wrap it with a hair elastic.
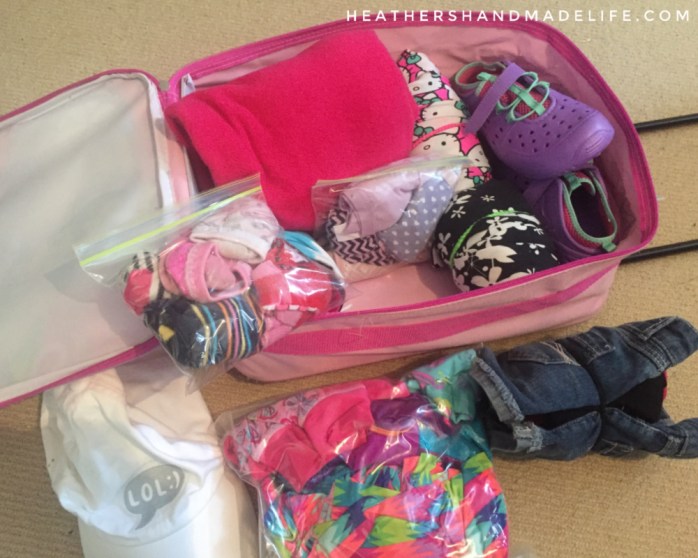
- Don’t double up. One ball cap. One pair of sunglasses. One bathing suit per person is fine for most vacations, since they dry quickly over the edge of a tub. One pair of PJs is fine, too — in an emergency that requires a second pair of PJs, a T-shirt and underwear would work.
- Pack multipurpose items. Instead of packing a jacket and a sweatshirt for each of the kids, I packed a fleece sweater that doubles as both.
- Bag it up. I separate the kids’ items into clear zippered bags — one for underwear, one for socks, one for their bathing suit and rashguard — so it’s easy to see what we have and what’s still clean. (Socks still in the baggie? Still clean!) This is also helpful if Security needs to look through a suitcase, says someone who once had her undies rifled through at Heathrow as a mortified 10-year-old girl.
- Dress carefully for the plane ride. Employees and their families travelling standby are required to dress nicely, so this means wearing fancy clothes and shoes we likely won’t need on our vacation. But we can still layer on items that will be helpful to have on our trip, like cardigans and jackets. Anything we wear is something we don’t need to pack!

- Pack liquids sparingly. With the 100ml limit on liquids and gels, we only bag up a few essentials, like deodorant (not a gel, but sometimes it’s questioned), toothpaste, my face cream, my husband’s hair gel, and Children’s Tylenol. We buy a bottle of sunscreen at our destination, and shampoo is free at hotels anyway (and homes where you’re staying as a guest).
- Keep carry-ons simple for kids. You don’t want them hunting through a bunch of compartments and forgetting to zip up pockets. I recently modified two canvas grocery bags to have tight elastic-gathered tops. They can stick their hands into the bags to fish out what they need — a snack, a book, etc. — and then the bag snaps shut again, keeping everything from spilling out onto the plane.

- Stock it with the basics. We happily let our kids watch videos on the in-flight entertainment system — best invention ever — so headphones are a must. But I also pack an activity book and pencils (my husband refuses to include crayons, markers or stickers since he’s had to scrub airplane table-trays at work), a book, a few small toys, snacks, and their very own pack of gum. The gum really is the highlight of any airplane ride.
While packing carry-on bags only might take a bit more planning — you can’t just toss a ton of stuff in and have plenty options — it certainly has its advantages. We have everything we need close at hand, we never have to worry about lost luggage, and it reminds us there’s really not that much stuff we need on a daily basis.
Of course, ask me again when I’m wearing the same T-shirt for the third time on our trip and see how I feel. 😉


As featured on …


