
I admit it. I’m super nosy.
My family and friends are always tell me that I’m nosy, but I prefer to think of it as “curious” or “very interested in people.”
I don’t think I can even blame it on being a journalist, because I’ve been like this since I was a kid. I like to ask a lot of questions. I need to know the details. I want to know not only what happened in a given situation, but exactly what people said, thought, wore, ate, felt — and what order it all happened. My sister has admitted this nosiness would make me a good lawyer.
For the first five years I was a parent, I was with my kids pretty much constantly, so I always knew what was going on in their lives. Our son was out of my sight here and there for preschool and playdates, but I was able to piece together how it had all went down. When they said something new or learned a new skill, I could tell you exactly when and where it had happened for the first time.
So when our son started Primary in September, it felt like I was shipping him over to boarding school overseas — hoping for the occasional mailed letter that didn’t really say much of anything. He was making new friends and learning new things that I knew nothing about. He disappeared on the schoolbus into the darkness of the (very) early morning, and reappeared on the bus seven hours later.
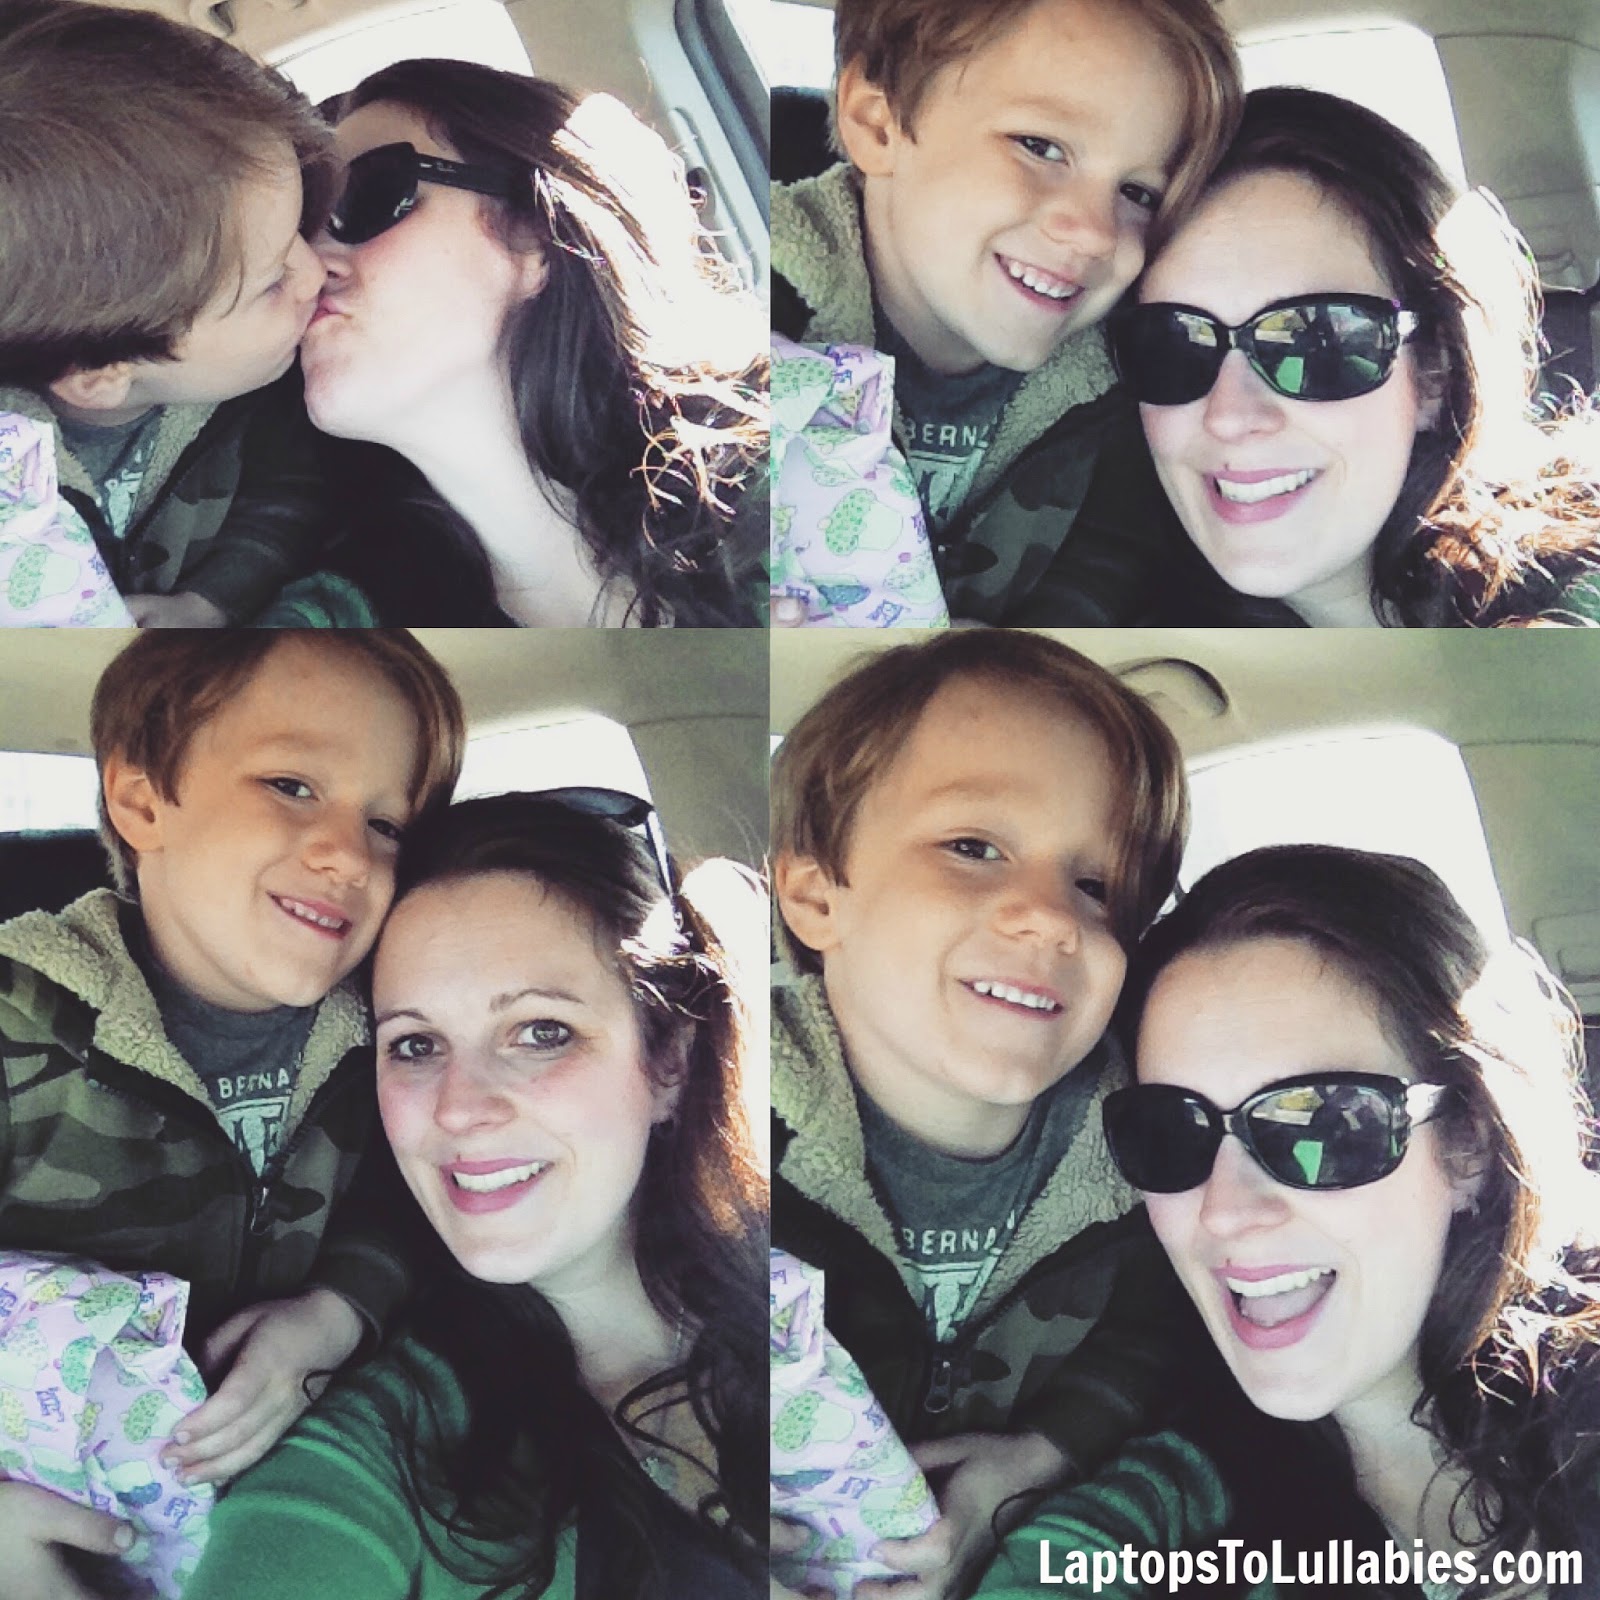
SEVEN HOURS. Seven hours of me obsessing over what he was doing, what he was saying, who he was playing with and whether or not he was paying attention or being a good listener or following the rules. Was he following in my school footsteps and being a Teacher’s Pet or was he acting more like my husband — who ran a “business” in Grade 2 where he dyed his classmates’ bottles of white glue using the felt inserts from coloured markers?
So from the very first day of school, I implemented a mandatory after-school snack that was actually an interrogation in disguise …
Continue reading in my weekly parenting column, The Mom Scene
Three ways to DIY a lettered canvas

Walking around our house is sort of like flipping through a life-size book of quotes. In frames, on canvases, on chalkboards, there are hundreds of words and phrases — mostly inspiration ones, but a lot of funny ones, too.
On the wall in my home office: “Being an artist is like being yourself for a living.” On the wall in the kitchen: “Donut worry, be happy.” Even the powder room has several prints with phrases, like my favourite “We used to want it all. Now we just want to pee alone.”
Want to get a head start on handmade holiday gifts, or just give your favourite phrase a place of honour on the wall?
Here are three different ways (and different price-points) to put words on your wall — without needing a stencil, a paintbrush or a steady hand …
Paper letters ($)
I picked up a clearance package of paper letters and numbers (Elmer’s BoardMate) that are designed for classroom bulletin boards and Grade 8 bristol board projects.
I liked the contrast of the black letters as I laid them out on the unpainted white canvas and brushed a layer of Mod Podge on top.
But as the clear top coat had dried, the paper letters wrinkled and bubbled. As Cher Horowitz would say, this attempt was “a full-on Monet” — OK from far away, but a big old mess up close.

Foam letters ($$)
For attempt No. 2, I headed straight to the scrapbooking notions aisle at the craft store and started examining the packages of foam letters to see which ones were the thickest.

The trick was to find a reasonably-priced package that contained all of the letters I needed. I found a nice set of 242 in a pretty font (“Rockabye” from American Crafts’ “Thickers” collection).
They had adhesive backs so they stuck easily to the canvas — which I’d painted with a coral ombre effect — and it ended up being a nice gift for my sister’s new apartment.

Wooden letters ($$$)
This was the most expensive option, but easily the most professional finished product.
I bought 14 primed wooden letters at the craft store for about $2 each after confirming in the store that they’d fit nicely on the canvas I was buying. I hot-glued them to an unpainted canvas, and then coated the whole thing with two coats of chalk finish paint (“River Rock” in Martha Stewart’s Vintage Decor Paint line).

Once the second coat was dry, I gave it a distressed look by dragging sandpaper across the canvas and roughing up the edges of the letters to show off their original white finish.

***
So whether you go with letters made from paper, foam or wood, this is an easy project that you can whip as a gift, holiday decor or just to remind yourself of a special sentiment. Any excuse to buy wooden letters is a good one, really.


Is the low price of DIY kinetic sand worth the mess?

Clay and sculpting dough are fun for a while, and so is driving toy trucks around in a bin of rice. But the latest sensory activity involves moldable sand designed for indoor play.
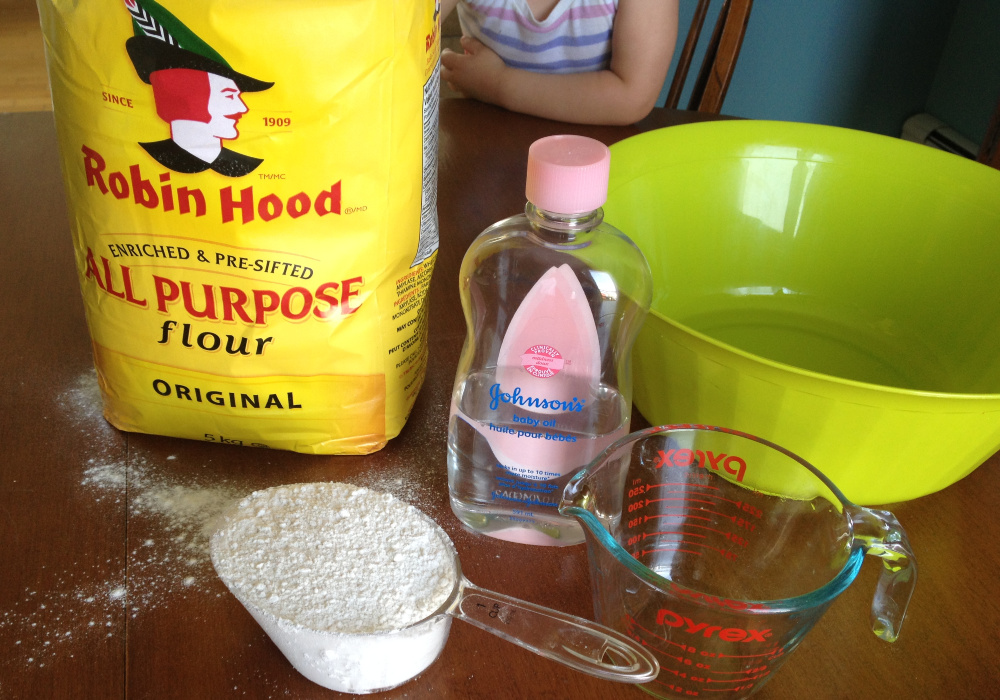
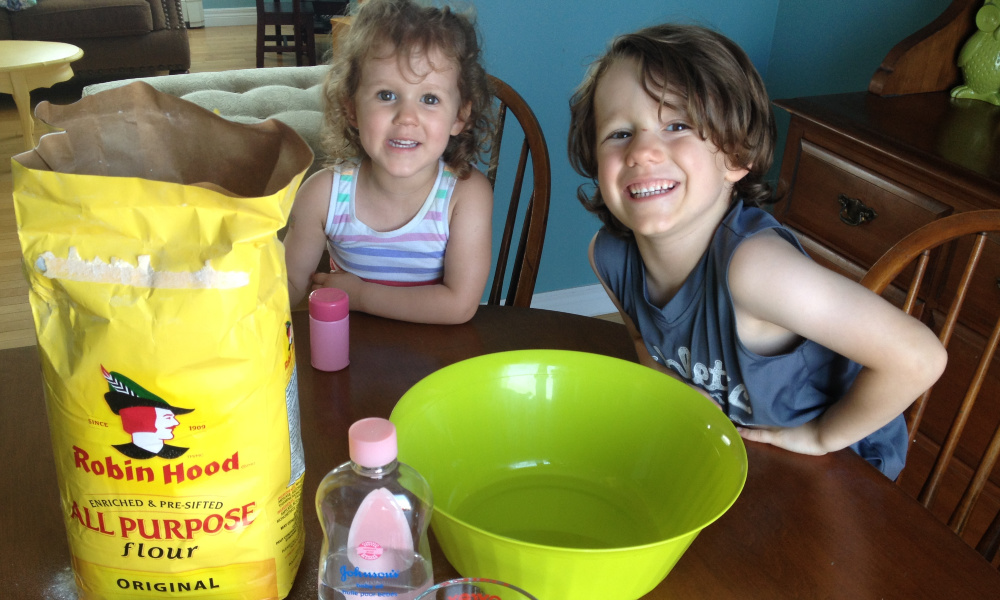
I’d been tempted to pick up packages of kinetic sand, but it’s usually $15 for a very small package. It seemed overpriced. There are plenty of recipes floating around online, so I decided to try making it for a fraction of the cost — about $3 for nine cups.
Here’s how you can make your own kinetic sand:
- Get a big bowl, and scoop in nine cups of flour. If you have multiple kids begging for turns, divide up the cups accordingly to prevent fights.
- Pour in 1 1/2 cups of baby oil. The original recipe I found called for 1 1/4 cups but I found it needed a little extra oil. Plus, it’s easy to tell each kid to pour 3/4 cup, and I like easy math.
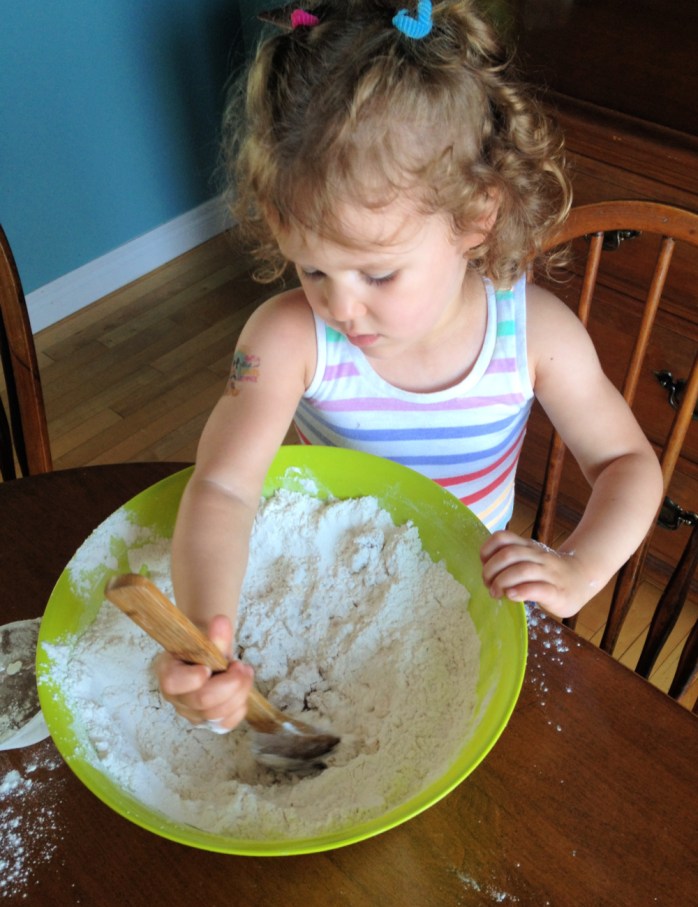
- Mix it all together with your hands. We tried a spoon at first, but it really takes kneading to combine the flour and oil. If it’s too dry, pour in some more baby oil — it smells so nice!
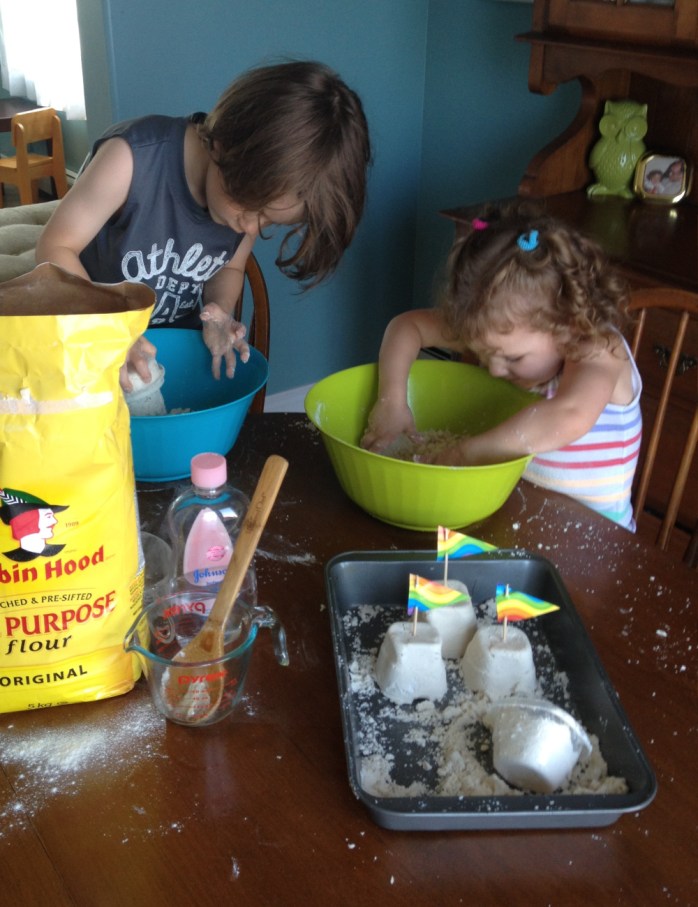
Once the sand had a good consistency, I divided it into two bowls and let the kids play with it.
We also used a rectangular baking pan so they could spread it out and build. We didn’t have any sand sculpting toys, but a few plastic lunch containers worked OK for making castles and towers.

The kids played with the sand happily for a couple of hours, on and off, and we saved it in an airtight container for future use — it’ll last a month.
But … I think now is the point where we talk about the mess? Oh dear, the mess.
We do a lot of crafts and even more baking, but this project was the most frustrating mess I’ve ever cleaned up. I’m not sure what I was expecting, really, because even traces of sand from the neighbour’s sandbox seem to track all through the house.
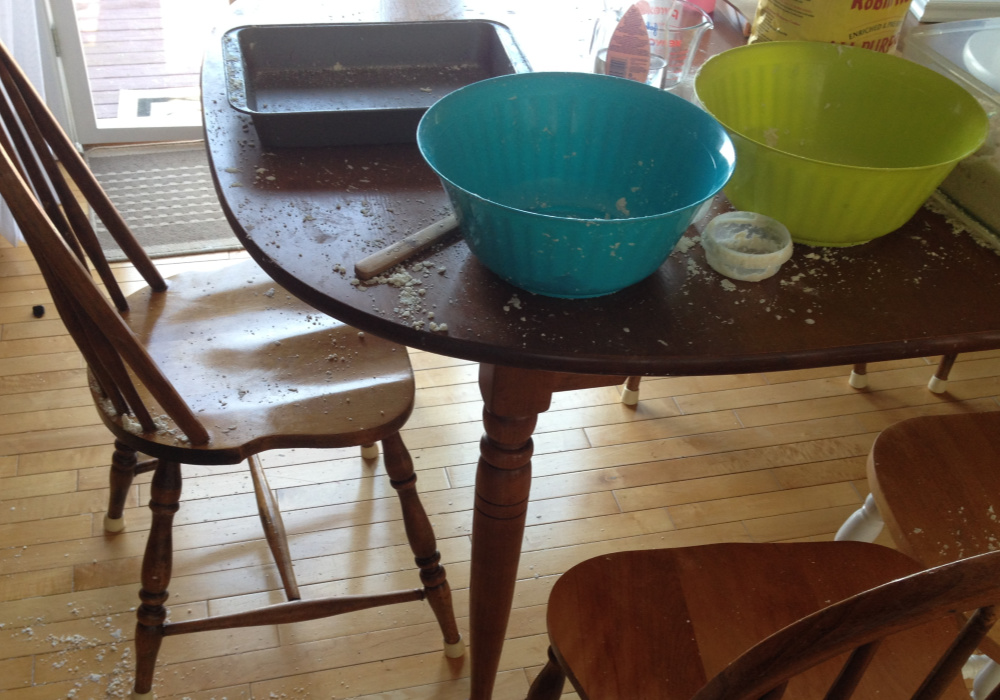
The powdery sand was in every crack of the hardwood floor, every crevice of the table and chairs, and totally coating the kids’ clothes — which, of course, meant it was soon all over the place.
It took a lot of sweeping and wiping to get it all cleaned up, and I may have muttered something about never, ever playing with that cursed sand again.
I felt some of the “real” kinetic sand at the craft store a few days later, and I must admit it’s probably worth the steep price. The store-bought sand is soft and pliable, and probably far less messy. You’d still need to sweep well after using it, but you wouldn’t be wiping up drips of baby oil, patches of flour and crumbly clumps of sand.
We’ll play with our homemade sand again soon, but I have a feeling we’ll be trying it outdoors this time.
Homemade kinetic sand: Is the low cost worth the mess?


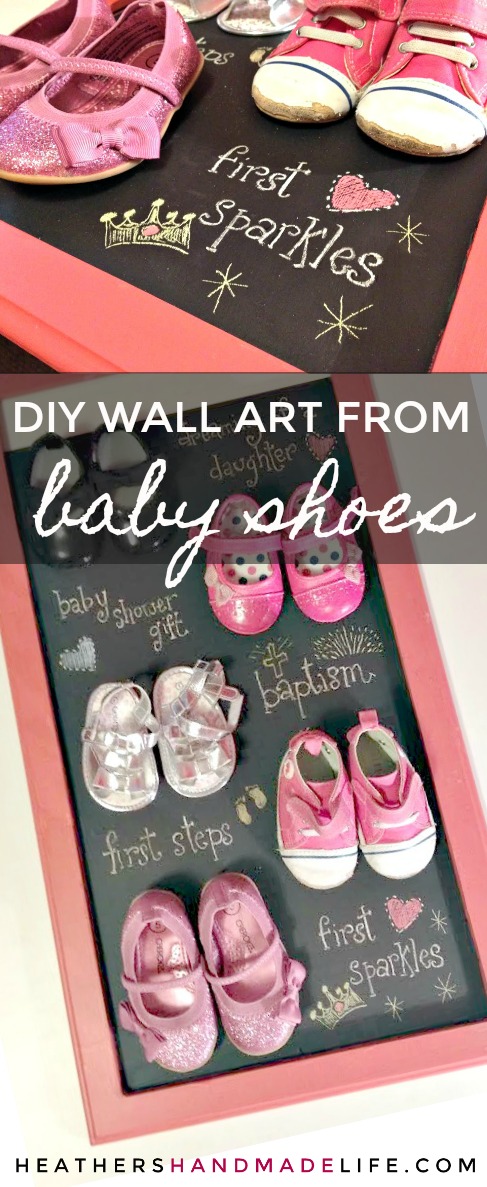
DIY wall art from baby shoes

When our son was a baby, he pretty much had one pairs of shoes at any given time. They were all bland combinations of navy blue, light blue, and grey — and when he outgrew a pair, we bought a larger pair that looked nearly identical. They matched everything he wore, and it was all very simple, really.
Things have been quite different with our daughter, who is now two.
Baby girl shoes are like chocolate-covered potato chips to a mom — they are more expensive than they should be, but you don’t even care because they are dreamy and YOU MUST HAVE THEM.
Our daughter, Charlotte, actually acquired her first pair of shoes years before she was born. My mom picked up a pair of impossibly tiny patent-leather Mary Janes and tucked them into her jewellery box, hoping that someday I would have a baby girl. They were her first Mary Janes of, uh, many.
Thanks to gifts, sales, second-hand purchases, and hand-me-downs, Charlotte quickly amassed a huge shoe collection. When my good friend had a baby girl last year, I had more than a dozen pairs ready to hand down.
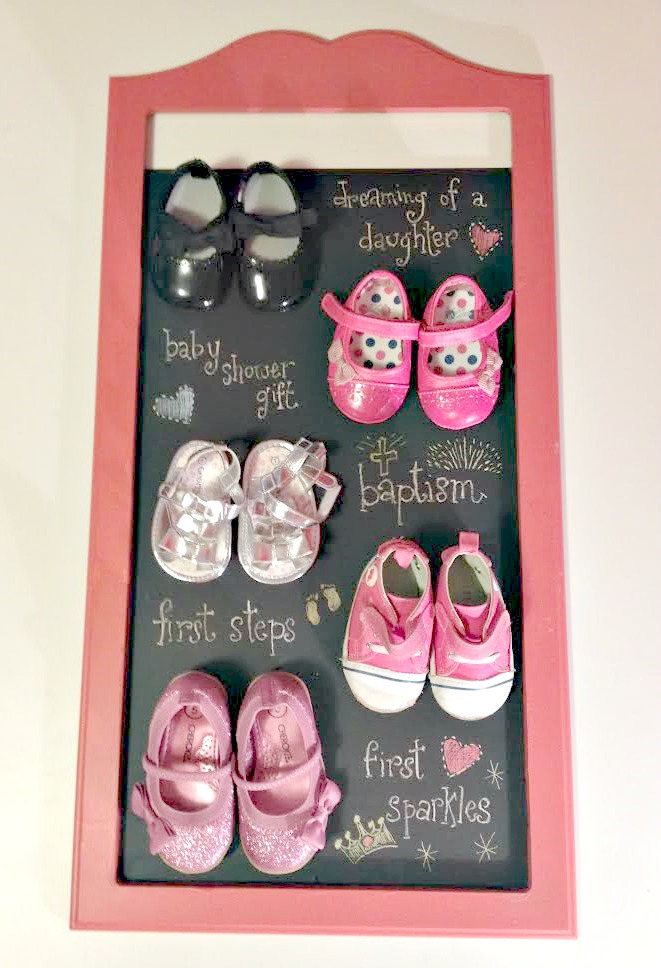
Even though I’ve been good about parting with these adorable little shoes, there have been a few pairs I couldn’t give up — like the itty-bitty Mary Janes from my mom, the silver sandals Charlotte wore to her baptism.
Instead of keeping them buried in her keepsake box, I decided to give them a place of honour …
I picked up a wooden calendar holder at a yard sale for a quarter. It had a weird pattern sprayed onto it from a previous owner’s project, but I knew I could just paint over that.
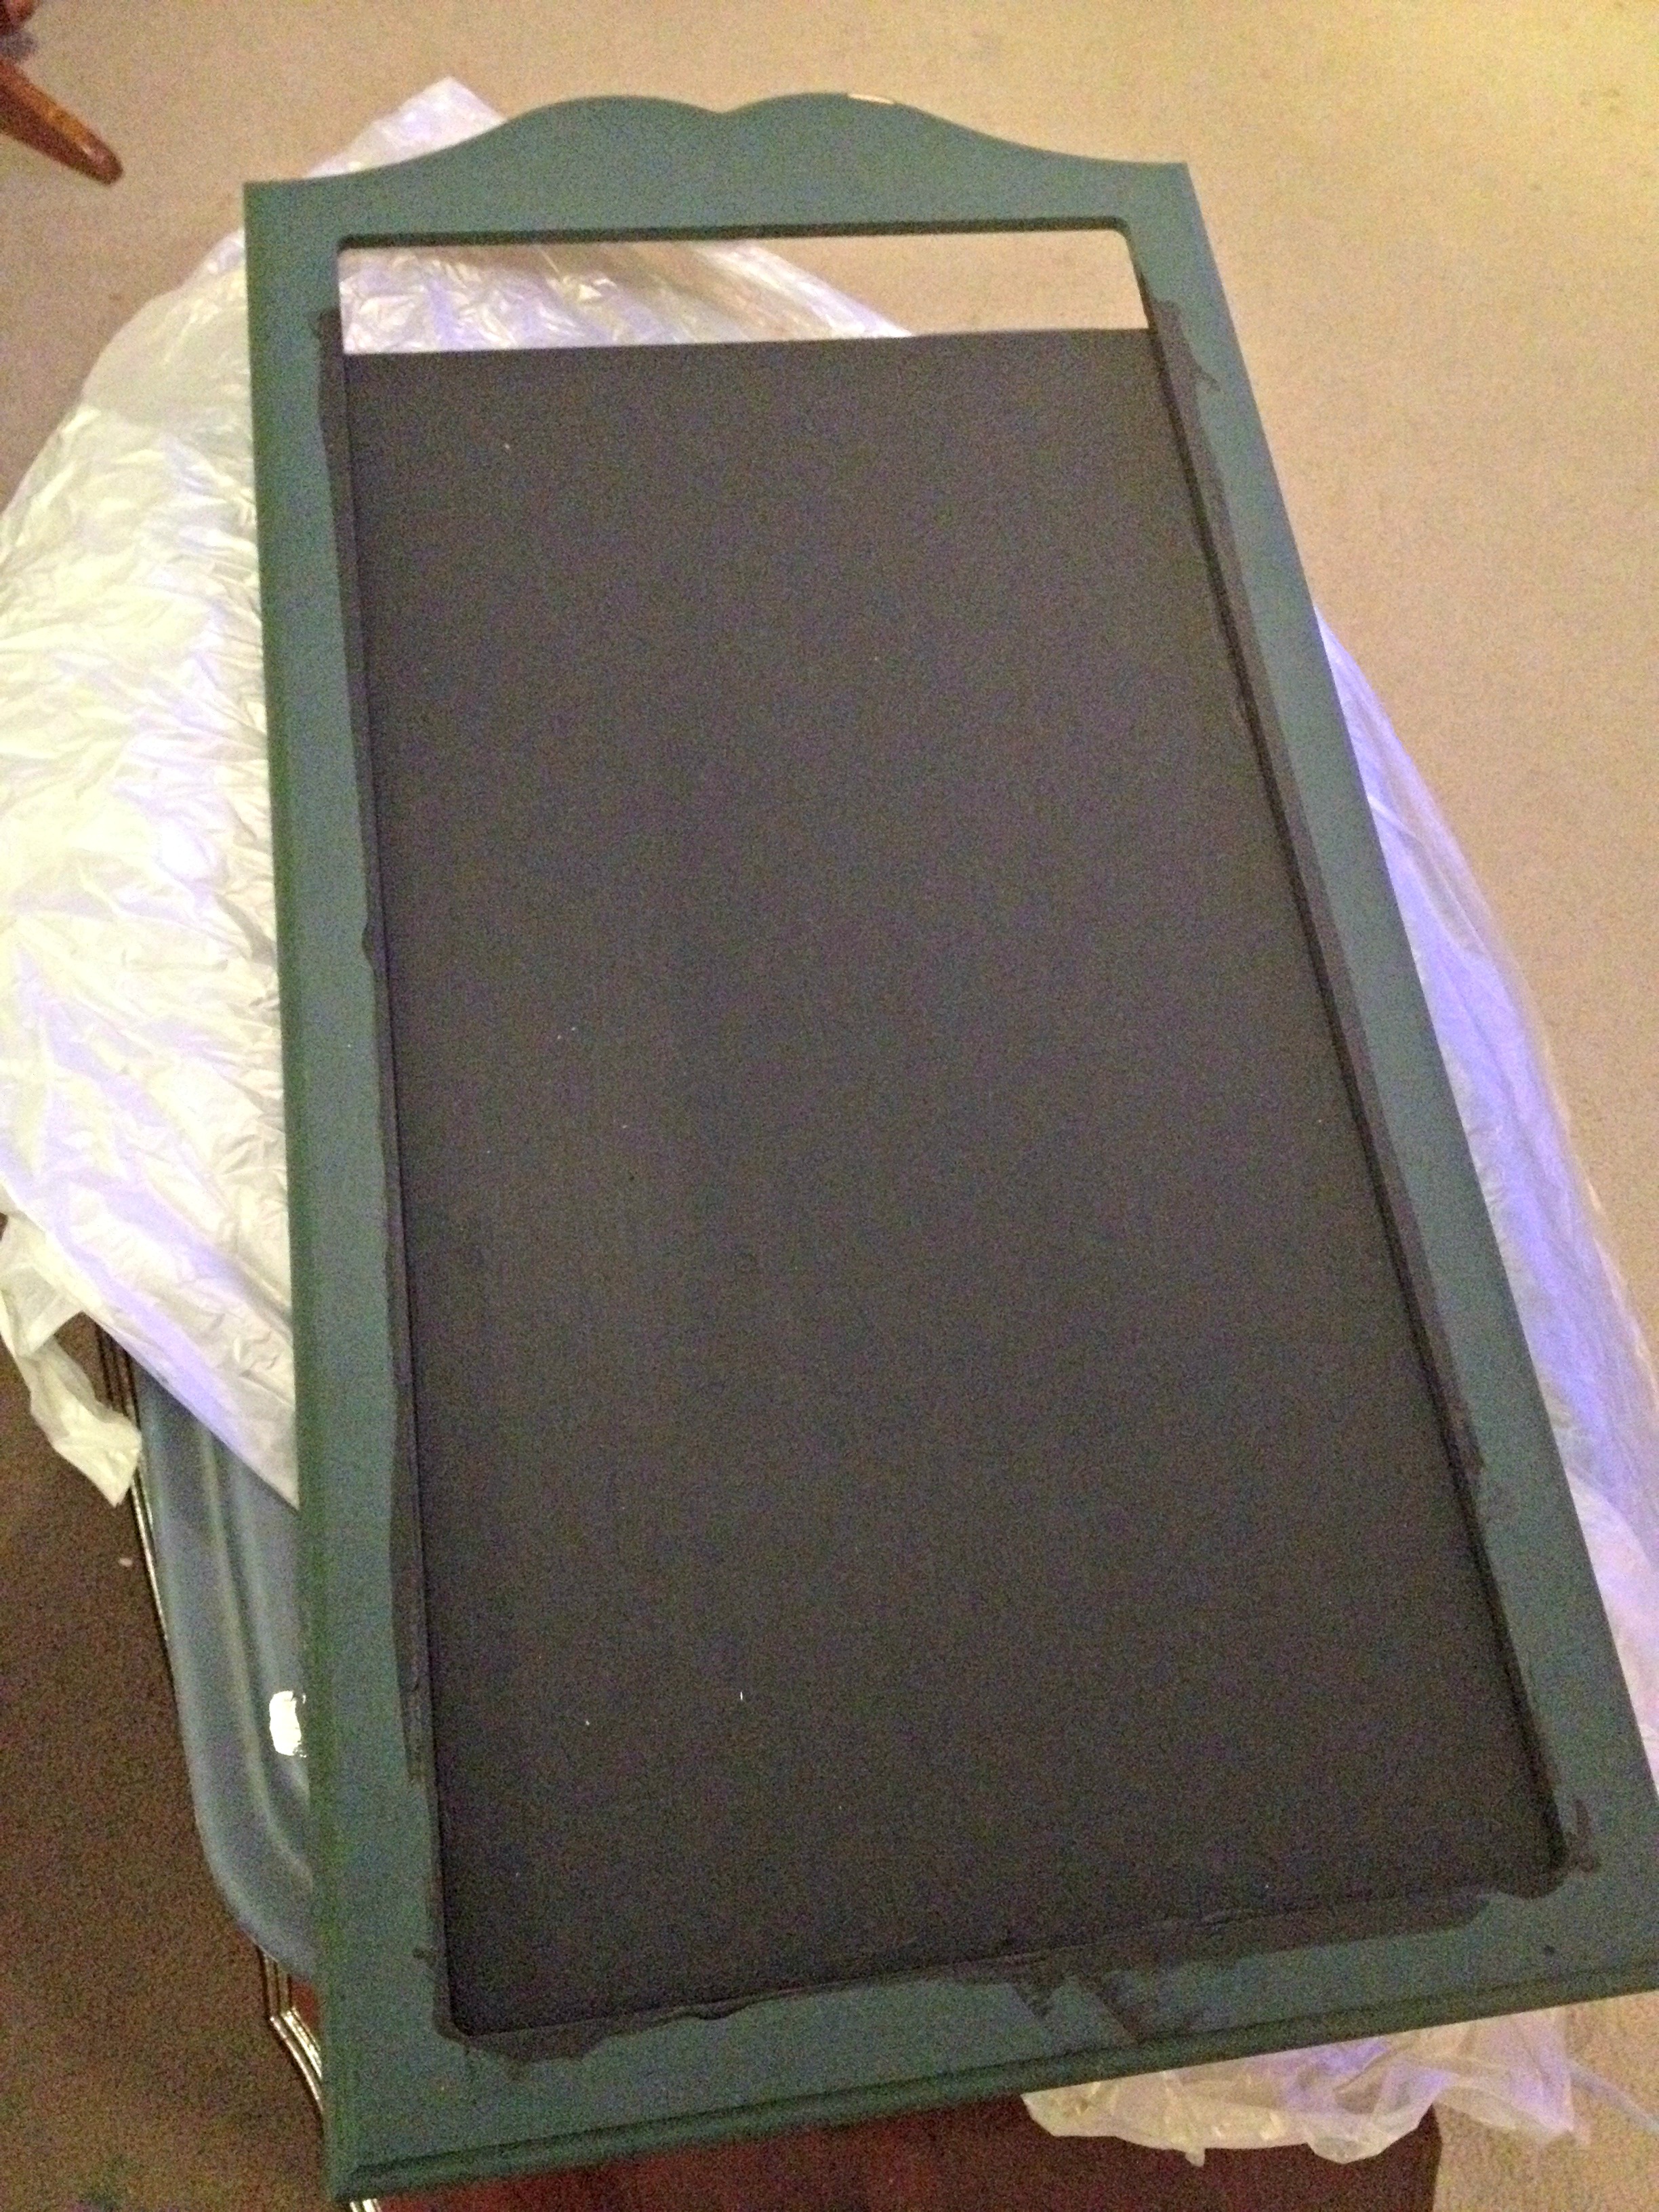
I coated the main surface with chalkboard paint from my never-ending can. I’m pretty sure I will have the same can for the rest of my life, because it lasts forever.
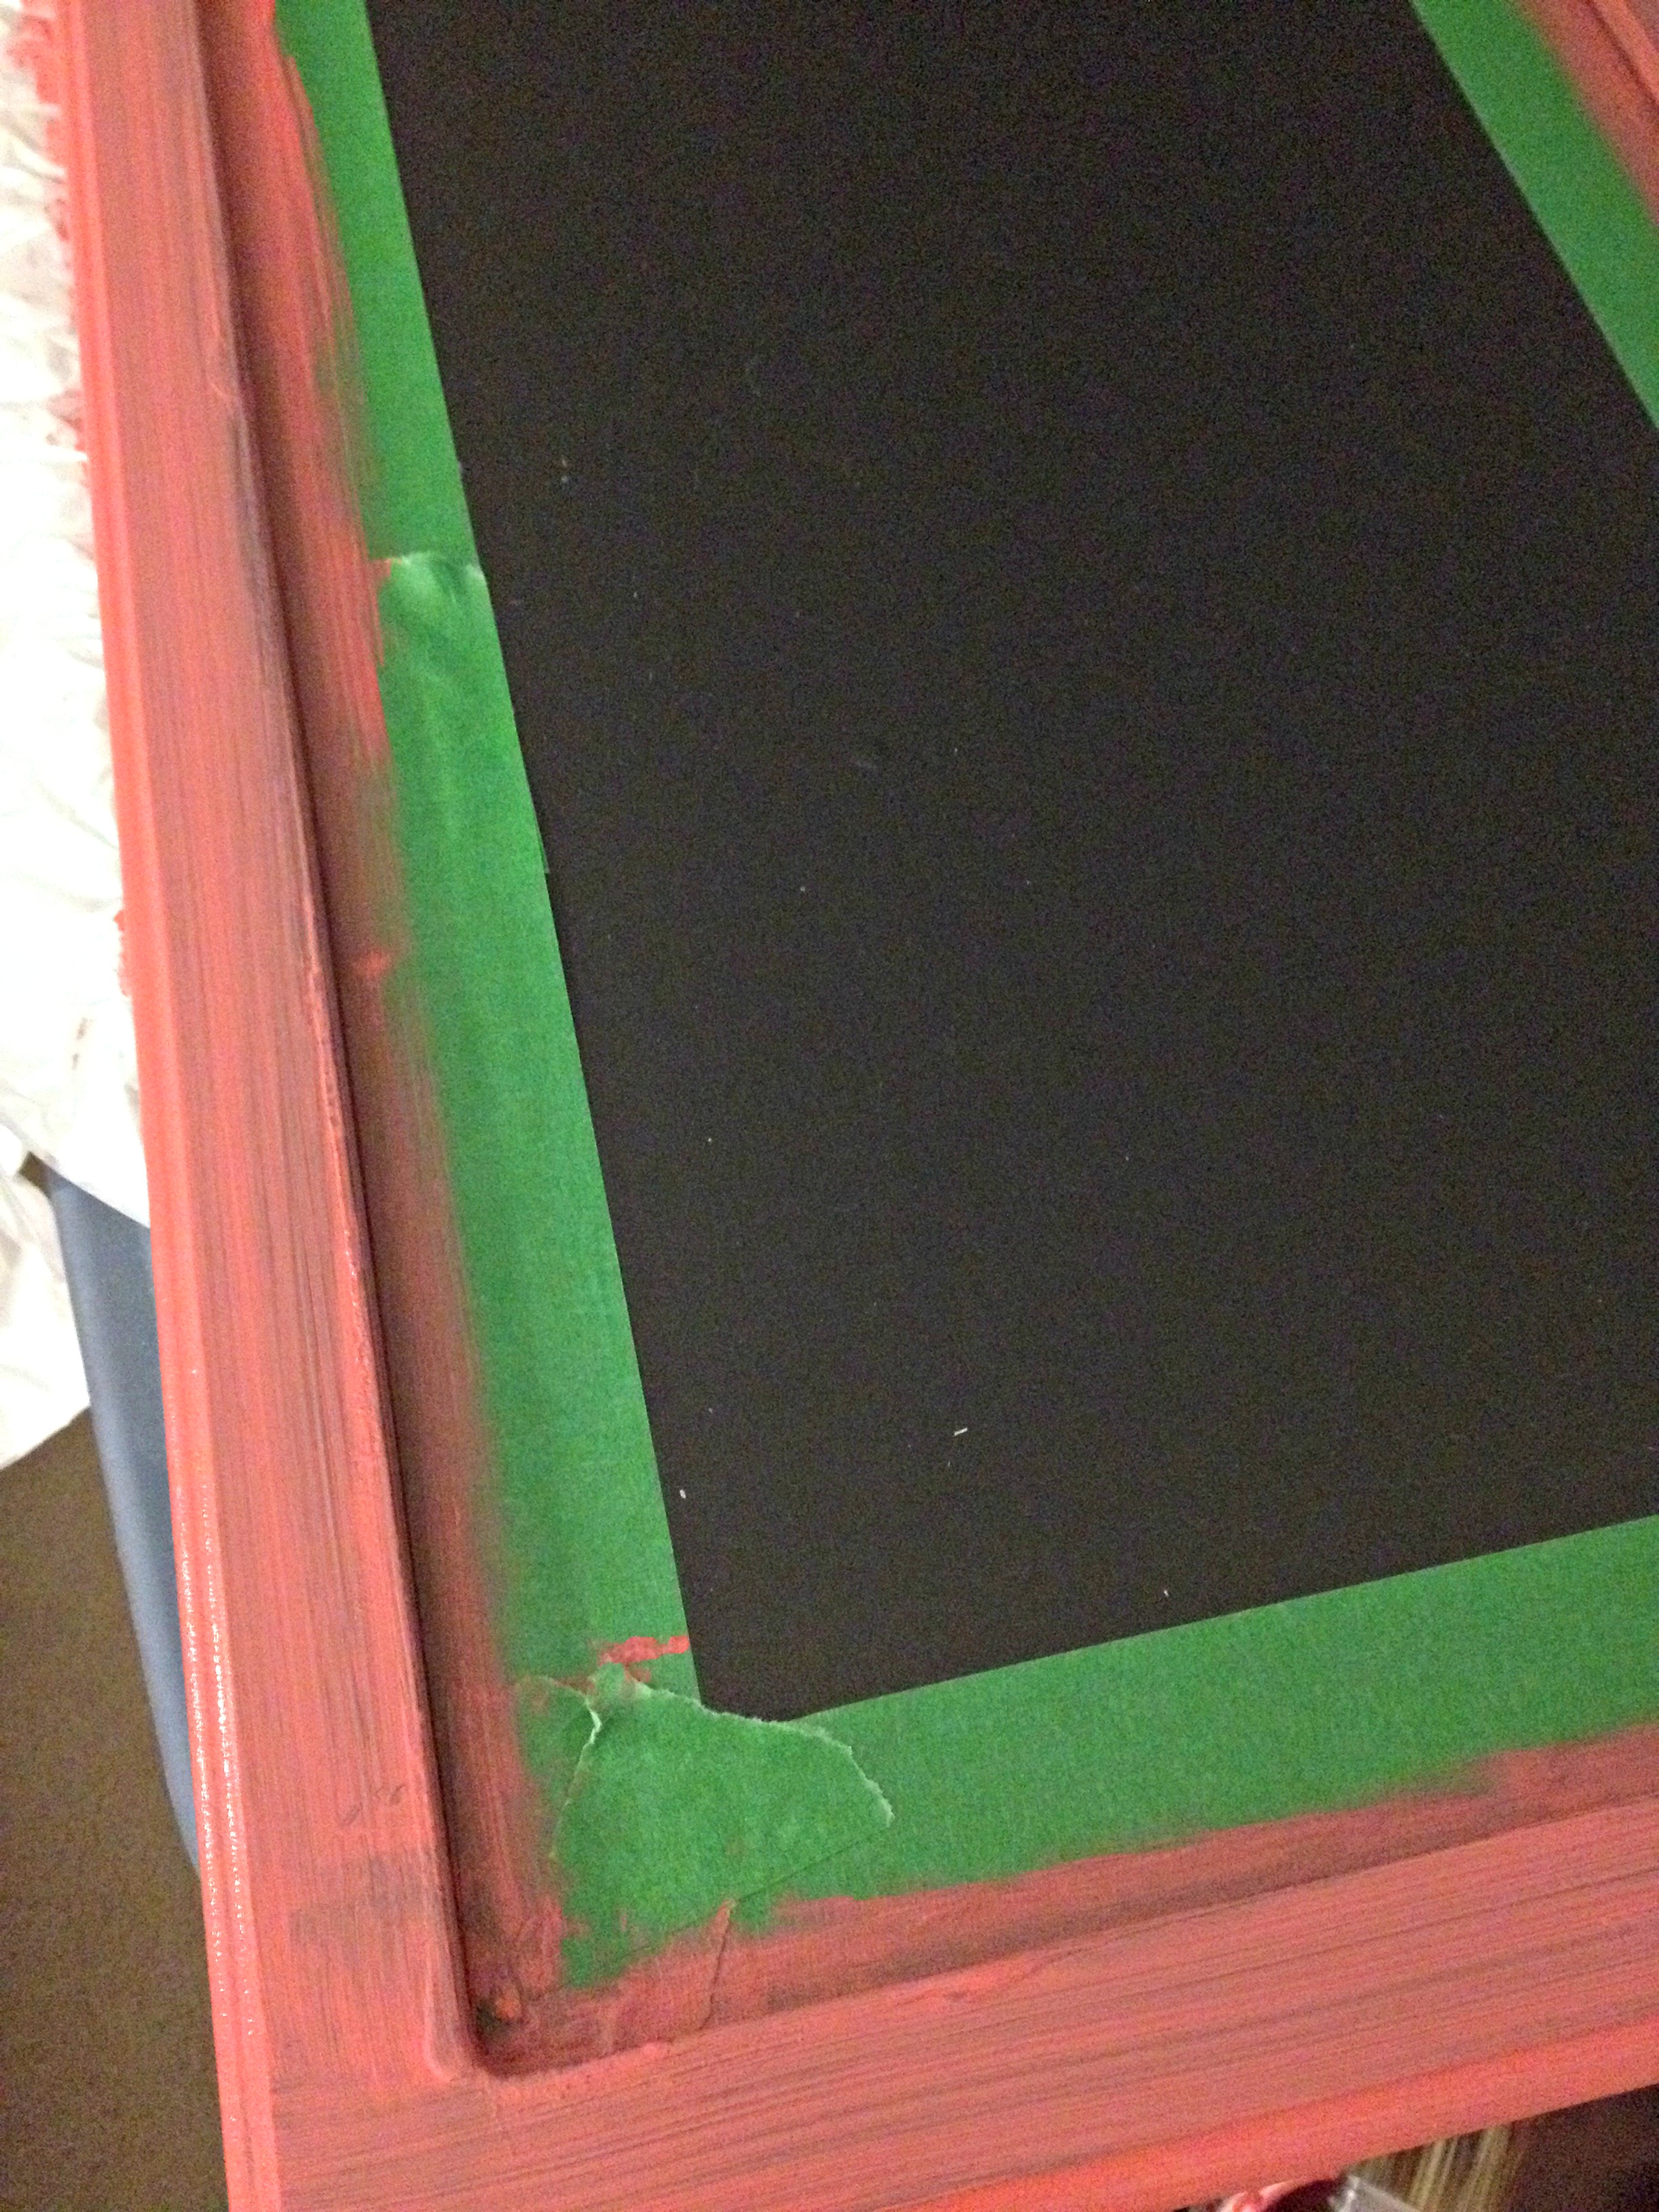
I taped off the chalkboard area, and used some leftover coral paint (CIL’s “Tea Rose”) on the trim.
I like to buy hook-and-loop picture-hanging strips by the roll — it’s much cheaper — so I cut some small pieces to fit behind the shoes. I stuck one side to the chalkboard surface, and the other side to the bottom of each shoe.

For the lightweight shoes — like the paper-thin baby sandals — I just used a bit of hot glue to secure them to the board.
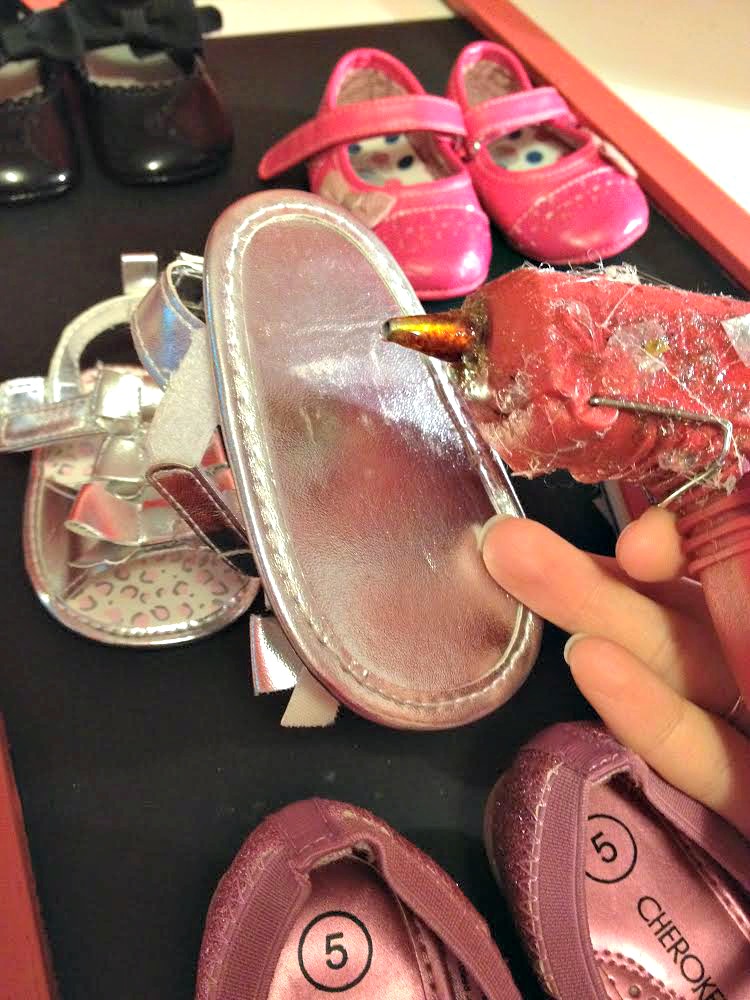
I wanted to write a special message beside each pair of shoes, because I’m the only one who really remembers the meaning behind each pair. I printed my letters with pencil first, and then traced the letters with chalk. I also added a few embellishments (stars, hearts, and a crown) because I couldn’t help myself.
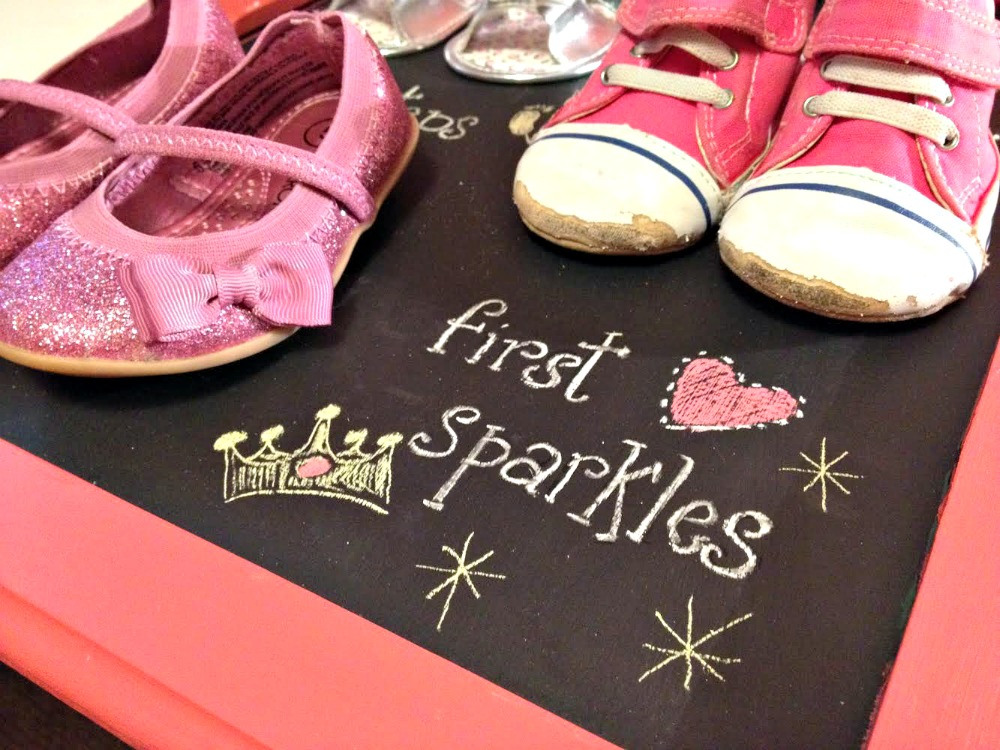
Every pair of shoes has their own story to tell, and now we can smile when we walk by this display in our upstairs hallway.
If Charlotte has a daughter of her own someday, the sticky strips and glue will peel off and the shoes will be good to wear again. But by then, we’ll probably all be wearing space boots with rocket boosters, right? Let’s hope!


As featured on …


