
DIY hanging bars

Three summers ago we built a simple wooden teeter-totter for $60 and the kids still love it today. It opened our eyes to the genius of building your own playground equipment from solid wood, rather than spending hundreds or thousands on dinky metal and plastic sets.

Last summer, we built a set of monkey bars for $175 and they’re still the most popular thing in our backyard — well, maybe second to the swings.


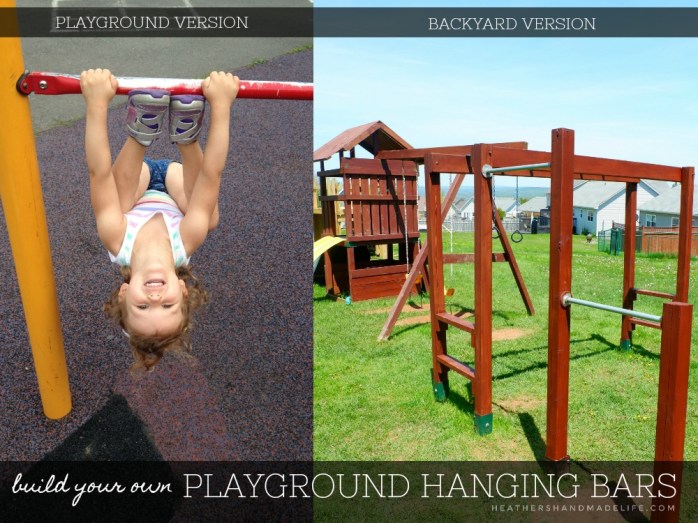
This summer, I decided we could expand on the monkey bars and add two hanging bars. The kids love flipping around on the ones in their school playground, and it felt like a natural next step in our backyard.
It started off pretty similar to the monkey bar build — the same pressure-treated 4×4 posts and the same giant ground spikes* to keep them snugly nestled in the yard. Because we were building the bars off the existing monkey bars, we just needed two new posts.

(My handy husband even remembered the trick he “invented” last summer, where he used a small scrap of 4×4 to help him pound the spike into position before adding the real post.)

We’d purchased the monkey bars as a set, but the hanging bars needed to be hunted down since they’re not a standard piece of playground equipment. It involved visits to several different stores as we shopped for something decidedly unusual.
We looked at bars that would be too thick for our kids’ little hands, and bars that would be too skinny for swinging comfortably.
Once we figured out the right thickness (3/4”) we started running into issues on the length. It was seemingly possible to find suitable bars that were 35” long like the ones at the school. We ended up settling on bars that were 24” long, and they worked out fine in the end — narrower for sure, but the kids could still flip on them just fine. They even came with their own flanges for screwing into the posts.
UPDATED TO ADD: Galvanized 24″ 3/4″ metal pipes from Canadian Tire.
I had measured the hanging bars on the school playground so we could copy them as closely as possible. The tall bar was 69” off the ground, and the low bar was 42” off the ground, so we stuck with those measurements.
The set of two bars took a single afternoon to build and they were ready for “testing” by the time the school bus returned. it seemed like half the neighbourhood kids flocked to our yard to try them out, so it was another week before we got around to staining them to match our deck (Sico’s “Autumn Brown” in exterior semi-transparent).
Now that our backyard has a playhouse, swings, a teeter-totter, monkey bars and hanging bars, I’m not sure what’s left to add, but I’m sure we’ll come up with something.
We always do! 😉

One Comment on “DIY hanging bars”
So what do you think?


As featured on …


Pingback: DIY monkey bars