
What I’m learning about oil painting

Back in January I shared that my Christmas present from my husband was OIL PAINTING LESSONS — yeaaaaaaaah! — so I thought it was time for an update.
Remember my lemons? Well, our class runs in four-week sessions and I managed to finish my painting during the fourth and final class of the first session. (I’m partway through the second session now — more on that later!)
I took pictures of my progress at the end of each class so I could see how the lemons (and everything else in the painting) were changing from week to week.
During my first two-hour class, I gridded out the picture, sketched it onto the canvas, and did my “underpainting” a.k.a. It’s Just The Base Layer, Heather, Don’t Freak Out.

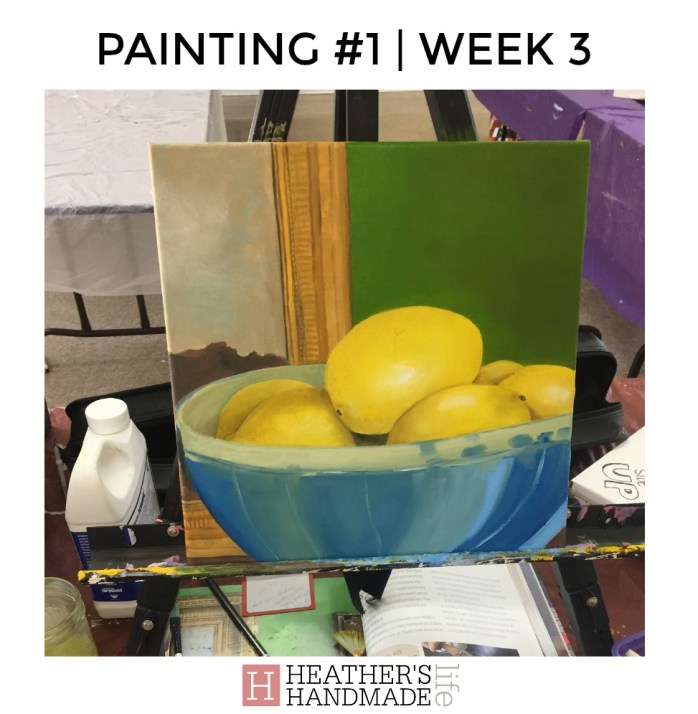
During the second class, I added some detail to the picture frame (teeny tiny nervous brushstrokes) and my instructors described how to start making certain areas lighter or darker — “highlighting and shadowing.” Instead of a watery-looking green background that was mostly one colour, I darkened the right side which gave everything a bit more dimension.
One instructor kept urging me to put “big white splotches” on the lemons for their highlight, and I was SO FRIGGING SKEPTICAL because since when does a “big white splotch” sound like something that’s gonna turn out nicely? Really? But I did it, and she was SO RIGHT. Now I’m all about the big white splotch. 😉
Oh, and the bowl was frustrating me, so I painted over it with bolder blues. And I still didn’t like it. Oh well, the lemons were looking better. 
The third two-hour class was when things REALLY began to come together. I took the white splotches even further to really shine up those lemons (yes, I was sick of thinking about lemons by this point).
I spent most of the class fighting with the lemons’ “shadow” and worrying I was making them “look too dirty.” One instructor had a great tip about doing a faint dark line around part of a lemon, and then using a clean + dry brush to basically “feather” the dark into the light to create a natural shadow. Once I got the hang of that, I was PUMPED.
I also agonized over the bowl, trying to give it the hand-painted look it had in my inspiration picture without looking like I’d had a stroke while painting it. I tried to copy it as closely as possible, but it did NOT look good.

In the final two-hour class, I decided SCREW REALISM and took some creative liberties with the freaking hand-painted bowl. I painted over the drippy parts on the rim (since they just didn’t look right in the painting) and highlighted certain points of the rim, and got everything to a point where my instructors suggested it was done. Of course, I listened — the fear of continuing on and RUINING IT was a very real fear.
I was finished, and it felt great!
I didn’t work on the painting at home, so it was finished in 3.5 classes (7 hours total, including the time to sketch on the canvas).
Here’s a look at how it progressed each week. It almost looks like a cartoon in the Week 1 shot, doesn’t it? Then the lemons slowly get dirtier and big-white-splotchier (um, I mean “more shadowed and highlighted”) each week.
In summary, completing this first oil painting has taught me …
- The majority of the work is lightening colours and darkening colours.
- You will be shocked by how many shades of a particular colour make up one tiny area.
- The prettiest colours are sometimes the murkiest, strangest ones. (The bluey-green painting in the background, for example)
- Don’t be afraid of white splotches — they won’t look as weird as you think, especially when you stand back from your work.
- Don’t be afraid of going super dark in some areas. No, your lemons aren’t too dirty. 😉
***
I’m two classes into the second four-week session, and I’m attempting … a portrait of my babies!
(Of course, as soon as my classmates saw what I was doing, they all said portraits were super hard and they would NEVER attempt one and I was like … oh crud.)
More on that soon, including how Week 1 I’d officially named my painted-children “Ghost Eyes.”
xo


As featured on …


