
DIY charging station

We lost power twice this week, and both times my phone was nearing the end of its battery life … and I was on deadline. Without my phone to provide an emergency hotspot internet connection for the (also-dying) laptop, well, you can imagine how this left me.
As long as there’s snow and ice (and wind and rain, apparently), I’m going to be better about keeping everything charged. For my work, you see … not just because the kids were whining about the darkness and needed the warming glow of the iPad to soothe themselves.
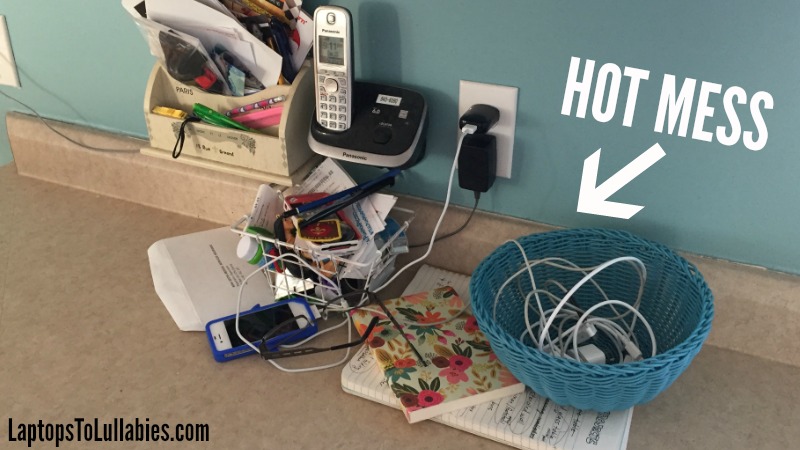
I’d been planning to make a charging station for a long time because I was sick of the mess of cords across the kitchen counter. (The mess included receipts, pens, junk mail and containers of bubbles, too, but let’s focus on the cords.)
Months ago, I picked up a decorative white wooden crate from Michaels that was perfectly distressed with little brass details on the corners. Normally I’d try to DIY something like that, but it was absolutely perfect — and I scored it for 40 per cent off with a coupon.
I’d been planning to build a charging station from scratch, but decided this little crate was perfect in almost every way. It just needed some kind of dividers or compartments for the different-sized devices. I bought a special plug with extra outlets — including USB ports — and then … the project stalled.
The crate sat on the counter and we heaped the devices, cords and headphones inside of it, behind it and in front of it. Because the crate was always messy, certain people (ahem, like the one I married) felt it was cool to drop random items in there. When I was cleaning it out, I found four different pairs of his sunglasses!
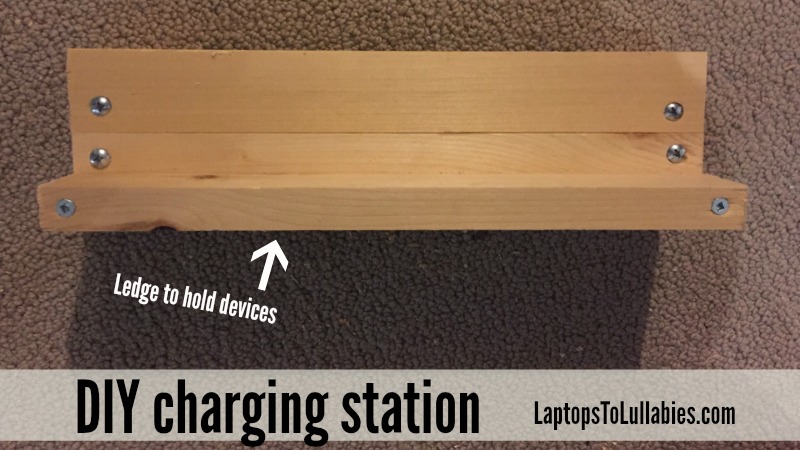
This week, however, I decided it was time to finish what I’d (barely) started. I grabbed a couple of 1×2 scraps and held them in front of the crate, deciding what exactly I was going to do. The trouble with dividing the crate was that the little iPods would be hidden at the bottom, and there needed to be lots of room for the chunky second-gen iPad.
I decided to screw three small pieces of wood together to make a ledge for the littler devices — it’s basically a wooden doll-sized couch, if you want to get technical. I didn’t even screw the ledge into the sides of the crate because it fit in snugly when I wedged it inside.
I painted the ledge with the closest match I had on hand (“Limestone” by Fusion Mineral Paint) and brushed a bit of it over the crate, here and there, so the colours blended. Once the paint was dry, I distressed the ledge with a bit of sandpaper and drilled four hours for charging cords.
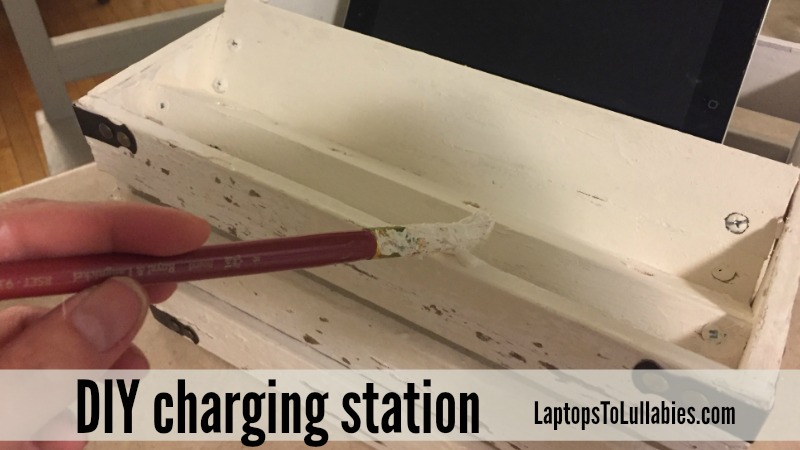
(My biggest drill bit wasn’t very big, so just picture me swirling it around trying to make the holes bigger — like I was scraping the last bit of whipped cream out of the mixing bowl.)
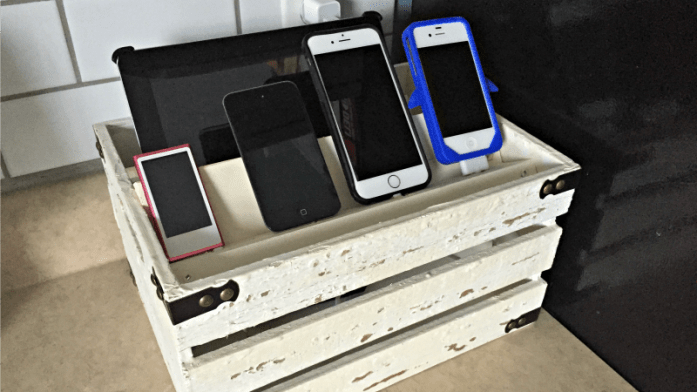
I popped the cords through the holes, strung them through a crack at the back of the crate, plugged everything into the wall, and I was done!
The ledge holds our iPhones and the kids’ iPods, and our iPad fits nicely in the space at the back. Because the ledge is completely removable, I can tweak the charging station as our devices change or even use the crate for something else down the road. I also store any extra chargers and sets of earbuds in there so it’s a one-stop shop for that stuff.
Now if only all of the counter clutter was managed so easily!
 |


As featured on …


