
Free coffee table makeover

I was starting to worry that my favourite week of the year was going to be a bust. Clean-Up Week was almost over and I had yet to pick up a single curbside treasure.
Luckily, I scored a few great pieces on the last day before the garbage trucks rolled through town to pick everything up. My best find was this oval coffee table. It was in good shape, but I suspect no one had snagged it because it was missing a huge glass panel. (And what’s the point of a coffee table with a gaping hole?)
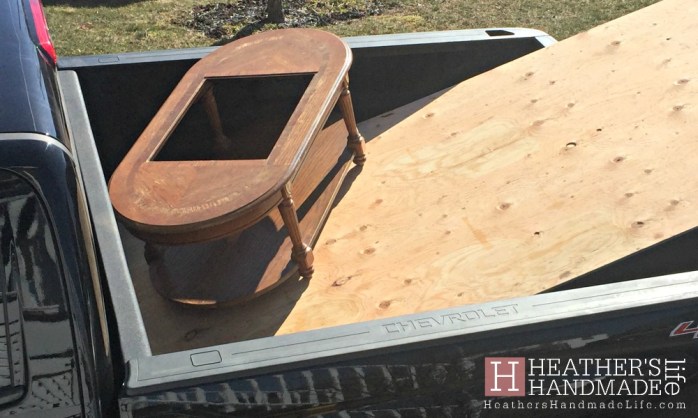
It was a beast of a thing so I decided it needed to be trimmed down a bit. Our living room isn’t very big and our sectional sofa takes up a lot of room. We’d gone years without a coffee table and only missed having one sometimes — we certainly didn’t want or need anything huge.

My husband took it apart and lopped off each end of the ovals, taking the table closer to a square shape.

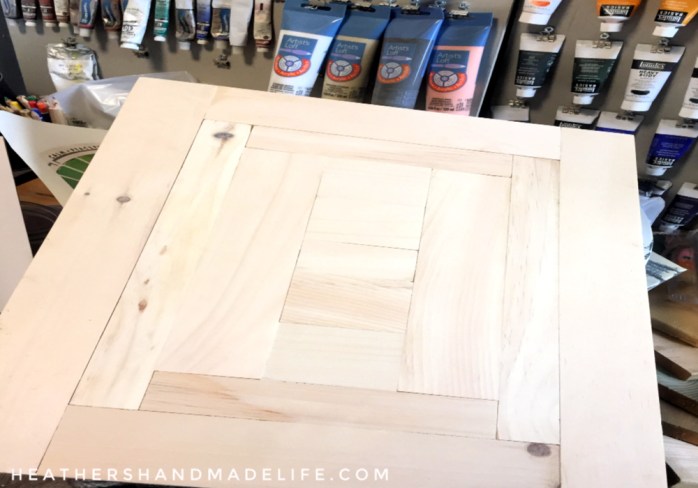
Then I took the pieces over to the deck to start painting, and left him with a tiny request: Build a cool-looking wooden panel, ideally with a herringbone pattern, to replace the missing glass.
I left him in his shed, pondering how he was going to make something look cool and what the heck I meant by “herringbone.”
After I sanded everything lightly, I brought out a type of paint I haven’t used in a while: Miss Mustard Seed’s Milk Paint. *dramatic clash of symbols*
While it’s true that I love everything I’ve painted with this stuff, it’s not my go-to product. There’s mixing and whisking and waiting and it tries my patience, BUT the results really are awesome. And how could I resist a colour called “Farmhouse White”?
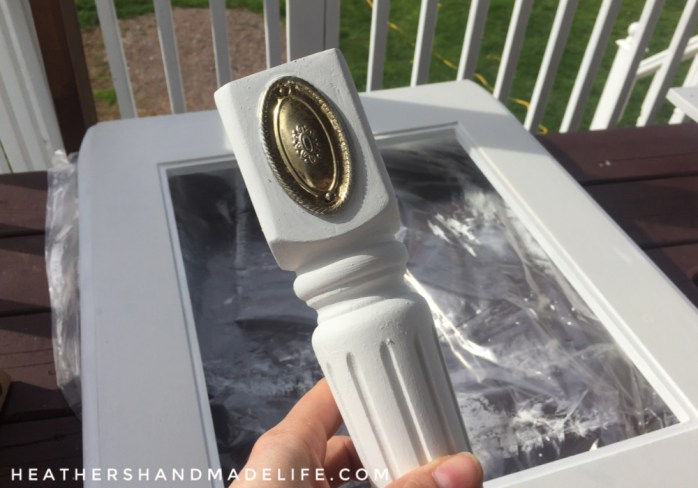
Because this curbside coffee table wasn’t top-quality wood and I didn’t sand it that well, I mixed in some bonding agent to help the paint adhere.
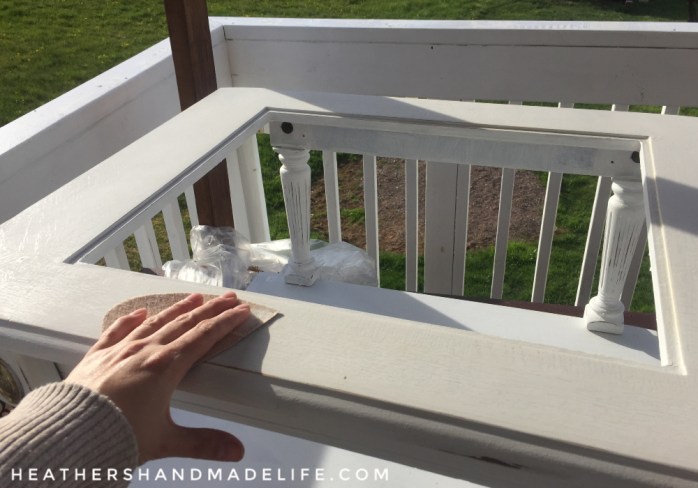
The sun dried everything quickly, but I was making quite a drippy mess since milk paint is thin and I am a very sloppy painter. Painting the little nooks and crannies of the table legs was especially frustrating, and the table’s shelf was super cheap wood that wasn’t taking the milk paint well at all.
Confession time! I must admit to caving the next day and adding a quick coat of my beloved Fusion Mineral Paint — just on the legs and bottom shelf — to even things out. “Casement” was a good enough match to “Farmhouse White,” and the whole thing looked much better after a bit of distressing, too.
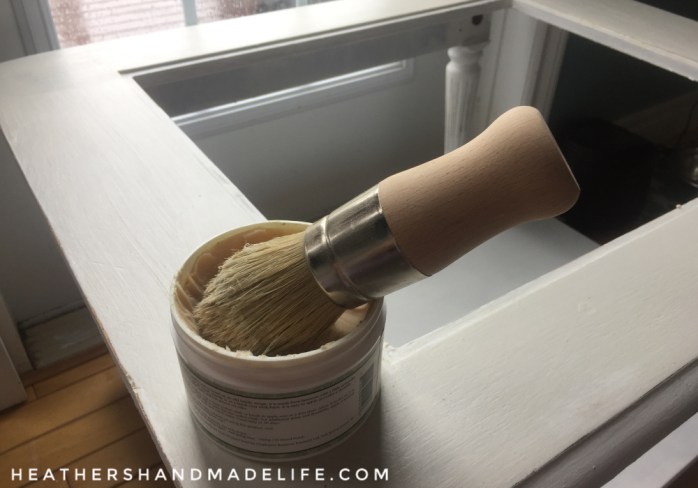
When I was happy with the top of the table, I sanded the milk paint until it was smooth and then brushed on a coat of wax. Once I’d buffed it with a soft cloth, the tabletop was silky smooth to the touch — I call this the “Ahhhh moment,” when the frustration of using milk paint finally pays off.
My handy husband was ready with my tabletop insert, and he’d done a wonderful job. No herringbone pattern — “too many angles,” he said firmly — but he’d created an intricate pattern of squares and rectangles and sanded the whole thing smooth. I loved it.
(Let’s skip over the fact that when I begged my tired-yet-handy husband to help me reattach the table’s shelf and legs — right after he woke up from sleeping off the night shift — he wound up with a drill bit-sized hole in the palm of his hand. Whoops.)
I stained the panel a warm brown (Minwax’s “Dark Walnut”) and applied coat after coat of polyurethane to protect it — sanding lightly between coats to make it velvety smooth. Once it was dry, it took two seconds to set it into the top of the table, thanks to the little grooves he’d routed into the bottom.
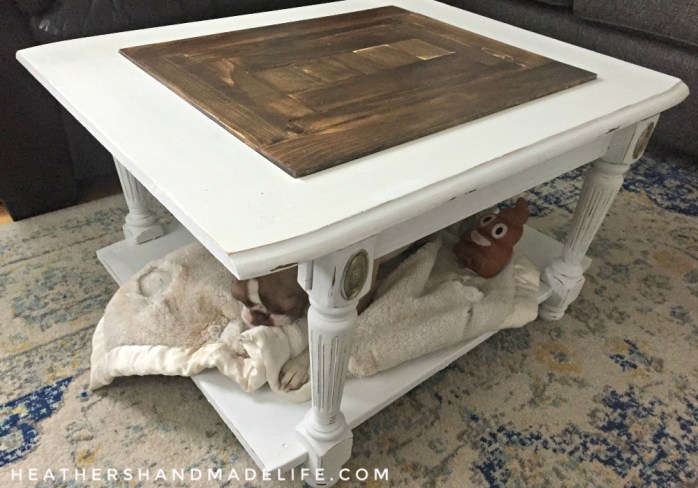
It may have taken years, but we finally have a coffee table again! It looks nothing like the hunk of junk I snagged from somebody’s curb, it matches everything in our living room, and it was a great husband-and-wife collaboration (with minimal squabbling and only one injury).

What not to say about Kate Spade

I didn’t want to write about suicide on my son’s eighth birthday. But then, I didn’t want to hear what I’ve been hearing, either.
Kate Spade took her own life yesterday, and it seemed like everyone was talking about it. Suicide brings out the Judgy Judys, and I found myself cringing again and again. It’s fine to say “I don’t understand that.” It’s fine to say “Such a shame.” What is NOT FINE is to say … well, pretty much anything like this …
“She designed pretty purses! She designed floral notebooks with inspiration phrases! How could anyone so HAPPY do something like THAT?” NO.
“People who do that are just cruel” NO.
If you have never been suicidal, if you have never suffered from the deep darkness of mental illness, if you could not FATHOM taking your own life, then please refrain from saying anything other than “How sad.”
Because you DO. NOT. UNDERSTAND.
“Suicide is selfish!” NO.
“She had everything in the world to live for!” NO.
“Jeez! What a dumb thing to do.” NO.
“How could somebody DO that to their family?!” NO.
“She had a 13-year-old daughter! How could a PARENT kill themselves?” NO.
“What’s wrong with people?!” NO.
“She had it all!” NO.
“… ‘The last person on earth you’d think would take her own life.'”
“This ‘mental illness’ business has gone too far.” NO.
“What a stupid thing to do.” NO.
***
I don’t know Kate’s story — I just own a bunch of her notebooks because I like her style. But I do know what it feels like to hurt. What it feels like to think things aren’t going to get any better. What it feels like to think the only way to stop hurting is to make EVERYTHING stop, permanently.
How sad.
When your husband’s (sort of) in labour

It’s strange watching your husband in the throes of a painful labour, but that’s sort of what happened to us yesterday.
I knew the pain was bad when he woke up early in the afternoon, not long after going to sleep, after being at work all night. He texted to say he was having bad stomach pain, and I rushed upstairs to find him pacing the hall — his eyes squeezed shut. This was definitely not a run-of-the-mill cramp.
“Appendix!” I thought immediately. Except I knew nothing about a person’s appendix, really, except that sometimes they burst or rupture or something. I Googled “appendix pain” and it showed someone clutching their right-hand side in agony. Ah-ha!
I wanted to rush him straight to the ER, but he wasn’t convinced. So I called 811, the medical advice line, knowing they’d tell us to go and figuring he’d listen to them. (A great resource, but I could call 811 complaining of a papercut and they’d suggest going to the ER to have it checked.)
Fifteen minutes later, we were zooming off to the hospital. He was triaged quickly and marked as “urgent.” He was in too much pain to sit down so he paced, occasionally doubling over. People kept shooting him nervous looks. He was pale and sweaty and the pain intensified until he refused to leave the bathroom because he didn’t wait to make a scene in the waiting area.
It didn’t take long for him to be hurried into a room and I couldn’t help but have major flashbacks. Almost exactly eight years earlier, it had been me in the johnny shirt — flailing and twisting at the toe-curling pain. It was all so familiar. The moaning. The scrunched-up face. The throwing up from the pain.
Except this time, I wasn’t in the bed. I was the one with the useless cold compress and the nervous reassurance. I was the one holding the basin and offering sips of water. I was the helpless spouse on the sidelines who couldn’t do anything to take the pain away from the person I love most in the world.
Continue reading in my weekly parenting column, The Mom Scene …
DIY pet door in a screen door

Our Boston Terrier, Annabelle, loves going outside during the warmer months, and it was kind of a pain. She’d scratch at a door to be let out, and then two minutes later she’d decide it was too cold/hot/rainy/windy and want back inside.
When she figured out she could throw herself at the back screen door and push it open, one of us would have to go over and shut it again (she never learned that part) to keep the bugs out. Two minutes later, she’d be scratching at the front door again. Arghhh!

Our back screen door is just a cheap wooden-framed one (basically this one) and I decided it would be easy to add a pet door into one of the lower panels. So I hopped online and expected to see a $20 or $30 option I could toss into my cart. Um, nope! I was shocked to see pet doors were in the $160-$300 range — just for flimsy plastic doors. What was wrong with the world?
I grumped about that for a few minutes and then decided I could figure something else out. Something MUCH cheaper!
I started by measuring one of the lower panels in our door. It was 13.5” wide and 25” tall, so I sketched out a door that was 13” wide and 24.5” tall to give myself a little wiggle room — you know, for swinging, hinges, etc.
I grabbed a 1×2 board from my studio and quickly assembled a frame: two vertical boards measuring 24.5” and two horizontal boards measuring 10” to slip in between.
![]()
I snipped out that screen in that panel, held the tiny door frame in place and confirmed it would fit — so far, so good. Now how was I going to hang it?
I considered using regular hinges, but none of them would allow the door to swing in both directions and then shut automatically. What I really needed was the type of hinges they use on saloon doors. Ah-ha!
I sent my handy husband to purchase a 3” spring hinge* with an adjustable self-closing speed.
Now, this single hinge was close to $30, so we decided to only buy one — a second would have been nice, but not worth another 30 bucks.

I took the hinge out of the package, read the instructions three times, played with it, and still could NOT figure out how to attach it. It was a fierce combination of plates and springs and pins, and all I could accomplish was getting it to snap my finger painfully. I blame my creative brain.
Luckily, my handy husband looked at it and knew just how to install it. (God bless him.) The door swung open and closed, and we could adjust the tension so it required more or less force to push it open.
With the complicated part figured out, I went back to prettying up the tiny pet door — adding decorative panels, white paint and even a little door knob (an old cabinet knob). I also took the piece screen cut from the panel of the big door and stapled it to the little door.
Now when our glass patio door is open, our pup is free to go in and out through her special opening in the screen door. It blends in perfectly with our real screen door, and it’s completely adorable.

Now, the saloon hinge isn’t perfect. We’ve adjusted the tension a few times so far, trying to find an ideal level where she can push her door open without too much of a “snap-back” effect. On days when she’s going in and out a lot, we loosen the tension pins enough so even a light breeze nudges the little door open and closed.

I actually keep the main screen door locked most of the time to keep her from pushing on the door and pushing the whole thing open. This works out quite well, since it also keeps the kids outside (although they are small enough to climb through the pet door if necessary, and think that’s pretty hilarious).
Now I really must make a tiny welcome mat, and maybe add a tiny mailbox for even more cuteness.


Work-at-home summer prep

Consider this a PSA to all parents of elementary-aged children: We’re down to less than a month before the end of the school year.
Summers have always been hard for me as a self-employed person who works from home. September through June, I have a solid work routine and guaranteed time to focus.
July and August are pretty much a dumpster fire, professionally speaking.
Transitioning to summer has always been tough, but this year I’ll feel the pain more than ever. This has been the first time both of our children are in elementary school and I have been treasuring those precious weekday hours.
Monday through Friday, from 8 a.m. to 2 p.m., I sequester myself in my basement office and my fingers are pretty much glued to my keyboard. Most days I’m so busy that I don’t eat lunch until I remember to choke something down in the five minutes before I leave to pick them up from the bus.
I have other self-employed friends who are semi-dreading the end of the school year, too. In theory, it would be nice to take July and August off from our work. We could spend buckets of quality time with our kids, sleep in, soak up the (limited) good weather and not jump every time our phone dings with a new email.
Of course, that’s not an option for most of us, since our businesses wouldn’t take kindly to a two-month hiatus. We are also fans of paying our mortgage and, like, eating …
So what’s the solution to keeping our children happy, fed and alive while we do the work we need to do? Camps! Lots of ’em!
This is the time of year when camps open the registration floodgates and parents start frantically writing cheques — hoping they don’t accidentally write the amount in the payee section because what millennial parent even writes cheques in 2018?!
Of course, camps aren’t cheap. There needs to be a balance between how much you’re going to earn that week and how much you’re paying to unload your kids for a sweaty week of themed day camp.
(Ooh — here’s an idea, camp owners. Registration really should take place the August before, when frustrated work-at-home parents would tearfully pay twice as much to have a quiet house the following summer.)
And so, I clicked around and read numerous fliers to compare costs. I scrutinized the calendar for July and August and decided which weeks would be toxic for my mental health (a.k.a. which weeks my husband would be working or sleeping off the night shift during all of our kids’ waking hours). I checked with friends to see which rugrats were going where.
I ended up signing the kids up for two weeks of full-day camp — one week in July, and one week in August to spread out my sanity. They’ll also attend a free week of half-day VBS (Vacation Bible School) at a nearby church, since they went last year and declared it to be the best camp they’d ever attended.
I have a good friend who babysits, and I can hire her to watch them — at her house — if I need the odd day or half-day here and there. The kids will spend time visiting my mom in Halifax, and there’s also the fact that their dad will have days off to take them to the playground, the Wildlife Park, etc.
Heading into this summer, I feel more prepared than I ever have in the past. By combining the powers of day camp, a babysitter, a doting grandmother, and a husband who does shift-work (and is therefore off certain weekdays), I hope I can make it through July and August with my career and my sanity intact.
***
You feel this pain on a spiritual level? Here are some related posts to scroll through while you sip a comforting hot beverage …
- Taking the pressure out of summer vacation (written going into last summer)
- The work-at-home summer (written going into the summer of 2016)
- Why we stopped signing up for summer sports
- How Google makes me a better work-at-home parent
- What you NEED to know about yourself if you work from home
- My tips for new freelance writers
- What our kids learned in “summer school”


As featured on …


