
The triple toonie birthday party

Our daughter has become close friends with two little girls who share, almost, the same birthday. Every year, there’s a whirlwind of parties spread over one or two weekends as we celebrate Gabby (April 23), Vera (April 24) and Charlotte (April 25).
This year, Vera’s mom asked me in early March which date I was planning for Charlotte’s party. She also wondered, out loud, when Gabby’s party might be, so we didn’t all wind up scheduling them for the same day — many of the girls’ friends overlap.
I hadn’t even thought ahead that far, and joked we should just join forces and throw one party for all three of them. I’d been halfway kidding, but the more we discussed it, the more it seemed like a great idea. One afternoon, one party and three moms to plan it? Hmmm.
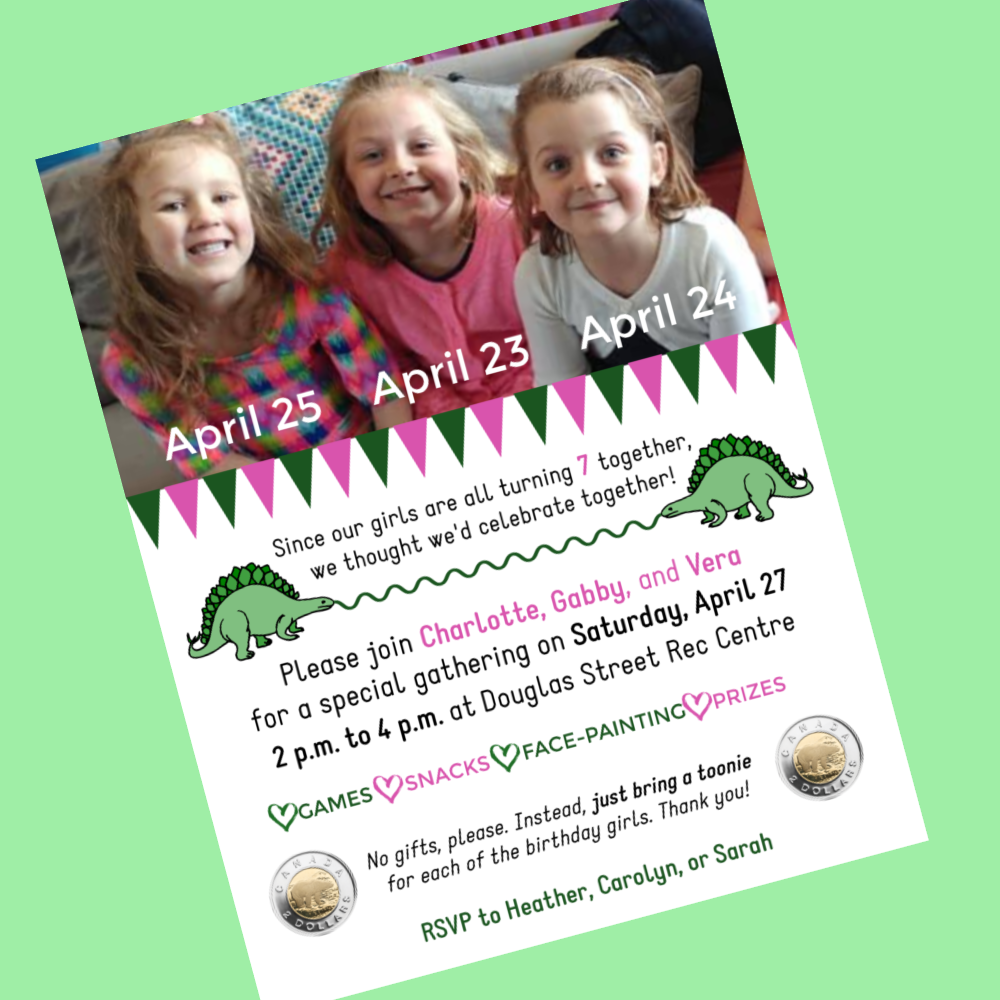
How did we pull it off? Continue reading in my weekly parenting column, The Mom Scene …
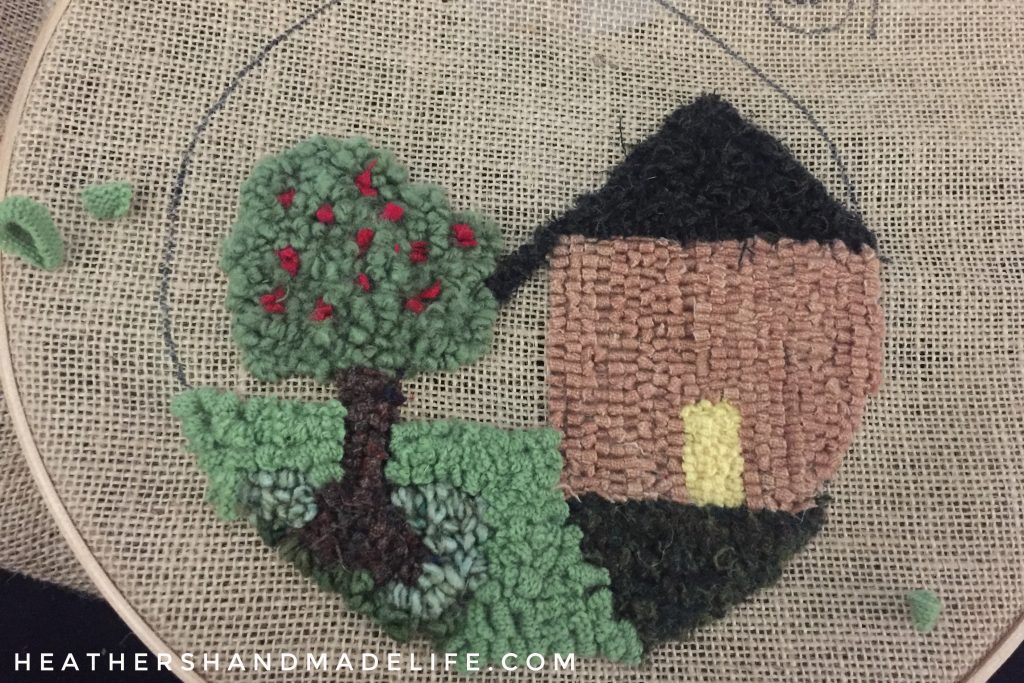
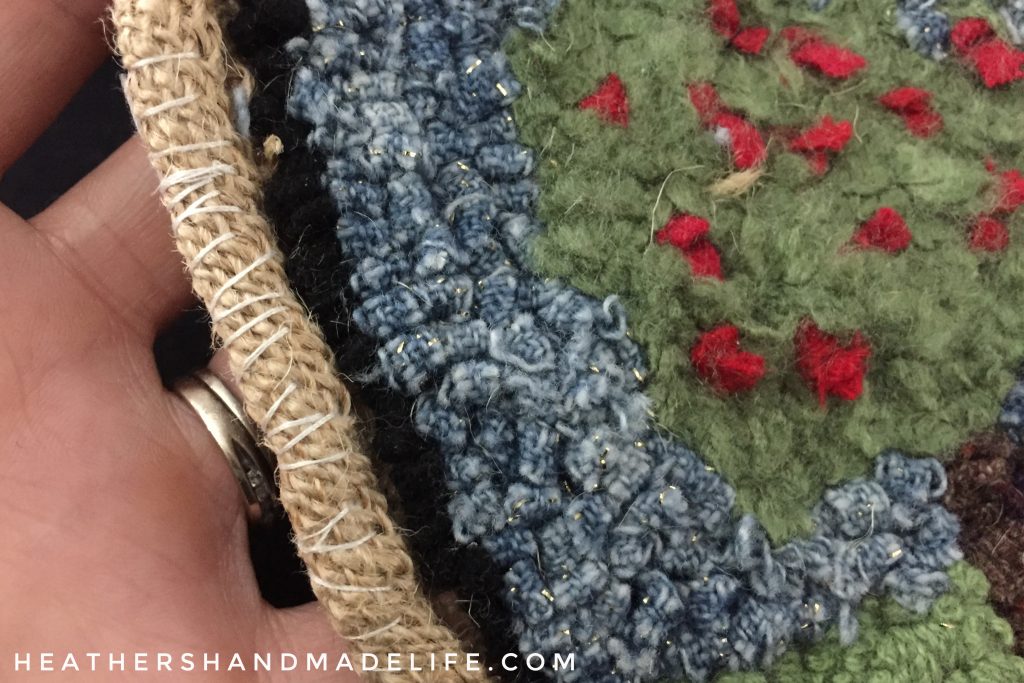
Hooked on rug-hooking

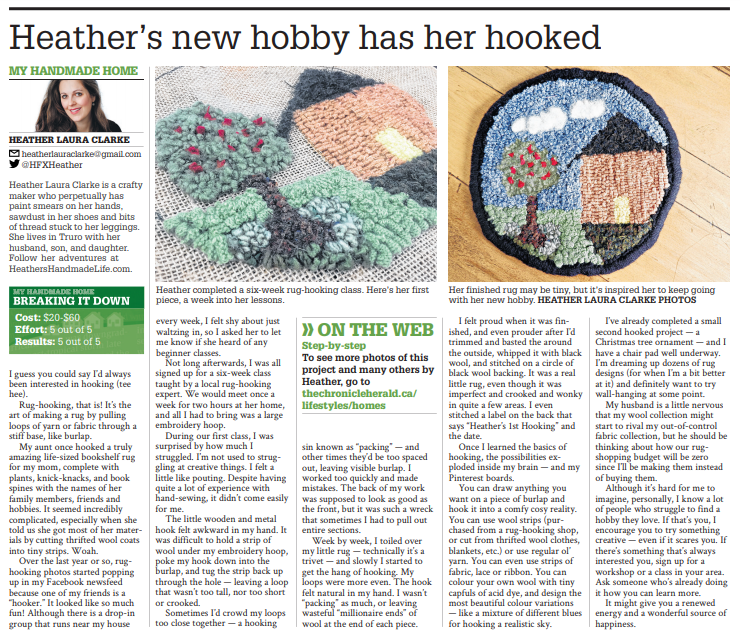
I guess you could say I’d always been interested in hooking (tee hee).
Rug-hooking, that is! It’s the art of making a rug by pulling loops of yarn or fabric through a stiff base, like burlap.
My aunt once hooked a truly amazing life-sized bookshelf rug for my mom, complete with plants, knick-knacks, and book spines with the names of her family members, friends and hobbies. It seemed incredibly complicated, especially when she told us she got most of her materials by cutting thrifted wool coats into tiny strips. Woah.
Over the last year or so, rug-hooking photos started popping up in my Facebook newsfeed because one of my friends is a “hooker.” It looked like so much fun! Although there is a drop-in group that runs near my house every week, I felt shy about just waltzing in, so I asked her to let me know if she heard of any beginner classes.
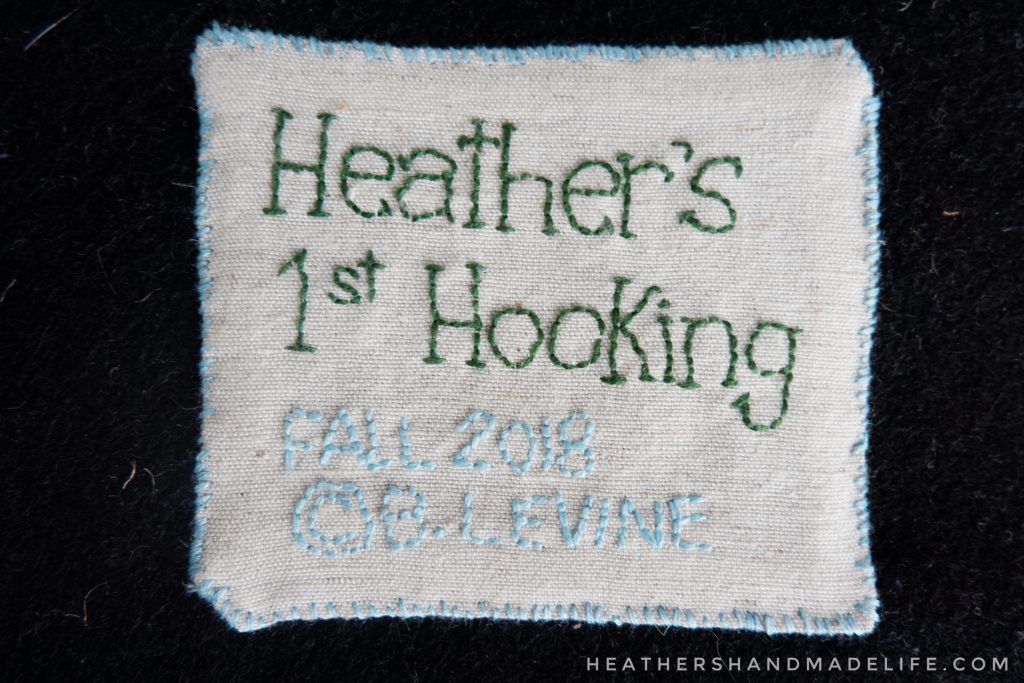
Not long afterwards, I was all signed up for a six-week class taught by a local rug-hooking expert. (Beverly Levine, for locals!) We would meet once a week for two hours at her home, and all I had to bring was a large embroidery hoop.

During our first class, I was surprised by how much I struggled.
I’m not used to struggling with creative things. I felt a little like pouting. Despite having quite a lot of experience with hand-sewing, rug-hooking didn’t come easily for me.

Continue reading in my weekly DIY column, My Handmade Home …
Or pin this post to read again later!

The healthy hack that’s helping me eat more salad

Eating well is always something I’ve struggled with.
I guess I hoped my tastes would evolve as I got older and I’d start to want to eat salads and salmon and all the “grown-up food” that grown-ups seemed to love. That didn’t happen. (Salmon makes me want to upchuck.)
I love “kid food.” I would rather eat a cheeseburger and fries than just about anything else. Well, that or chicken fingers and fries. Or nuggets? You get the picture. NOT IDEAL when you’re 35 and pear-shaped, you know?
Just because healthy eating doesn’t come naturally to me doesn’t mean I don’t TRY, TRY, TRY all the damn time to be better at it. After all, I want to be healthy, I want my kids to see me being healthy, and most importantly I want THEM to be healthy.
My wise little sis once told me no one *likes* salad, but they eat it because it’s healthy, good for them, etc. I have since heard from several people who really do LOVE salad (I’m looking at you, Sylvia!) which baffles me.
I do not love salad.
But dammit, I’m trying.
Read MoreTransforming furniture with decor moulds

One of my very favourite things is getting to try different creative mediums, so when my friends at Phillips and Chestnut Victorian Salvage & Décor in Truro invited me to try decor moulds and air-dry clay, of course I said yes.
It had been ages since I’d played with moulds. Way back in the day, I’d used plastic moulds and plaster to make little ceramic shapes, frames and boxes. They were fun to make, but not very useful — highly breakable, leaving crumbles of powder wherever they smashed.
This mould from Iron Orchid Designs, though, is very different. It’s flexible and rubbery, and can be used with different mediums for making lots of different crafts. (It’s also food-safe, so you could even use it for fondant or chocolate.)
I picked one called Classic Elements that included nine different Baroque-style shapes, like delicate curves and friezes. I’m obsessed with Baroque frames, so I’m always drawn to all things textured and swirly.
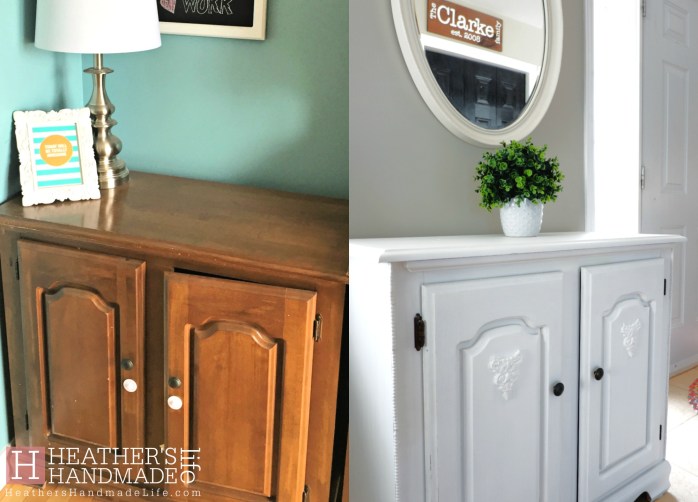
For my first project, I decided I was going to refresh a small hutch we’ve had for a few years.
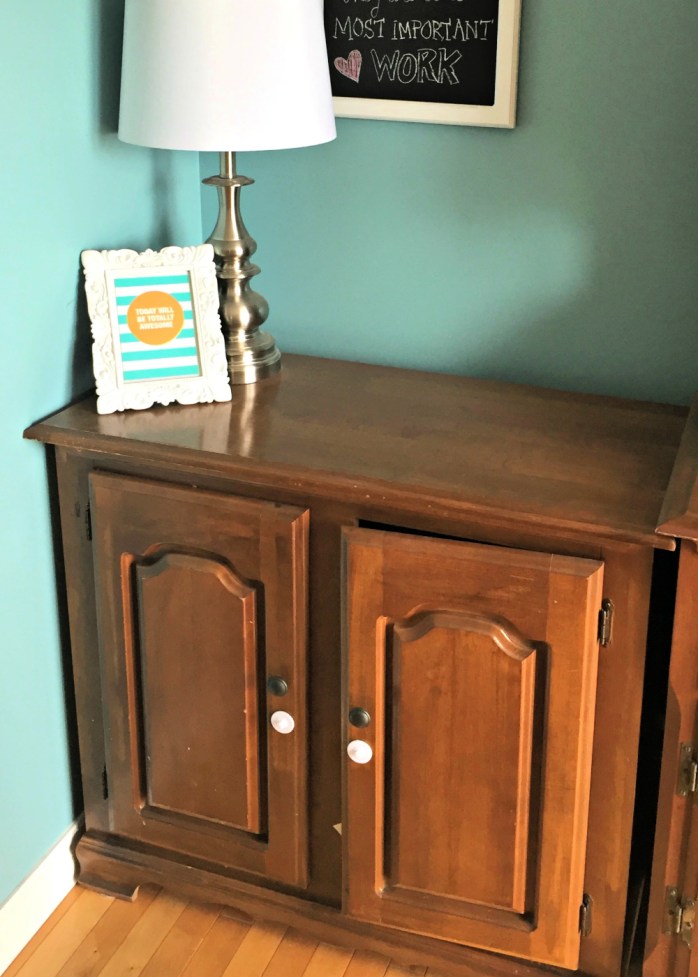

It had been used to store the kids’ art supplies, so it was streaked with a few “accidental” marker swipes and needed a fresh coat of paint. Its smooth, plain doors would be an ideal surface for adding a little interest …

Continue reading in my weekly DIY column, My Handmade Home …
Continue reading in my weekly DIY column, My Handmade Home …
Or pin this idea and come back to it later!

Custom Guess Who? family game

Growing up, one of my favourite games was Guess Who. You know, the one where each player has a photo of a mystery person, and you flip photos down as you try to guess which person’s on the other person’s card?

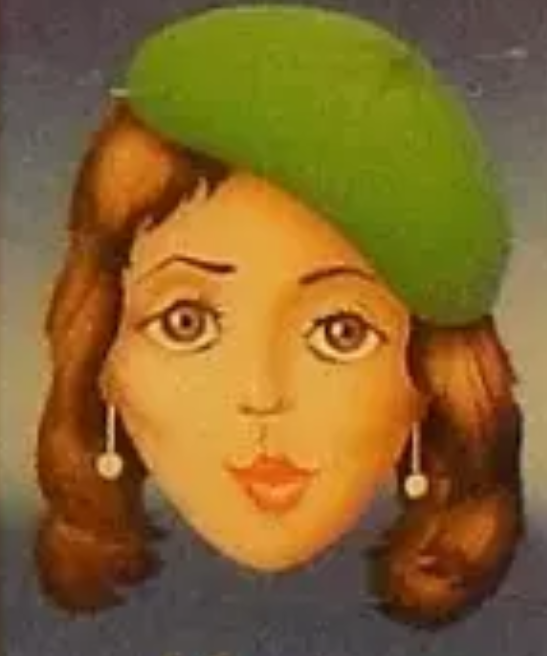
I remember being annoyed, as a child, that there were only like five women and 19 men. Seriously, what gives, Milton Bradley?! My sister and I always hoped to get Maria, who wore a jaunty green beret.
(We’ve actually played the game even as adults, except with questions like “Does your person look super shady?” and “Was your person probably a substitute teacher at some point?” Hilariously, we always guessed right based on those weird clues.)
A couple of years back, I picked up a secondhand game for $2 with grand plans to turn it into a customized Guess Who game with photos of our family. However, I stuck the game into one of my cabinets of art supplies and forgot about it.
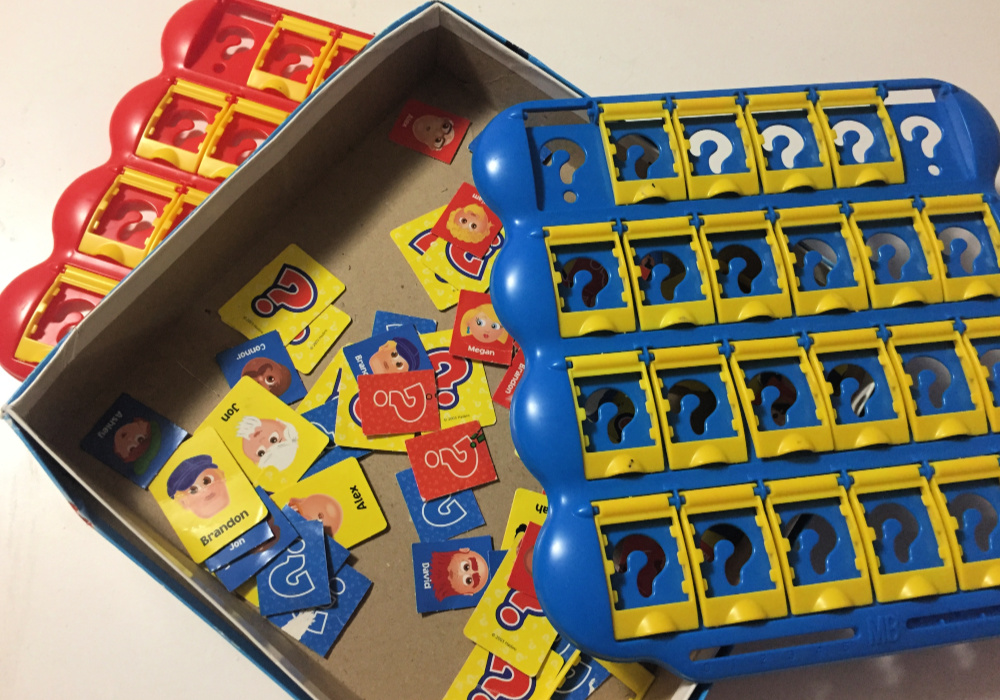
Last weekend, I dusted it off and decided I was finally going to organize and order the photos I needed for the game.

Start to finish, it took me a couple of hours to do — and that included ordering the photos and picking them up at Staples.
No joke, the kids and I played at least 40 rounds that very first day — and it was much more fun than the original version.

It’s just so darn CUTE!

Want to turn an old Guess Who? game into a fun, customized version? Here’s how …
Continue reading in my weekly parenting column, The Mom Scene …

Or pin this idea and come back to it later!


As featured on …


