
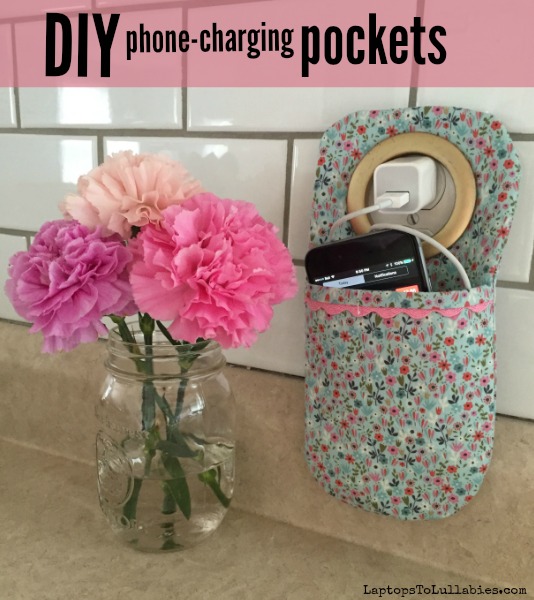
DIY phone-charging pockets

We’re an iFamily, so we have several iPhones, ancient iPods and a (very sticky, kid-friendly) iPad that always needs charging. I’ve been playing around with different wood bin/basket charging station ideas for a year now and I have yet to come up with a solution I’m happy with.
However, I did stumble across an idea for charging our phones that doesn’t leave a trail of ratty cord stretching across my kitchen counter.
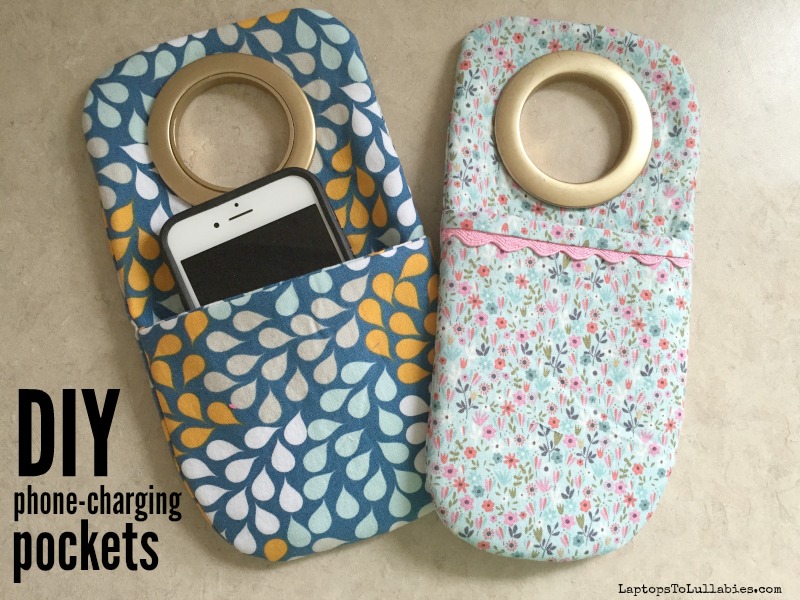
These hanging charging pockets can be whipped up in less than 10 minutes and customized to fit the decor of any room. It’s seriously cute and functional!
Here’s how to make your own phone-charging pockets:
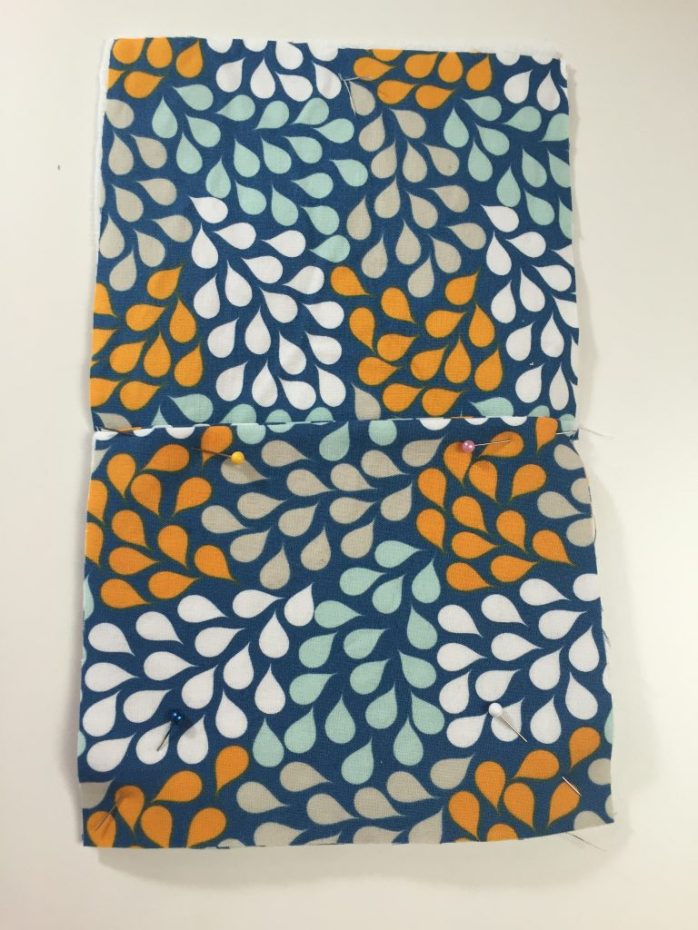
1. Start by cutting two main rectangles out of your fabric. I picked 25 centimetres by 15 centimetres, slightly larger than my iPhone 6.
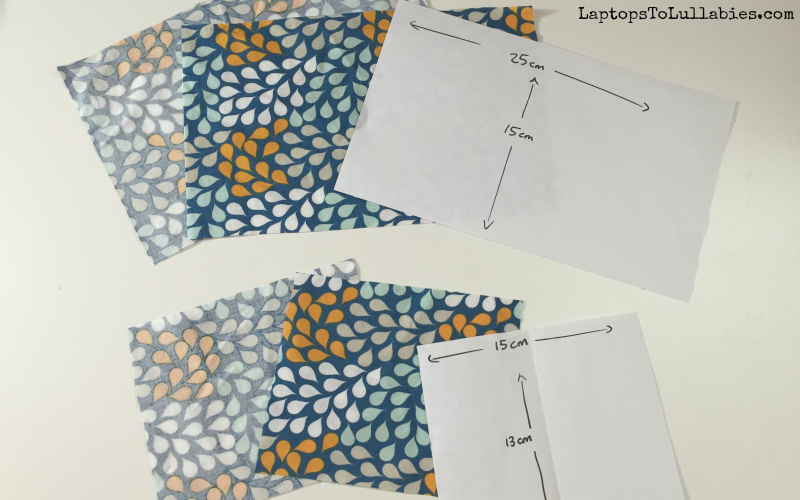
2. Cut two pocket pieces that are as wide as the first piece (15cm, in my case) and about half as tall (I picked 13cm). You can make these as large as you need to snugly encase your phone.
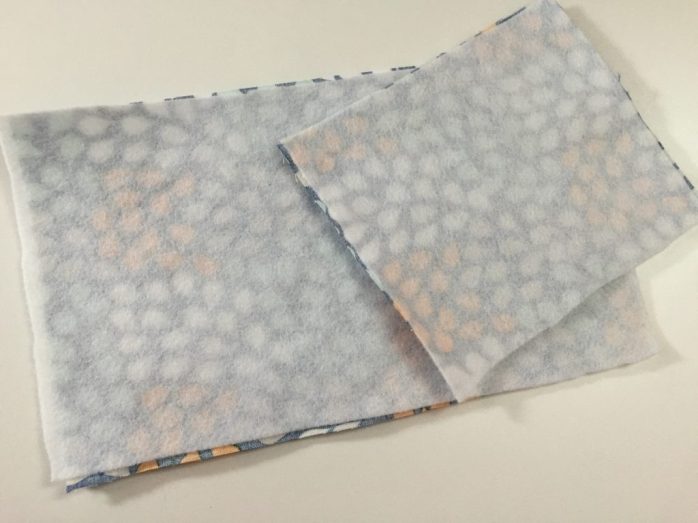
3. Next up, cut two pieces of fusible fleece — one of each size. Iron one piece of fleece to the back of your main rectangle, and one piece to the back of your pocket rectangle. This is just to make the project a little sturdier. (Side note: This was actually my first time using fusible fleece and I loved how it made the cotton fabric really thick.)
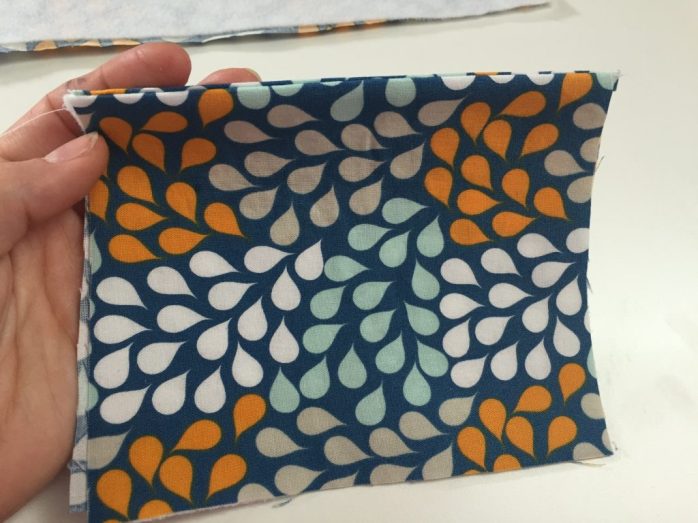
4. With right sides together, sew your two pocket pieces together along the top, and then flip the fabric and press so the right sides are on the outside again. Your pocket is done!
5. Take your pocket and pin it to the bottom of your main rectangle (the one with the fleece ironed to it). There will be raw edges all of the way around both pieces, except for the top of the pocket, and that’s fine. Sew the pocket to the main rectangle, rounding the corners if you’d like.
6. Lay the other large rectangle on top, good sides together. Sew all of the way around the edge, rounding the corners if you’d like and leaving a little gap so you’ll be able to turn it right-side out. Trim around the corners to cut away the excess fabric so it won’t be bulky, turn it inside out and hand-sew the gap closed.
7. The final step is adding the plastic grommet. These are used for curtains so they usually come in packages of 10 or 12. Use your thumbnail to pop the two pieces apart, and trace one of the circles on your finished piece where you’d like the charging cord to slip through.
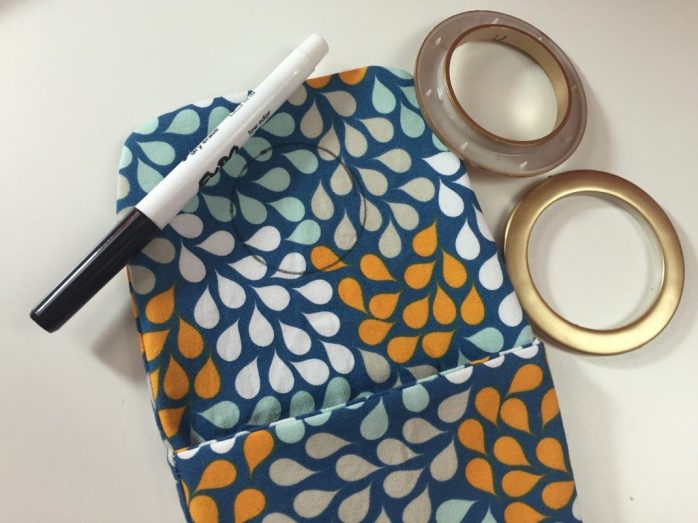
Cut out the circle, slip one grommet in between and one on top, and click them together to conceal the raw edges of the circle. (Side note: It’s very satisfying to snap the two circles together and now I’m plotting other grommet projects. Think of all of the things I could neatly hang on hooks!)
***
I experimented with a second charging pocket that was a little slimmer than the first one and it also fit my phone, so there’s a lot of flexible with this “pattern.” You could even sew a larger one for iPads or tablets, but I wonder if they’d be too heavy to hang off the power adapter thingy?
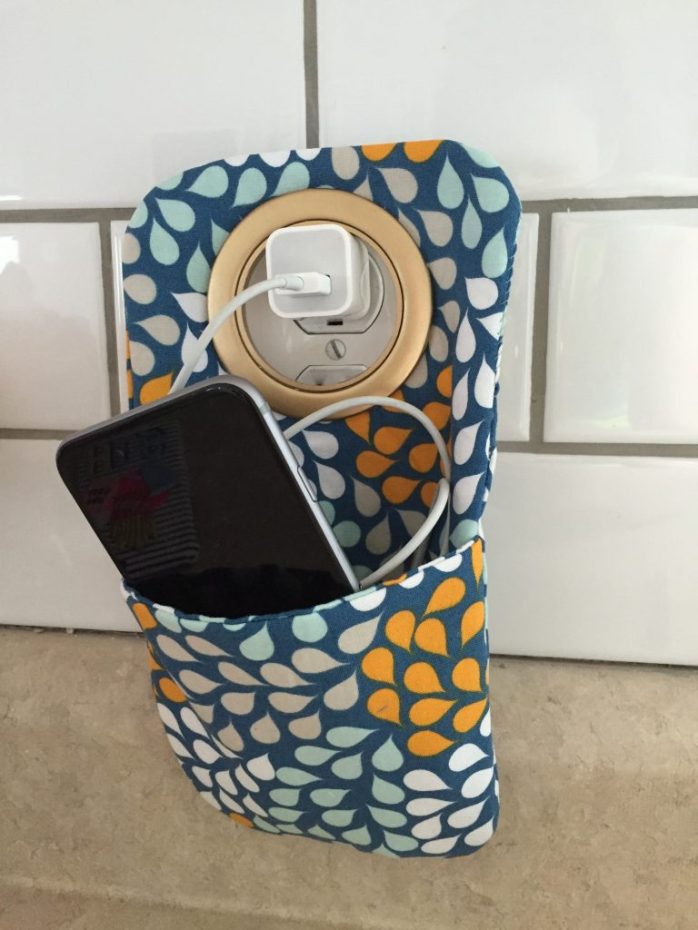
These charging pockets are so fast to sew up and hang nicely on the power adapter while your phone is charging. There’s plenty of room to stuff the cord inside the pocket to keep it off the counter, and you can even grab the whole pocket and take it with you — like a purse for people who are always misplacing their charging cord (hi, Mom).


As featured on …


