
DIY memory quilts from loved ones’s clothes

Last year, I started sewing memory quilts for people who had lost someone close to them.
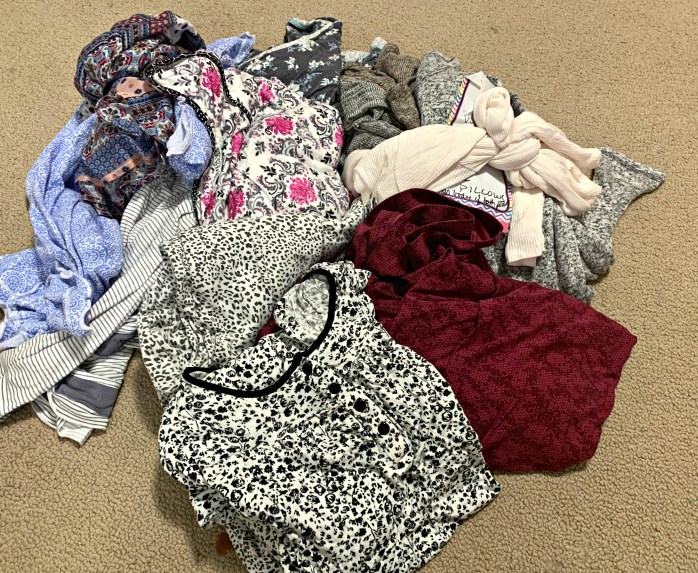
These quilts are a nice way to preserve someone’s favourite items of clothing — T-shirts, dress shirts, ties, nightgowns, sweaters, jeans — in a way that allows their loved ones to still snuggle up with them.
For this particular project, I was asked to make several lap-sized memory quilts from someone’s favourite soft, stretchy nightgowns and sweaters.
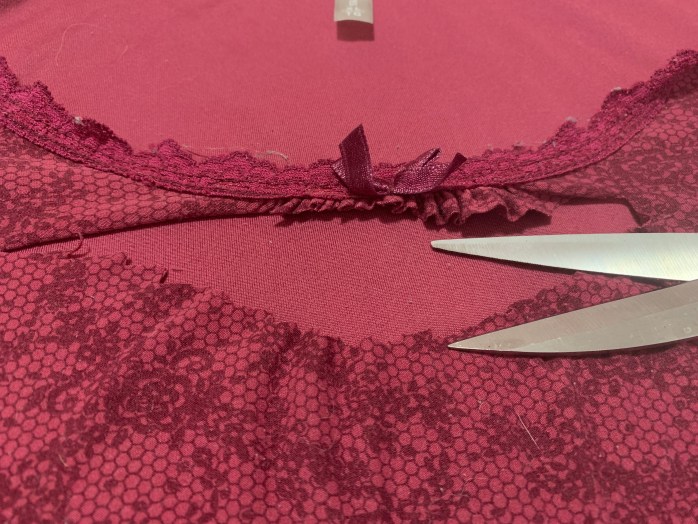
I started by cutting through any gathered/ruched areas so the fabric could lie flat …
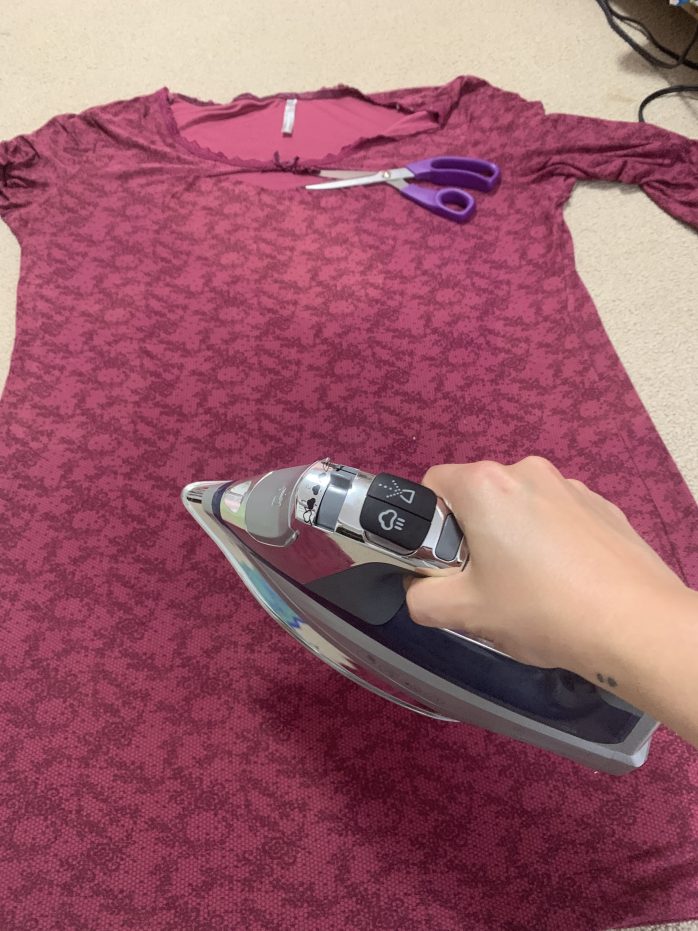
… ironing the fabric smooth …
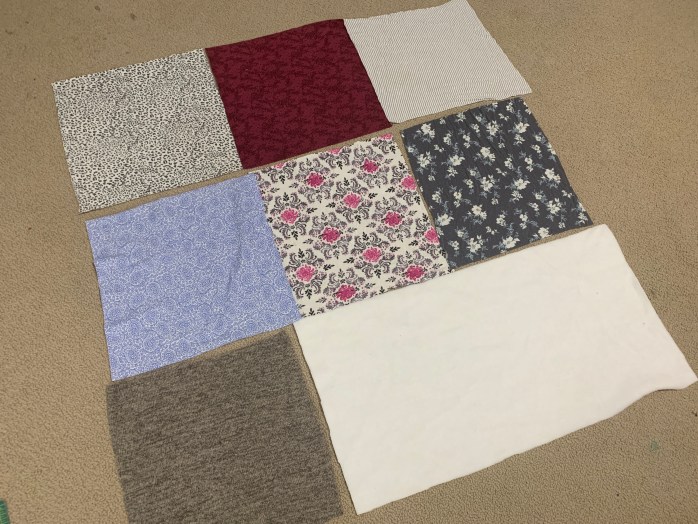
… and cutting out 12” x 12” squares using a plastic quilting template. This is faster with a rotary cutter and mat, but tracing squares and cutting them out with scissors works fine, too.

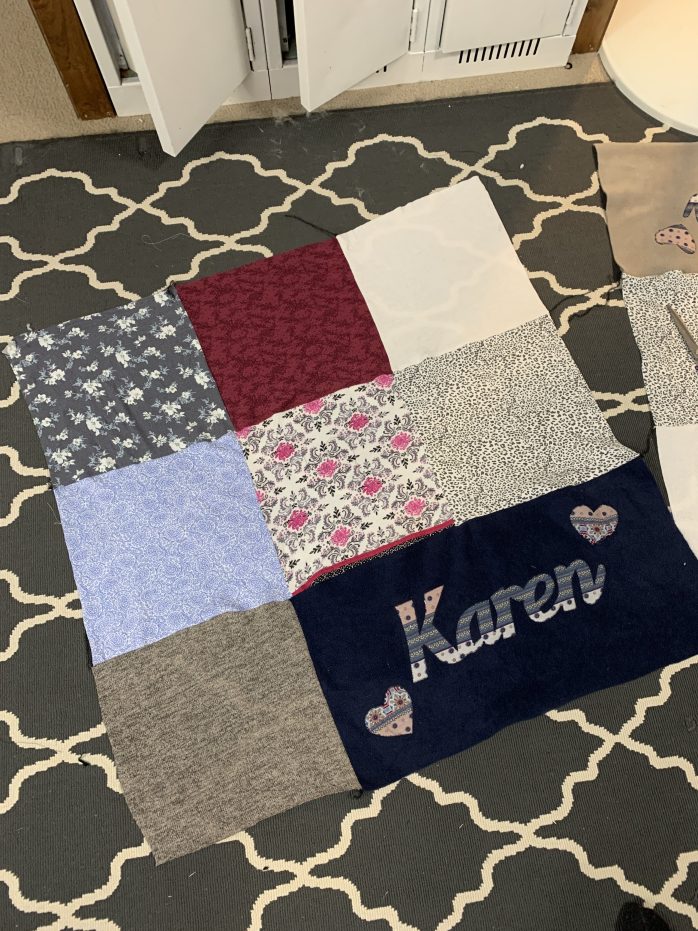
Once I had cut squares from almost every piece of clothing, I sorted them into piles so each quilt would have roughly the same amount of each colour or print. I decided I had enough squares to make everyone a nine-patch quilt.
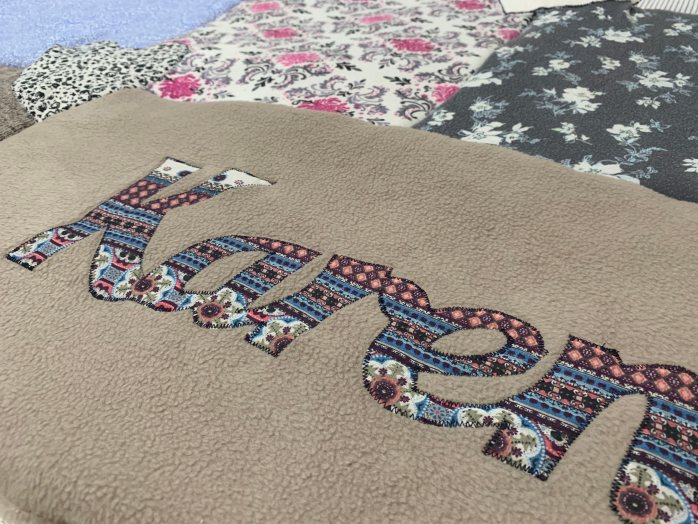
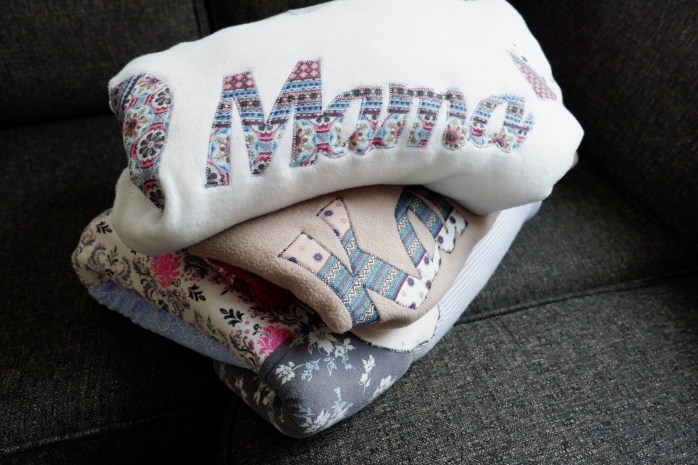
The one piece I hadn’t cut up yet was what had been her favourite shirt, so I wanted to do something special with that one. There wasn’t enough of it to be able to give everyone a square of it, but there was enough to make a special accent for each quilt: an appliquéd name.
I knew the thin stretchy fabric of the nighties and sweaters wouldn’t have been the best surface for supporting an appliqué, so I modified my nine-patch plan so each quilt would actually have seven squares of clothing plus a fleece rectangle that took the place of two squares. The fleece would provide a stronger backing for the appliquéd names.
I carefully snipped the favourite shirt open and ironed Heat’n’Bond Lite to the “wrong” sides of it.
Then I printed the names out on regular printer paper, cut them out and traced each name backwards onto the Heat’n’Bond Lite (since I was working on the wrong side of the shirt fabric).

I cut out each name — snipping through the fabric and the Heat’n’Bond Lite — and peeled off the paper backing, so the fabric name had a shiny backing on it. Then I laid it onto the fleece rectangle and ironed it down, melting the adhesive so the name stuck to the fleece.
Once the name was firmly stuck to the fleece, I used a zig-zag stitch to sew all the way around each letter. This prevents the name from fraying or peeling off the quilt, but it also provides a nice finished look. (I experimented with a few heart shapes, too, and it definitely worked better on the fleece than on the stretchy knit fabrics.)
Now it was time to assemble the quilt tops. My serger and I had been going through a rough patch in our relationship but thankfully he decided to smarten up, which made the process much faster than using my sewing machine. Holding my breath, I used my (temperamental) serger to sew together each row and attach the rows to make completed quilt tops.
The final step was adding the backing and finishing the ends. I spread out a thick, fuzzy white blanket (right side up), laid each quilt top over the blanket (right side down) …
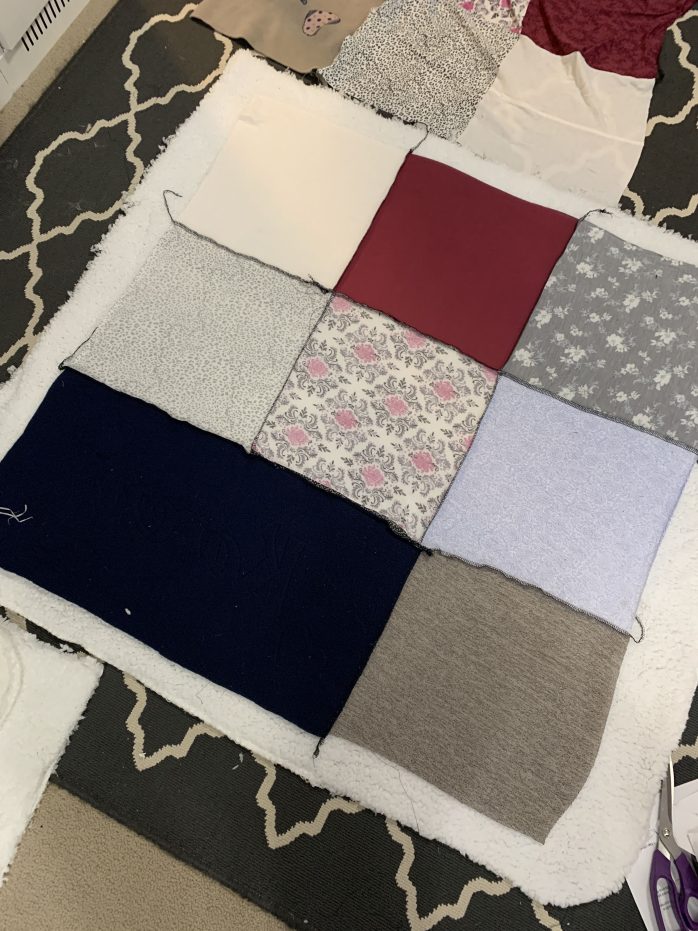
… and cut around each quilt top so it had a matching “back” cut from the blanket.

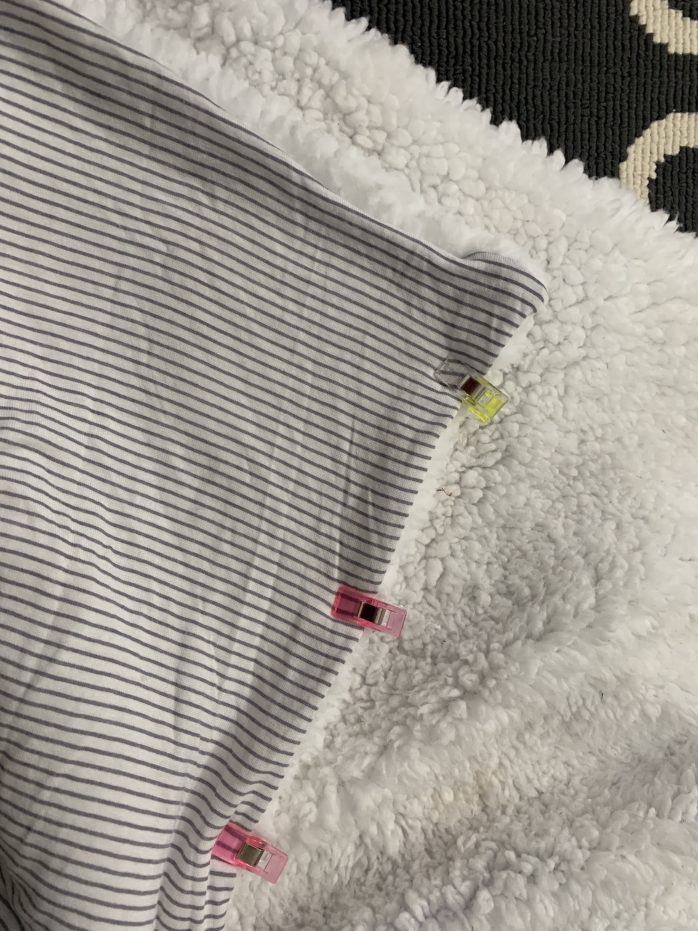
I pinned these “sandwiches” together and stitched around three sides, leaving one side open so I could turn the whole thing right-side-out. Then I tucked the raw edges under, sewed the final side shut and continued sewing around all of the edges for consistency.
These lap-sized memory quilts are very snuggly and warm. Because the clothing squares were all cut from well-loved nighties and sweaters, they’re also super soft.
It is a bit emotional to work on these types of projects, but I always hope they bring comfort to the person’s loved ones.
xo
Please consider pinning this post so someone else can find it.
15 Comments on “DIY memory quilts from loved ones’s clothes”
So what do you think?


As featured on …


So beautiful!
LikeLike
Love it! Have wanted to do this before w/the kids’ baby clothes but this is a WONDERFUL idea to keep a departed loved one near to heart.
LikeLike
Thanks so much! I agree — such a special keepsake!
LikeLike
When cutting out sweaters, did you have any issues with the knit fabric unraveling?
LikeLike
I have never cut into a knitted sweater, but I suspect that would be a problem. I’ve only cut into stretchy clothes, or woven/cotton type clothes.
LikeLike
Beautiful, where can I order, cant see info to order?
LikeLike
I’m afraid I don’t make these for hire. But there are folks on Etsy who do!
LikeLike
My sewing days are over, but I like this idea. Do you know of anyone who does this work for hire?
LikeLike
Check with a seamstress in your area. Quite an easy project for anyone who enjoys sewing. 🙂
LikeLike
Is there a way to get a printout of these instructions. I would love to do these for my grandkids with my husband’s shirts
LikeLike
Sure. I’ll email it to you!
LikeLike
Do you quilt them after you sew them together and turn them inside out? Wasn’t sure how the front and back stay together. They look great!
LikeLike
Thanks! I think for these ones, I just “tied” them (stitched through the points of each square a couple of times to make sure the layers held together.
LikeLike
This is beautiful. Can I get a printed copy of the instructions? Also, do you use interfacing on any of the fabric? My mom passed away 5 years ago, I am just starting with her clothes and want to make a small quilt/blanket for some of my family.
LikeLike
I don’t have a printable copy, but you could print out the blog post. Iron-on interfacing is a good idea if the fabrics have any stretch to them, but not necessary for cottons.
LikeLike