
DIY faux floating shelves
I’ll never know if my husband bought me my own mitre saw and drill set for my birthday out of love, or because he no longer wanted to be responsible for executing all of my crazy Pinterest ideas.
Either way, I finally have my own power tools!
BONUS: I still have all of my fingers to type this.
My very first project, on my actual birthday, was building faux floating shelves for our basement bathroom. I wanted them to be somewhere around 24” long to fit neatly above the toilet. I decided buying a single 6’1 x 6 board made sense, since I could get three shelves out of it.
(Why oh WHY does a 1 x 6 board actually measure 3/4” by 5 1/2”? I don’t understand it, but I’m going to have to start thinking of “1 x 6” as a nickname rather than actual measurements.)
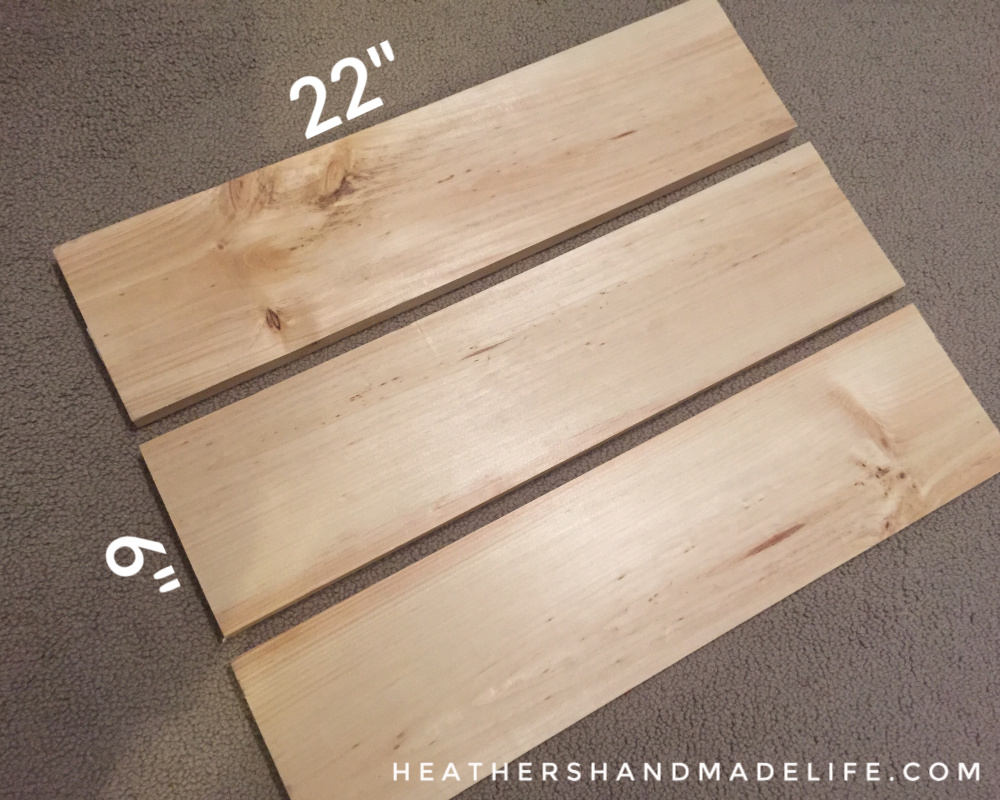
I used my new saw to cut three shelf pieces — each one 22” long. Then I grabbed a long skinny 1×2 and chopped off six little pieces — one to match up with each end of the shelves. No measuring tape required, by the way. I just held the 1 x 2 up against the end of a shelf and drew a pencil line, and then used my first piece as a template to cut the other five.
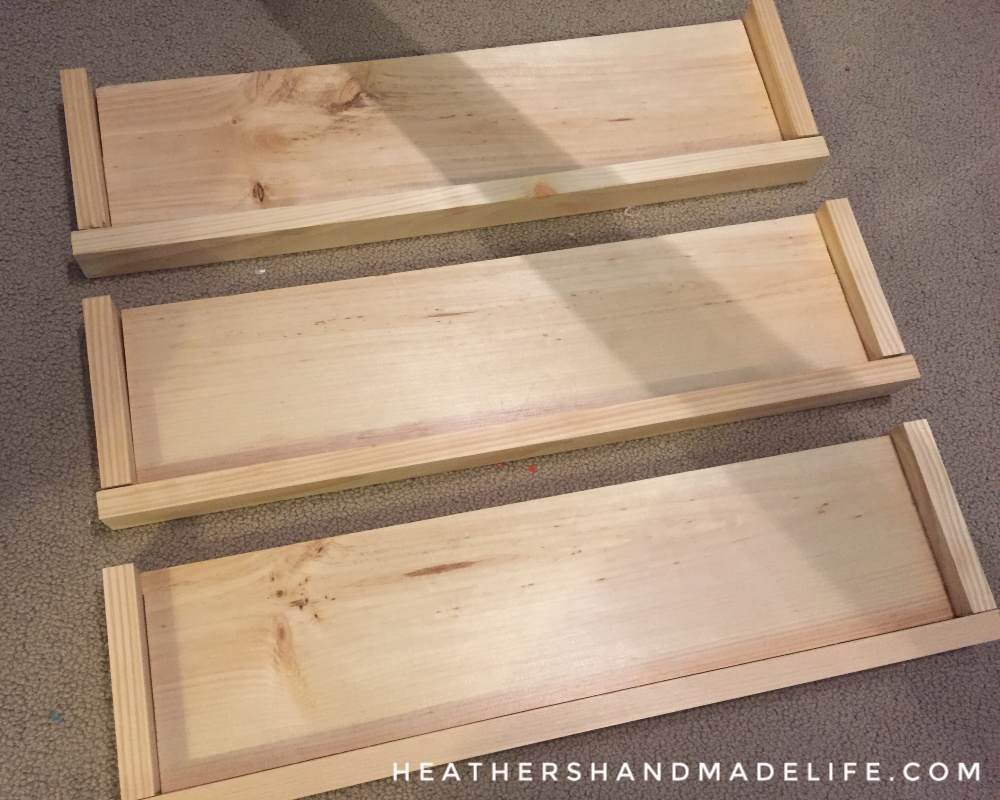
The last cuts were boards for the front to create the sneaky look of having thick, chunky floating shelves. I stood up the short end pieces against the shelves, held a long piece of 1×2 in front of the whole thing, marked it off, and knew exactly where to cut to make a little “apron” for each shelf.
I borrowed my handy husband’s brad nailer to attach the pieces together and, wow, that thing is awesome. It’s like a gluegun for wood! In no time at all, I had all three shelves assembled. If I flipped them over, they looked like a wooden tray missing one long side.
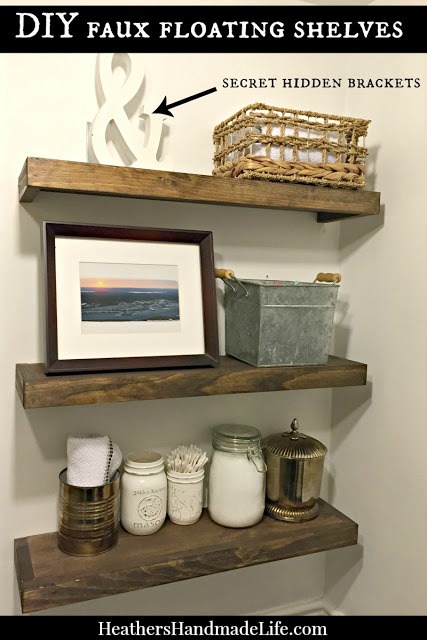
After a visit to the backyard to stain them (Minwax’s “Dark Walnut”), I brought them back inside to measure where the brackets would go. So these aren’t technically floating shelves because of the brackets, but I knew I could hide them with accessories.
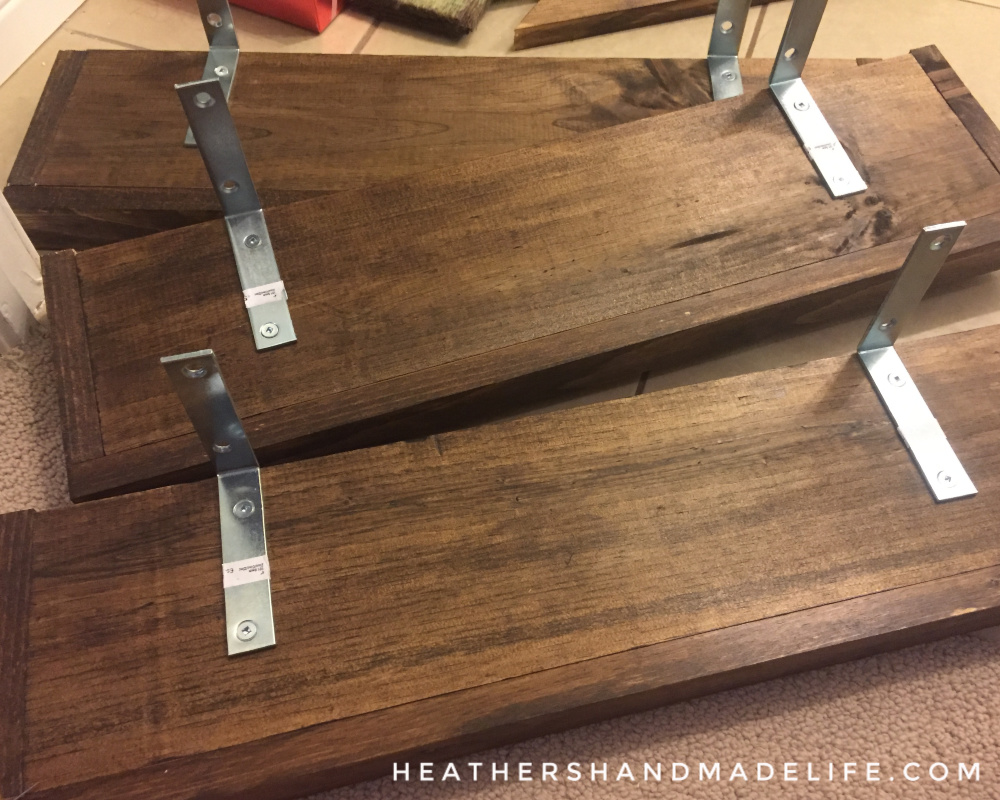
I marked that each bracket would be 5” in from the edges and then had to laugh at the tools I was using: a 4B sketching pencil and a sewing measuring tape! Three of my hobbies converged right there on my first-ever woodworking project.
I predrilled the holes so the wood wouldn’t split and then screwed two brackets into each of the three shelves. I didn’t even remove the price stickers, it seems, since I was too excited to get them on the wall.
Installation would have been easier with two sets of hands, but I’d done everything myself so far and stubbornly refused to bring in my husband in those final minutes. Holding a pencil between my teeth and my drill between my knees, I climbed the step stool, pressed the first shelf against the wall — with a level balanced on top — and scribbled shakily inside the bracket holes where I needed to drill.
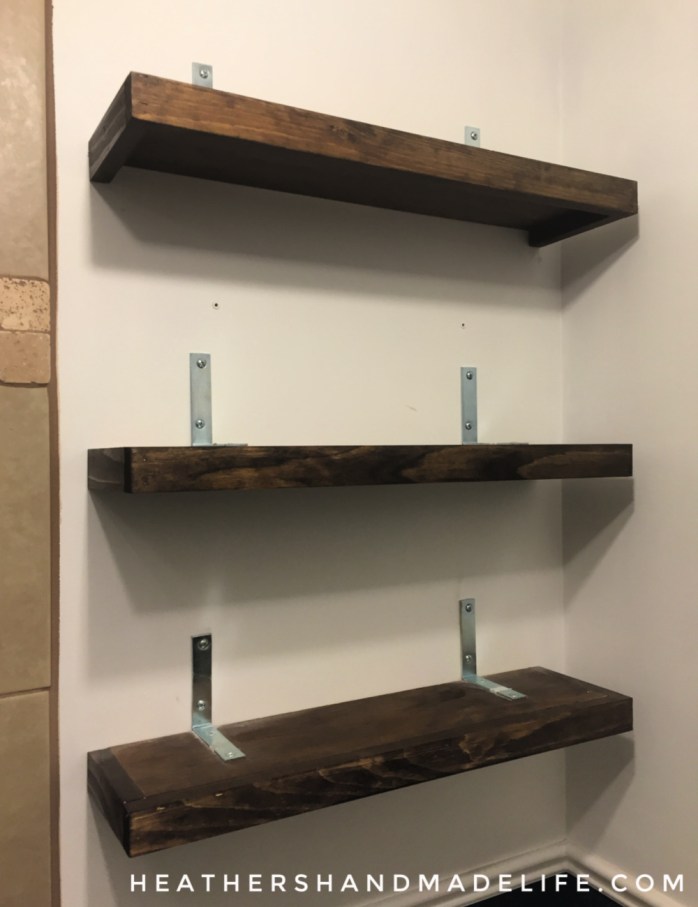
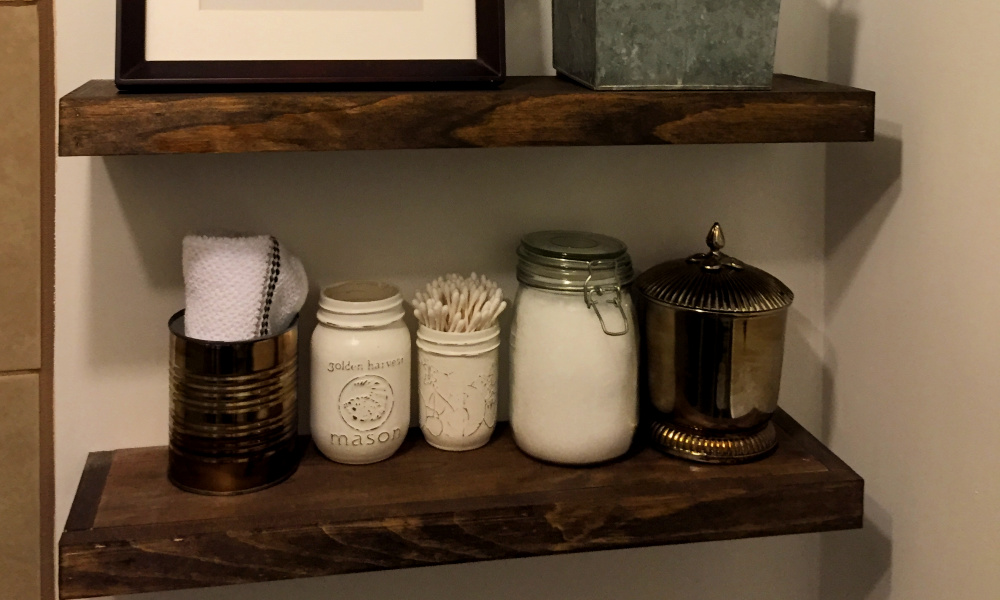
Once all three shelves were snug in the wall — complete with wall anchors! Look at me! — I stood back to admire my work. The first thing I noticed was that I probably should have added a bottom board to the underside of the shelves — at least the highest one — since you could see the “tray” design and it ruined the illusion of one thick shelf. Oh well. I think I’ll try that next time!
Giddy with a sense of accomplishment and feeling like the next Amy Wynn Pastor (#TradingSpacesForever), I styled my new shelves with bits and pieces I’d been squirreling away for the basement bathroom. Chalk-painted mason jars with sanded detail, a tin can and silver canister I’d “faux-tarnished” with stain and a tin bucket to hold guest toiletries. I admit the jar of epsom salts is silly because there’s no tub in that room, but I like the way it looks!
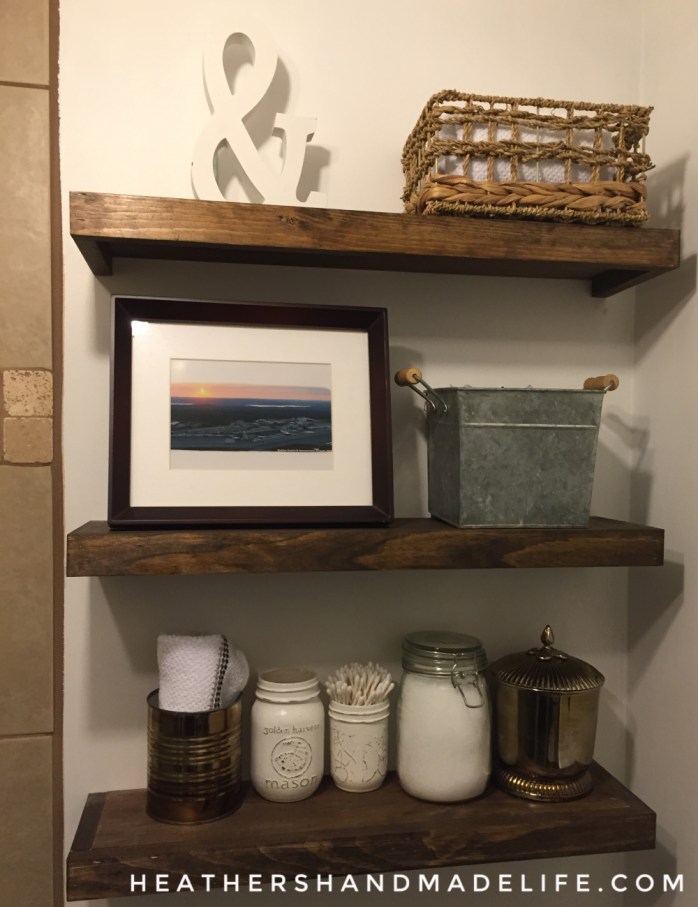
You can’t see the brackets at all now that the shelves are full, and they really do look like chunky floating shelves. I’ll always think of them as my “birthday shelves” since I made them and installed them on the very same day I received my new mitre saw and drill set.
And you’d better believe I haven’t stopped building since!
5 Comments on “DIY faux floating shelves”
So what do you think?


As featured on …


Hi,,,,i love you house and your blog ,, you have a new follower
Angelica
LikeLike
Thank you, Angelica! 🙂
LikeLike
Very useful post. This is my first time i visit here. I found so many interesting stuff in your blog especially its discussion. Really its great article. Keep it up. floating shelf with drawer
LikeLike
I am not sure how you applied them to the wall? Or did I just miss it?
LikeLike
I have a hard time describing my thoughts on content, but I really felt I should here. Your article is really great. I like the way you wrote this information. dlf crest Gurgaon
LikeLike